![J300 [2009 - 2012]](/uploads/Chevrolet_Cruze_2009-2012_.jpg)
Tools:
- 3/4 "end bit
- Driver attachment E-14
- Driver attachment E-10
- Driver attachment E-18
- Wrench attachment 8 mm
- Wrench attachment 13 mm
- Wrench attachment 10 mm
- Wrench attachment 14 mm
- Driver attachment 15 mm
- Wrench attachment 17 mm
- 6mm hexagon wrench
- Open end wrench 24 mm
- Torx wrench (sprocket) T50 (if required)
- Torque wrench
- Wrench attachment, 12-sided 19 mm
- Medium flat screwdriver
- Mounting paddle (if required)
- Drill (5.5 mm)
- Screw jack
- Support (shoe) anti-rollback
- Pulley Locking Tool (if required)
- Micrometer
- Flat stylus
- Sharoshka
- Drilling machine
- Emery stone
Parts and consumables:
- Bar
- Metal plate (corner)
- White Spirit
- Rags
- Sealant
- Cylinder head gasket (if necessary) (96353002)
- Valve lifter (if necessary) (96376400)
- Engine oil
Note:
This article shows how to adjust the valves of a Chevrolet Cruze.
We check the thermal clearances in the valve drive in accordance with the maintenance schedule after 90 thousand km of run, as well as when a characteristic "clatter" sound occurs in the area of the cylinder head cover. The operations are performed on a cold engine, at a coolant temperature of 20 ± 5 ° C.
Checking and adjusting thermal clearances in the valve actuator F18D Chevrolet Cruze
1. Unscrew the two bolts and two nuts securing the engine cover with a 10 mm wrench.
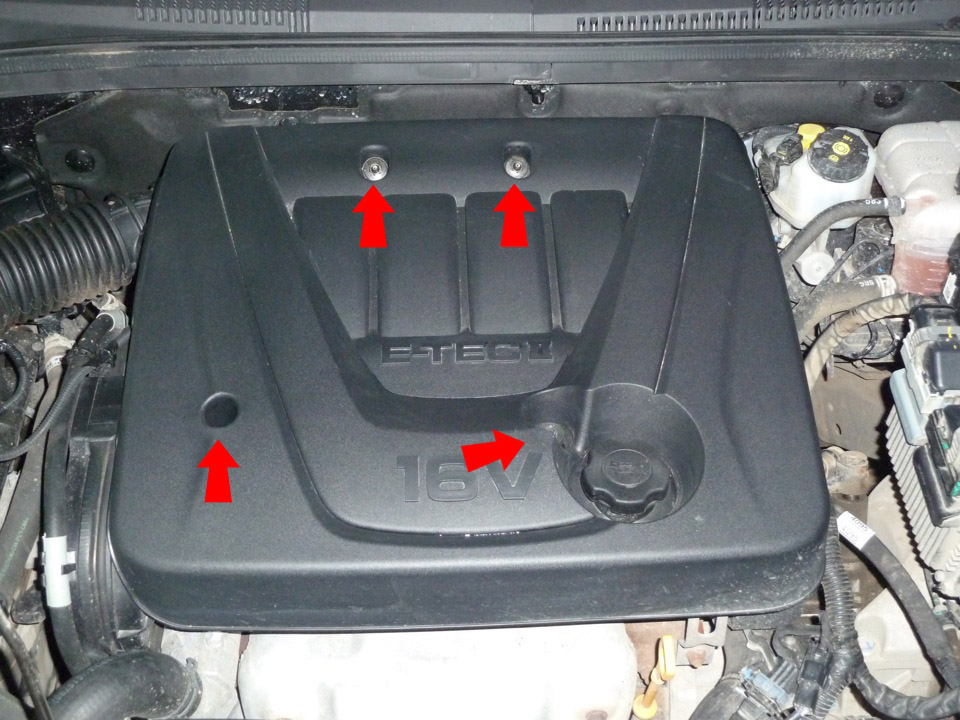
2. Pull and remove the engine trim cover.
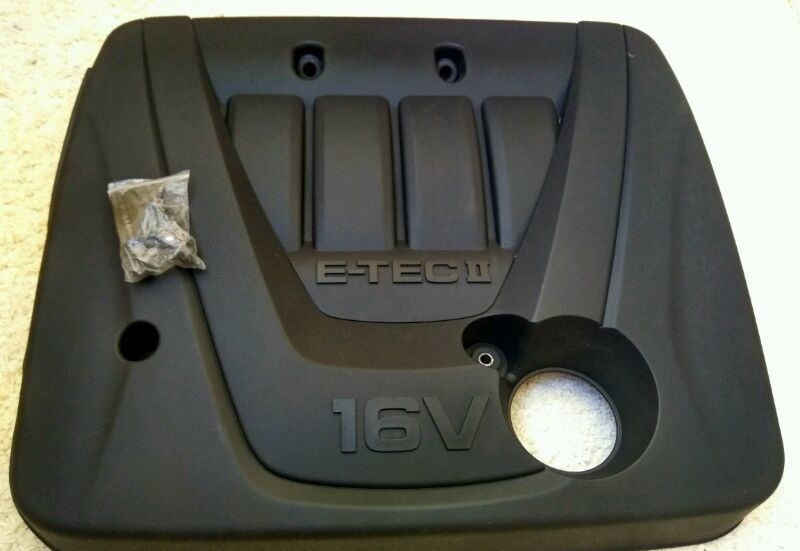
Chevrolet Cruze engine decorative cover
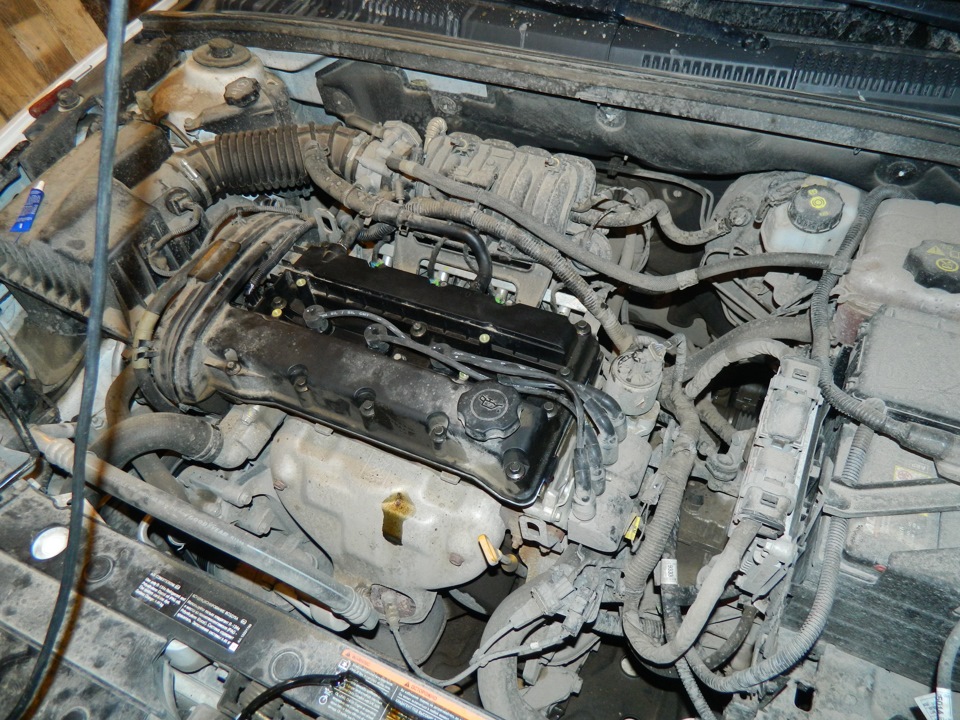
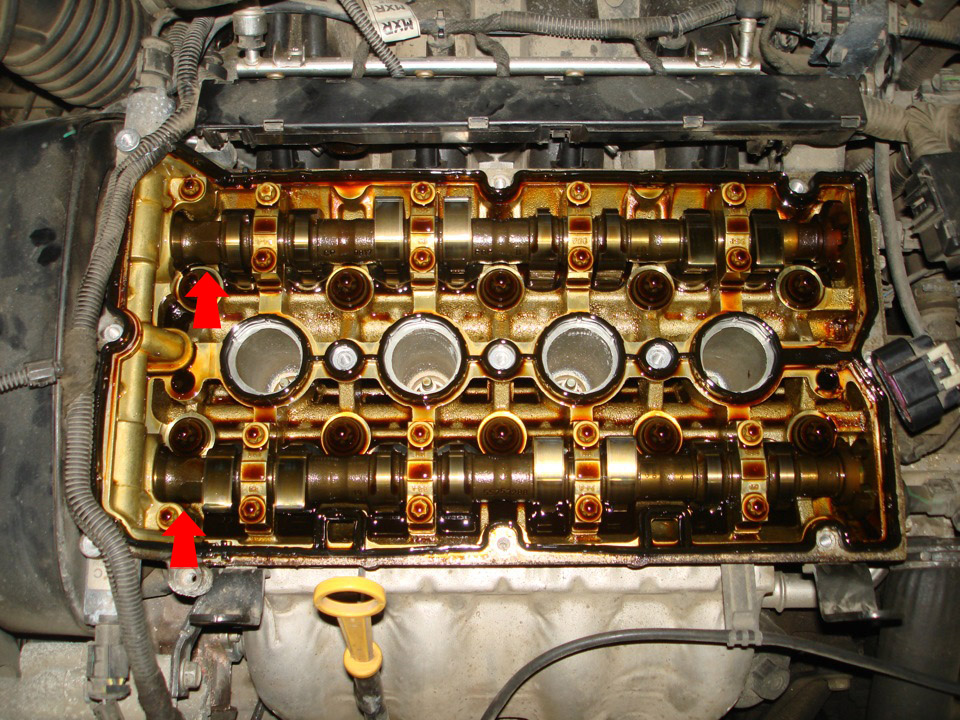
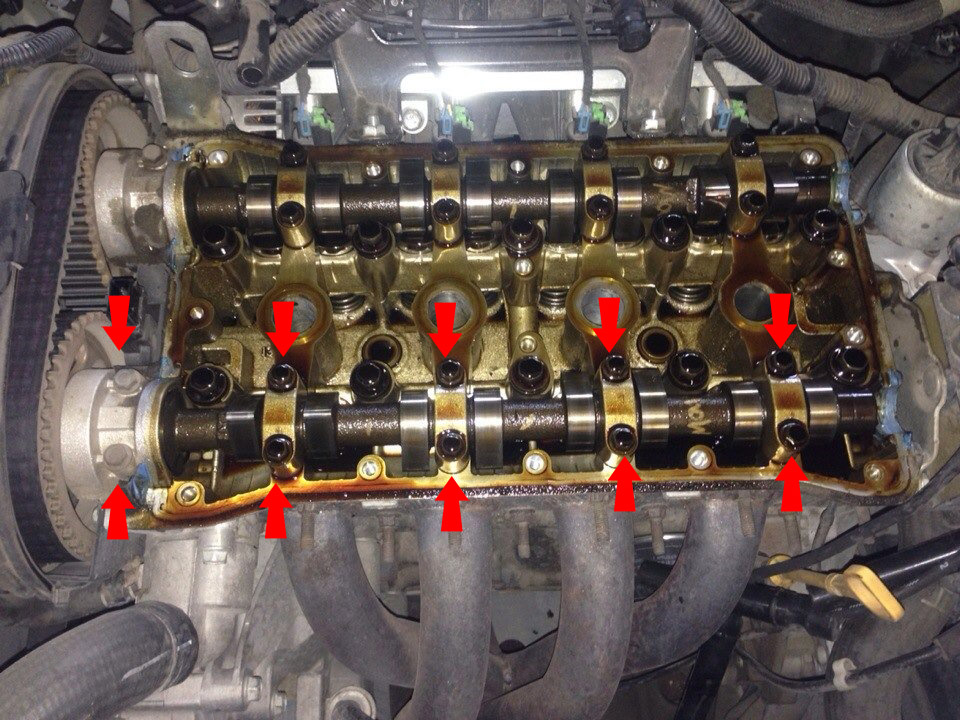
3. Remove the cylinder head cover.


The removed cylinder head cover
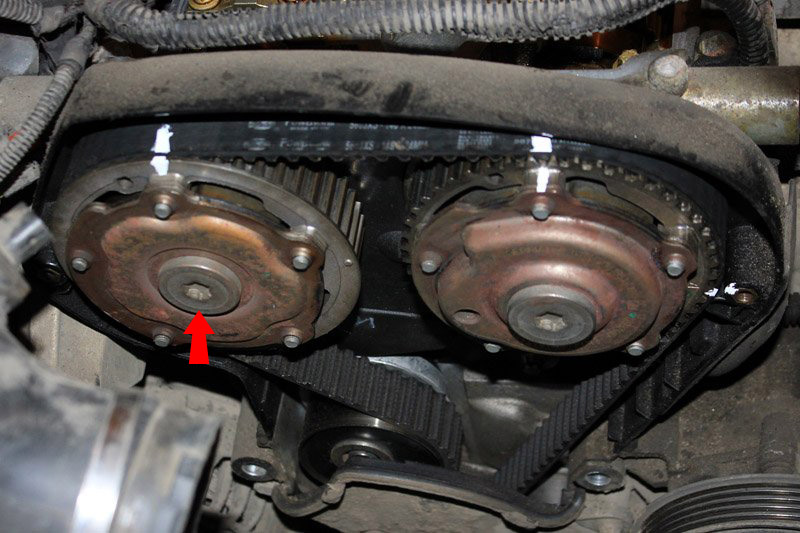
4. Set the piston of the first cylinder to the TDC position. When the piston of the 1st cylinder is in the TDC position of the compression stroke, the marks on the camshafts and marks on the crankshaft should be opposite each other.

Camshaft marks
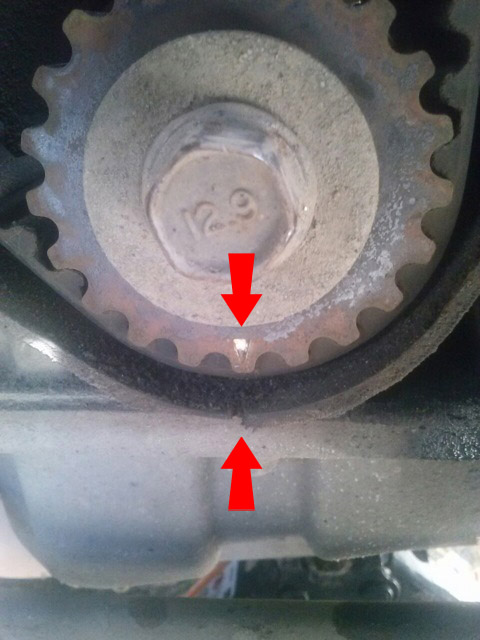
Marks on the crankshaft
Note:
Since it is inconvenient to turn the crankshaft by the bolt attaching the pulley to it, you can do this in the following ways:
- include any gear (best of all fourth) and slowly drive the car until the marks are aligned;
- engage any gear and jack up one of the front wheels. Then turn the suspended wheel until the marks align.
- If there is an automatic transmission, then the engine can be turned by the power steering pump pulley (without much effort).
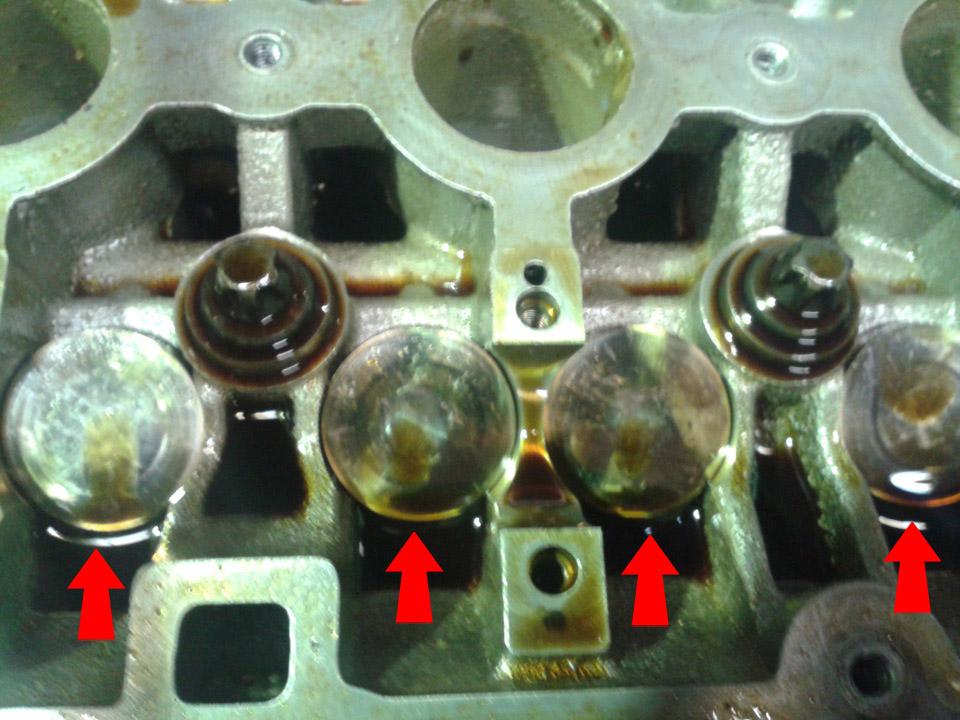
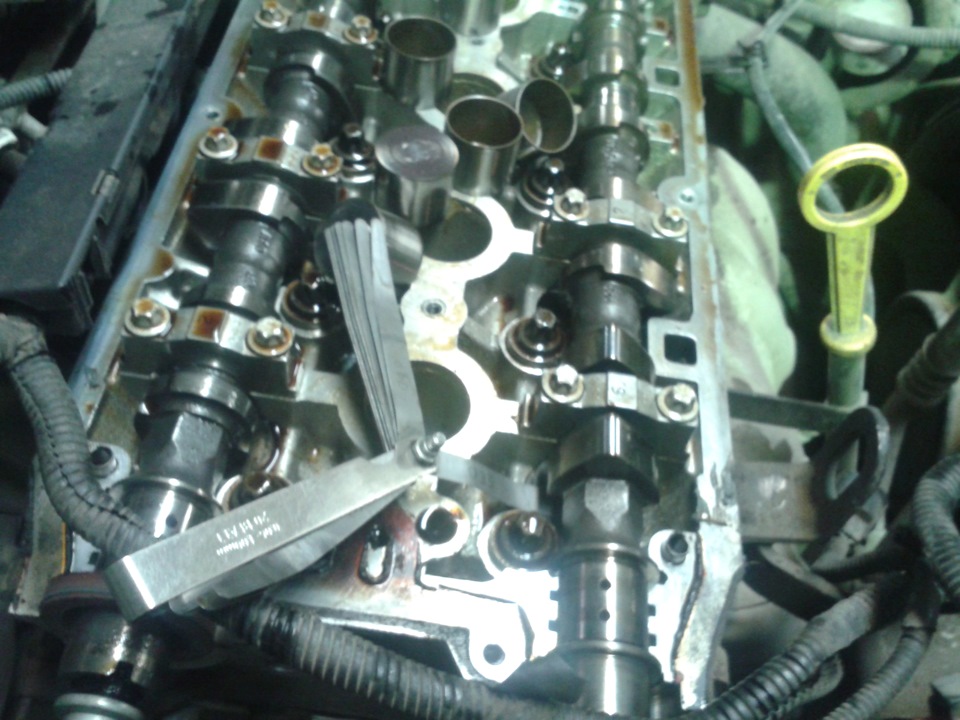
5. In this position of the shafts, check the clearance between the Chevrolet valves with a set of feelers. Write down the values obtained.

Measure the clearances of the Chevrolet Cruze
Note:
Similarly, check the clearances in all valves while rotating the camshaft.
Nominal clearances: 0.25 mm (intake) and 0.3 mm (exhaust), on a cold engine. The clearance tolerance for all valves is ± 0.05 mm.
6. If you need to adjust the valves, then remove the air filter housing.
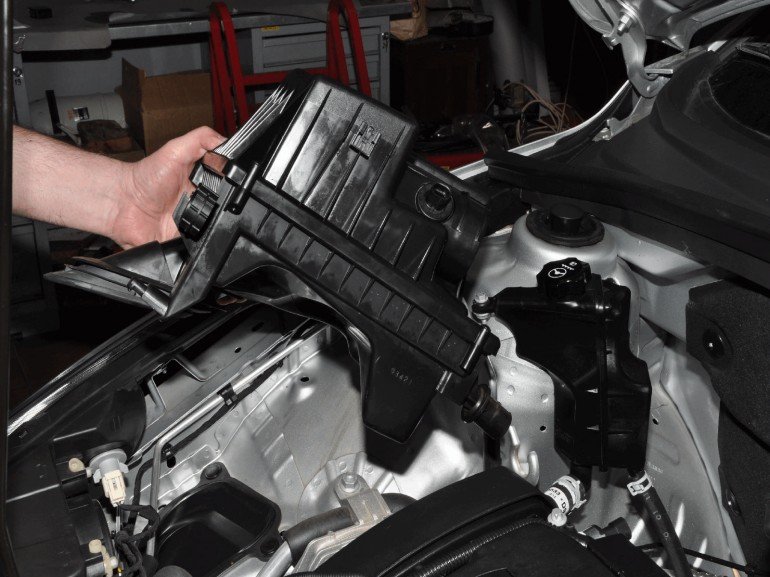
Chevrolet Cruze air filter housing
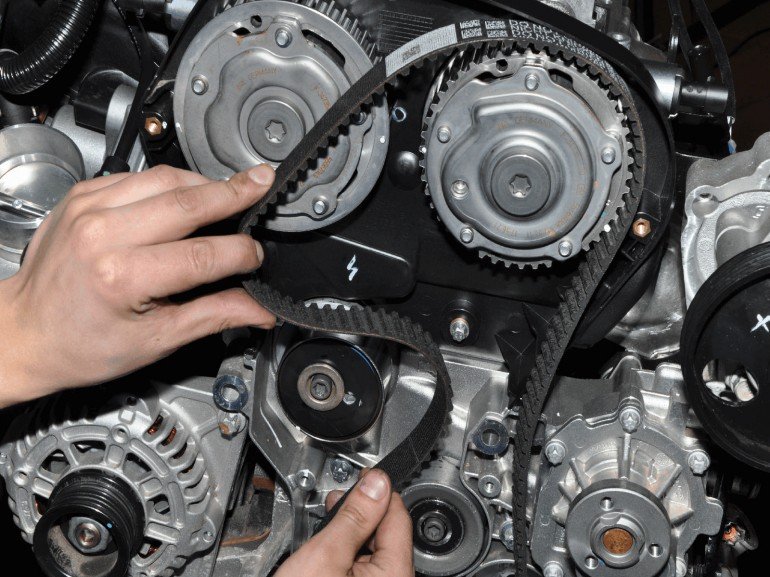
7. Remove the Chevrolet Cruze 1.8 timing belt as described in this article .
8. Holding the camshaft of the exhaust valves with a wrench 24 from turning, unscrew the bolt securing the gear to the camshaft and remove the gear.
Places where you can keep the camshaft from turning
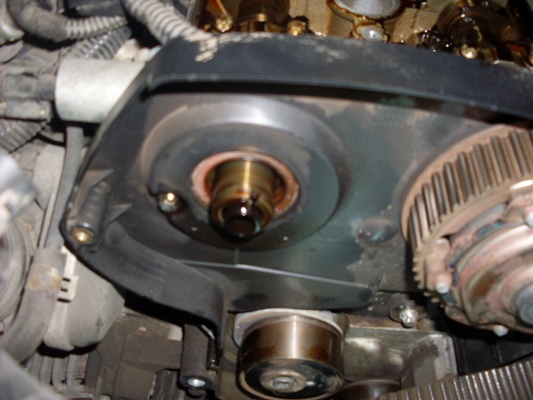
Removed Chevrolet camshaft gear
Note:
Remove the second gear in the same way.
9. Unscrew the key on the 17th camshaft bed and remove the camshaft.
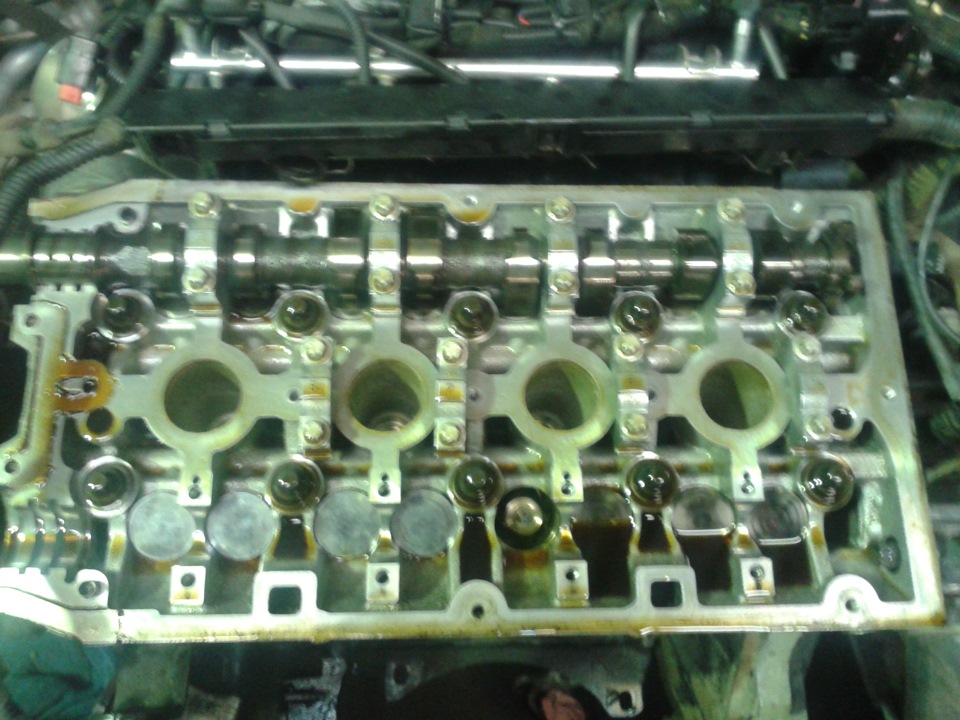
Chevrolet Cruze exhaust camshaft
Note:
The second camshaft has the same mounting.
10. Remove the valve lifters.
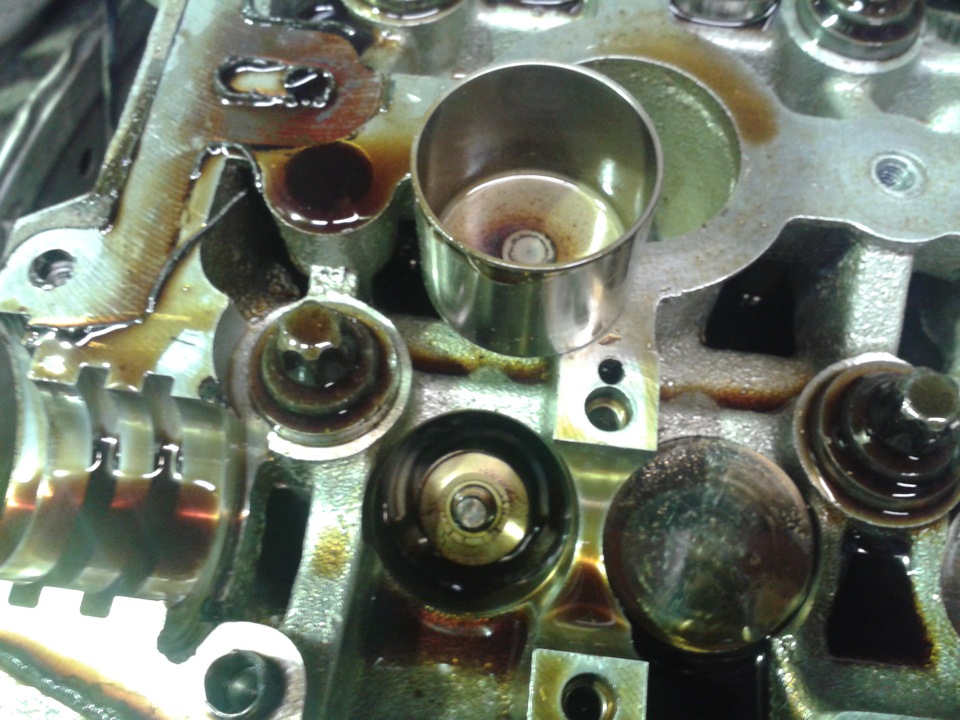
Note:
On the pushers inside, there are numbers of the type: 38 F1119 74, 41 F1111 74, manufacturer INA: 38 or 41 - this is the size of the pusher in hundredths of a millimeter, if measured with a micrometer, the dimensions will be 3.38 mm and 3.41 mm, respectively. F1111 and F1119 these are dimensional tolerances. For example, a pusher with the designation 38 has tolerances of 3.372 - 3.388. Roughly speaking, a pusher with a size of 3.38 overlaps these dimensions, because it makes no sense to make a pusher with a difference of 0.01 mm, since the tolerances for adjustment look like +/- 0.04. So with the help of these markings and a dipstick, you can independently adjust the valves.
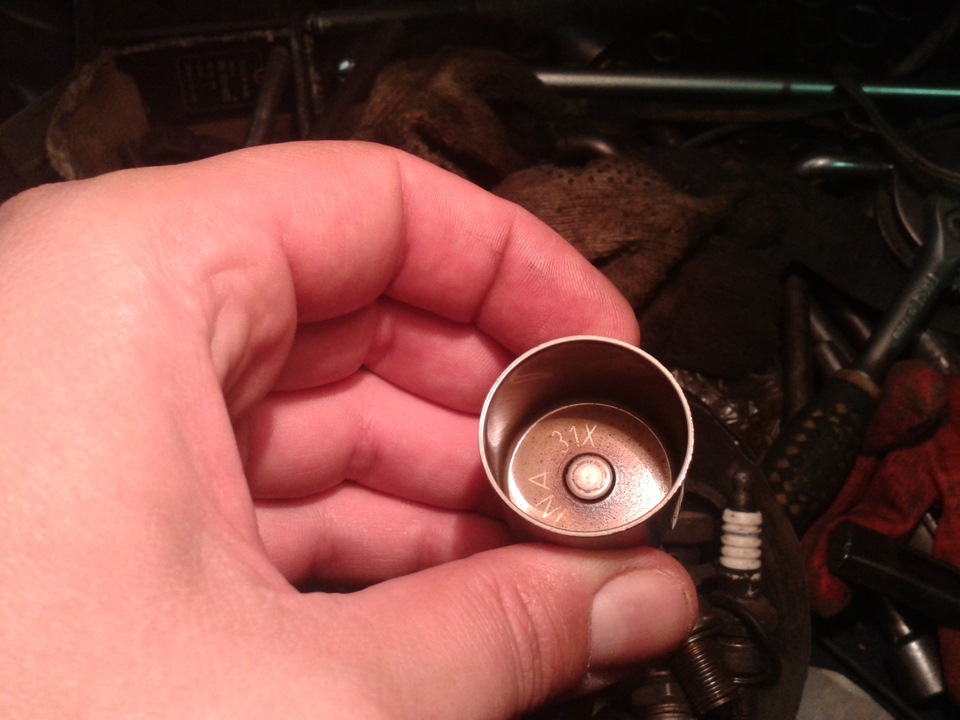
Pusher marking
11. Measure each cup with a micrometer and record the result in the table.
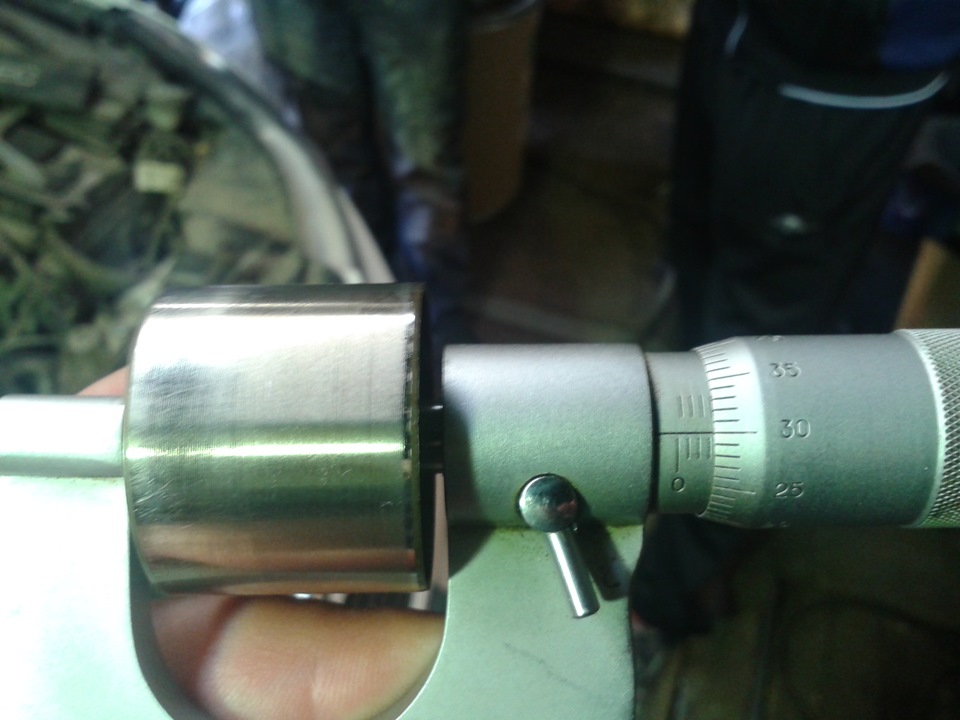
Note:
After you have drawn up the table, calculate the size that you need to remove in order to get the desired gap.
The clearance in the valve drive is adjusted by replacing the valve tappet with a new one, the thickness of which must be calculated by the formula: S = A + BC, where S is the thickness of the new tappet, mm; A is the thickness of the old pusher, mm; В - measured gap, mm; C - nominal clearance, mm.
12. Remove the required thickness with a conventional cutter on a drilling machine from the inner section of the glass.

Note:
Do this procedure slowly and carefully, measure with a micrometer, periodically correct the end of the cone on an emery stone.
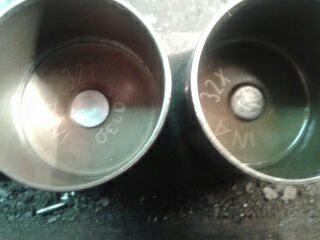
This is how the glasses look from the inside, on the left - processed, on the right - not
13. After removing the required size from the bottom of the glasses, install in place, tighten a couple of yokes by hand, turn the camshaft completely a couple of times and check the resulting clearances.
14. If clearances are normal, lubricate all yokes with engine oil and reinstall them.
Warning:
Do not overtighten the bolts on the yokes otherwise you will pinch the crankshaft.
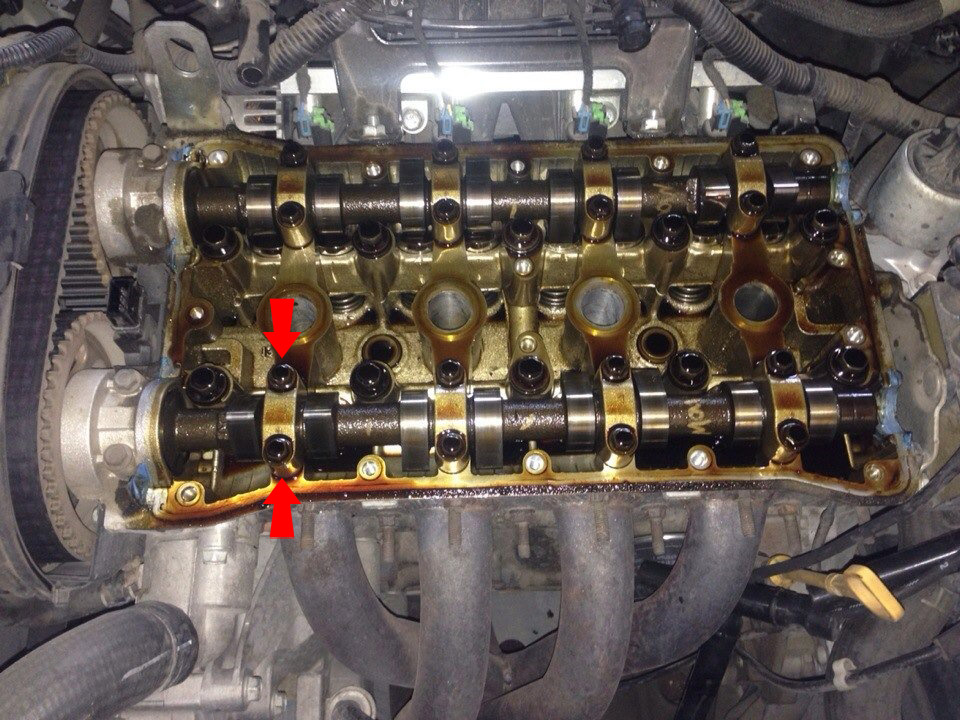
Location of bolts on yokes
15. Degrease the main timing yoke and carefully apply sealant to it.

16. Replace the cylinder head cover gasket if necessary.
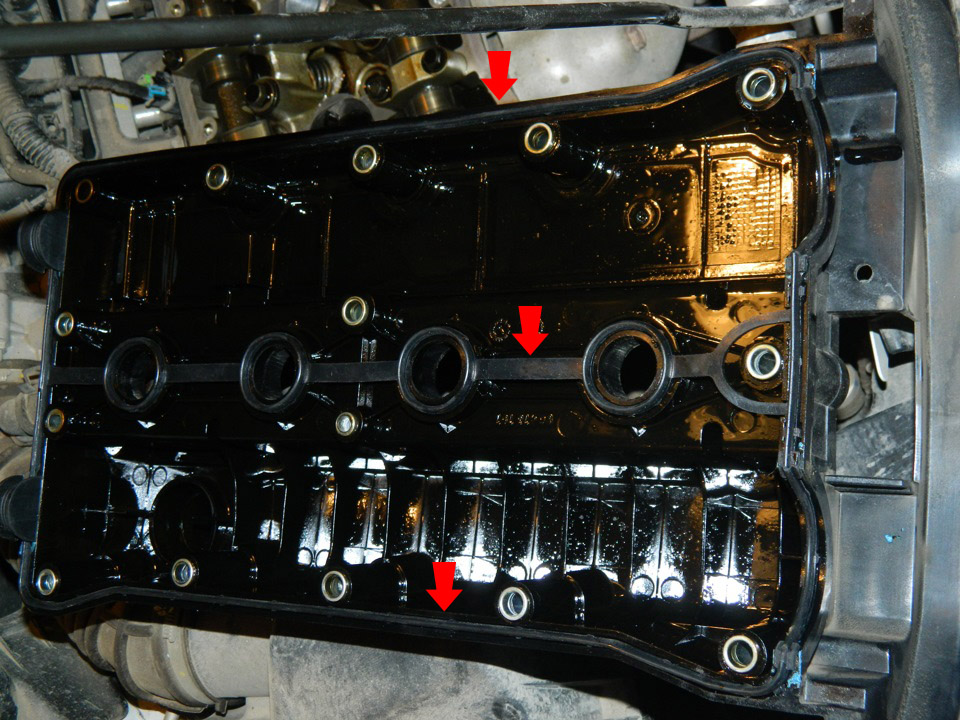

Chevrolet cylinder head cover gasket
Note:
Remove the old gasket and remove the remnants of the old gasket. Degrease the gasket locations, apply some sealant and install the gasket.
17. Install all removed parts in the reverse order of removal.
The article is missing:
- Photo of the instrument
- Photos of parts and consumables
Source: http://carpedia.club/