![B6 [2005 - 2010]](/uploads/Volkswagen_Passat_B6_2005_-_2010_.jpg)
Tools:
- Screw jack
- Balloon wrench
- Pliers
- Large flat screwdriver
- Metal brush
- Compressor or compressed air cylinder
- Curved box spanner 11 mm
- 7mm hexagon wrench
- 3/4 "end bit
- Wrench attachment 14 mm
- Torque wrench
Parts and consumables:
- Front / rear brake pads (depending on the place of repair) (replacement if necessary)
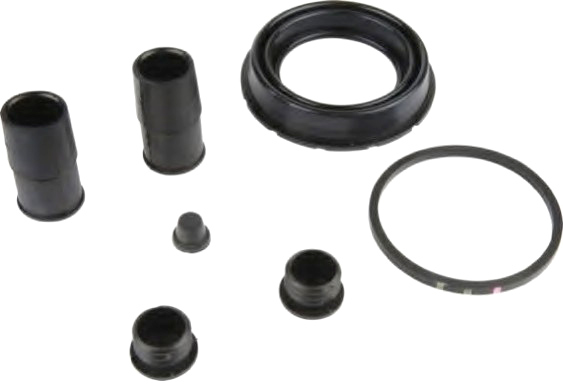
- Set of seals for the brake caliper housing (VAG 1K0698471A)
- Guide pin (VAG 251615219) (replacement if necessary)
- Purifier
- 10 * 1.5mm threaded bolt
- Aerosol grease type WD-40
- White Spirit
- Alcohol
- Brake fluid
Notes:
When the driver presses the brake pedal, the pads are pressed against the discs and brake the wheel. But the brakes are not equipped with mechanisms that take the block back. The pad simply stops pressing firmly against the disc. Often, after long-term use, the brake mechanism can lose its original geometry, which leads to accelerated or uneven wear of brake pads and discs, increased noise and an unpleasant odor. The pads overheat and lose their grip at the same time. In short, the vehicle's braking system becomes ineffective.
The reason may be either a damaged caliper guide, or dirt on the working surface, or the caliper itself. This article covers caliper repair to solve this problem.
Due to the likelihood that, due to the different elasticity of the cuffs in the old and the rearranged caliper, there will be a difference in the speed of the brakes, it is advisable to carry out the bulkhead immediately on both sides of one axis.
Repair of brake calipers Volkwagen Passat
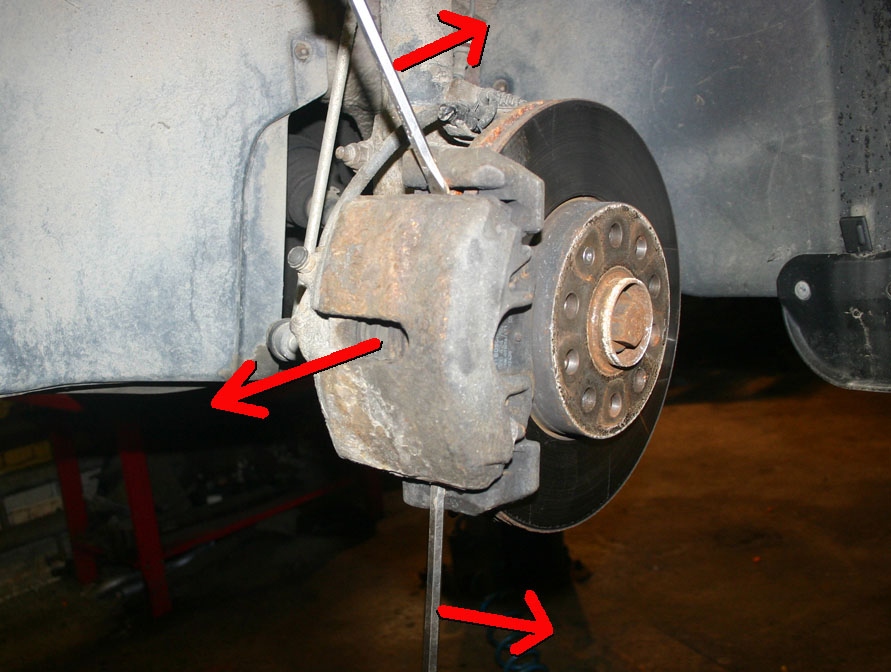
1. Using a jack, raise the car. We unscrew the wheel, turn the steering wheel to the extreme position.
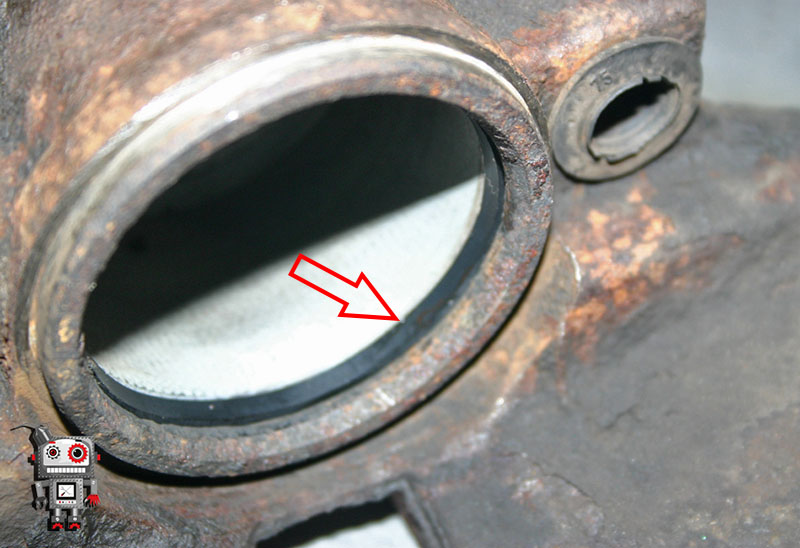
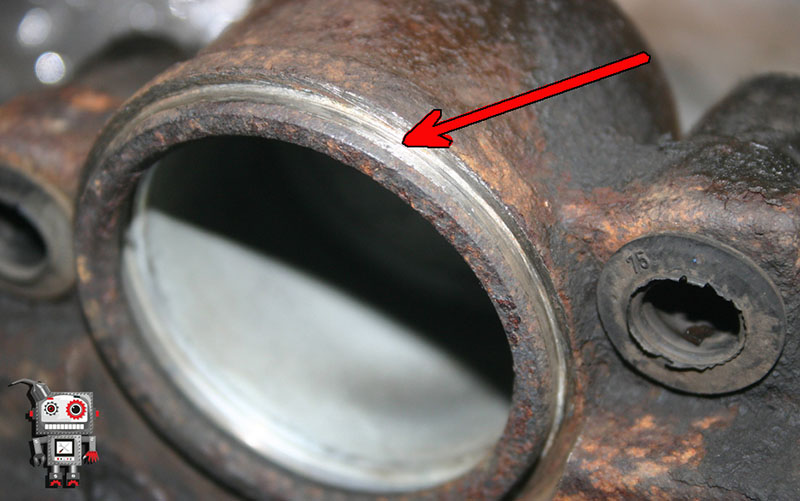
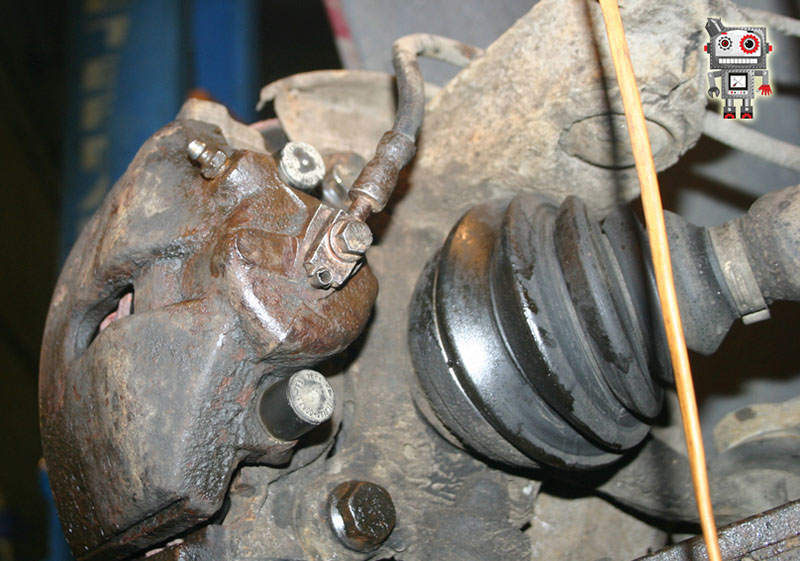
2. Thoroughly clean the surface near the brake hose mount. Can be treated with WD-40 grease, cleaned with white spirit and blown with air.
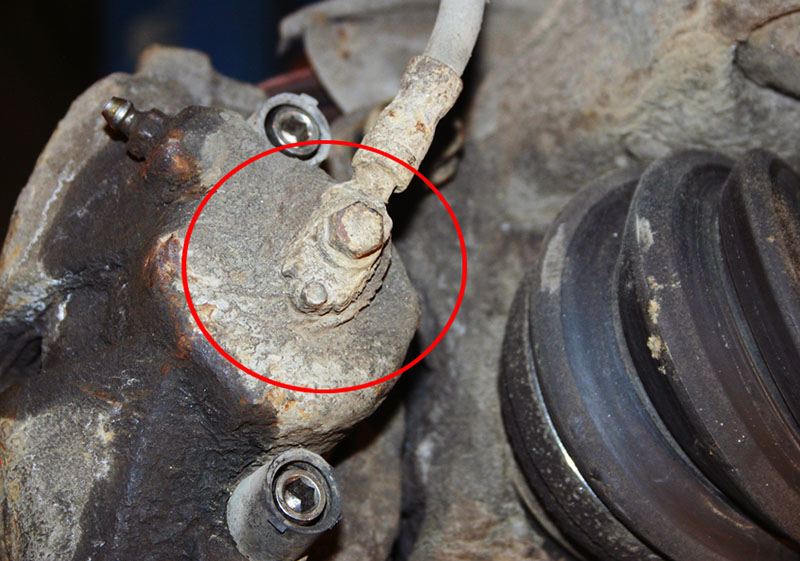
Surface near the brake hose mount that requires cleaning
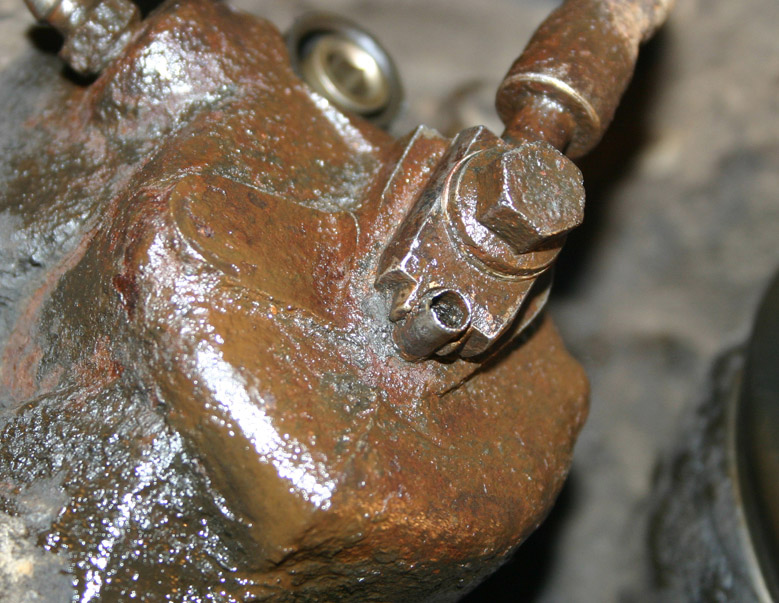
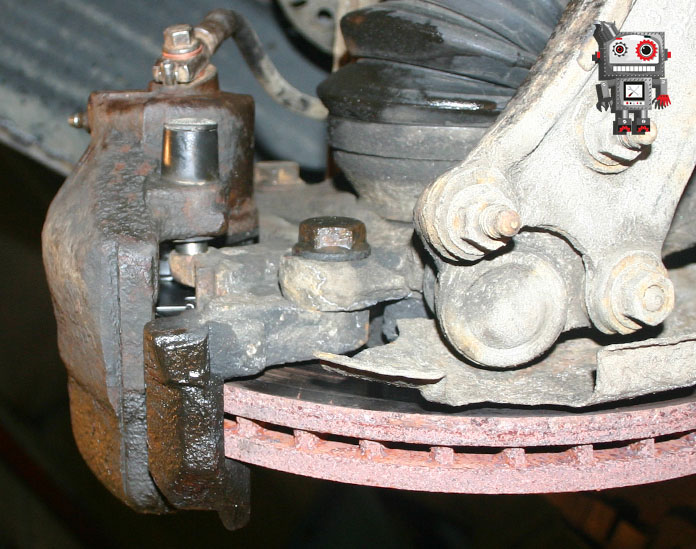
Cleaned area near the brake hose mount
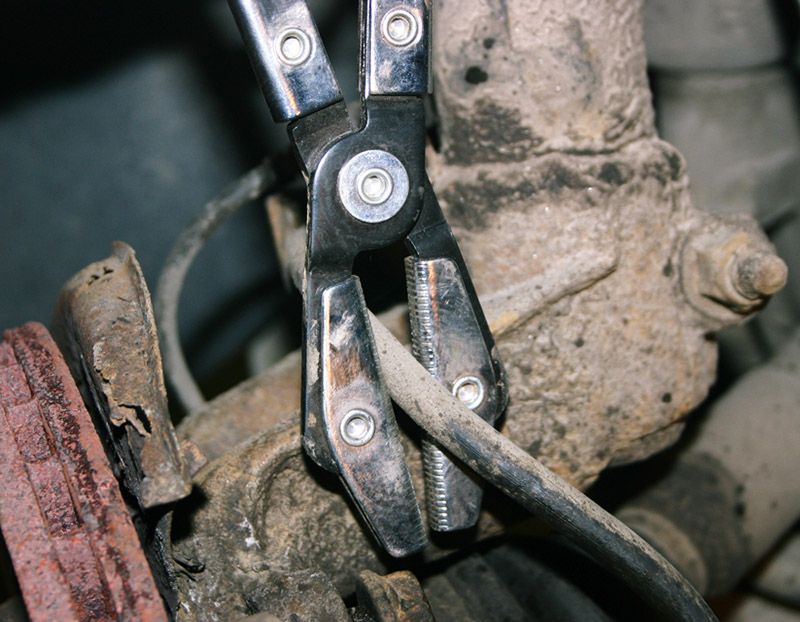
3. In order for the level of the brake fluid to remain the same, we pinch the brake hose using the locking pliers or clamp.
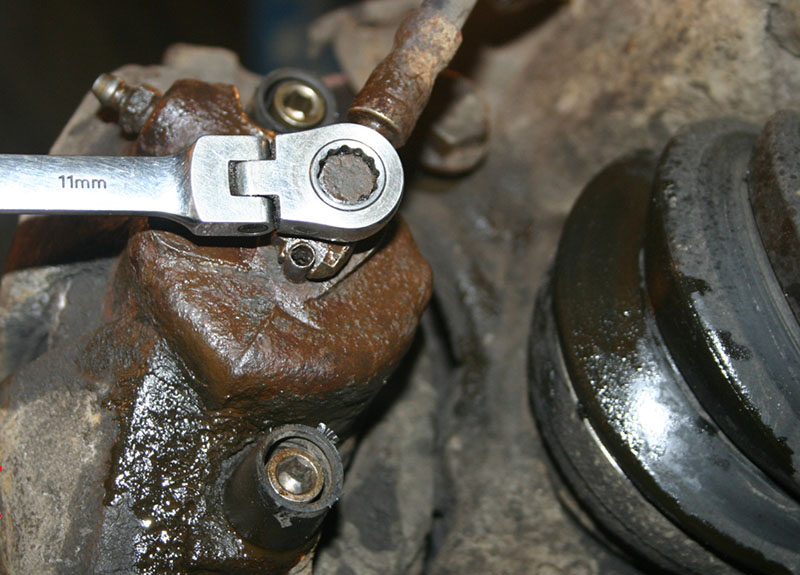
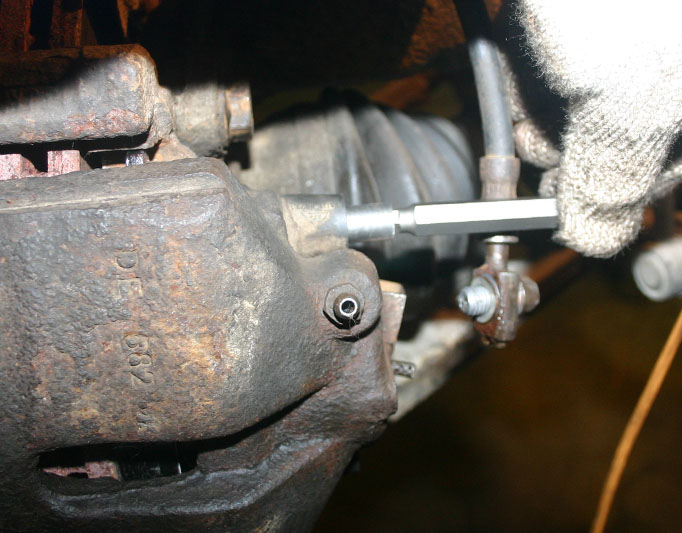
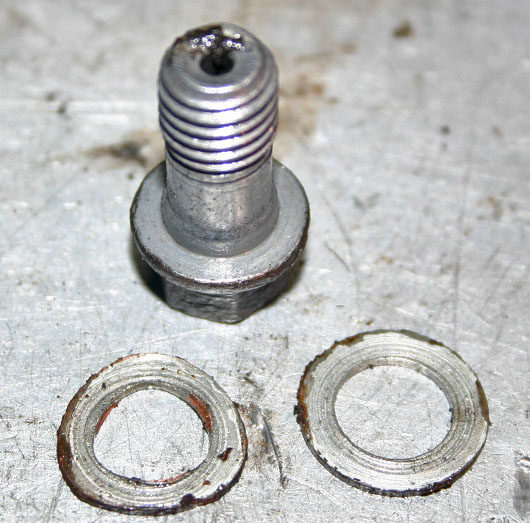
4. Unscrew the hollow bolt securing the hose and take the hose to the side.
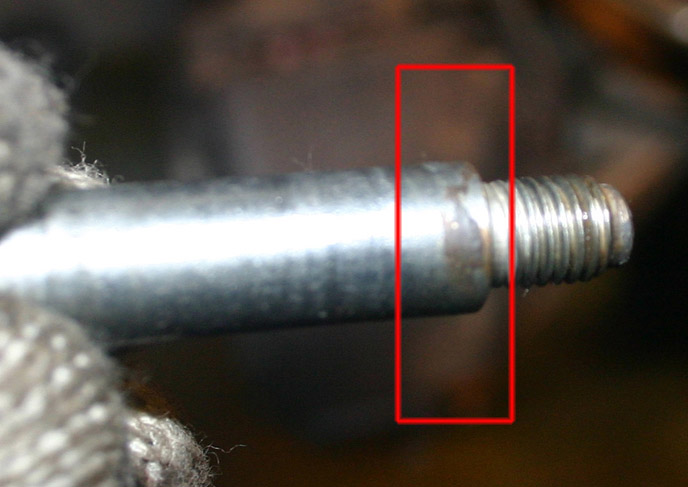
5. In order to prevent dirt from getting inside the hole, insert there a suitable size bolt with a thread 10 * 1.5 mm.

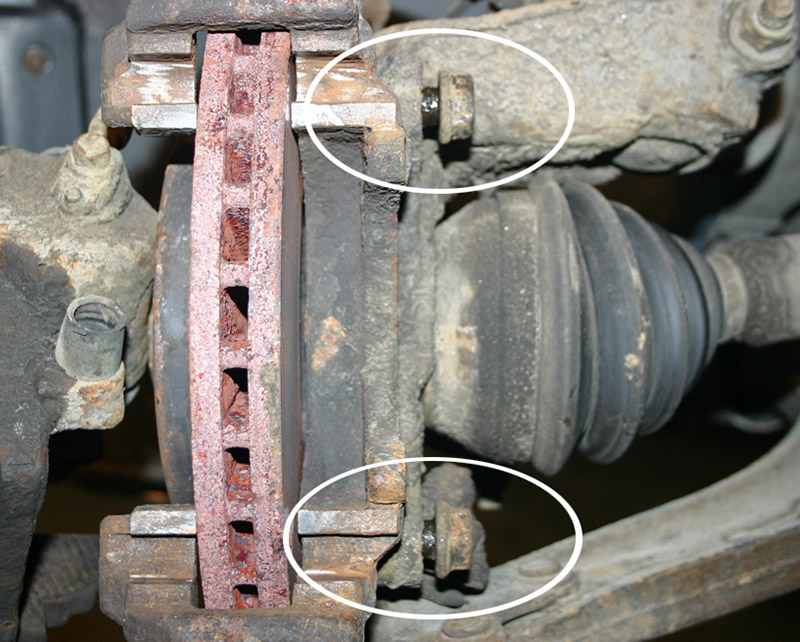
6. Remove the blanking caps from the brake caliper guides .

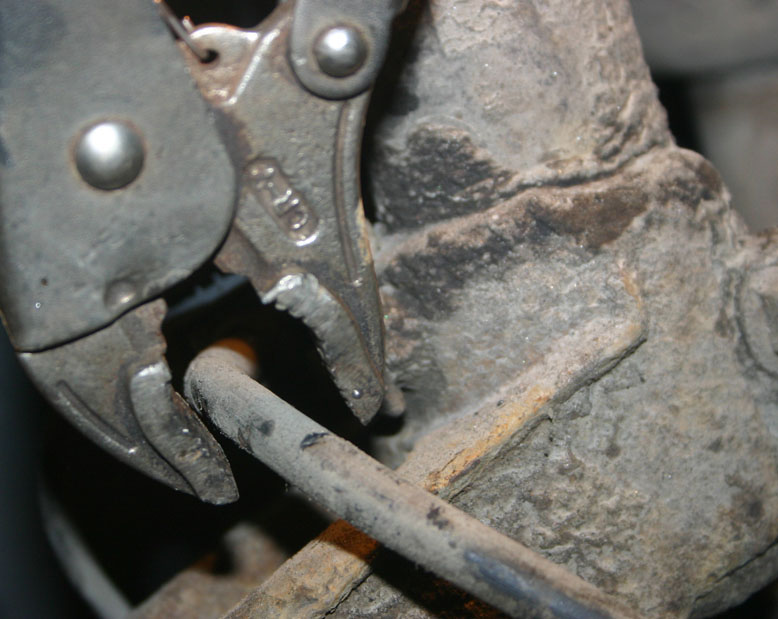
7. Unscrew the rails from the caliper using a 7 mm Allen key.
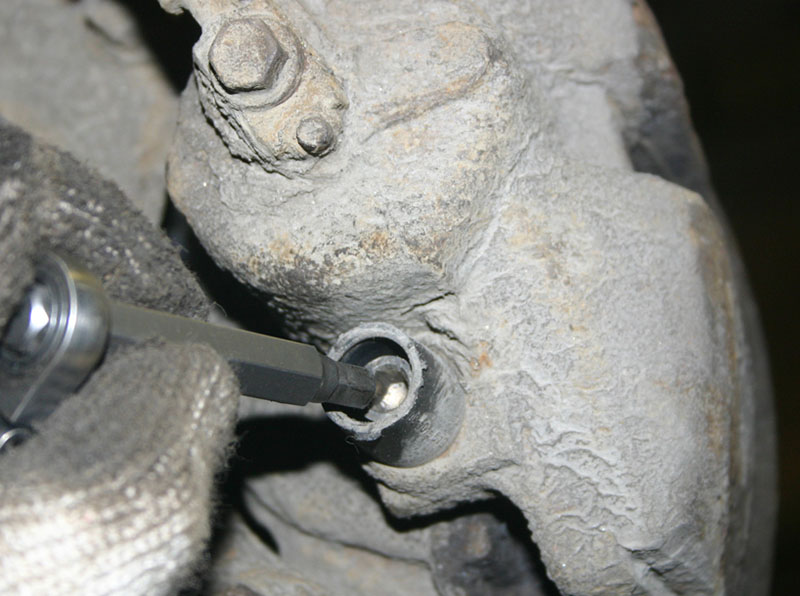
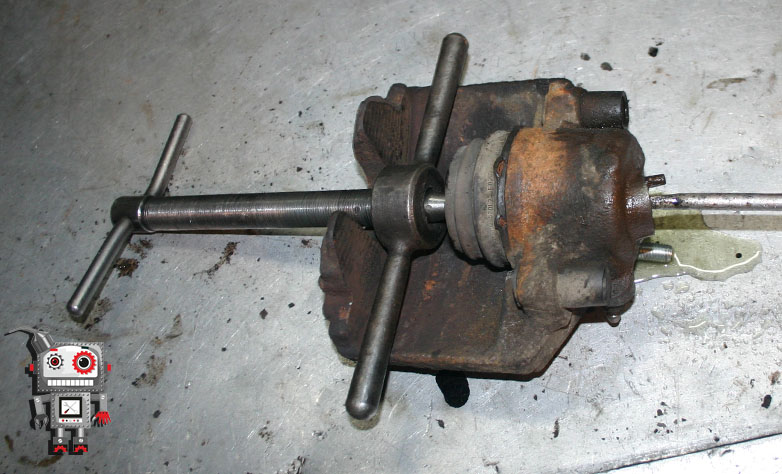
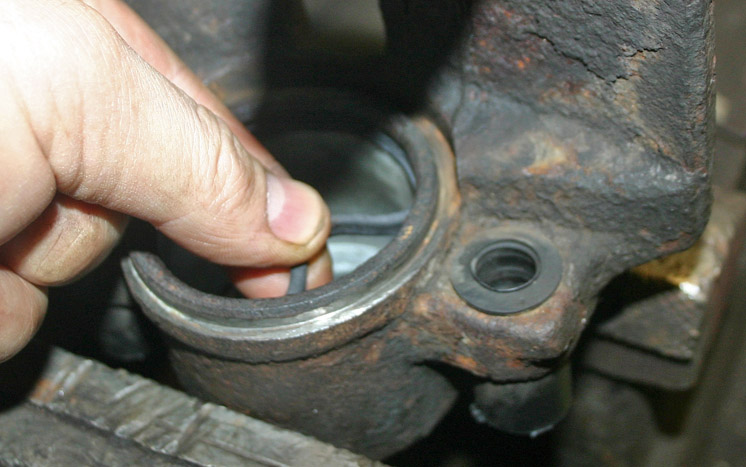
8. It is necessary to slightly sink the piston. Using a thick screwdriver, move the case away from the disc. We remove the caliper, helping ourselves with a screwdriver (screwdrivers).
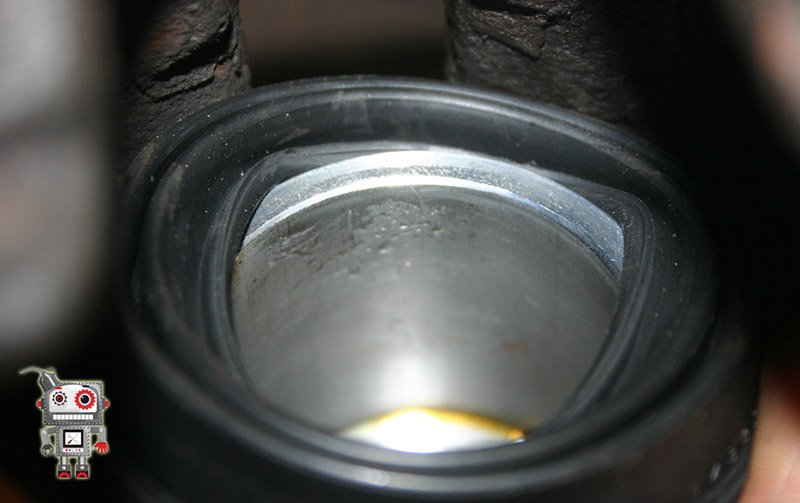
9. Remove the cover (boot) from the brake piston.
Note:
Despite the outer integrity of the cover, there may be moisture and dirt under it inside.
10. Remove the piston from the brake caliper. The piston can be removed from the housing in three ways:
- without still disconnecting the caliper from the hose, remove it from the disc, and press the brake pedal until the piston falls out and immediately pinch the hose;
- clamp the body in a vice, and pull the piston with large "crocodiles", simultaneously making circular movements;
- take it out with air. However, do not forget to provide support for the safety of your own body parts.
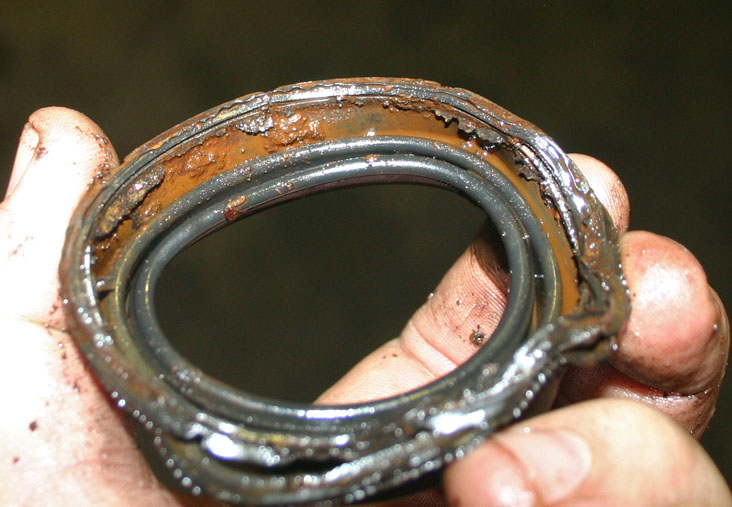
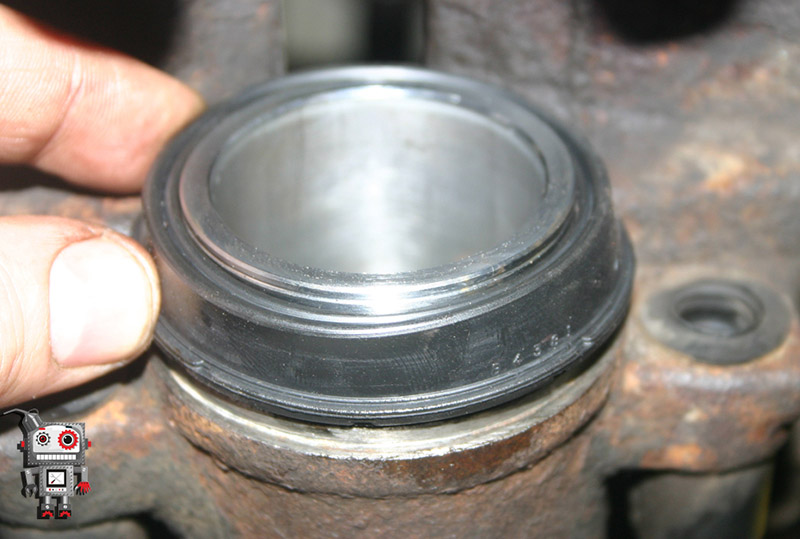
11. Next, draining the remaining brake fluid, take out the old cuff.
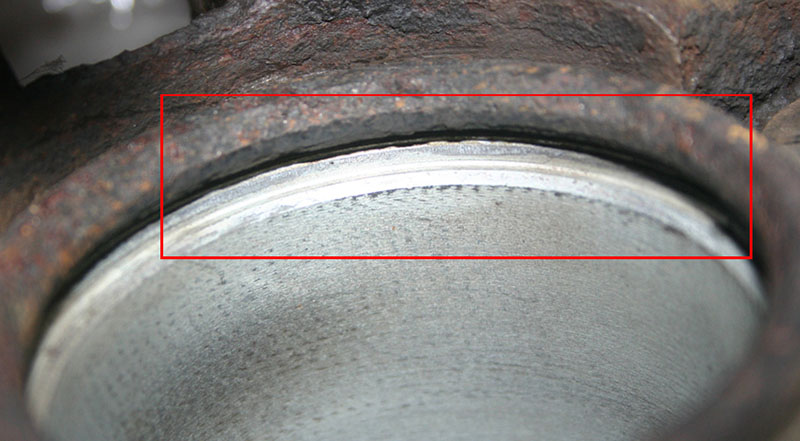
12. Thoroughly clean the surface under the protective cover, as well as grooves for the cuff.
13. In case of repair of the brake mechanism, replace all rubber seals and covers with new ones from the repair kit.
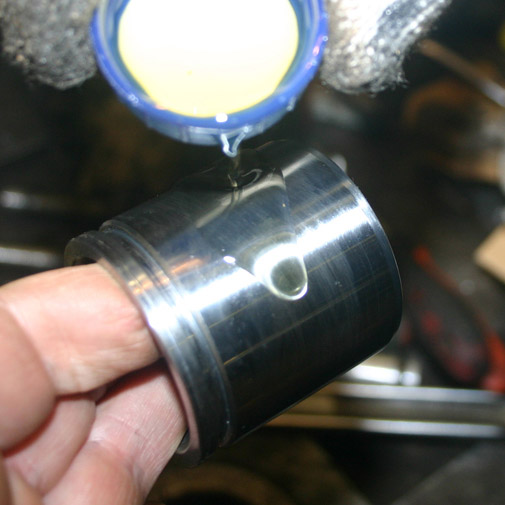
14. Wash all parts again with alcohol. Install the new cuff with clean hands and lubricate it with fresh brake fluid.
15. Moisten the piston surface with a small amount of brake fluid (a special paste can also be used for this).
16. Insert the piston into the caliper housing strictly vertically, and slightly swinging, with the effort of fingers, press the piston.
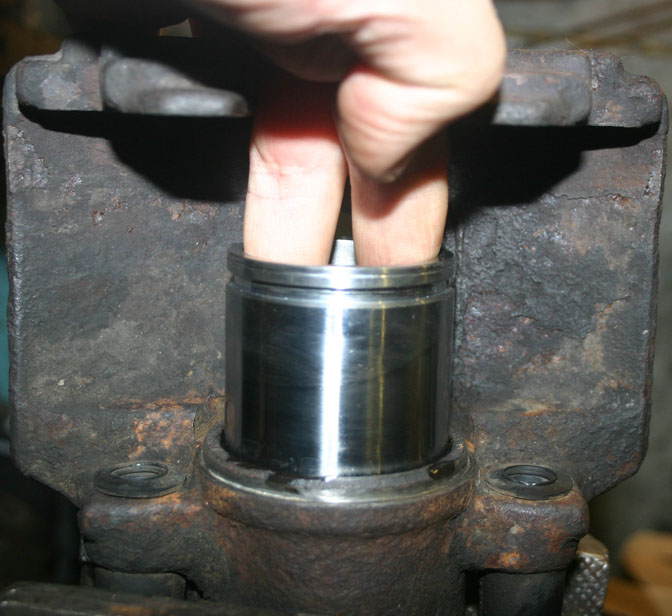
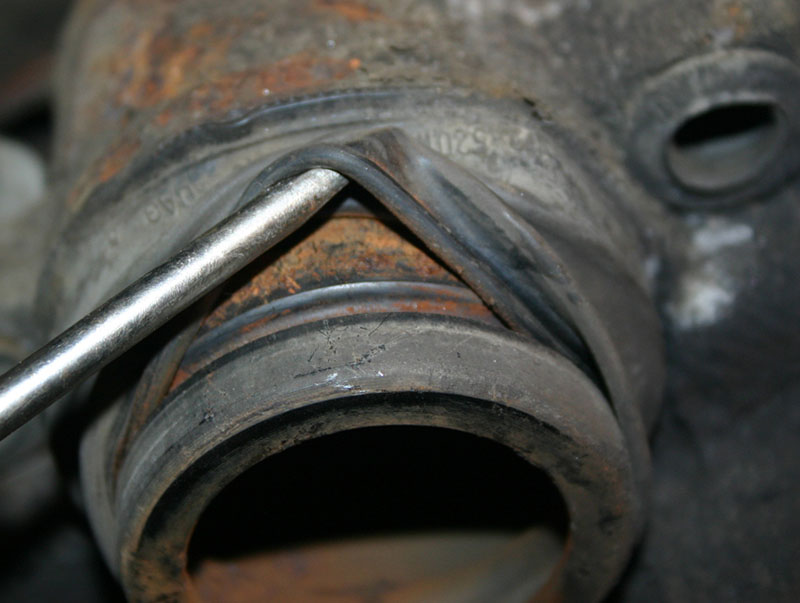
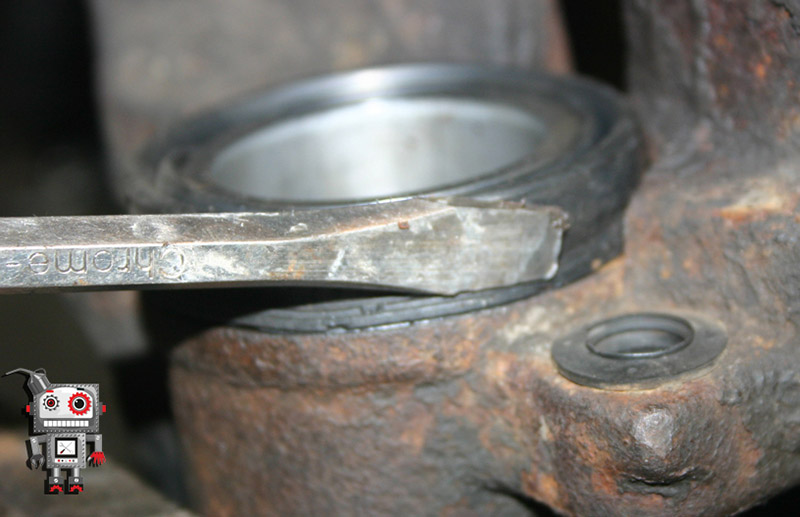
17. After sinking the piston to the middle, put a new protective cover over the cylinder.
18. Make sure the rubber boot is not jammed. Press the cover onto the body.
A wire ring is welded into the cover. For an even fit, VAG has a special mandrel, but you can handle it without it. The main thing is to distribute efforts evenly.
19. Sink piston completely, then air out. Make sure the boot is flat and not twisted or torn anywhere.
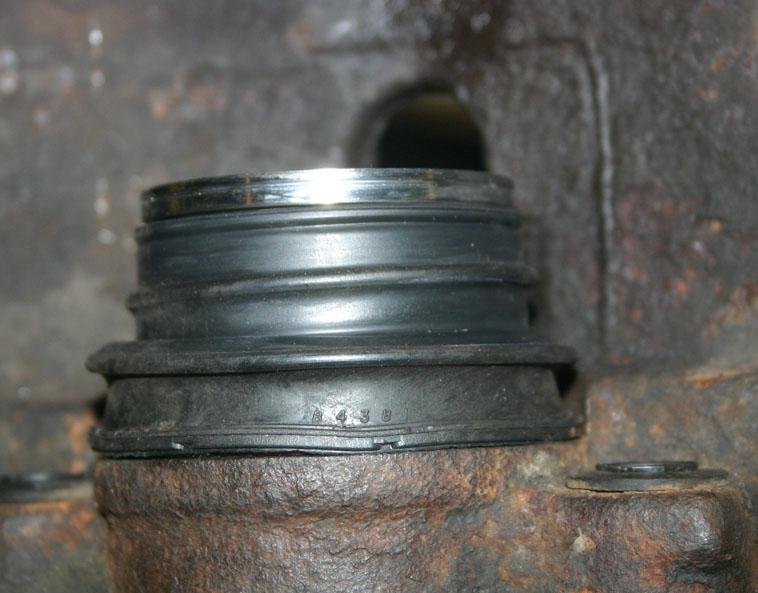
Sink the piston completely again.
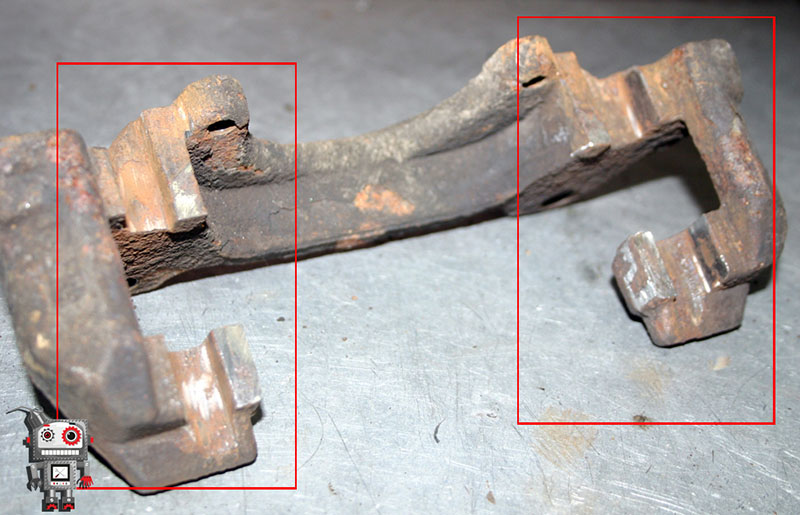
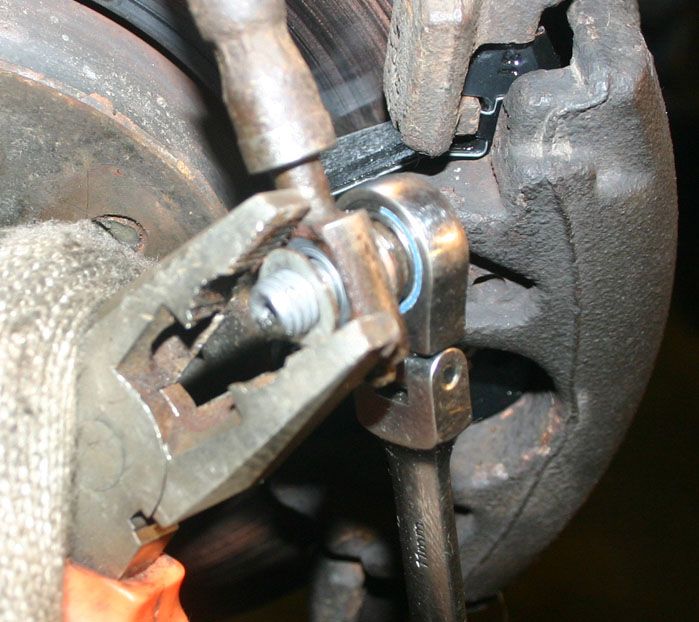
20. Unscrew the two bolts of the brake caliper bracket (14 mm head).
21. Thoroughly clean all surfaces on which the pads move.
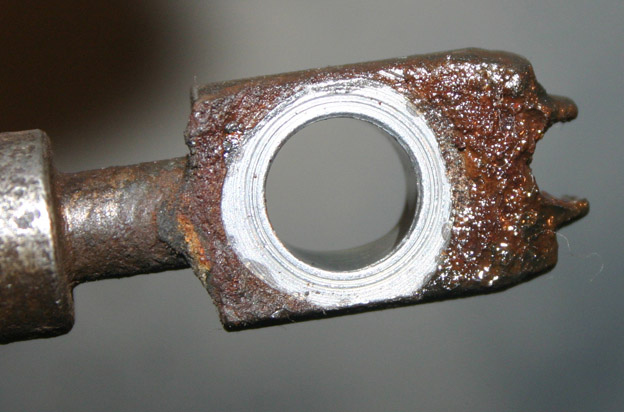
22. Check that the thread into which the caliper guides are screwed is not damaged.
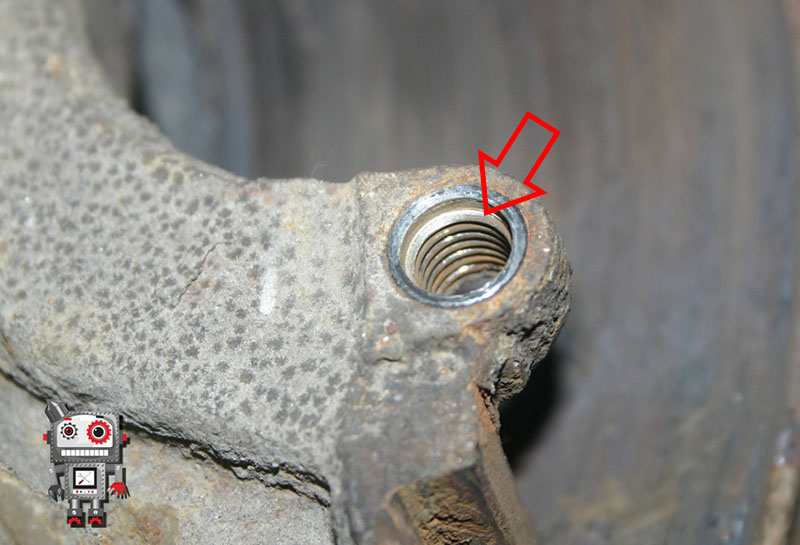
Note:
For the brake mechanisms of Passat B6 cars, a problem is inherent when, when unscrewing the guide, the dirt and rust formed on the protruding part pull out the threads along with them.
23. Screw the caliper bracket back into place. The screws are tightened with a torque of 190 Nm.
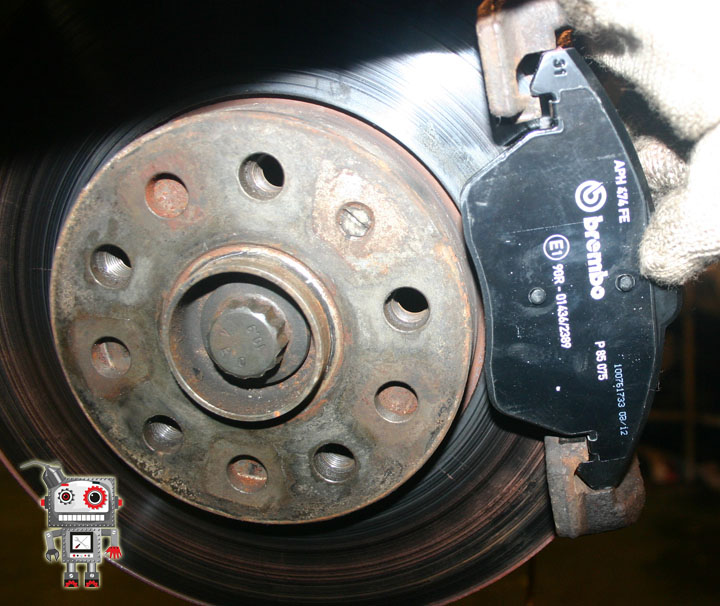
24. Install the block and make sure nothing gets stuck anywhere.
25. Clean the guides. If there are traces of rust, it is better to replace them.
26. Insert the inner block with the spring into the piston, slide the caliper onto the bracket, and tighten the guides. Make sure that the bolt goes along the thread, and only then tighten to a torque of 30 Nm.
27. Place new protective caps over the guide pins.
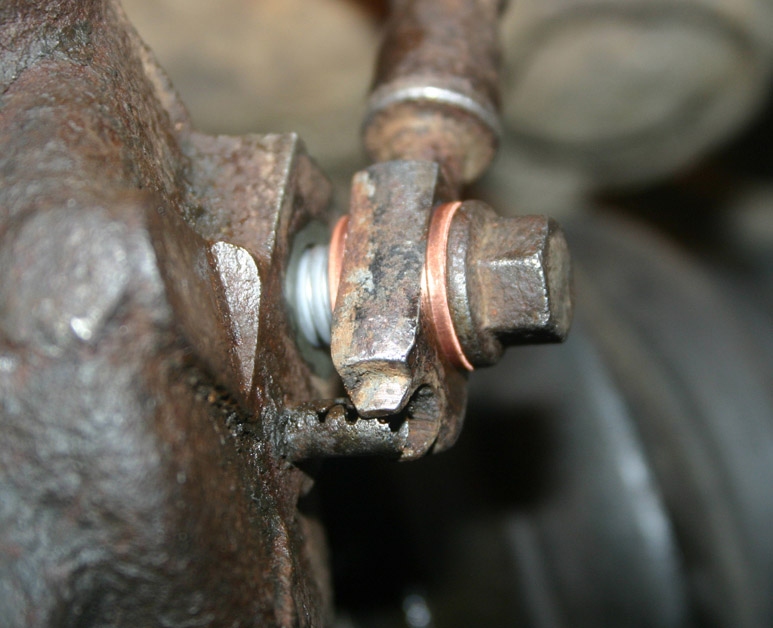
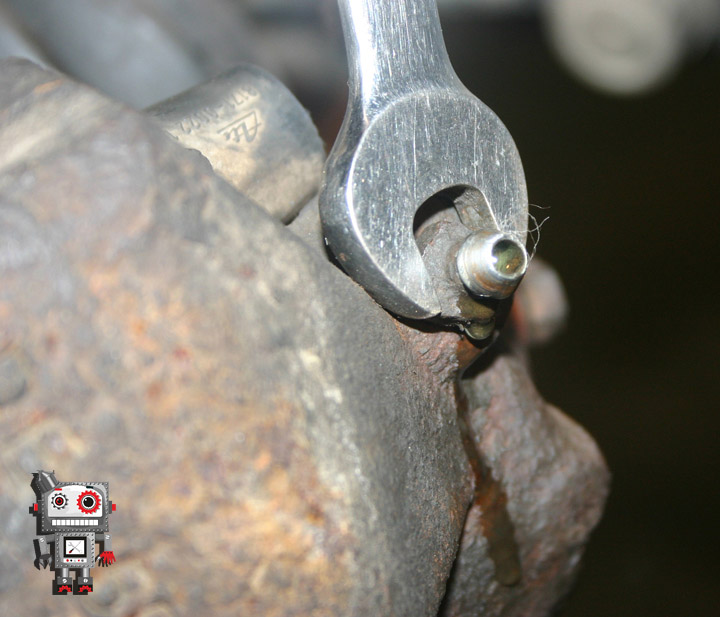
28. The brake hose is attached to the caliper with a hollow bolt and sealed with rings.
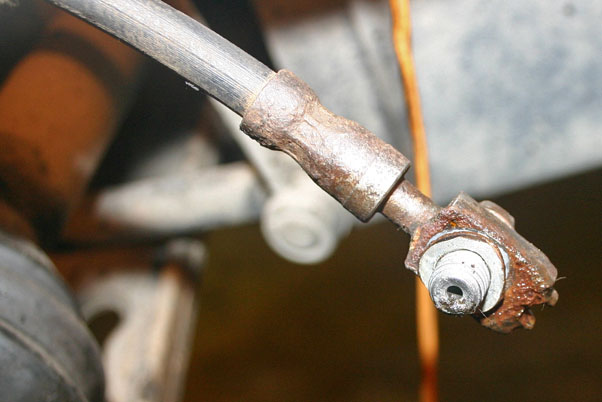
These rings can only be removed with a tool.
29. After removing and cleaning the hollow bolt, the o-rings will most likely have to be replaced. To do this, you can pick up similar in diameter and thickness.
30. Before assembly, purge the union with air from the compressor.
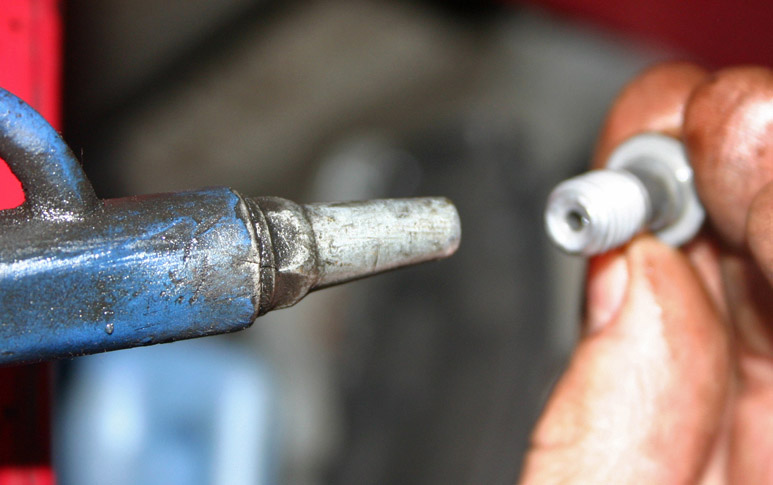
And clean the mating face on the hose.
31. Install the rings and fix the brake hose with a hollow bolt on the caliper (tighten to 35 Nm).
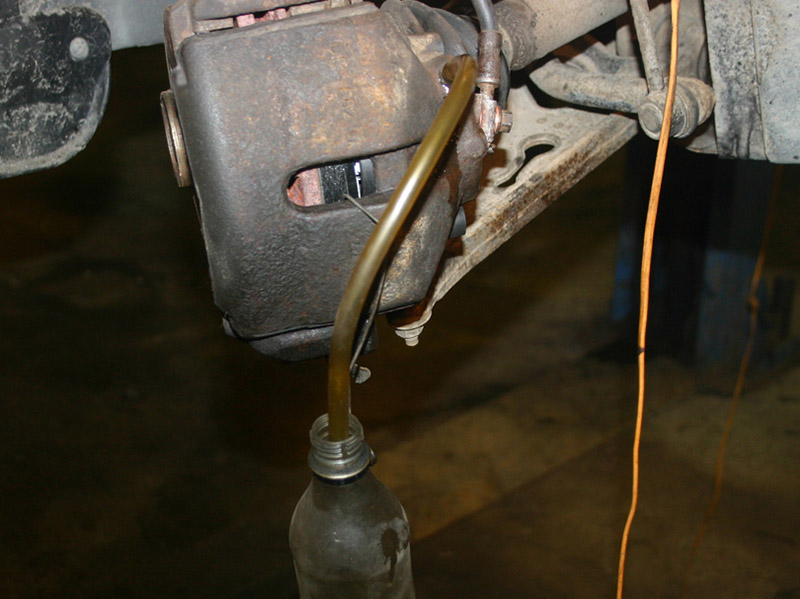
32. Remove the cap from the bleed union and release the brake hose.
33. If everything was done correctly, then there is no need to bleed the brake circuit. It is enough to wait until liquid flows from the fitting, evenly and without bubbles.
34. In order not to stain the mechanism and collect the escaping brake fluid, put a tube on the fitting and lower its other end into the bottle. Check the air outlet, when even liquid flows, tighten the union to a torque of 30 Nm. Bring the pads together with a few strokes of the brake pedal.
35. Wash away the remaining brake fluid and other and traces of activity from the caliper.
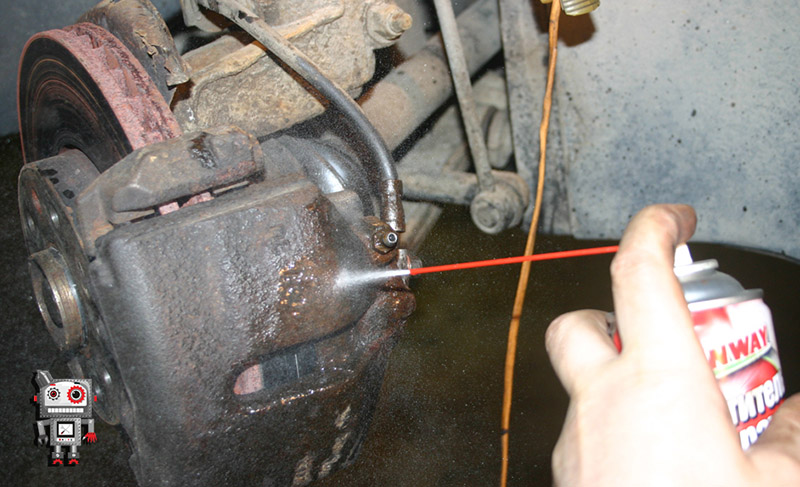
Pay attention to the cleanliness of the CV joint boot, ball joint covers and steering tip.
36. Start the engine (for the brake booster to work) and press the brake pedal hard several times. Carefully inspect the caliper from all sides for brake fluid leaks.
If all surfaces are clean and the machine is working properly, install the wheel and lower the jack.
37. Open the hood and check the level of the brake fluid in the reservoir. If necessary, top up to the standard level.
38. Take a test drive. If the pedal fails when pressed for the first time, and becomes higher after a couple of strokes, repeat the procedure for removing air.
The article is missing:
- Photo of tools
- Photos of parts and consumables
Source: http://carpedia.club