Tools:
- Box spanner, straight 15 mm
- Spanner straight 13 mm
- Balloon wrench
- Ratchet wrench
- Torx head T30
- 19 mm head
- Large flat screwdriver
- A device for pressing the brake caliper pistons (or a wrench with suitable tabs for the piston grooves)
- Screw jack
- Support posts
- Wheel rests "shoes"
- Metal brush
- Narrow nose pliers
Parts and consumables:
- Hose (if required)
- Syringe (if necessary)
- Guide pin protective covers (if required)
- Brake fluid (type DOT-4 plus) (if necessary)
- Caliper Guide Lubricant (If Required)
- Rags
- Wire
- Aerosol lubricant WD-40 or similar (if necessary)
- High Temperature Copper Spray Lubricant (30006)
- Brake pads complete with all parts (A 639 420 02 20)
- Ratchet (A 201 420 03 73)
- Ratchet support sleeve (A 124 423 00 50)
- Upper extension spring (A 210 423 00 92)
- Lateral extension spring (A 201 423 05 92)
- Lower extension spring (A 201 423 06 92)
- Lever that releases the brake pads (A 201 420 05 89)
Note:
This article describes how to replace the parking brake pads on a Mercedes Vito.
Replacing the parking brake pads Mercedes-Benz Vito W639
1. Brake the car with the parking brake and install chocks (“shoes”) under the front wheels.
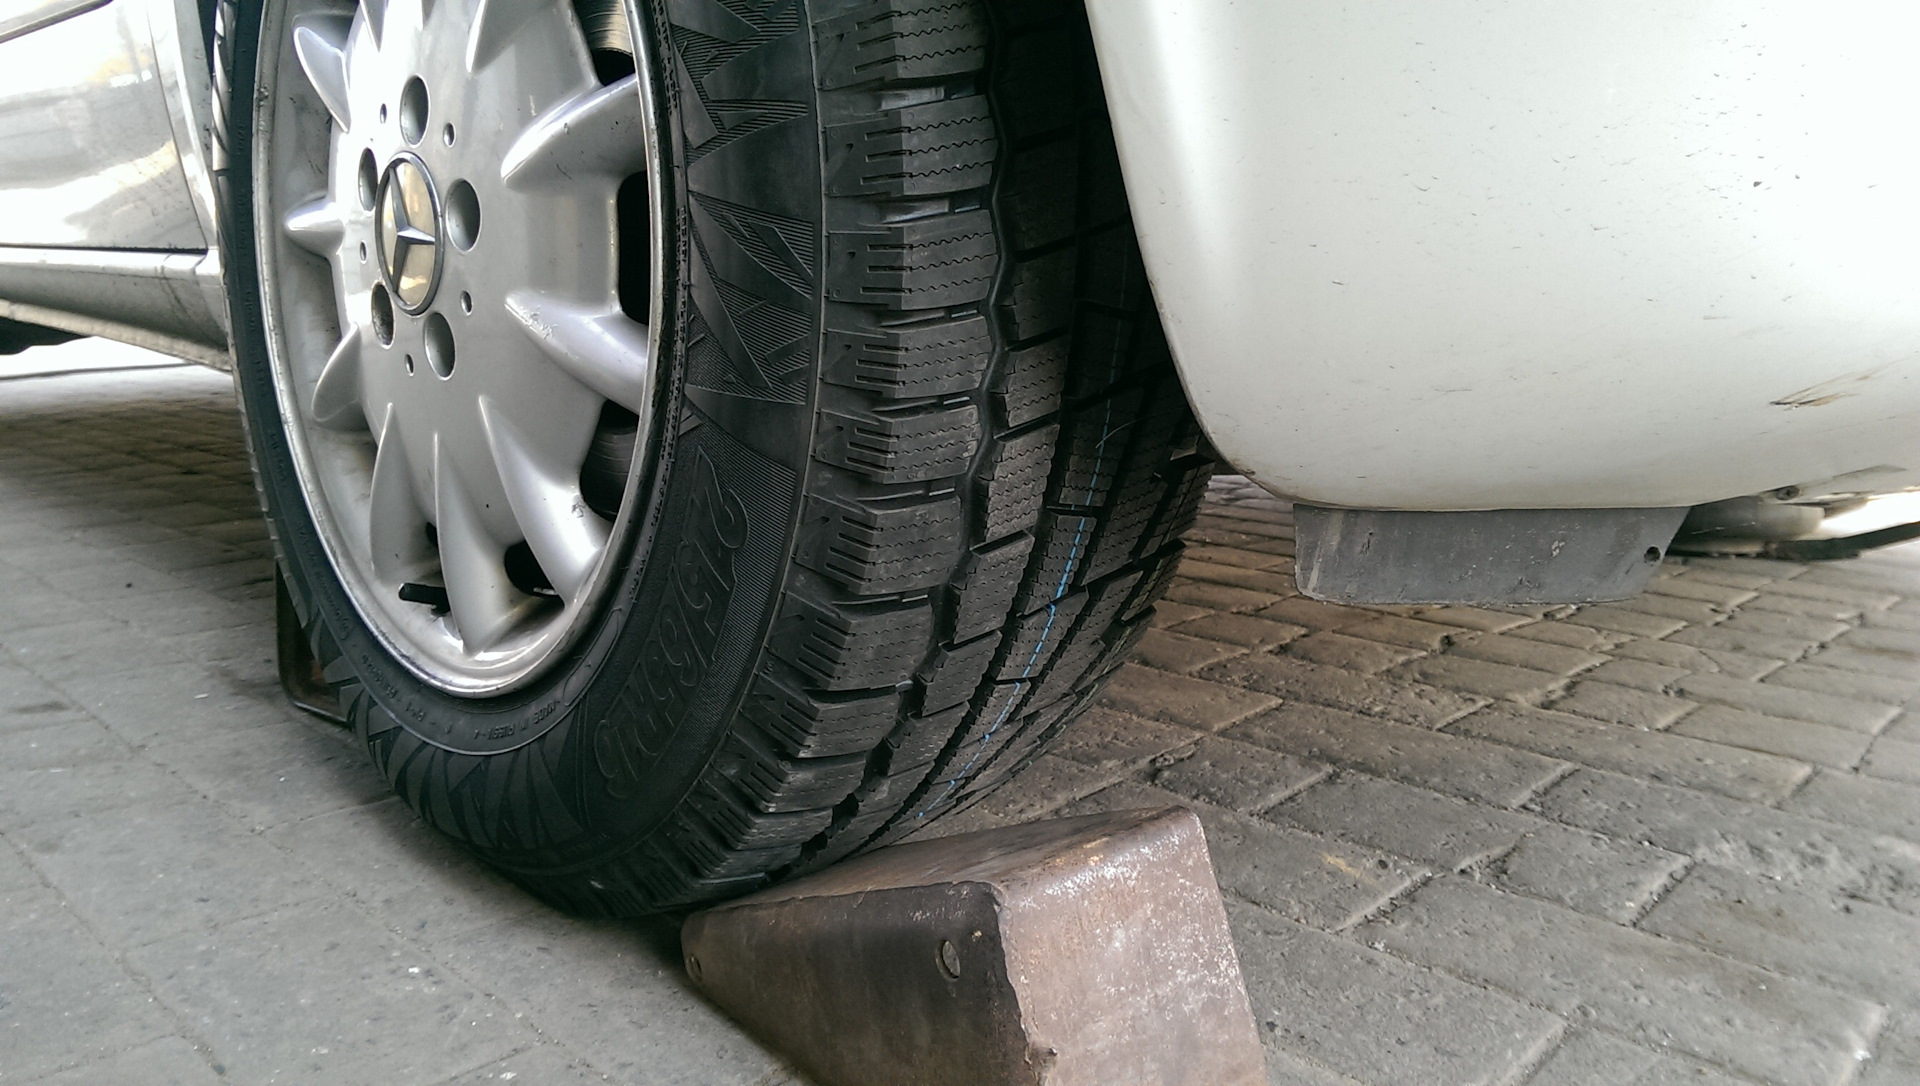
2. Loosen the wheel nuts, raise the rear of the car with a jack, place the car on secure stands, and remove the wheel.
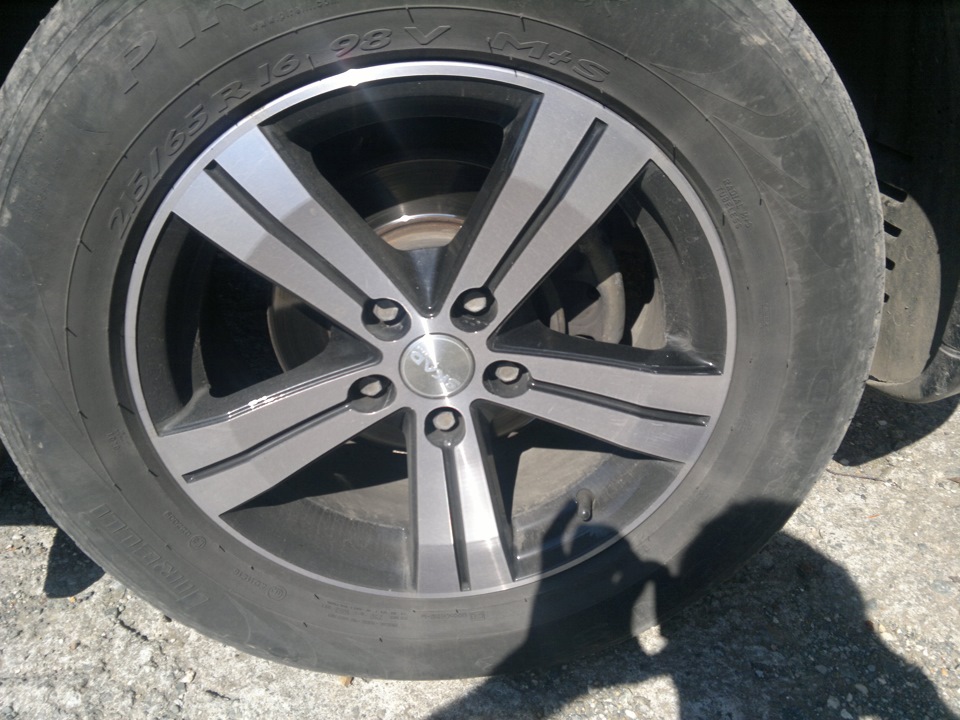

WARNING:
Loosen and tighten the wheel nuts only with the vehicle on the ground.
3. Remove the caliper and pads without disconnecting the brake hose from the caliper. Caliper removal and replacement of Mercedes Vito brake pads are described in this article .
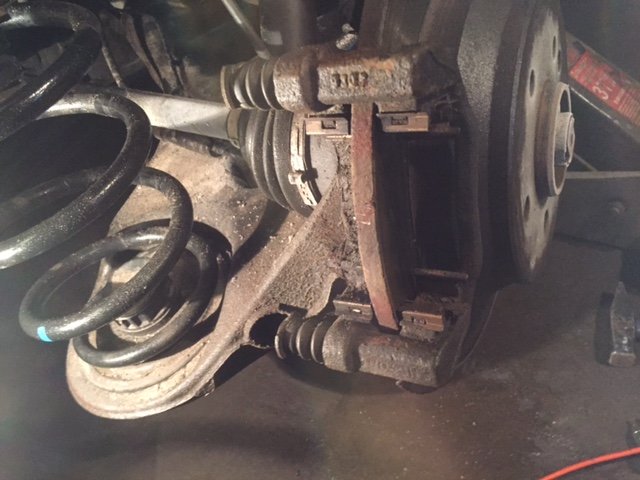
Useful advice:
The caliper can be tied to the spring with a wire.
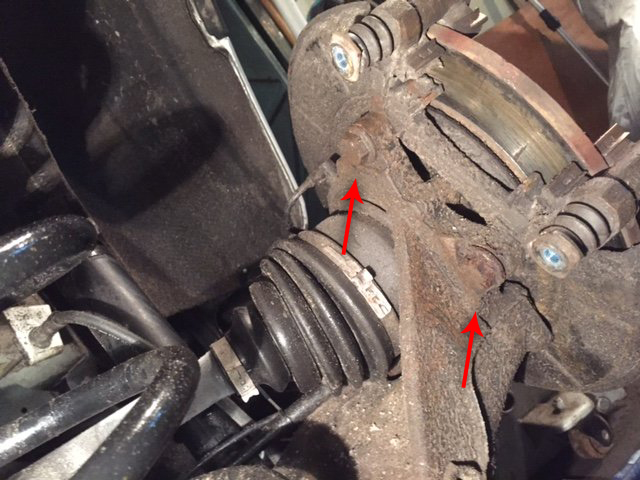
4. Using the "19" head, unscrew the two bolts of the caliper bracket (bracket), and remove the bracket without disconnecting the brake hose from the caliper. The removal procedure is described in this article .
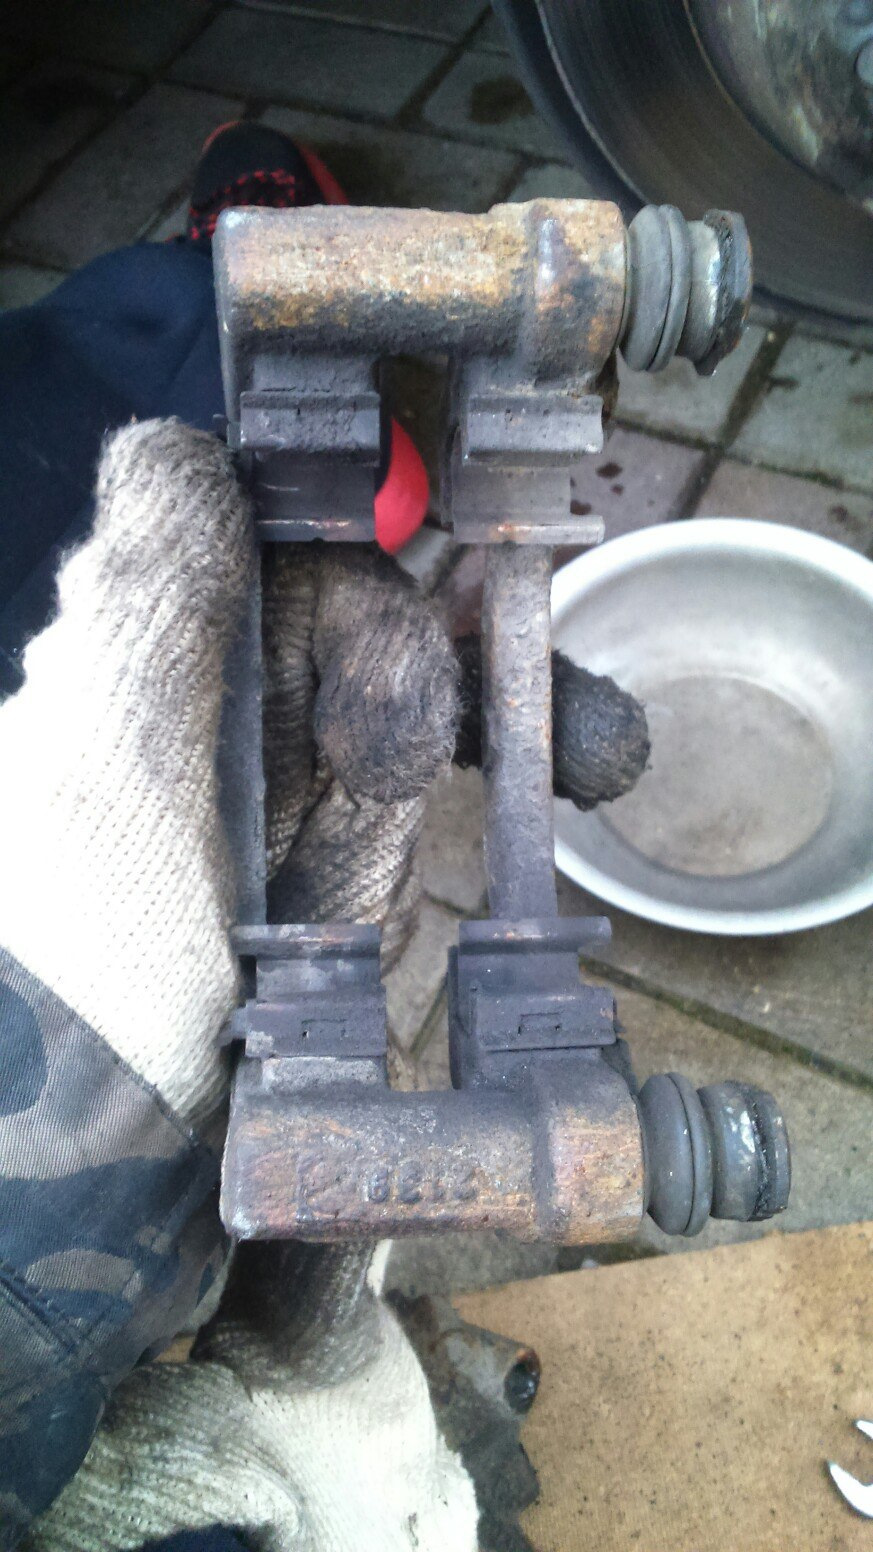
5. Remove the rear brake disc as described in this article .
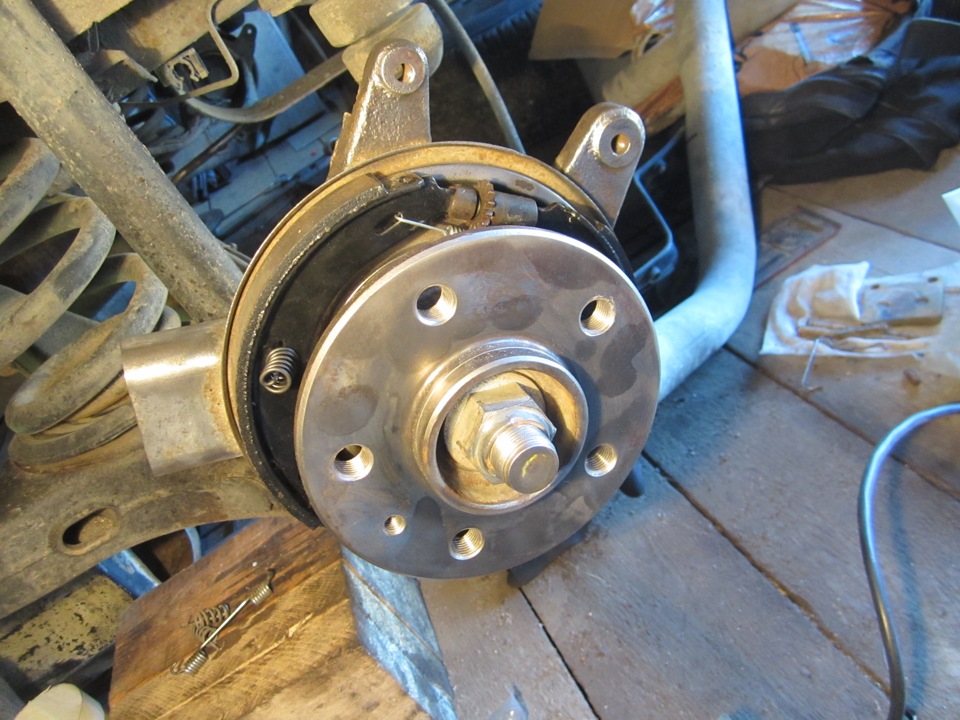
Note:
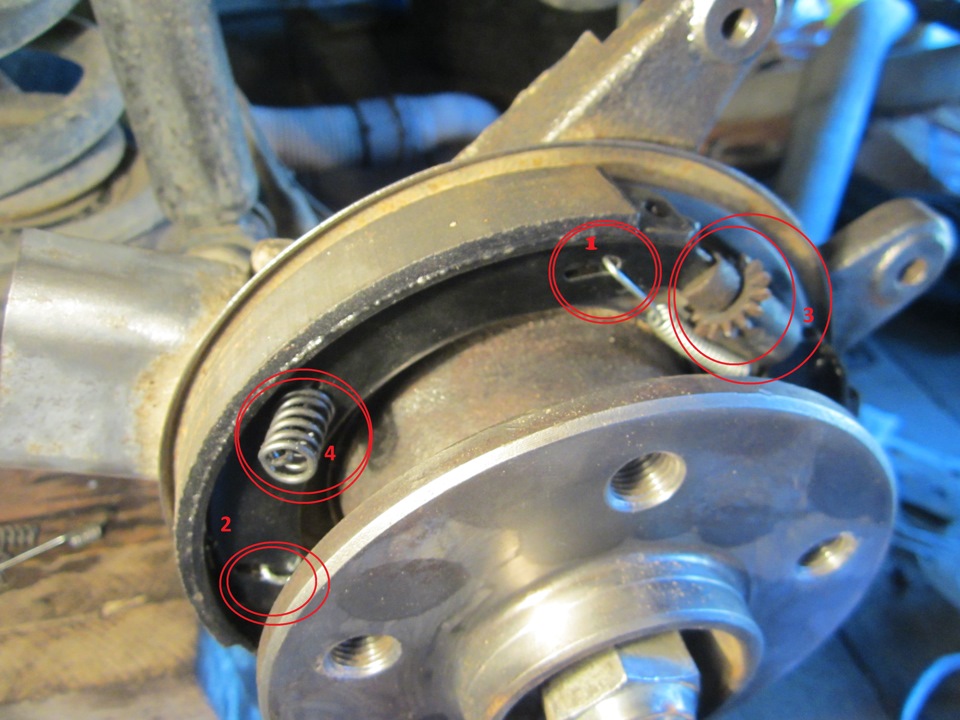
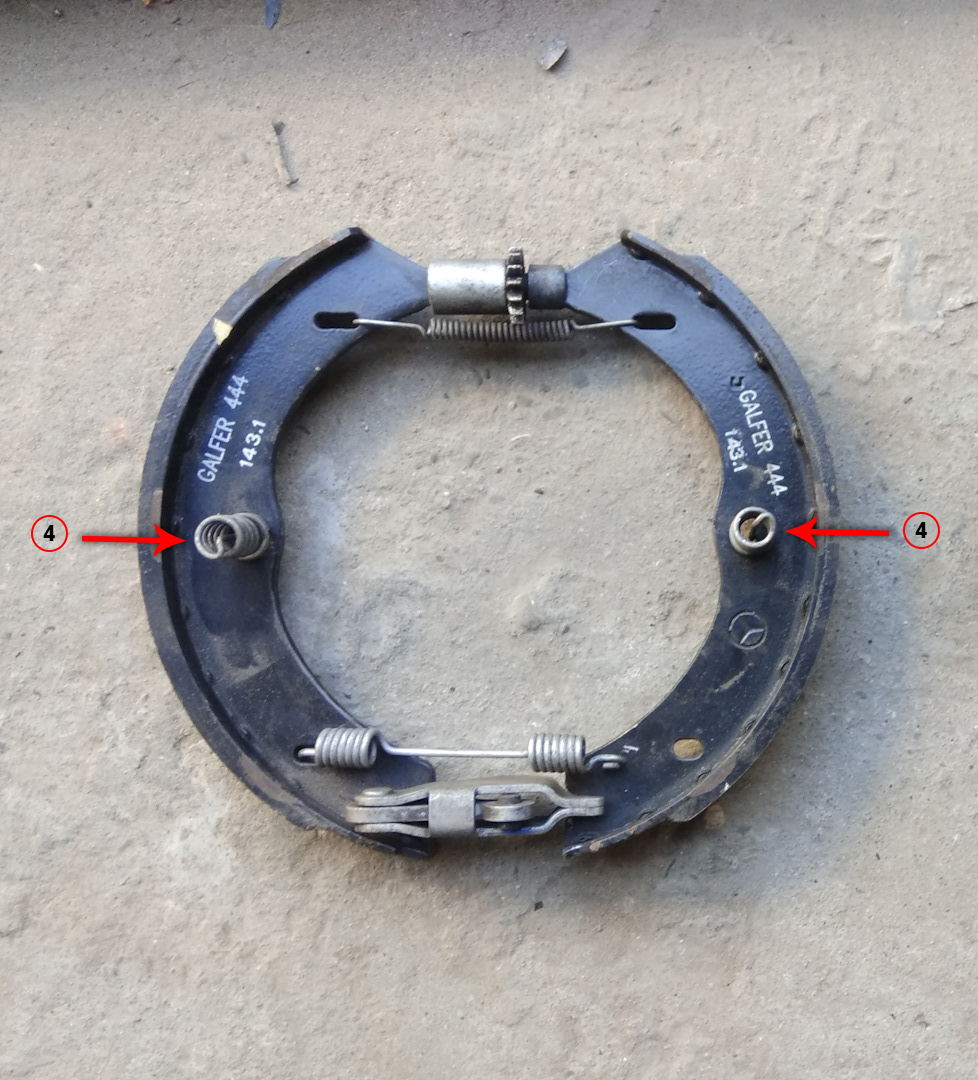
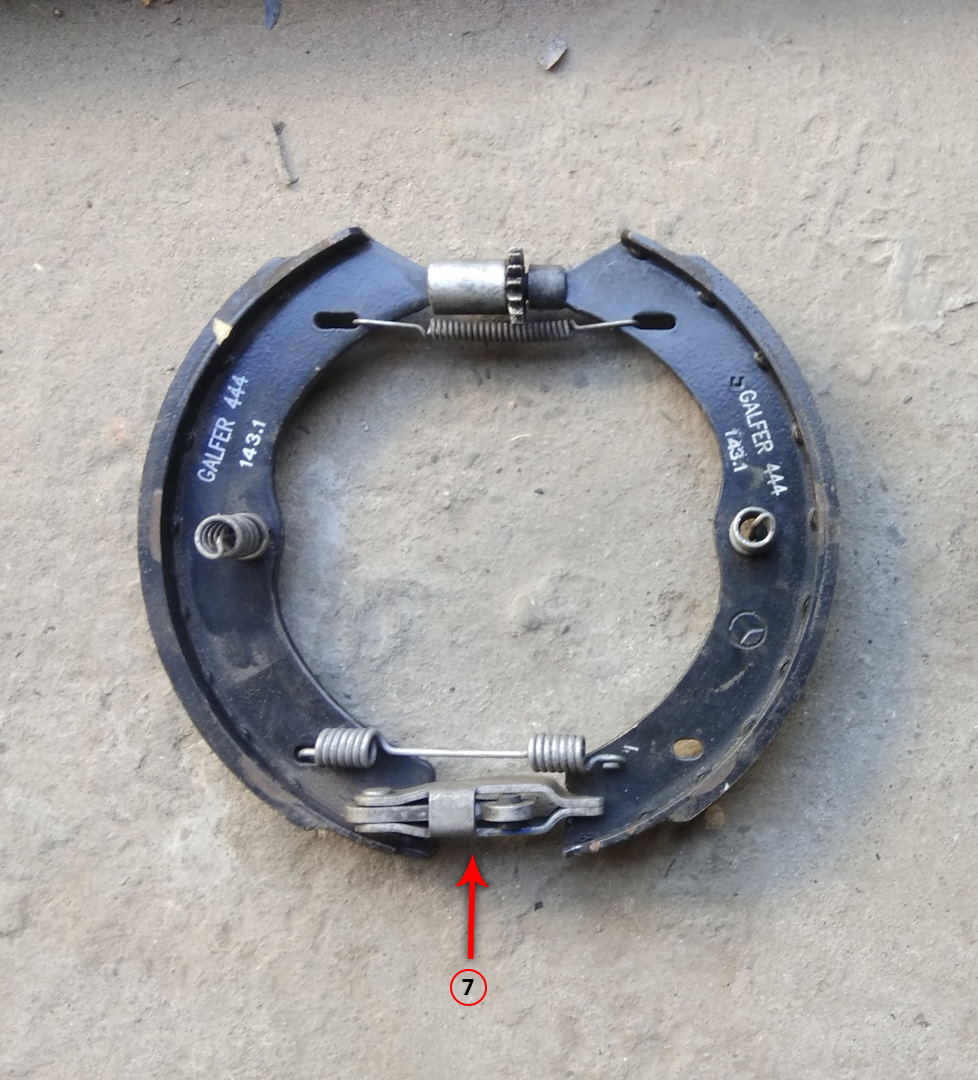
The parking brake pads are interconnected by springs No. 1 and 2 (see photo) a spacer mechanism No. 3 is inserted between them (it is located on top, there is also a spacer below) and part No. 4 (there is still the same, but on the second block) it holds the block on the body. The peculiarity of part No. 3 is that, having a screw mechanism, it can expand or contract, adjusting the expansion of the pads (i.e., to make it easier to remove the pads, you need to twist the ratchet (this is part No. 3) (see photo), weakening its action ).
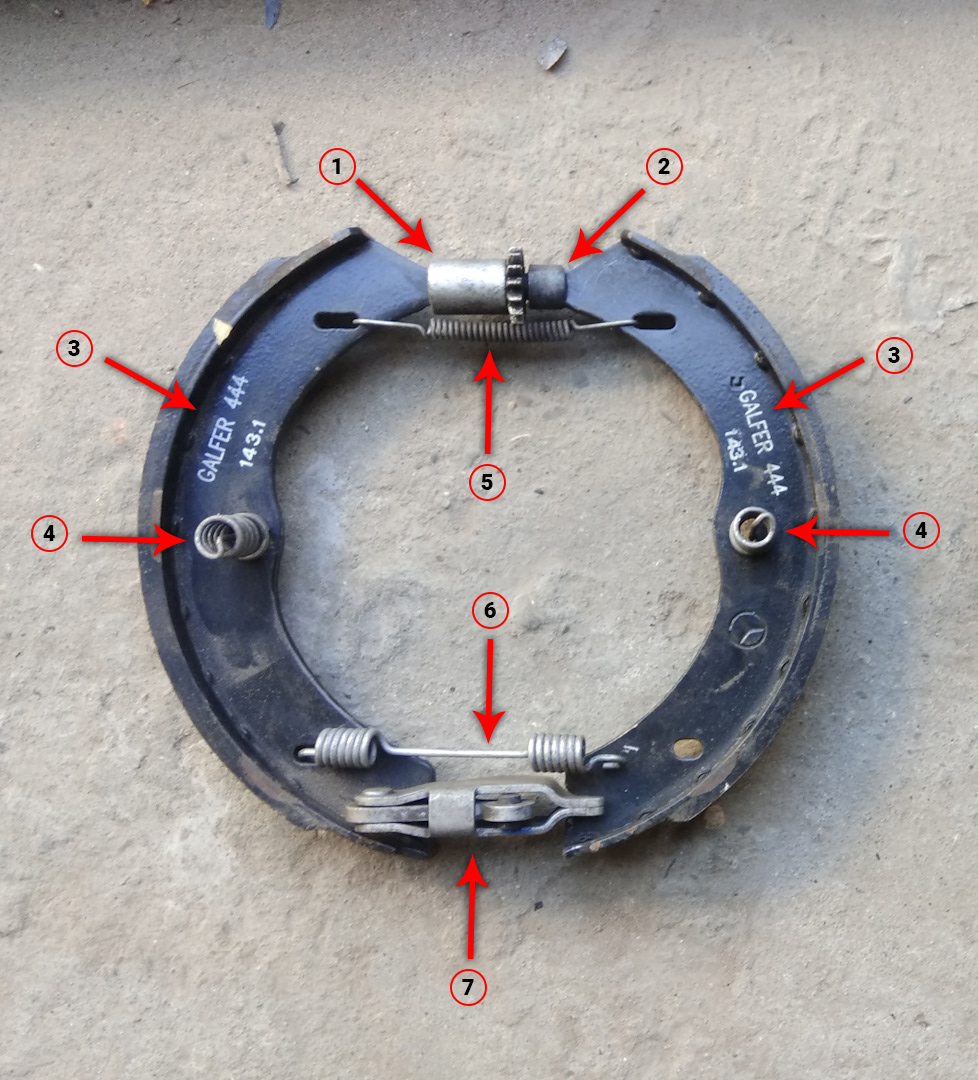
For clarity, the parking brake pads attachment diagram is shown on the removed pads.
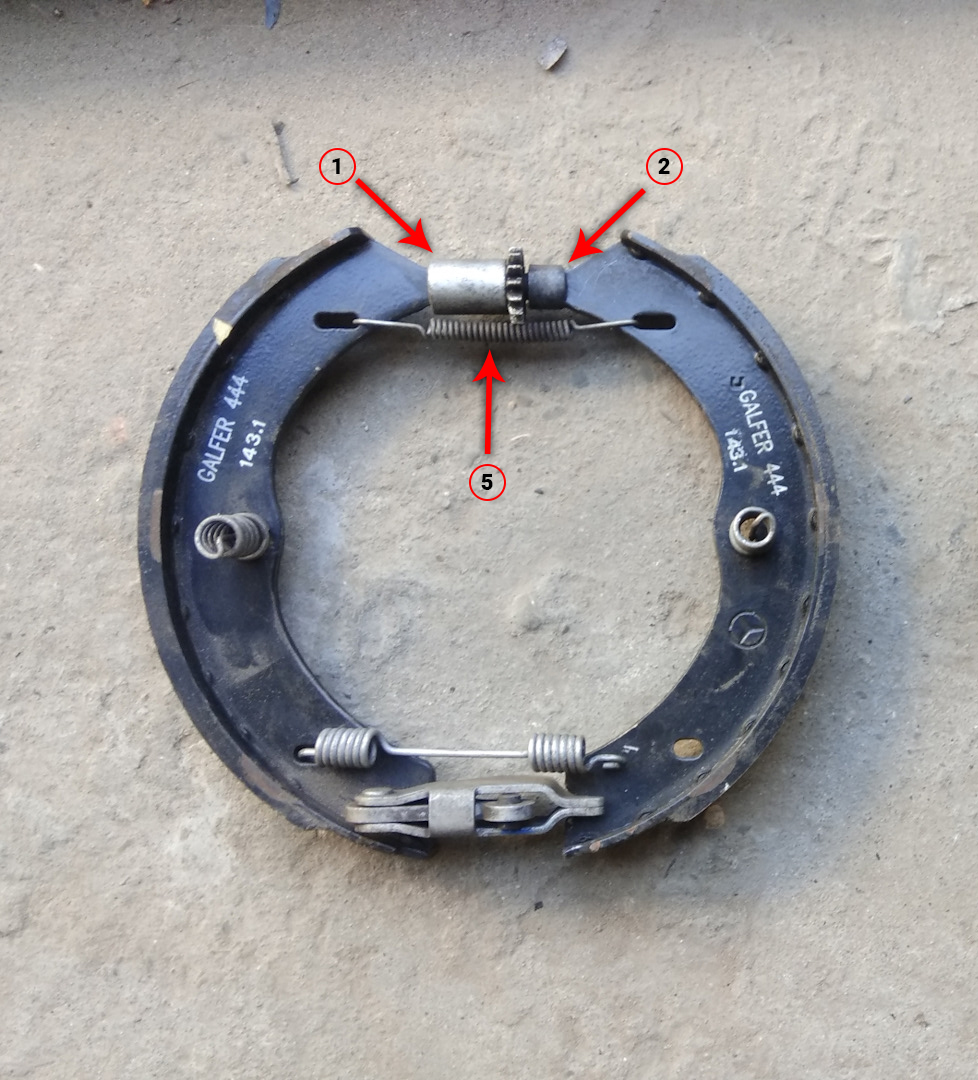
1 - Fixed part of the parking brake clearance adjuster.
2 - The rotating part of the parking brake clearance adjuster (ratchet).
3 - Brake pads.
4 - Clamping springs.
5 - Upper clamping spring.
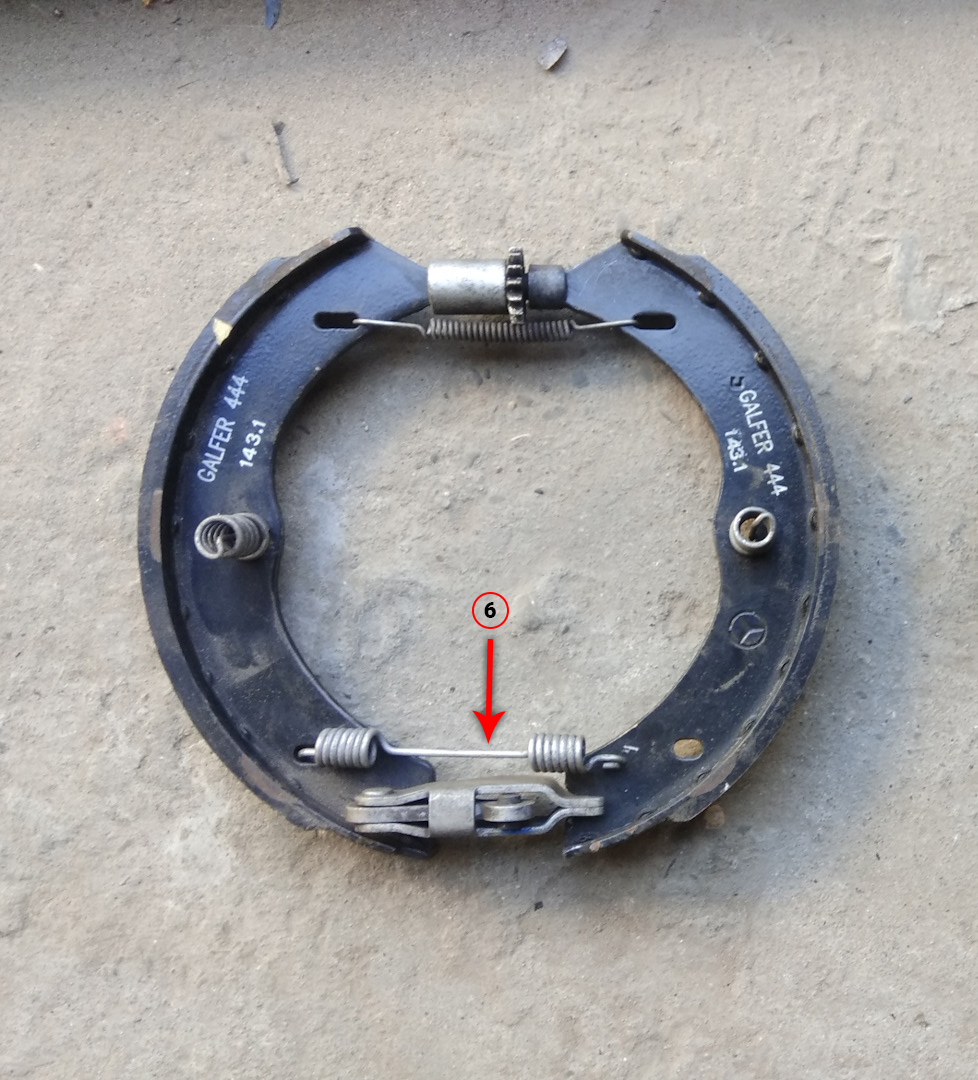
6 - Lower clamping spring.
7 - Lever that releases the brake pads.
5. Use narrow nose pliers or a flat screwdriver to remove the hold-down springs (4).
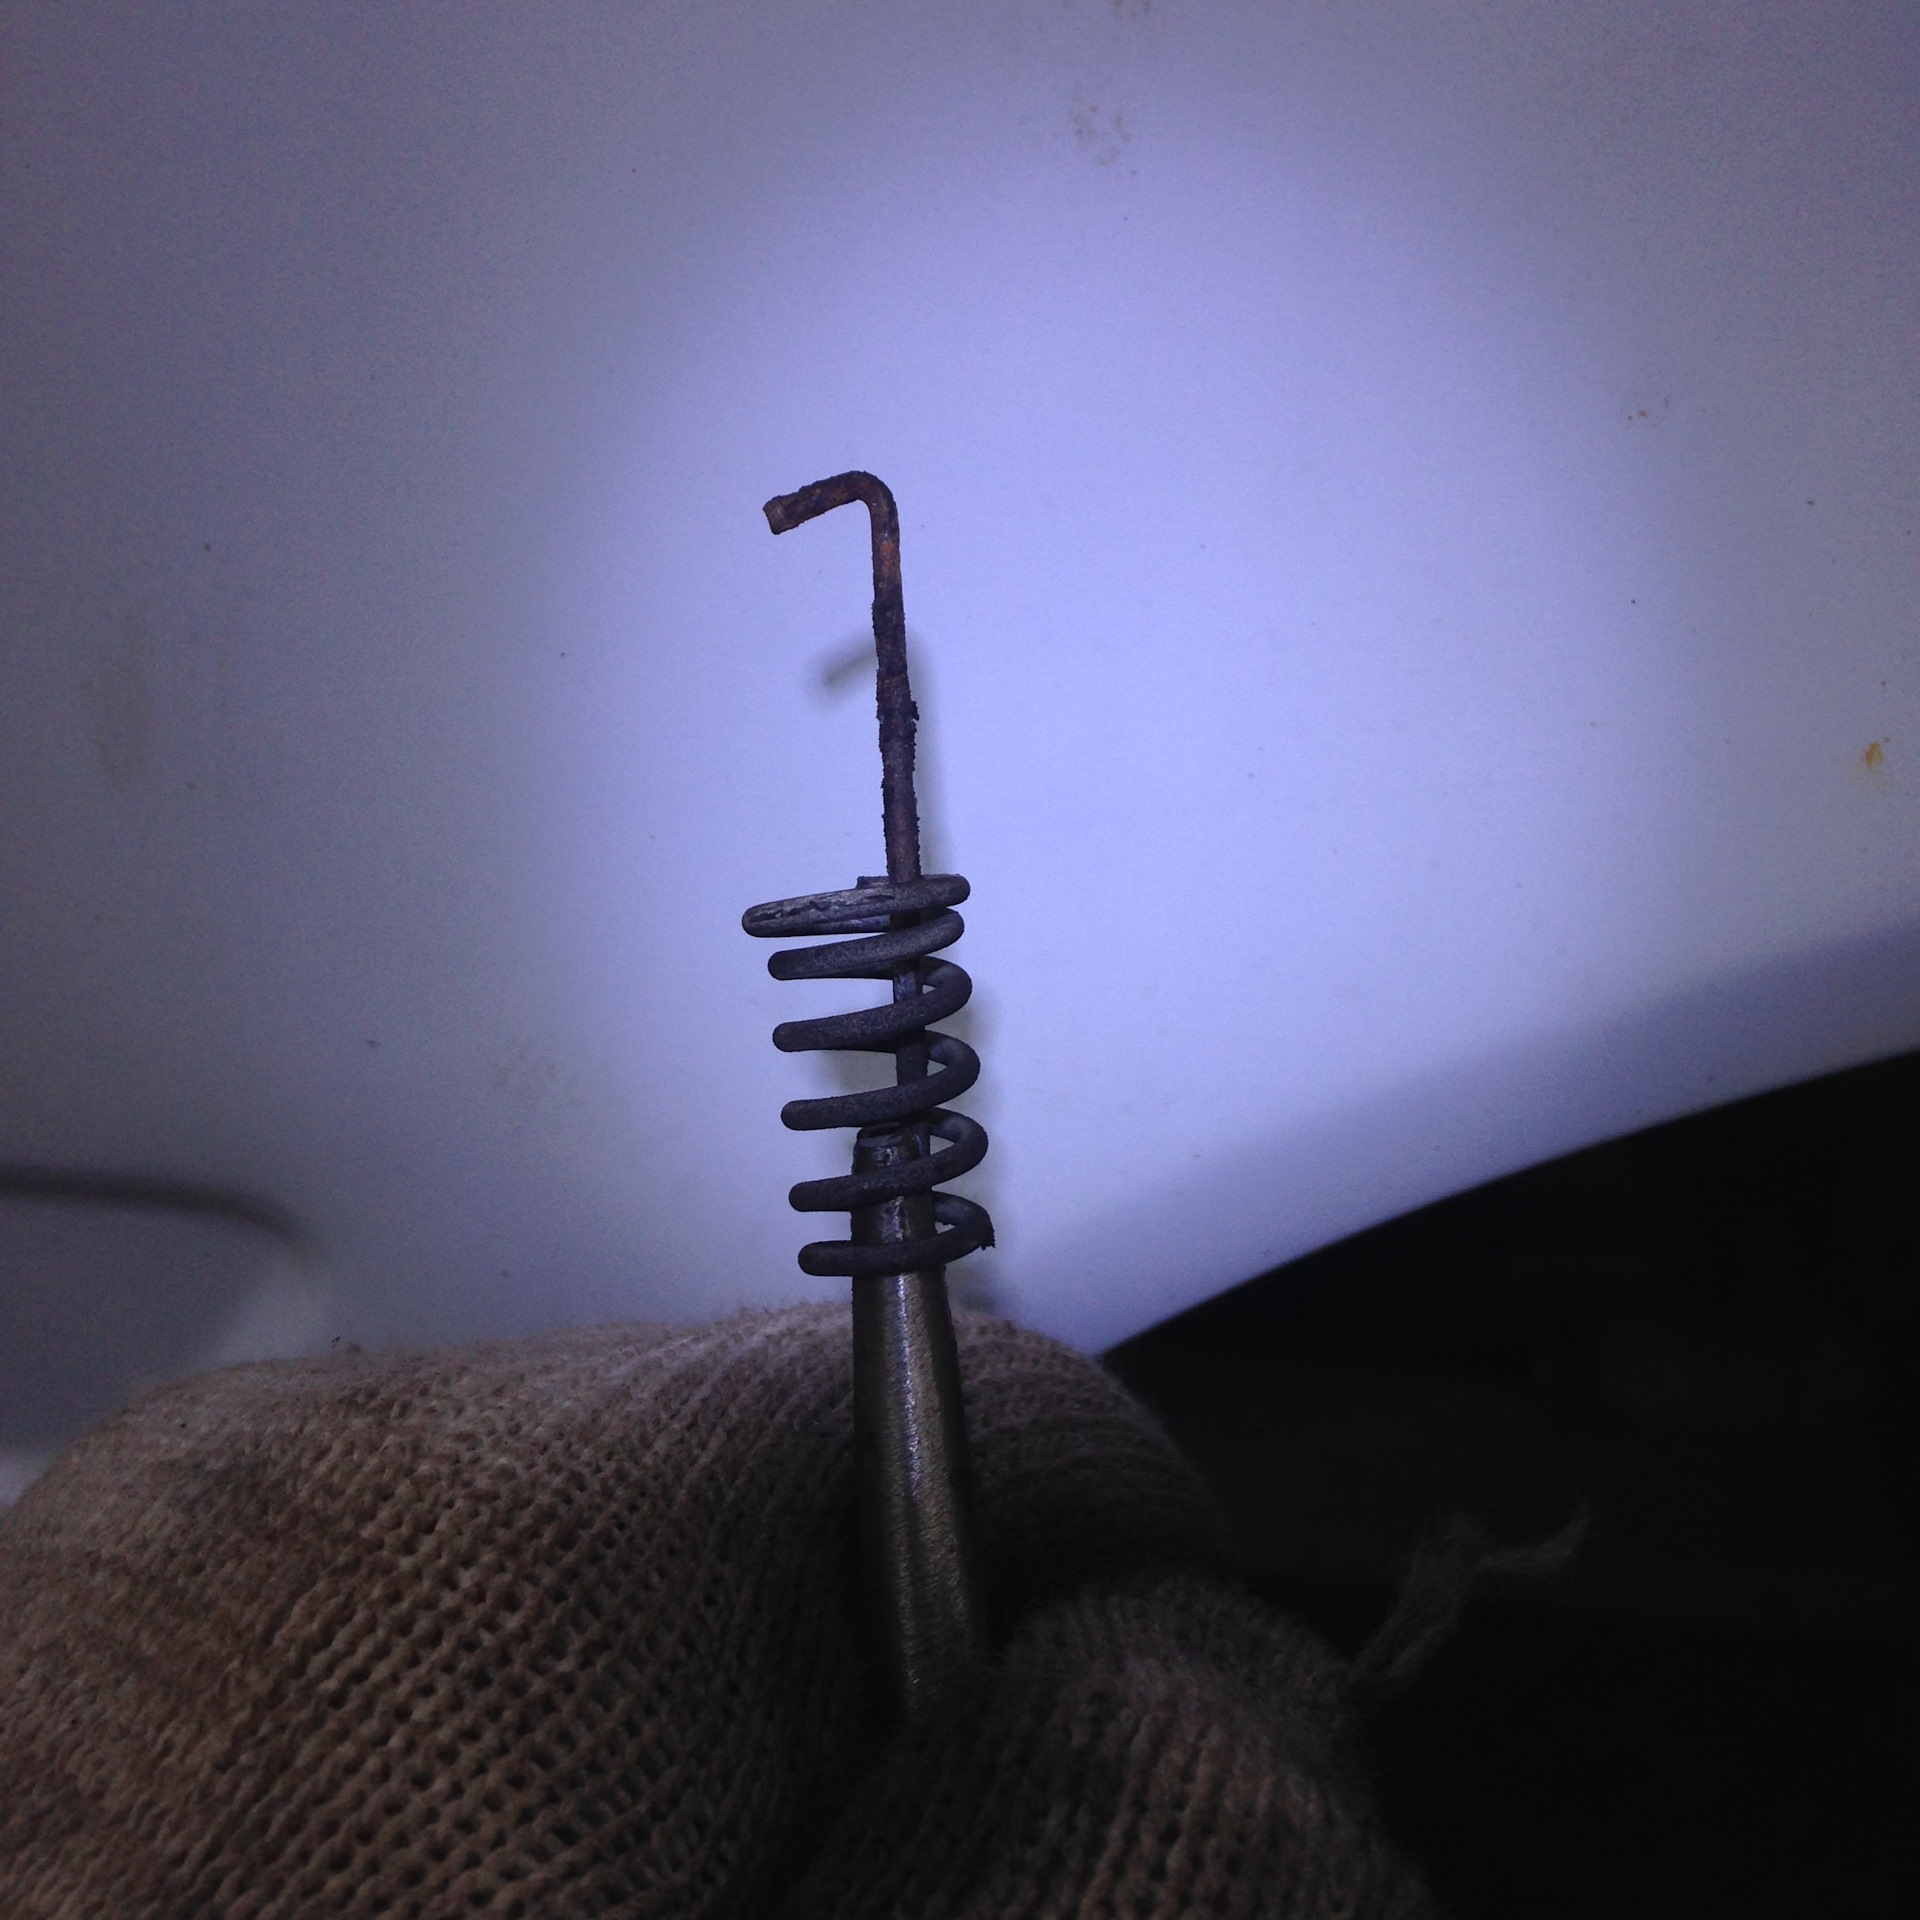
The removed hold-down spring of the parking brake pads
6. Use narrow nose pliers or a flat screwdriver to remove the lower hold-down spring (6).
7. Using narrow nose pliers or a flat screwdriver, remove the upper hold-down spring (5) with ratchet (1) and (2).
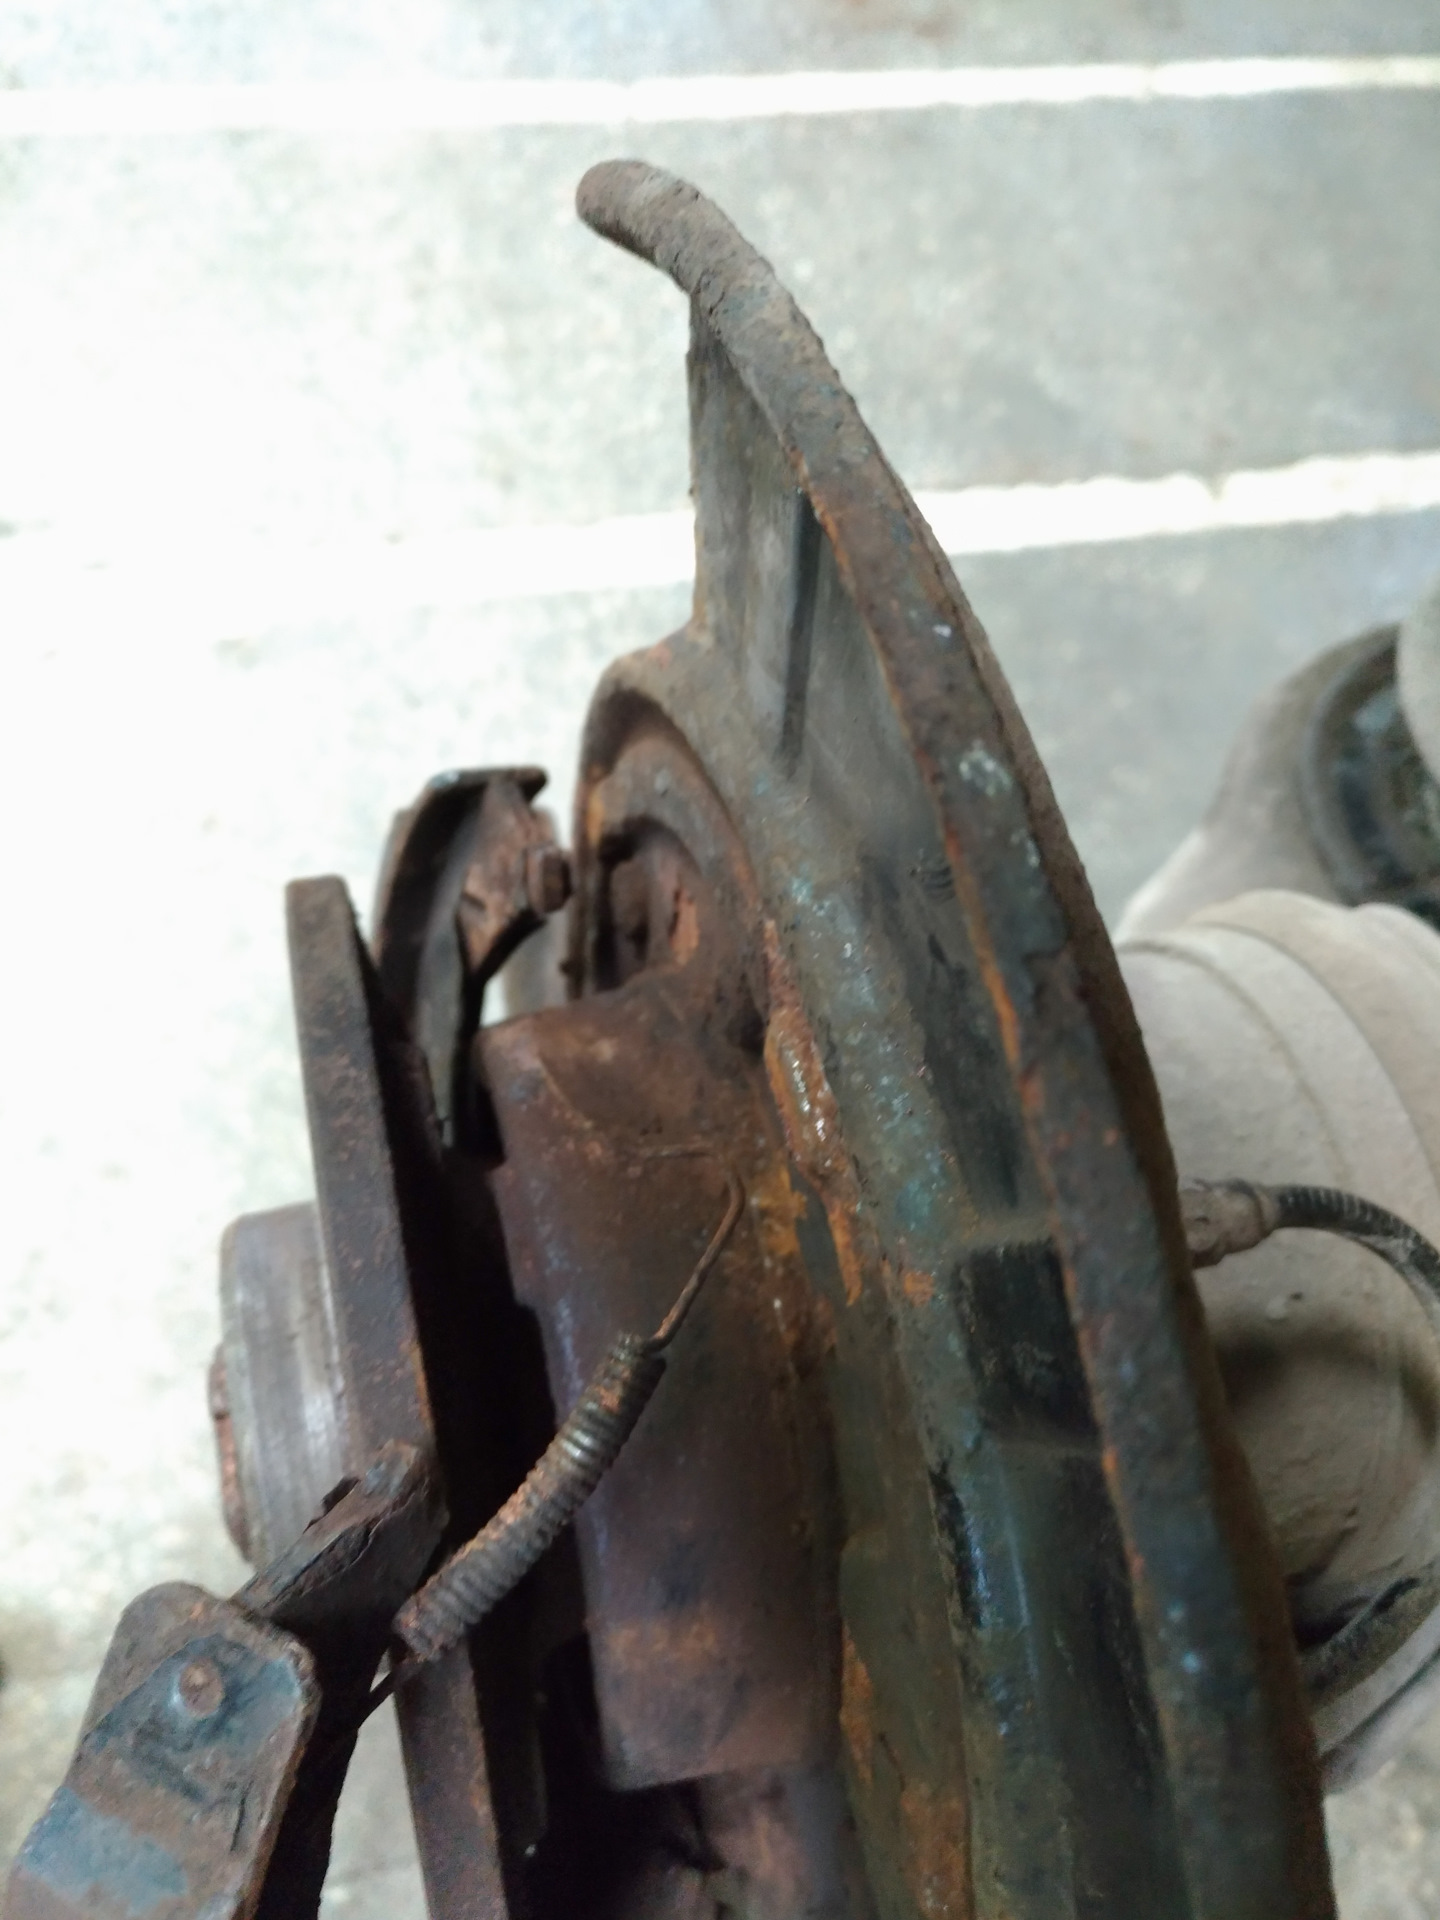
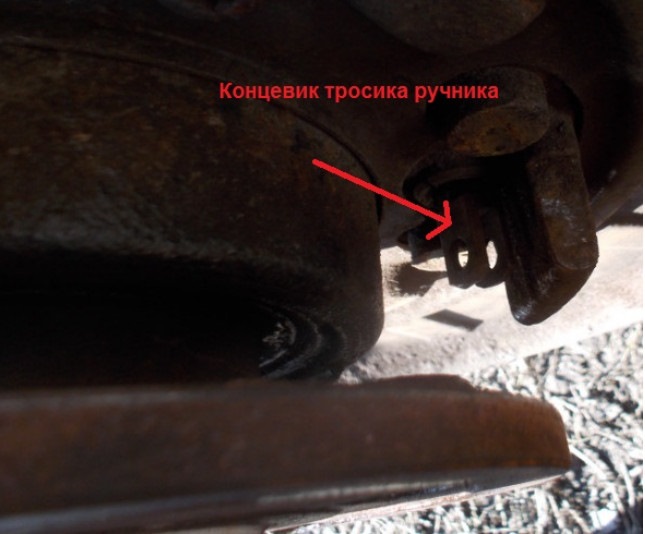
8. Using narrow nose pliers, disconnect the end of the parking brake cable from the release lever of the brake shoes (7).
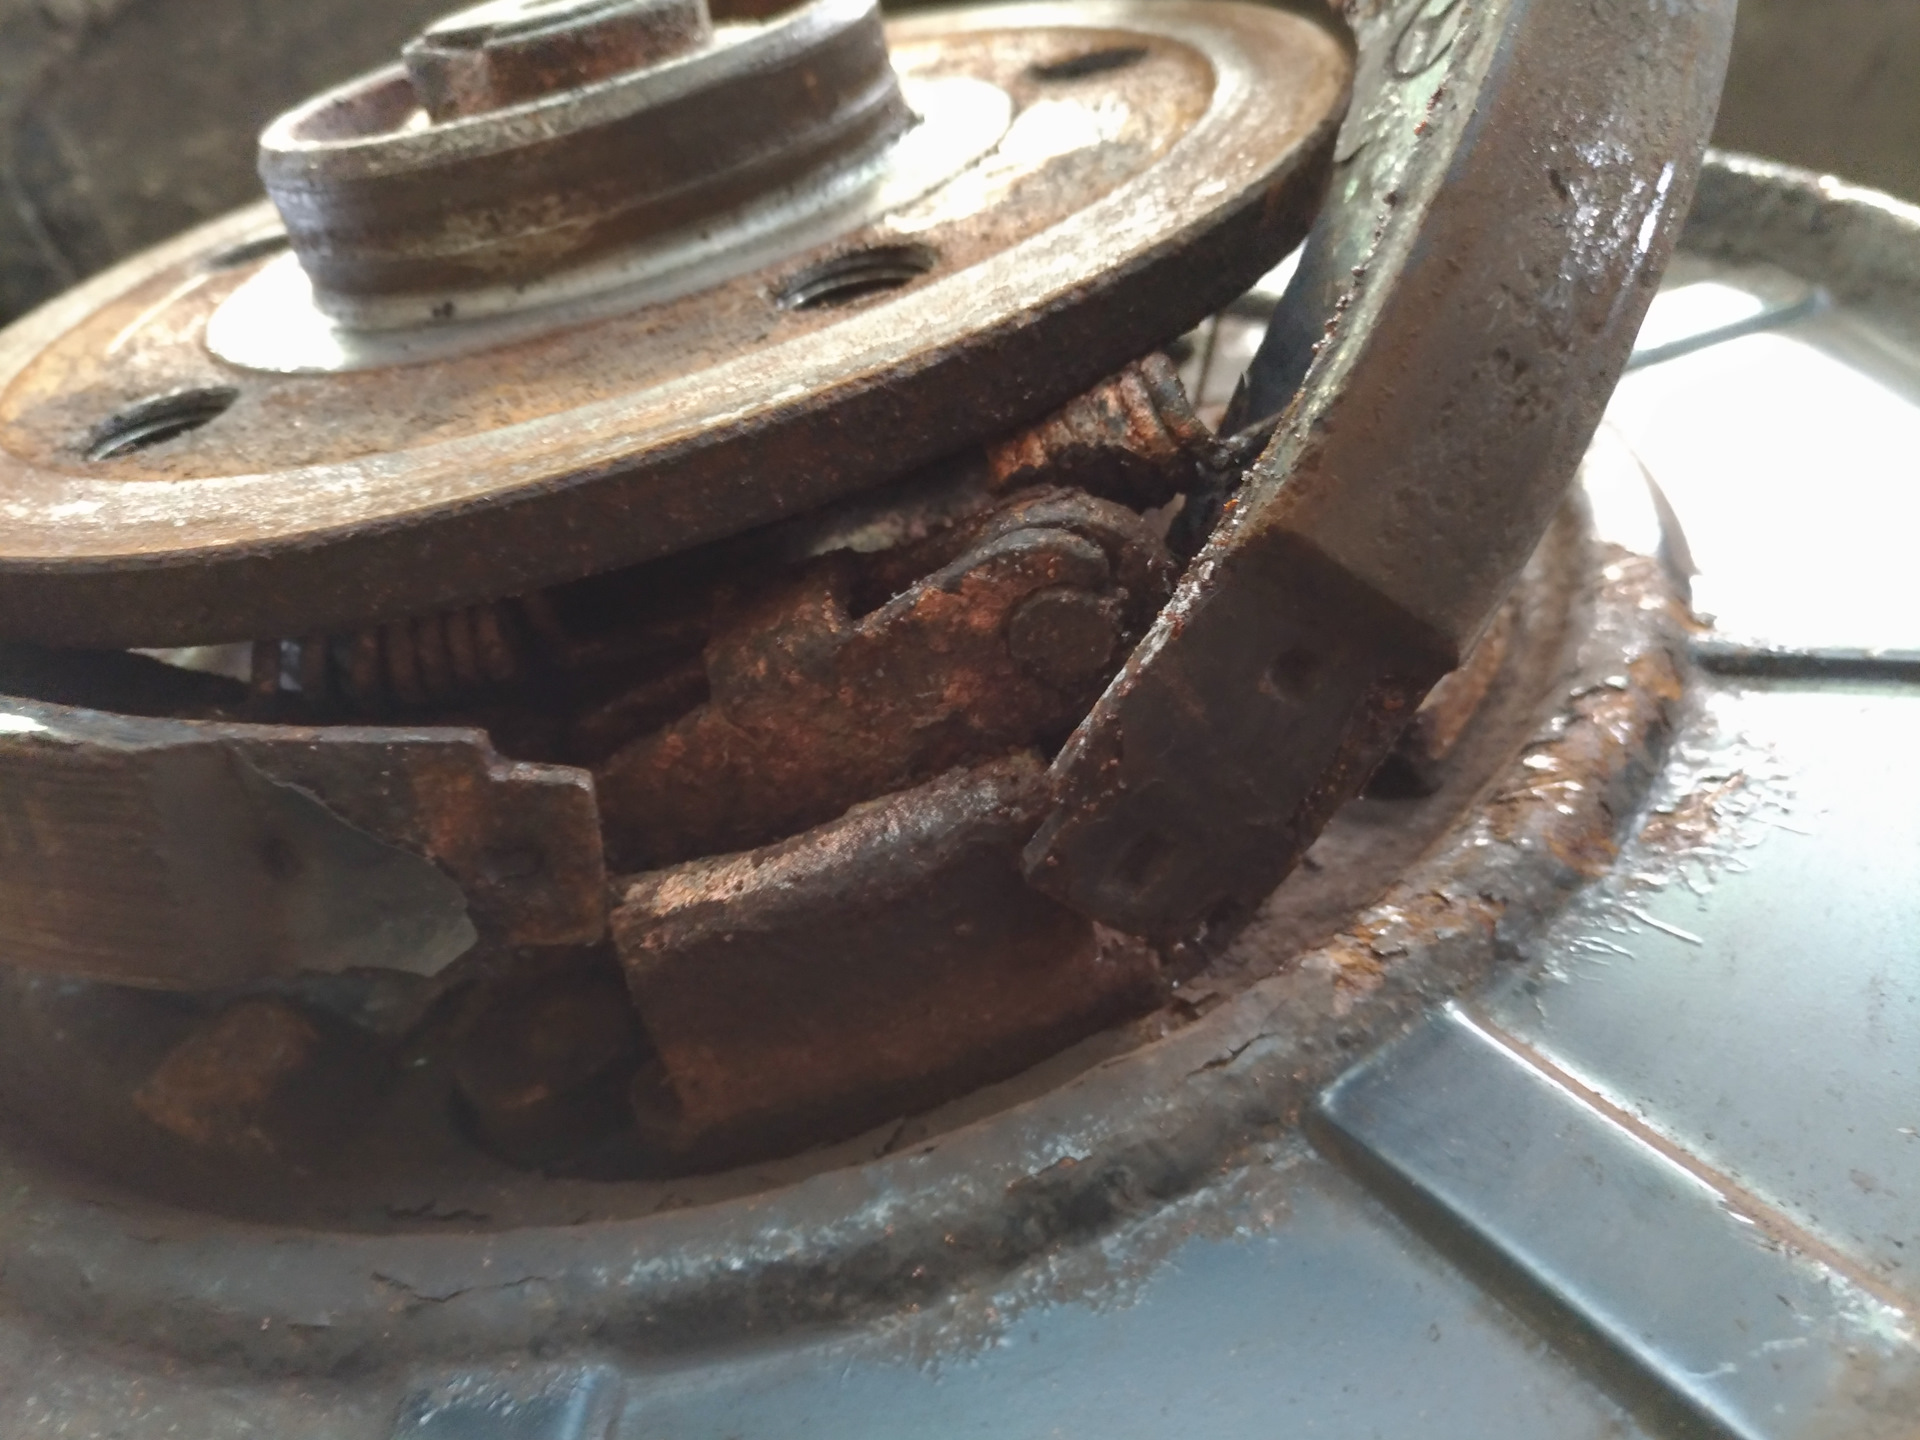
9. Remove the parking brake pads.
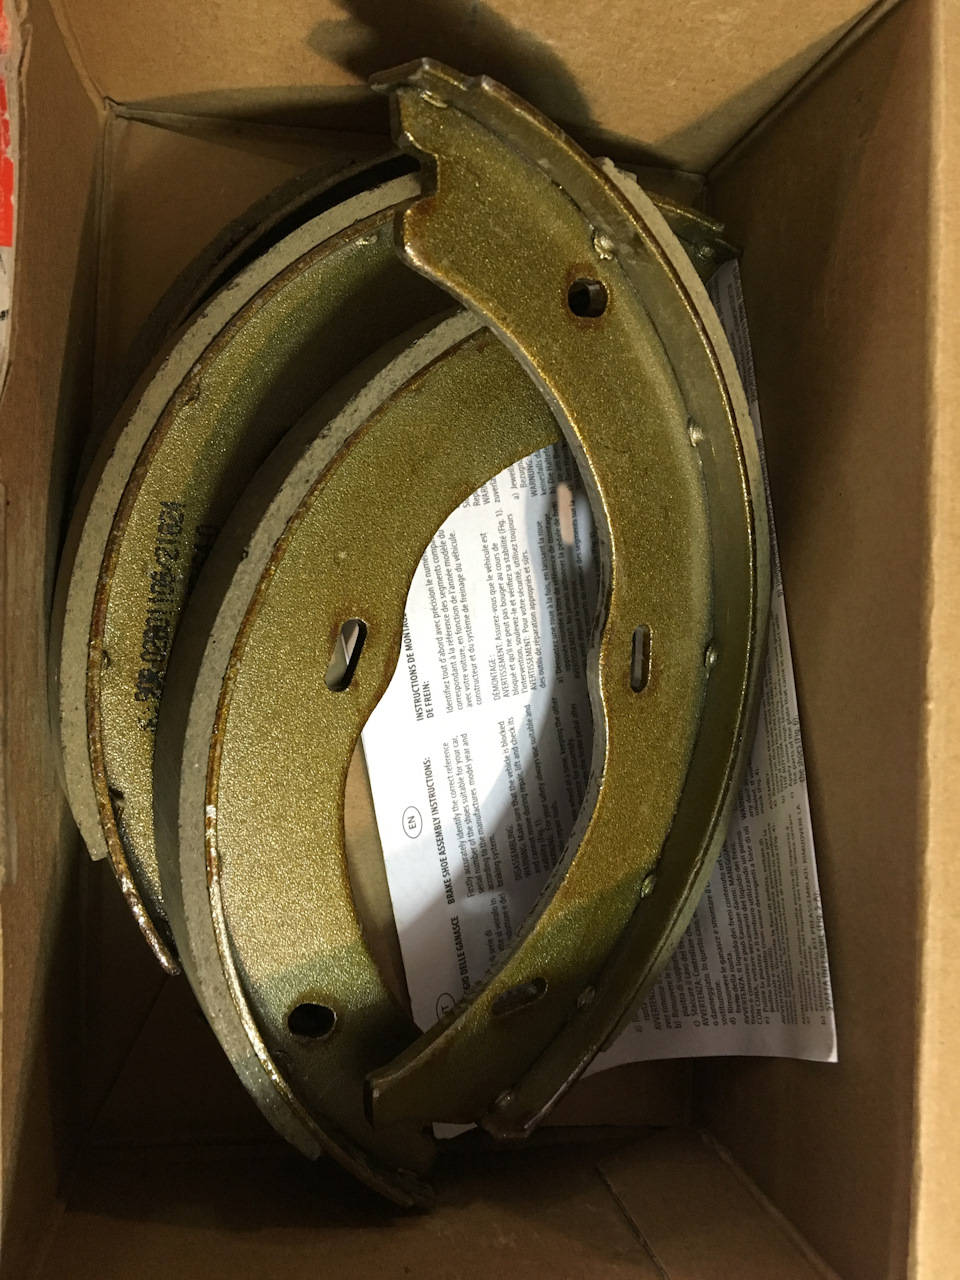
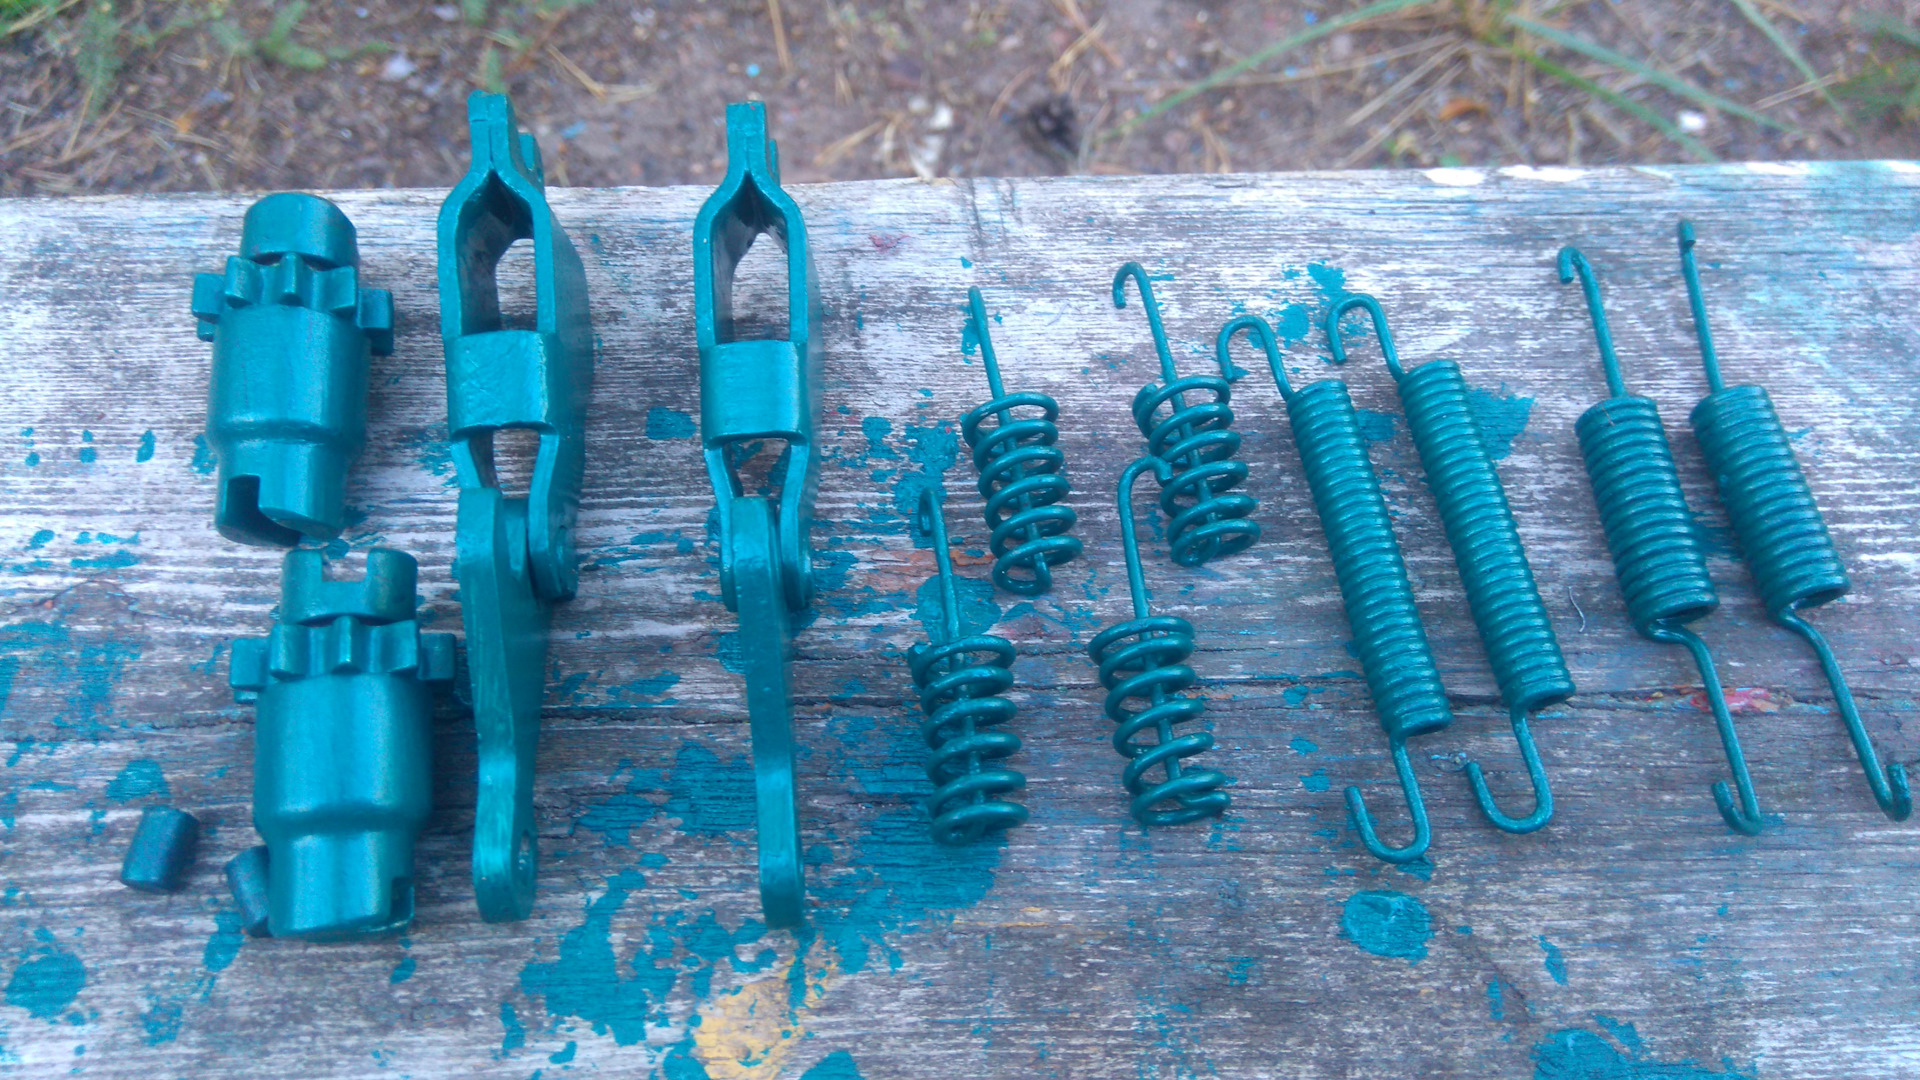
All parts of the parking brake pads removed
10. Install the parking brake pads in the reverse order of removal.
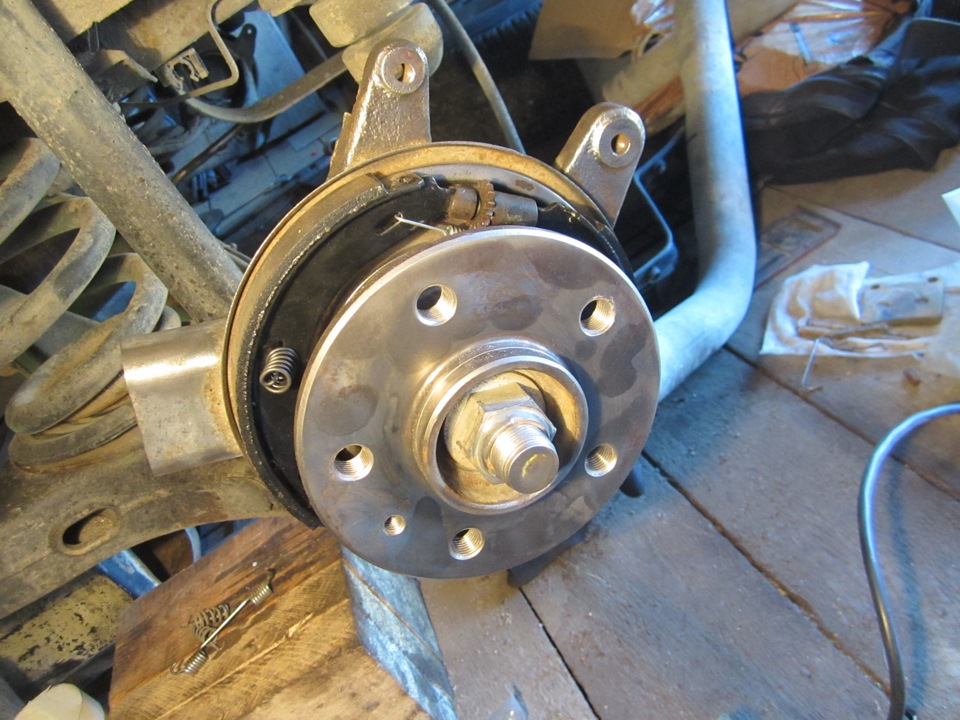
11. Adjust the parking brake of the Mercedes Vito as described in this article .
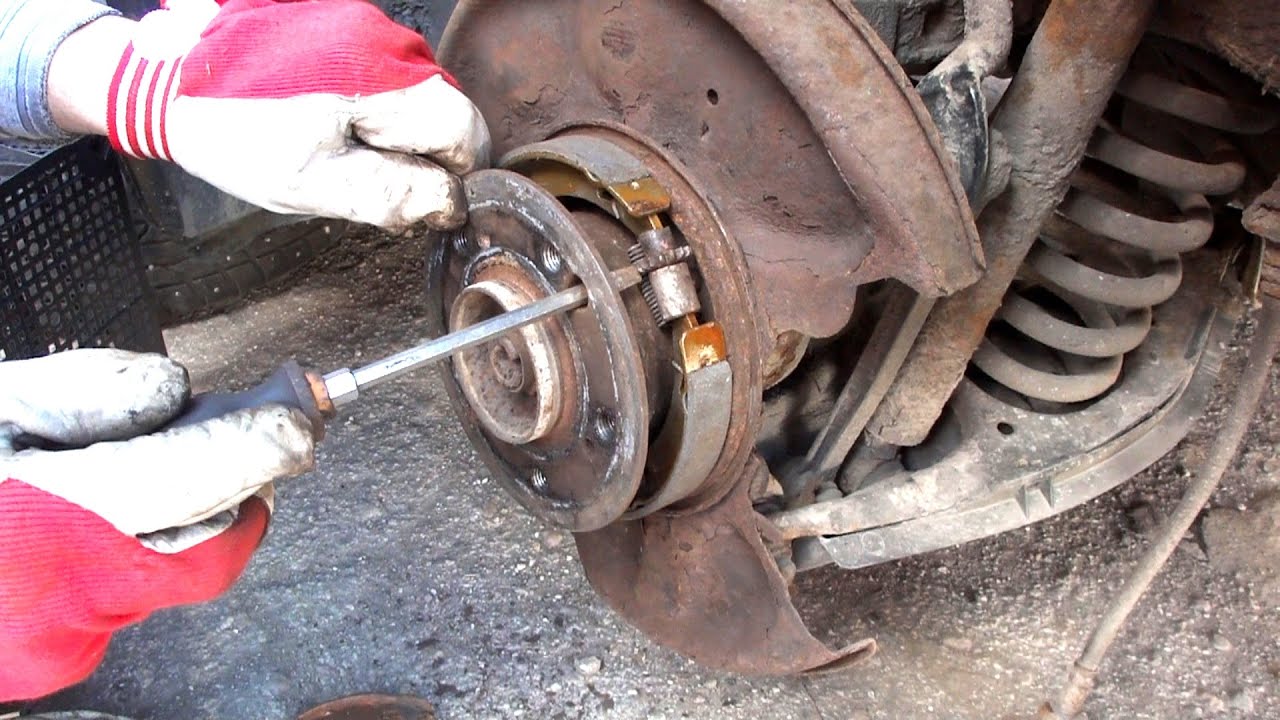
12. Install all removed parts in the reverse order of removal.
The article is missing:
- Tool photo
- Photos of parts and consumables
Source: http://carpedia.club/
![W638 [1996 - 2003]](/uploads/Mercedes-Benz_Vito_I_W638_1996_-_2003_.jpg)
![W639 [2003 - 2010]](/uploads/Mercedes-Benz_Vito_2013.jpg)