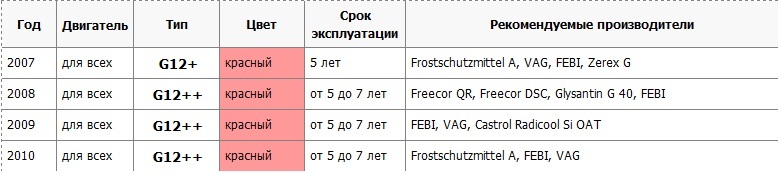
![1 generation [2007 - 2010]](/uploads/Nissan_Qashqai_2007-2010_.jpg)

Tools:
- Ruler
- pliers
- Open-end wrench 17 mm
Parts and consumables:
- Master brake cylinder
Notes:
The correct position of the brake pedal in the free state and when it is pressed all the way (pedal stroke) is one of the criteria for checking the health of the brake system. At the same time, the position of the pedal largely ensures the correct operation of the system.
If the pedal is at a distance from the floor that is greater than the standard, the wheels may not completely release when the pedal is released (usually there is no free play of the pedal). If the pedal is too low, there may be reduced brake performance due to reduced pedal travel.
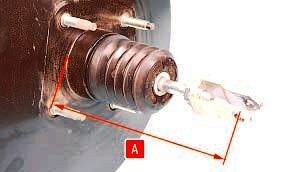
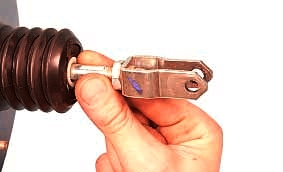
The pedal position is adjusted by changing the distance A from the end of the brake booster mounting pin and the center of the hole in its pusher fork. Distance A must be between 150.7–157.7 mm.
To check the brake pedal, do the following:
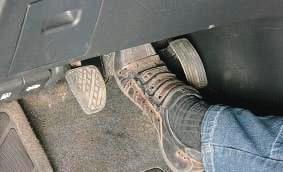
1. Start the engine, let it idle and depress the brake pedal vigorously several times.
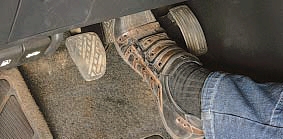
2. Pull the brake pedal up with your hand until it stops.
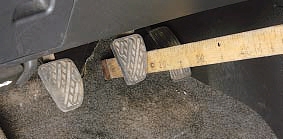
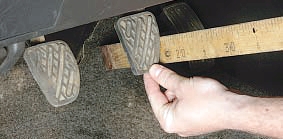
3. Release the pedal and measure the distance from the pedal pad to the floor. The distance should be approximately 183.7-193.7 mm.
Note:
The ruler must be installed perpendicular to the plane of the floor.
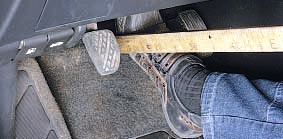
4. Vigorously press the brake pedal to the stop with a force of 490 N (50 kg) and measure the distance from the pedal pad to the floor (minimum pedal travel). The distance must be at least 120.5 mm.
5. Release the pedal and re-measure the distance from the pedal pad to the free floor. The pedal should return to its original position by the distance measured during the operation from the pedal pad to the floor.
6. Check the free play of the brake pedal, for which move the pedal by hand until the pedal stops moving without resistance. Determine the value of the free play on the ruler, it should be 3-5 mm. The non-compliance of the free play with the specified range of values \u200b\u200bmay be caused by the following reasons:
- increased play in the connection of the pusher fork of the vacuum booster and the pedal. This may be due to wear on the fork pin;
- jamming of pistons in the main brake cylinder;
- jamming of the plunger in the brake booster.
7. If the distance from the pedal pad to the floor during repeated measurement (p. 5) is less than the value measured in p. 3, then this indicates the pedal is stuck on the axle, the pistons in the working and master cylinders are jammed, or the compensation holes in the main cylinder are clogged brake cylinder.
Note:
Compensation holes in the main brake cylinder can be blocked by cuffs that are swollen due to the ingress of petroleum products into the system, as well as due to the use of low-quality brake fluid.
8. Stopping the pedal when pressed almost at the very floor indicates the presence of air in the hydraulic brake drive or the wear limit of the brake pads and brake discs. If there is air in the system, the pedal stops farther from the floor (“inflates”) with a few repeated presses.
Warning:
If the pedal is pressed to the stop and held in this position gradually moves to the floor, fluid has leaked from the hydraulic drive or the brake master cylinder is faulty. These malfunctions are very dangerous, so find the leak immediately and fix it or replace the brake master cylinder!
To adjust the brake pedal, do the following:
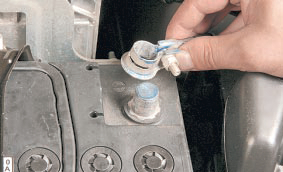
1. Loosen the locknut (for clarity, shown on the removed vacuum brake booster).
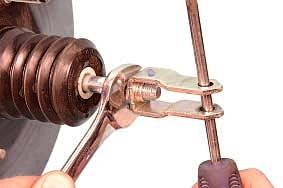
2. Rotate the vacuum booster rod to adjust the brake pedal travel.
3. After adjusting the position of the brake pedal, tighten the locknut.
The article is missing:
- High-quality repair photos
- Tool photo
- Photo of parts and consumables
Source: http://nissan-qashqai.dv13.ru/tormoznaya-sistema/proverka-i-regulirovka-polozheniya-pedali-tormoza/