![1 generation [2003 - 2007]](/uploads/Mitsubishi_Outlander_I_2003_-_2008_.jpg)
![3 generation [2012 - 2014]](/uploads/3.png)
![XL [2005 - 2012]](/uploads/4d137205da66f_.jpg)

Tools:
- Ratchet wrench
- Head 10 mm
- Head 23 mm
- torque wrench
- Pliers
- Diagnostic Scanner (MB991958)
- Funnel
- Syringe for pumping oil with hose assembly (if necessary)
Parts and consumables:
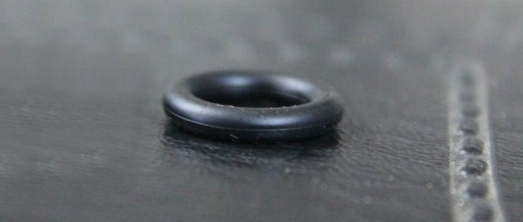
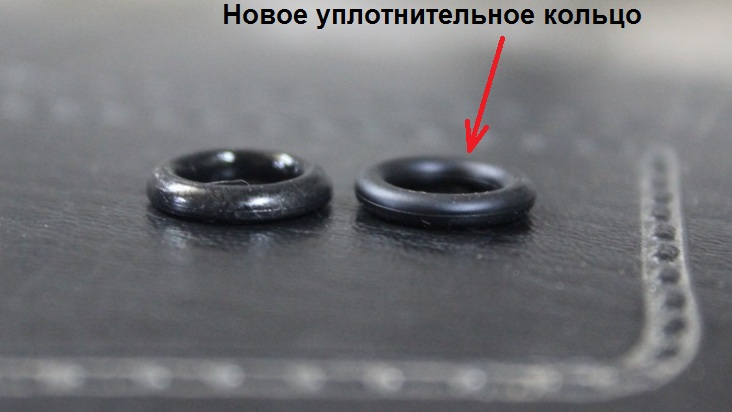
- O-ring 2705A031
- Technical capacity
- Hose d=8 mm (if necessary)
- rags
Note:
Mitsubishi Outlander HL cars with a 6B31 engine are equipped with an automatic transmission.
Periodically, but at least once every 15 thousand kilometers, check the level of the working fluid in the automatic transmission. The following shows how to properly check the oil level in a Mitsubishi Outlander HL automatic transmission.
Checking the level and topping up the automatic transmission fluid
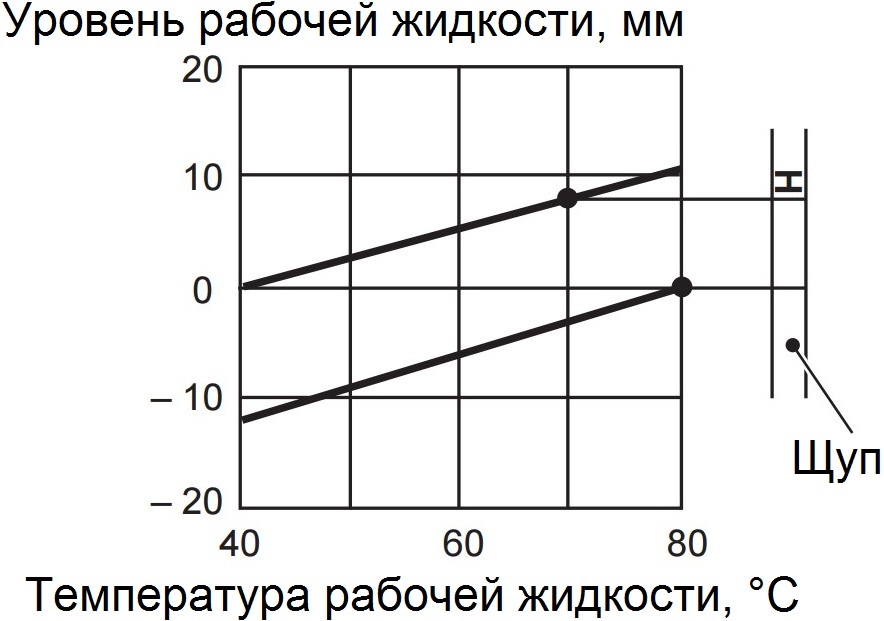
1. Before checking the automatic transmission oil level, drive the vehicle until the automatic transmission fluid reaches normal operating temperature (70 - 80°C).
Note:
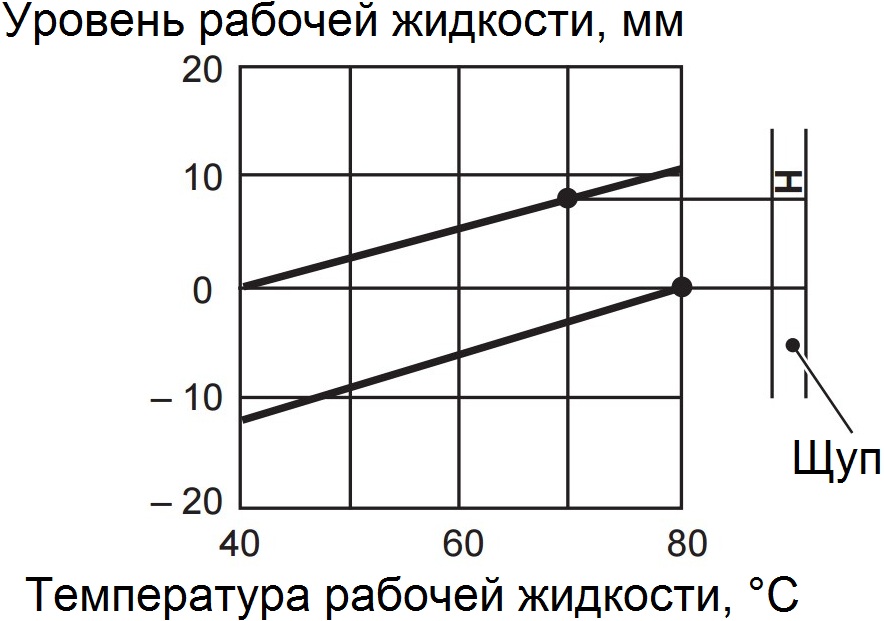
If there is not enough time to warm up the fluid to operating temperature, then testing is allowed at the temperature range indicated on the graph.
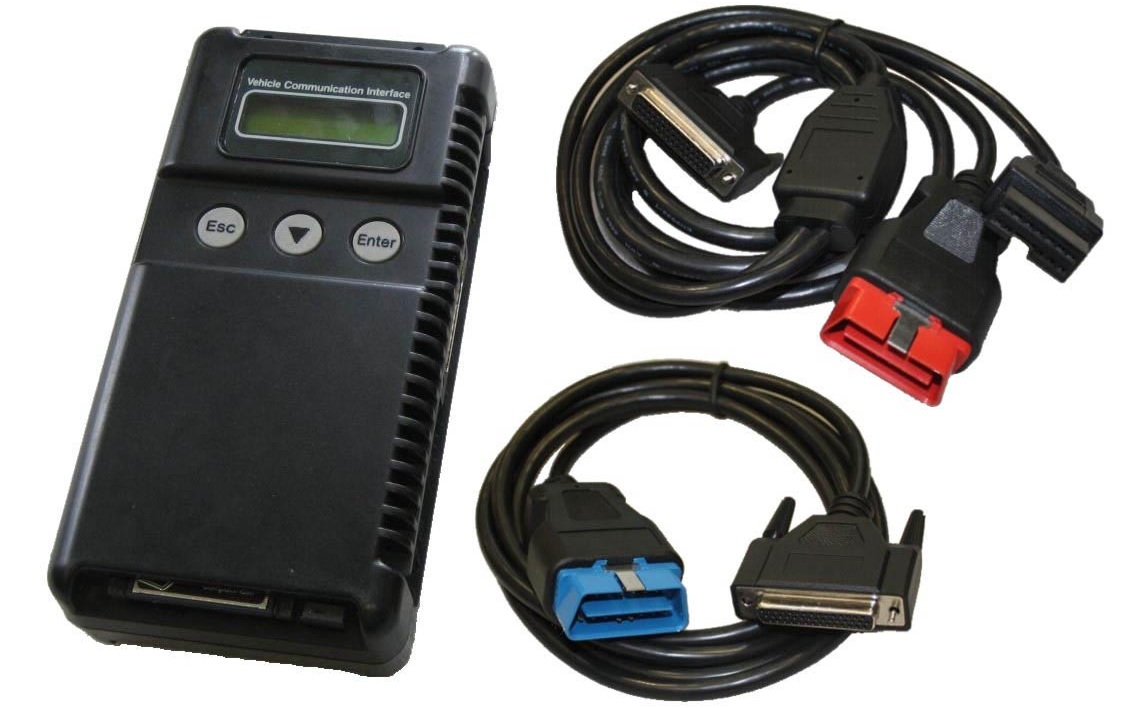
It is recommended to read the working fluid temperature using a scanner (MB991958).
2. Park the vehicle on a level, level ground.
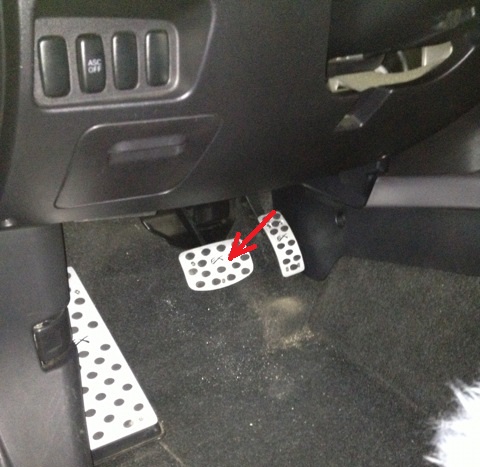
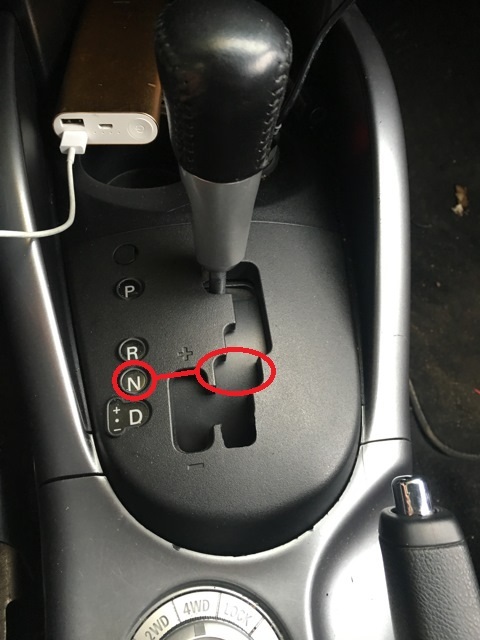
3. Press the brake pedal and move the selector through all positions, holding it in each of them for a few seconds to fill the entire hydraulic control system and torque converter with working fluid, and then set the selector to the "N" position.
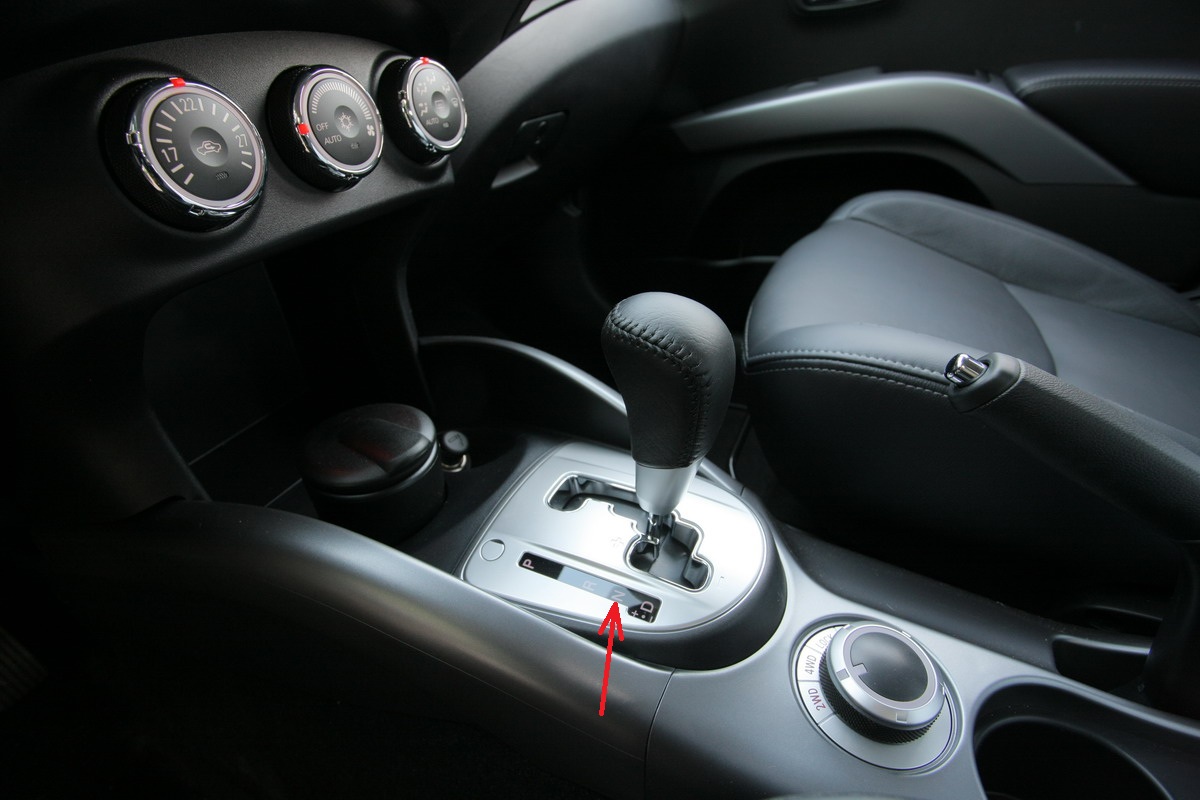
4. Leave the engine running at idle (selector in the "N" position).
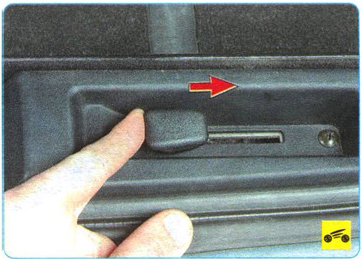
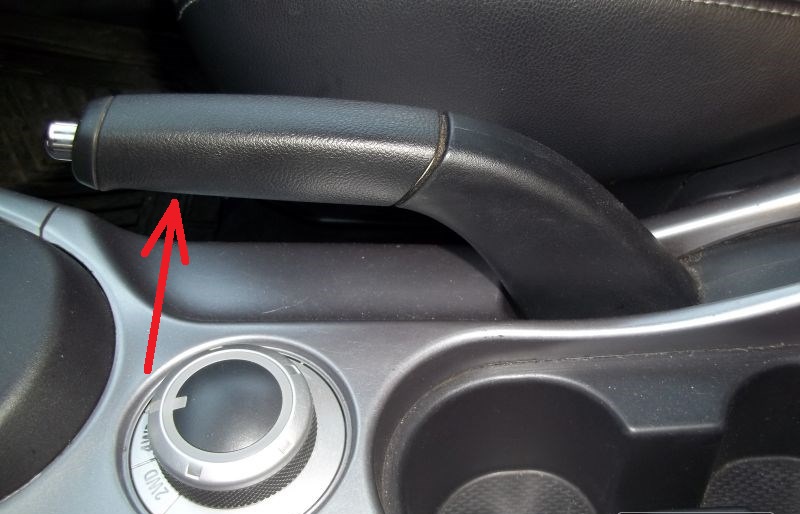
5. Before removing the dipstick, clean the area near the dipstick with a clean, lint-free rag. Remove the dipstick from the guide tube.
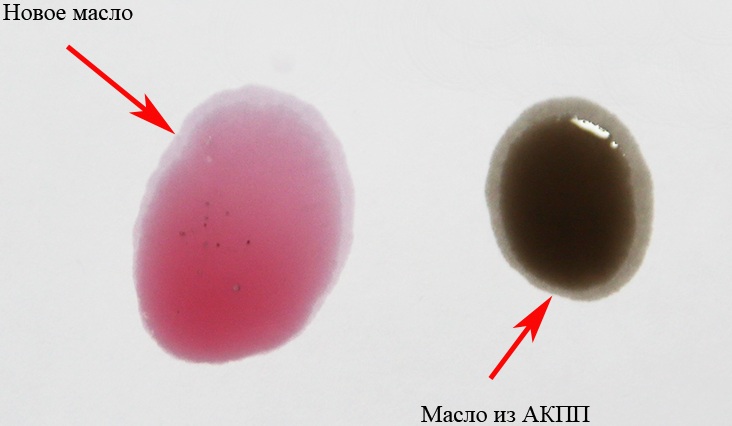
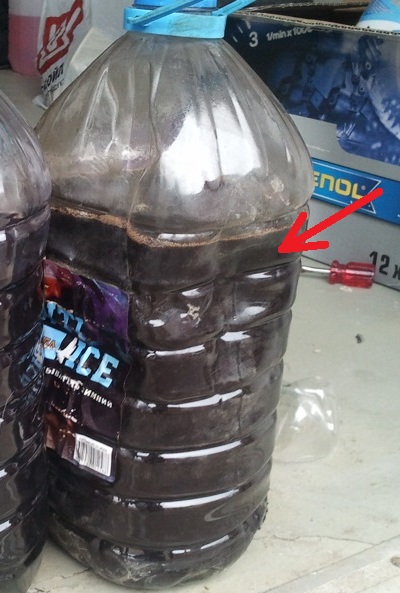
6. Check the condition of the working fluid in the automatic transmission using oil on the level indicator (you can drop it on a light rag).

Note:
It is necessary to overhaul the gearbox and clean the working fluid cooler tubes if a burnt smell of the working fluid is detected. This means that the automatic transmission fluid is contaminated with small particles from bushings and friction materials.
The working fluid must be replaced with a new one if the automatic transmission has been overhauled or the working fluid is heavily contaminated and does not meet the technical requirements (operation in severe conditions).
7. Wipe the dipstick dry and fully insert it into the guide tube.

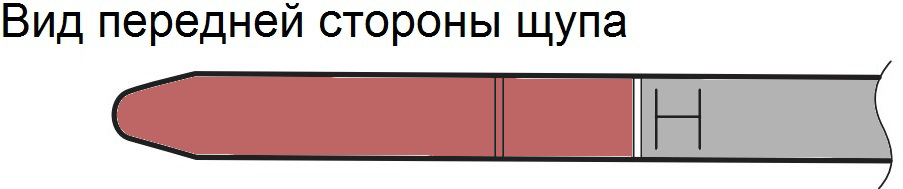
8. With the engine running at idle, remove the oil level dipstick. The normal oil level on the automatic transmission dipstick should be at its “H” mark. If the working fluid level is below this mark, then add DIA QUEEN ATF-J3 (J2, depending on the year of manufacture of the car) fluid to the level of the “H” mark on the dipstick through the dipstick guide tube.

Note:
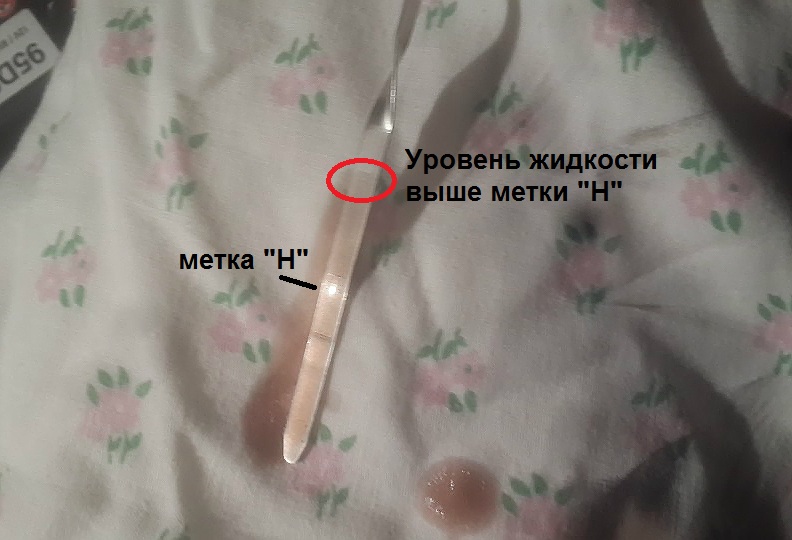
If the fluid level is above the "H" mark, replace the fluid.
Analysis of the results of checking the level of the working fluid: when underfilling, the pump pumps oil along with air, which leads to a decrease in line pressure in the lines, a decrease in downforce on the friction clutches and, as a result, slippage of the discs and their accelerated wear. Possible failures when shifting gears.
When the oil level is high and the moving parts start to touch the surface, the oil starts to foam. This leads, as in the previous case, to a drop in line pressure in the system. Possible failures when shifting gears. In addition, oil seals may be pressed through and oil leaks may appear.
The slippage of the friction discs leads to their accelerated wear, burning and shedding, which in turn leads to clogging of the oil filter and the suspension of the linear pressure solenoid of the machine and, again, to a drop in linear pressure. A chain reaction begins. In addition, foaming also causes fluid to escape through the transmission breather, which is mistaken for leaks.
9. Be sure to carefully examine the condition of the working fluid on the dipstick of the working fluid level (item 6 above). Reinsert the dipstick and check the tightness of the dipstick cover.
Replacement of automatic transmission fluid
Note:
Taking into account the operating conditions in the CIS countries, an oil change in the Outlander automatic transmission under normal operating conditions is recommended every 90,000 km. For severe service, fluid change intervals are recommended to be reduced to 45,000 km or 3 years, whichever comes first. However, sometimes the need to change the working fluid may arise earlier, for example, when repairing a gearbox, etc.
1. Drive the vehicle until the transmission fluid reaches normal operating temperature (70 - 80°C).
Note:
It is recommended to read the working fluid temperature using a scanner (MB991958).
2. Install the car on a lift or a viewing hole and tighten the parking brake.
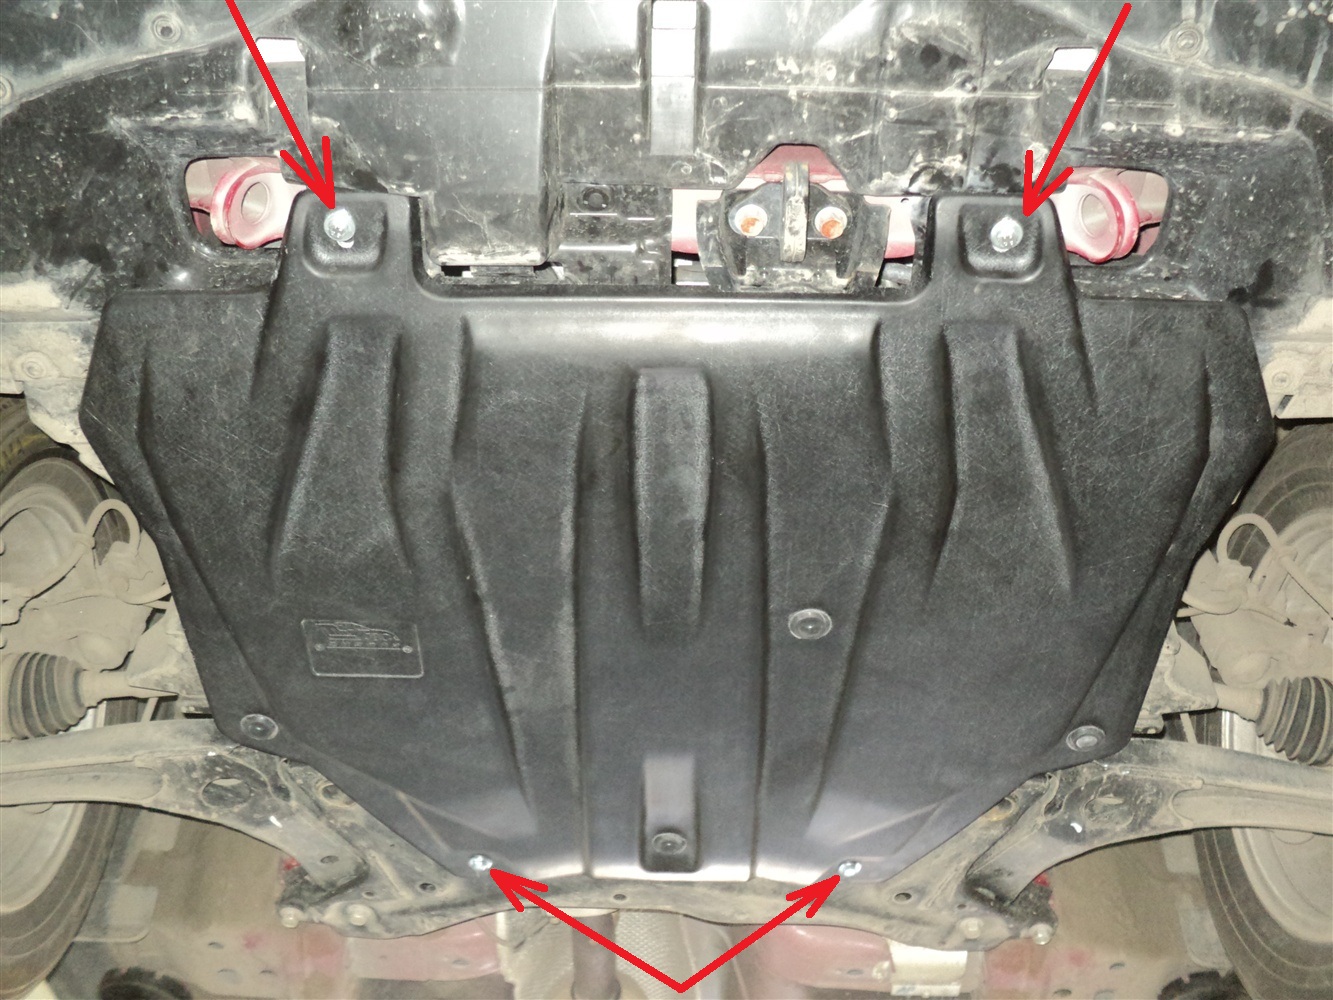
3. Before changing the oil in the automatic transmission, remove the engine oil pan protection as described here .
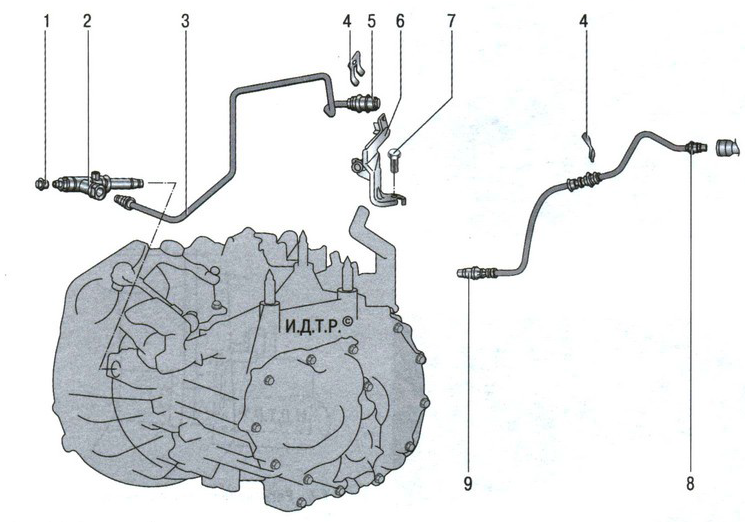
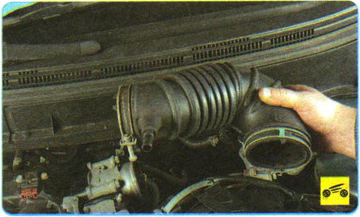
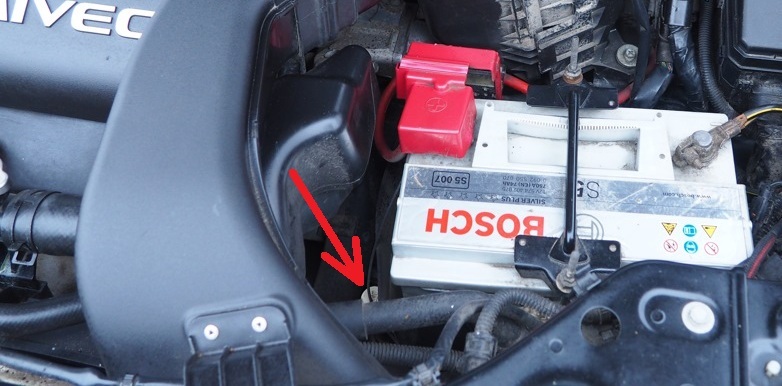
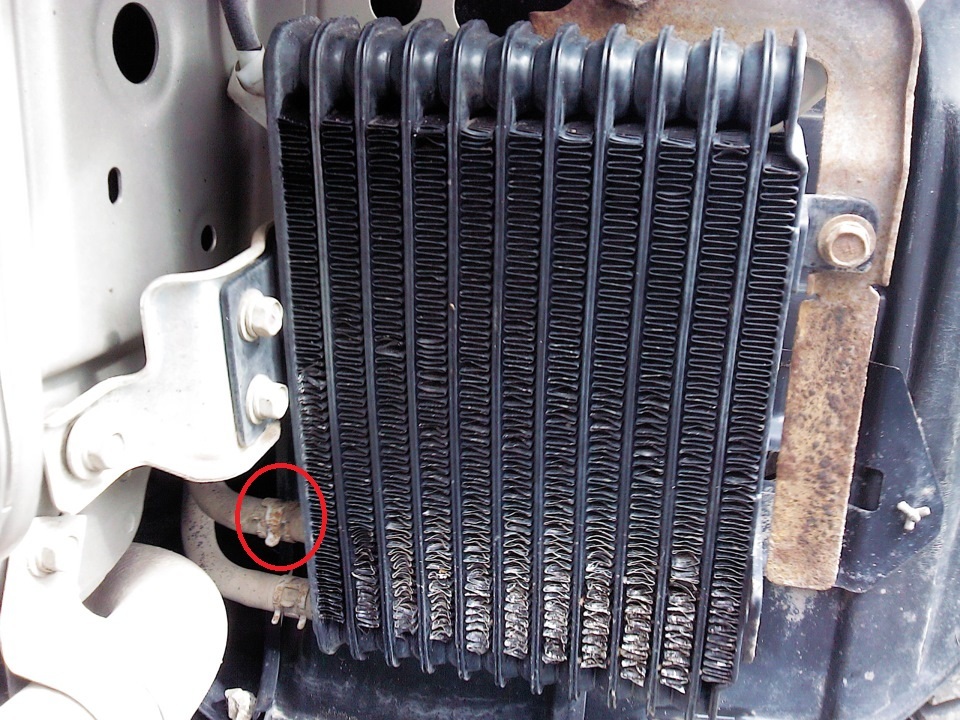
4. Squeeze the clamp ears with pliers and slide the clamp along the hose that connects the gearbox and oil cooler (inside the radiator, shown with the bumper removed for clarity).

Note:
If this hose at the point of connection to the cooler looks unreliable for removal, you can remove the clamp at the other end of this hose - near the pipe on the automatic transmission. In this case, to drain, you need to take another hose and install it on this pipe.
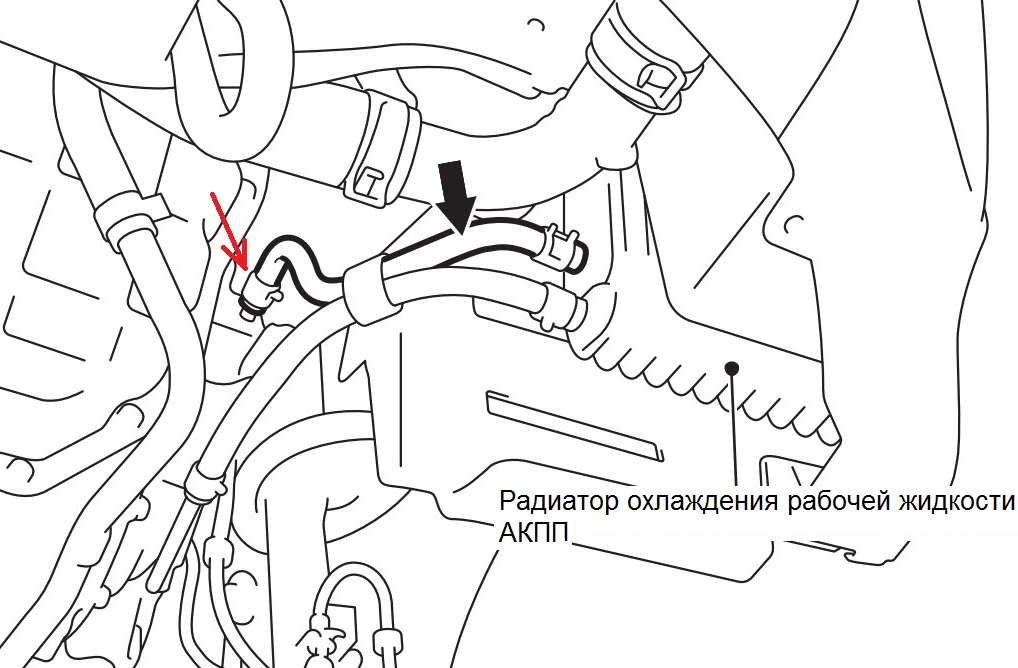
5. Place a container under the hose and disconnect the hose from the cooler.
6. Move the selector to the "N" position, start the engine (at idle) and allow the automatic transmission fluid to drain into a container.

Note:
The engine should run for no more than one minute. If the working fluid stops flowing out of the nozzle earlier, stop the engine immediately.
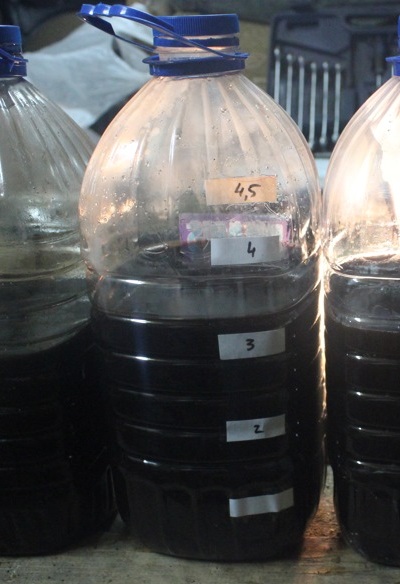
At this stage, approximately 3.5 liters should be removed from the automatic transmission.
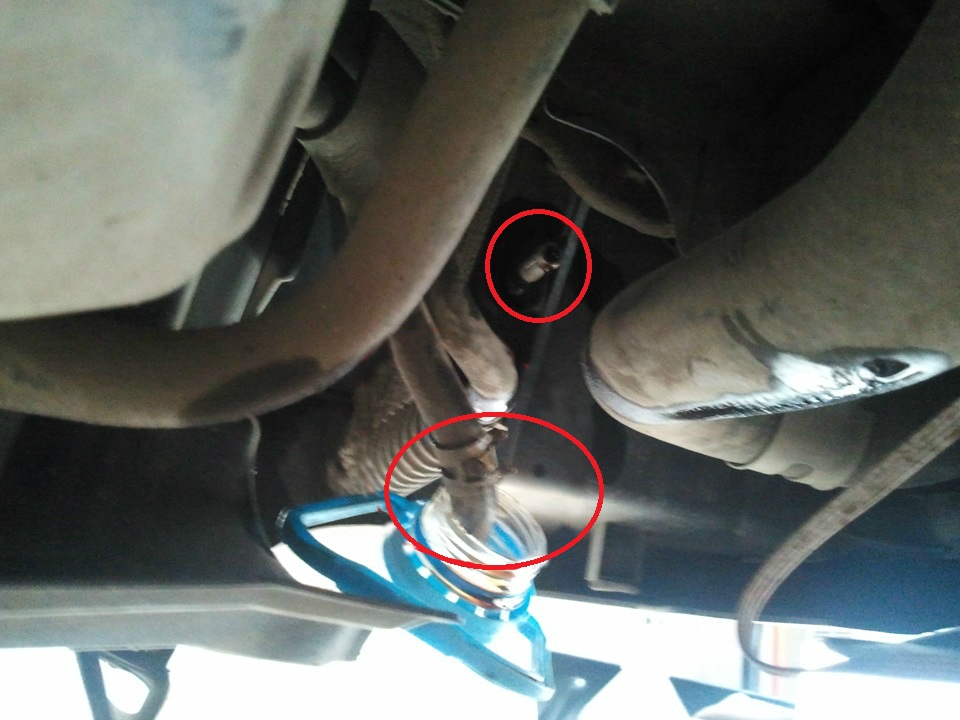
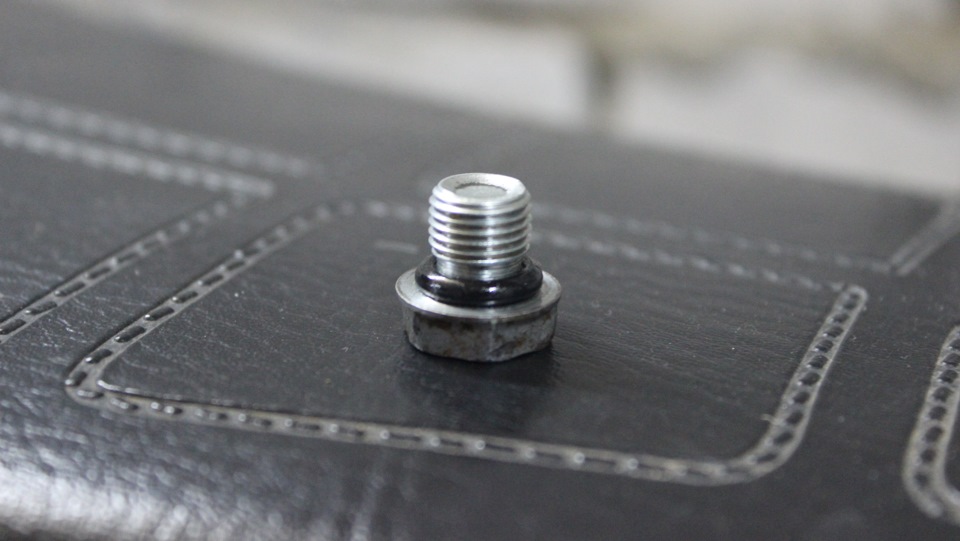
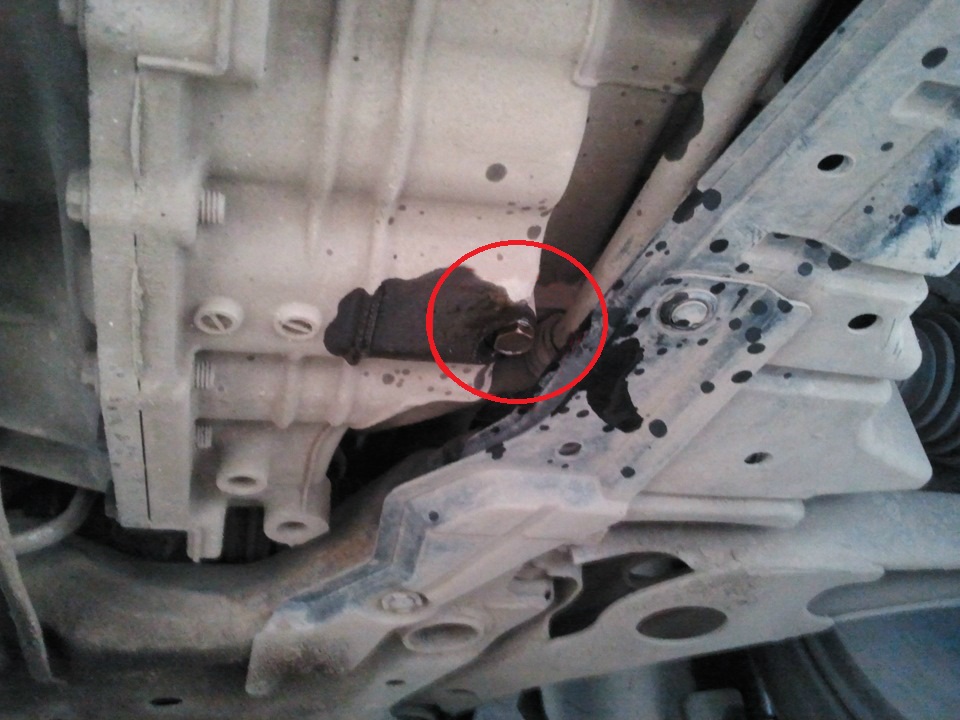
7. Then unscrew the drain plug on the gearbox housing pan and let the working fluid drain into the prepared container.

Note:
The volume of the drained automatic transmission fluid at this stage should be about 2.0 liters.
8. Install the drain plug with a new O-ring and tighten to the specified torque.
Note:
Tightening torque - 7.4 ± 2.4 Nm.
At this stage of work, it is not necessary to connect the hose (item 4-5) to the cooler / automatic transmission pipe.
9. Fill in a new working fluid in the automatic transmission through the guide tube of the dipstick level of the working fluid.
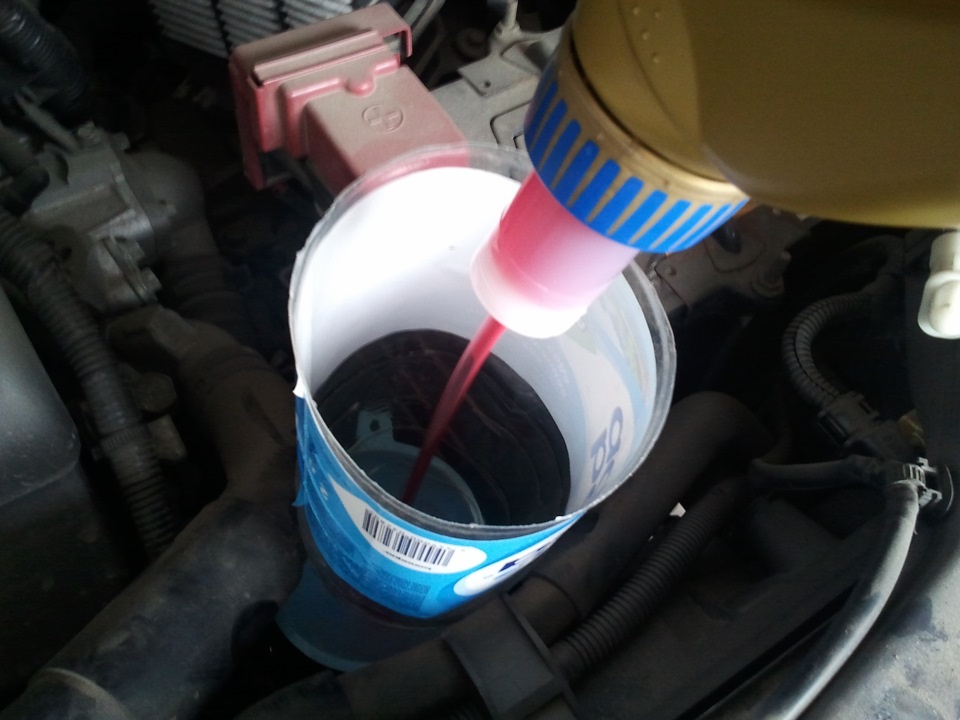
Note:
Filling volume - approximately 5.5 liters; total refueling volume (for a dry automatic transmission) - 8.2 liters.
Stop filling the gearbox with working fluid if it is not possible to fill in the above volume.
Stop filling the automatic transmission with working fluid if the above volume is filled (or a volume equal to the drained fluid).
10. Repeat the work described in point 6. If necessary, pump out the rest of the contaminated liquid.
11. Fill in a new working fluid in the automatic transmission through the guide tube of the dipstick of the working fluid level.
Note:
The volume of refueling at this stage of work is 3.5 liters.
Check the fluid (drained in step 10) for contamination or a burnt smell. If the fluid is still contaminated or burnt, repeat steps 10-11 before proceeding to the next step.
12. Reconnect the hose that was disconnected in steps 4-5 and insert the dipstick securely into its guide tube.
13. Start the engine and let it idle for one to two minutes.
14. Press the brake pedal and move the selector lever sequentially through all positions, holding it in each of them for a few seconds, and then set the selector to the "N" position.
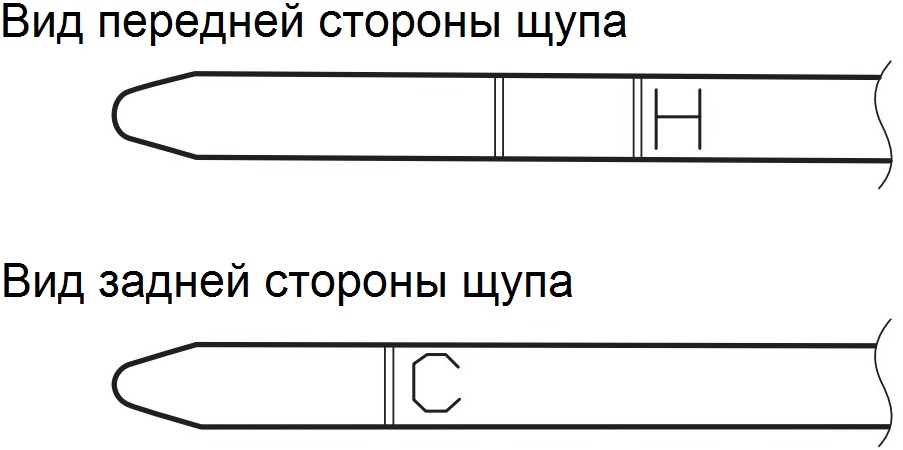
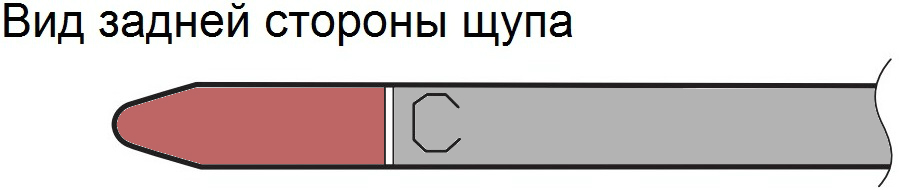
15. Make sure the automatic transmission fluid level is at the "C" mark on the dipstick. If the level is below this mark, add fluid.
16. Drive the vehicle until the automatic transmission fluid reaches normal operating temperature (70 - 80°C), and then recheck the fluid level.
Note:
The fluid level must be within the "H" mark.
The "C" mark on the dipstick is for reference only. Always check the fluid level at the "H" mark on a warm automatic transmission.
It is recommended to read the working fluid temperature using a scanner (MB991958).
If there is not enough time to warm up the fluid to operating temperature, then testing is allowed at the temperature range indicated on the graph.
17. If the fluid level is less than this "H" mark, then add fluid to the automatic transmission. In the event that the fluid level is above the specified level, drain the excess fluid through the drain plug to set the standard level.
18. Insert the dipstick securely into its guide tube.
19. Install the removed crankcase protection.
The article is missing:
- Tool photo
- Photo of parts and consumables
Source: carpedia.club