![W203/S203/CL203 [2000 - 2004]](/uploads/mercedes-c-klass-w203.jpg)

Tools:
- Jack
- Support legs
- Large flat screwdriver
- Puller
- rubber hammer
- Indicator for measuring axial clearance in a bearing
- torque wrench
Parts and consumables:
- Dye
1. Mark with paint the position of the front wheel relative to the hub. Thanks to this, a balanced wheel can be easily installed in its original place. Loosen the wheel bolts with the vehicle on the ground. Then lift the front of the car and remove the front wheel.
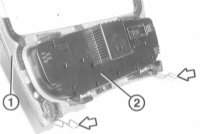
2. Screw 1 wheel bolt into the threaded hole opposite the lock screw and hand tighten. This will secure the brake disc to the wheel hub.
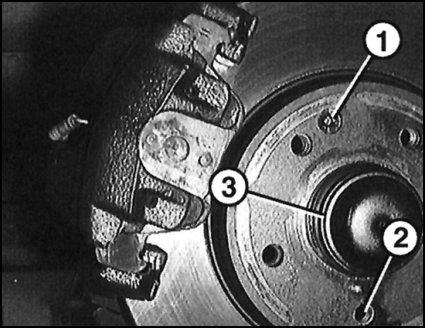
1 - locking screw;
2 - threaded hole;
3 - hub cap.
3. Carefully pry the disc brake pads away from the brake disc with a screwdriver.
4. Remove the hub cap with a puller or rubber mallet. To do this, turn the wheel and tap the cap with a hammer so that it falls.
5. Check bearing clearance by pulling hard and pushing on the flange. Rotate the hub several times before each measurement.
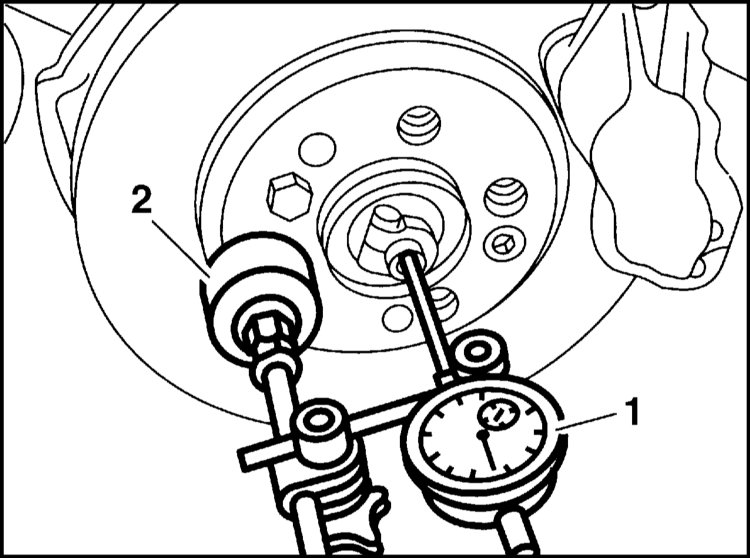
1 - indicator;
2 - holder;
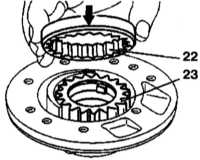
6. In the workshop, the axial clearance in the bearing is measured using an indicator and holder. Set the preload to 2 mm on the indicator. Required axial clearance: 0.01 - 0.02 mm.
Notes:
The wheel hub must not be rotated during the measurement.
Adjustment
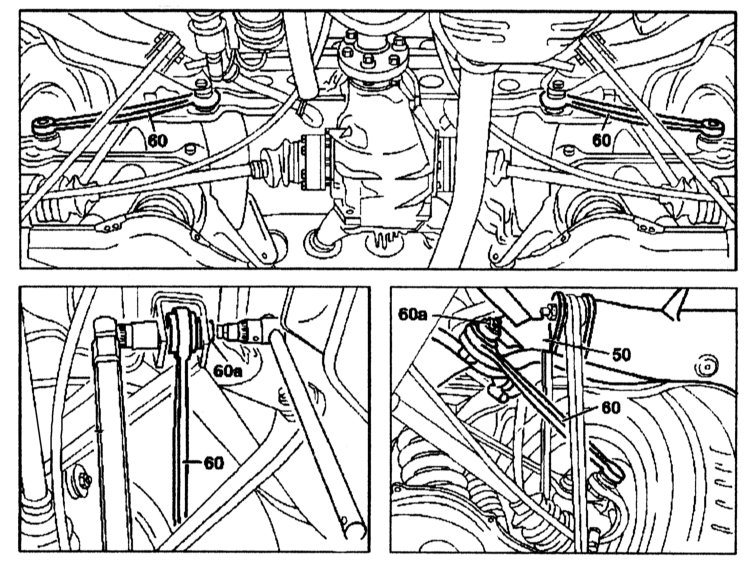
1. Loosen the split nut screw.
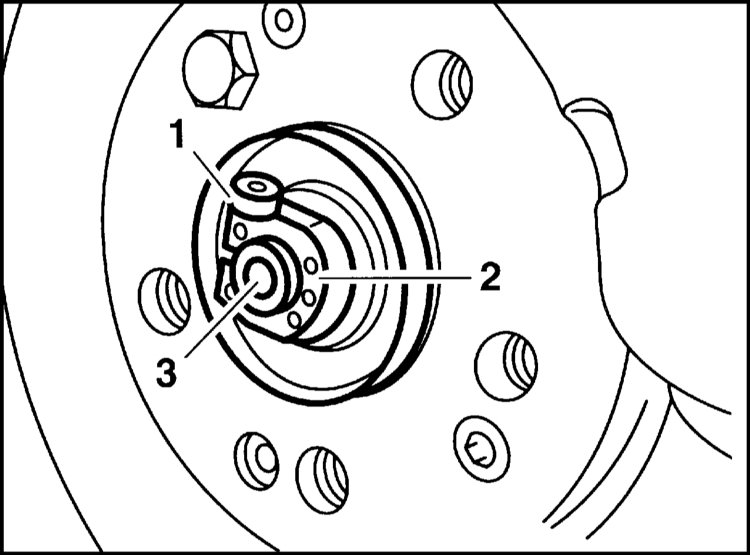
1 - screw;
2 - split nut;
3 - rotary fist.
2. Tighten the split nut while rotating the hub so that the hub cannot rotate. After that, unscrew the clamping nut one third of a turn in the opposite direction and, by hitting the steering knuckle axis with a plastic hammer, relieve the tension.
3. Repeat the measurement with the indicator and, if necessary, re-adjust the gap.
4. Mercedes-Benz checks bearing clearances using an indicator. In practice, the clearance in the bearings is adjusted correctly if the disk behind the slotted nut moves tight, that is, it requires a certain amount of force to be applied. Otherwise, tighten or loosen the split nut.
5. Tighten the split nut screw to 8 Nm and check the bearing play again.
6. Fill hub cap with high temperature bearing grease. The volume of oil is 15 g.
7. Install the hub cap in place with a rubber mallet. Use a suitable pipe for this so that the cap is level.
Notes:
If the cap is deformed, replace it, as a leak could allow moisture to enter the bearing, which in turn will shorten the life of the bearing.
8. Turn out a nave bolt at a brake disk.
9. Install the front wheel in place so that the previously applied marks match. Screw in the wheel bolts. Lower the vehicle onto the wheels and tighten the bolts crosswise to 110 Nm.
10. Press the brake pedal several times to install the brake pads.
The article is missing:
- Tool photo
- Photo of parts and consumables
- High-quality repair photos
Source: http://www.auto-knigi.com/model/mb_c/12_2_3