![B10 [2006 - 2013]](/uploads/Nissan_Almera_Classic_2006-2013_.jpg)

Instruments:
- Tubular socket wrench 13 mm
- Piston pin press tool
- Piston ring compression mandrel
- A hammer
- Piston ring remover
- Probe flat
- torque wrench
Parts and consumables:
- Motor oil
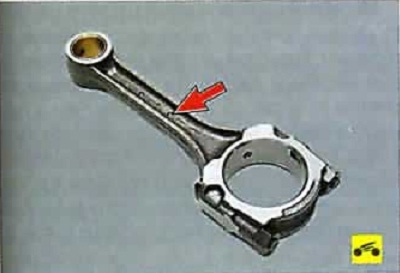
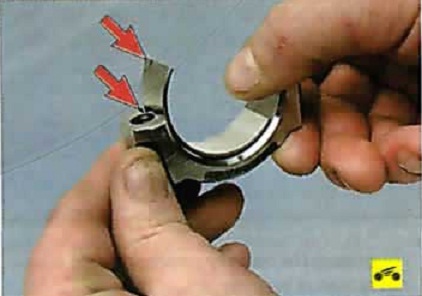
1. Insert the connecting rod into the piston so that the lugs on the connecting rod are facing the rear of the piston.
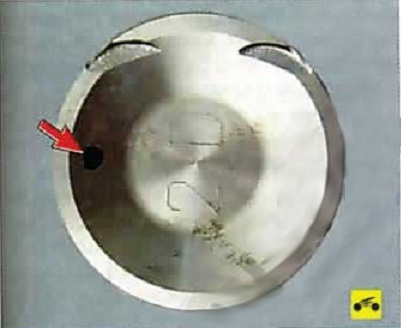
Note:
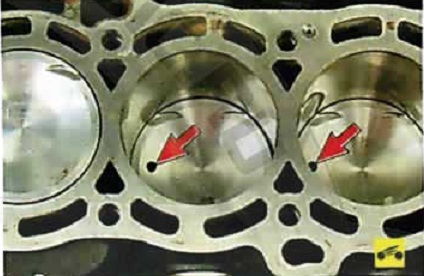
A mark in the form of a hole is made on the front part of the piston bottom.
2. Heat the piston to 60-70 °C, lubricate the piston pin with engine oil and press it into the piston using a screw press or with a hammer and a mandrel with a diameter of approximately 17 mm.
3. Install the piston pin circlips into the piston grooves.
4. Install piston rings. It is recommended to do this with a special puller. If it is not there, install the rings on the piston, carefully spreading the locks of the rings.
5. The order of installation of the rings is as follows: first install the composite oil scraper ring (the lock of the ring should be on the opposite side from the lock of the expanding spring), then the lower compression ring and, finally, the upper one.
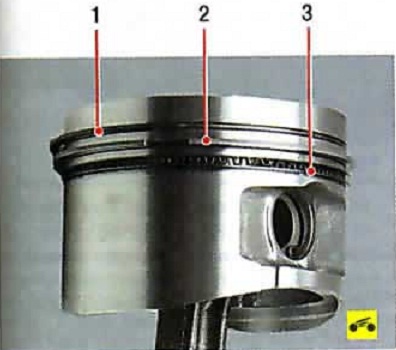
6. Orient the rings as shown. Install the rings on the remaining pistons.
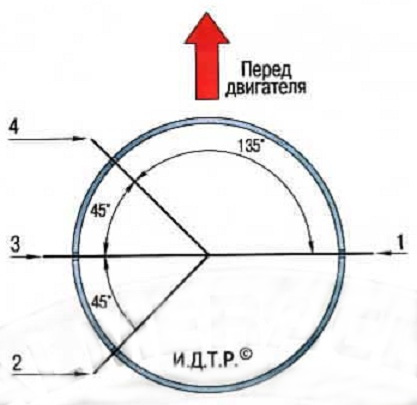
The location of the locks of the piston rings before installing the piston in the cylinder:
1 - expander of the oil scraper and upper compression rings;
2 - upper oil scraper ring;
3 - lower compression ring;
4 - lower oil scraper ring.
Note:
Install the lower compression ring with the marking facing up.
7. Install the bushing into the connecting rod, aligning the mounting tab of the bushing with the notch on the connecting rod.
8. Lubricate the cylinder mirror, piston, piston rings and connecting rod bearing with engine oil.
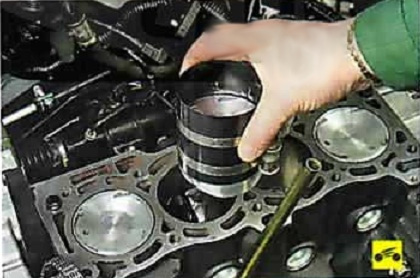
9. Install a mandrel on the piston to compress the rings and, screwing in the screw, compress the rings.
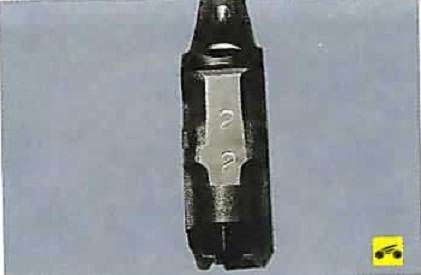
10. Turn the crankshaft so that its connecting rod journal, on which the connecting rod and piston group is mounted, is set at TDC. Install the cylinder piston according to the cylinder number marking on the connecting rod.
11. Press (for example, with a hammer handle) on the piston and slide it from the mandrel into the cylinder until the lower connecting rod head is installed on the connecting rod journal of the crankshaft. Install the pistons in the rest of the cylinders in the same way.
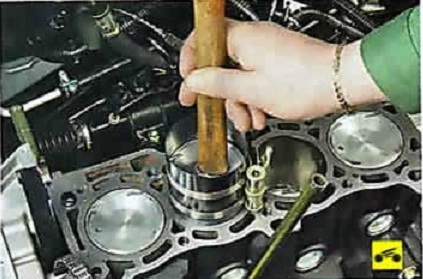
Note:
When installing the pistons in the cylinders, the marks (holes) on the pistons must face the front of the engine.
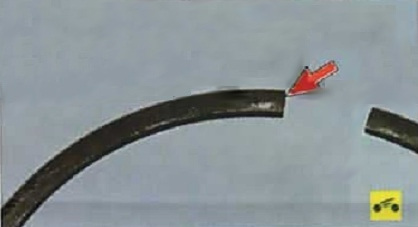
Warning:
When installing the piston, press the piston ring compressor firmly against the cylinder block, otherwise the piston rings will be broken.
Install the piston into the cylinder carefully so that the bottom end of the connecting rod does not damage the crankshaft crankpin.
12. Install the connecting rod bearings into the connecting rod caps by aligning the insert tab with the notch in the cap.
13. Lubricate the connecting rod bearings in the connecting rod caps and the connecting rod journals of the crankshaft with engine oil.
14. Establish a cover of a rod, having connected a rod with a neck of a cranked shaft.
Warning:
Install the connecting rod cover so that the cylinder number markings on the connecting rod and on the cover are on the same side.
15. Grease with engine oil a carving of bolts and nuts of fastening of a cover of a rod.
16. Screw on the nuts of the connecting rod bolts without completely tightening them.
17. Tighten the nuts of the connecting rod bolts to a torque of 13.7-15.7 Nm (1.4-1.6 kgf * m).
18. Tighten all nuts 35-40° clockwise.
19. Check up ease of movement of rods along rod necks. If seizing, unscrew the nuts of the connecting rod bolts and re-tighten them, as described in paragraphs. 17.18.
20. Check with a flat feeler gauge the side clearances between the connecting rods and the cheeks of the crankshaft cranks. The nominal gap is 0.200-0.470 mm, the maximum allowable gap is 0.5 mm. If the backlash is greater than the limit, replace the connecting rod and/or crankshaft.
21. Install the removed parts in the reverse order of removal.
Engine break-in
After assembling the engine, it is recommended to run it on the stand. Since this cannot be done outside of special repair organizations, after installing the engine on a car, run it in according to a simplified cycle as follows:
1. Fill in oil and coolant, check the tightness of all connections.
2. Start the engine and let it run without load through the following cycle:
- 820-900 rpm - 2 minutes;
- 1000 rpm - 3 minutes;
- 1500 rpm - 4 minutes;
- 2000 rpm - 5 minutes.
Do not bring the engine to maximum conditions.
3. During operation, check the tightness of the engine and its systems, oil pressure, pay attention to the presence of extraneous noise.
4. If extraneous noises or other malfunctions are found, stop the engine and eliminate their causes.
5. After starting the operation of the car, observe the modes provided for the break-in period of a new car.
The article is missing:
- High-quality repair photos
Source: http://remont-nissan-almera.net/dvigatel/138-remont-dvigatelya-assembly-i-ustanovka-shatunno-porshnevoy-gruppy.html