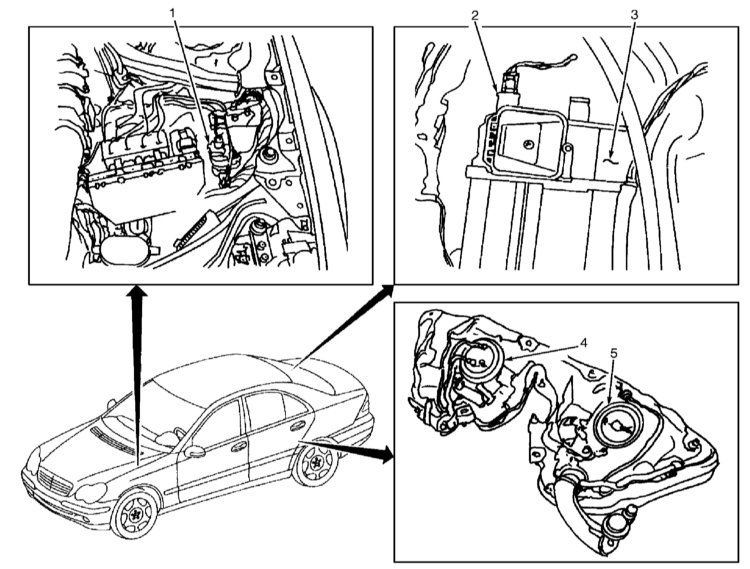
![W203/S203/CL203 [2000 - 2004]](/uploads/mercedes-c-klass-w203.jpg)

If you have a dynamic target tracking system (DynASP system) and an FCD (Floating Car Data) vehicle “floating” data system:
If you are registered as a user of Mercedes-Benz telematics services, the central dispatching office of these transport and technical services regularly and automatically performs transmission via your free short message (SMS) radio network.
In the case of using PrePaid prepaid cards (for using mobile phones without concluding a corresponding contract with a provider), such services for the transmission of the above short messages (SMS) are subject to payment by deduction from the amount on your card.
Phone - general information
The use of radio telephones inside the vehicle is only permitted if they are connected to a separate external antenna.
Phone off delay time
If the key is removed from the ignition switch, the phone remains on for about 10 minutes (delay time).
If you use the phone during this time, the phone turns off approximately 10 minutes after the end of the call.
Changing the Phone Off Delay Time:
By an additional entry in the phonebook, the phone off delay time can be changed between one of sixty minutes. (Entering an entry in the phone book - separate "Telephone User's Guide").
When "NACHLAUFZEIT" (DELAY TIME) and a number appear, enter a number (minutes) between "1" and "60". If you did not enter a number or entered an incorrect number, then the delay time of approximately 10 minutes is still valid.
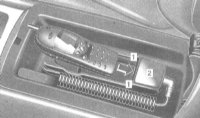
Cordless telephone in the armrest
Installing the telephone
 |
|
Open the phone compartment in the armrest.
Insert the phone with the lower part into the protrusions (1) of the receiving slot (2).
 |
|
In the front, push the phone down (3). The shutter (4) is automatically fixed by moving to the right.
Only in this position is the telephone connected to the hands-free installation.
If the battery is not fully charged, the charging process starts as soon as the key is inserted into the ignition switch.
|
The receiver socket (2) is suitable for the following phones: NOKIA 5110, NOKIA 5130, NOKIA 6110, NOKIA 6130, NOKIA 6150. |
Using the phone via the mobile radiotelephone control panel
 |
|
Removing the phone together with the holder: Pull the socket (2) with the phone upwards (6) out of the holder lock (5).
Installing the phone together with the holder: Insert the receiving socket (2) with the phone (7) into the holder latch (5) and press down until it clicks into place.
Phone use
 |
|
The receiver socket (2) has the function of a handset (arrow) for making telephone conversations.
(Using the phone - separate “Telephone User Guide”).
|
The handset function of the telephone is switched off as long as it is inserted into the receiving socket (2). |
Taking out the phone
 |
|
Move the shutter (4) to the left until it locks. Pull the phone forward.
Radiotelephone on the instrument panel
Installing the telephone
 |
|
Insert the phone with the lower part into the protrusions (1) of the receiving slot (2).
 |
|
At the top, press forward on the phone (3). The shutter (4) is automatically fixed by moving to the right.
Only in this position is the telephone connected to the hands-free installation.
If the battery is not fully charged, the charging process starts as soon as the key is inserted into the ignition switch.
|
The receiver socket (2) is suitable for the following phones: NOKIA 5110, NOKIA 5130, NOKIA 6110, NOKIA 6130, NOKIA 6150. |
Using the phone via the mobile radiotelephone control panel
 |
|
Removing the phone together with the socket: Pull the socket (2) with the phone back (6) out of the holder lock (5).
Installing the phone together with the holder: Insert the receiving socket (2) with the phone (7) into the holder latch (5) and push it forward until it clicks into place.
Phone use:
 |
|
The receiver socket (2) has the full functionality of a handset (arrows).
The handset of the telephone is switched off as long as it is inserted into the socket (2).
Taking out the phone
 |
|
Move the shutter (4) until it locks into place. Pull the phone up.
Luggage net in front passenger's footwell The
luggage net is designed for carrying light loads only.
Heavy, as well as fragile objects and objects with sharp edges must not be transported in a safety net for luggage.
The luggage safety net cannot protect the load in the event of an accident.
Source: http://www.auto-knigi.com/model/mb_c/2_15/