Tools:
- Special tool 09861-31100
- Cutter (or special tool 09861-31200)
- Special tool 09861-31400
- Sponge
Parts and consumables:
- Adhesive primer
- sealant
Withdrawal
1. Remove facings of forward racks of a body.
2. Remove an internal rear-view mirror.
3. Remove the wiper arms.
4. Remove the seal and the air intake niche cover.
5. Remove the windshield seal.
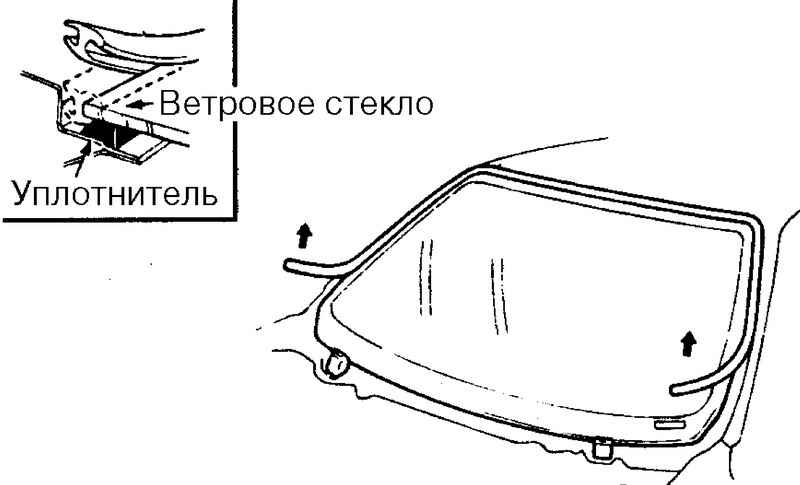
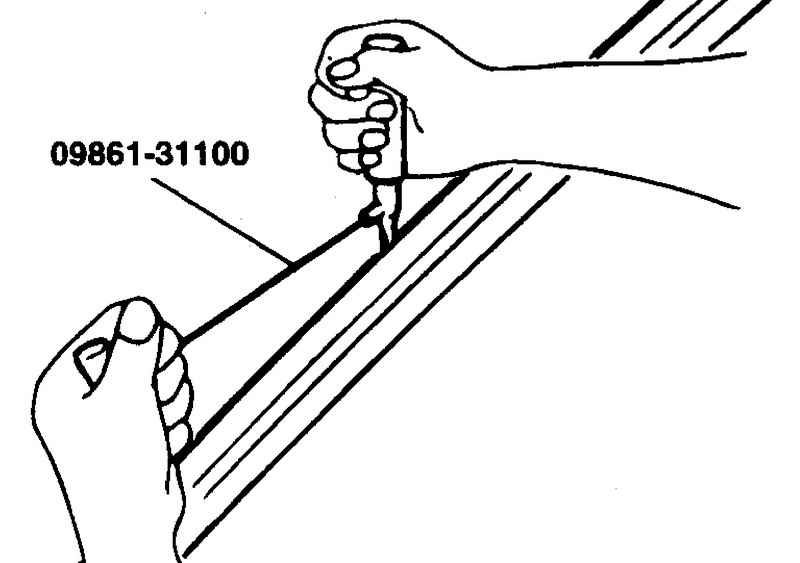
6. Cut off any excess adhesive with tool 09861-31100.
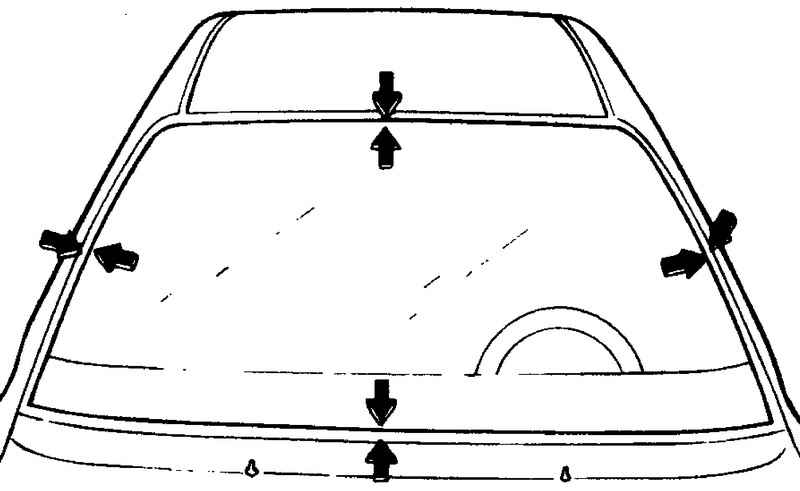
7. If glass is to be reused, mark the glass and opening with alignment marks.
8. Remove a windshield.
Installation
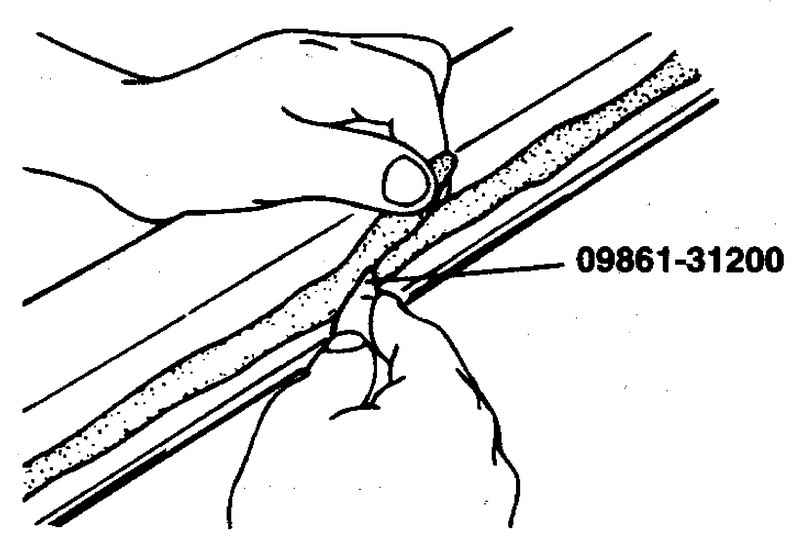
9. Using a cutter or tool 09861-31200, cut the bead of adhesive evenly to a thickness of about 2 mm from the glass bonding surface around the entire perimeter of the opening flange.
Attention:
Do not cut the adhesive bead to less than the specified thickness and take care not to damage the body paintwork with the cutter. If damaged, repair the layer by applying a finishing paint.
10. Clean the windshield opening flange with a sponge soaked in alcohol or a degreaser and degreaser.
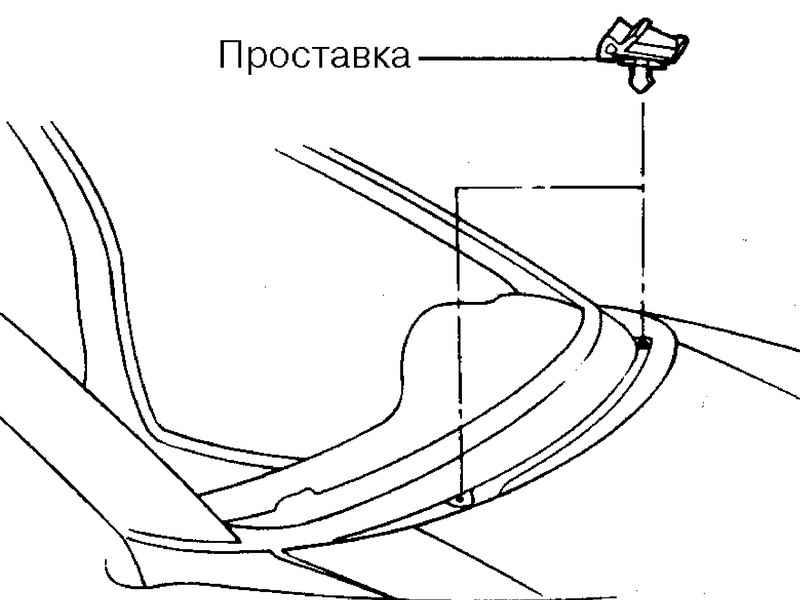
11. Install the spacers in the windshield opening.
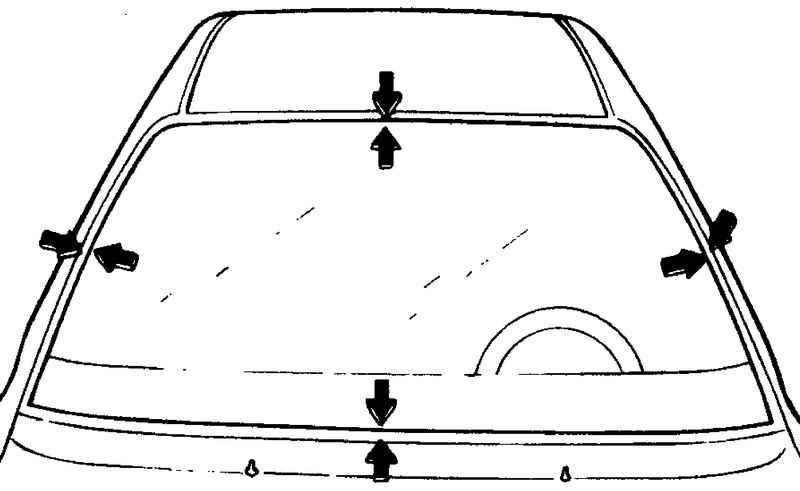
12. Install the new windshield in the opening and use a soft pencil to mark the glass and body in four places, as shown in the figure below.
13. Establish an overlay of a windshield, making sure that there are no gaps.
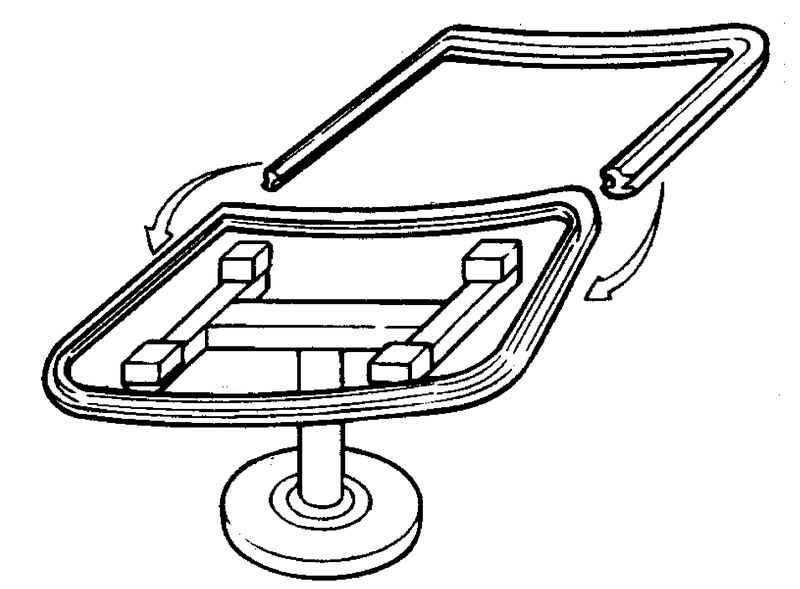
14. On the inner surface of the glass along the entire perimeter of the edge, stick a rubber insert that serves to hold the glue when installing the glass.
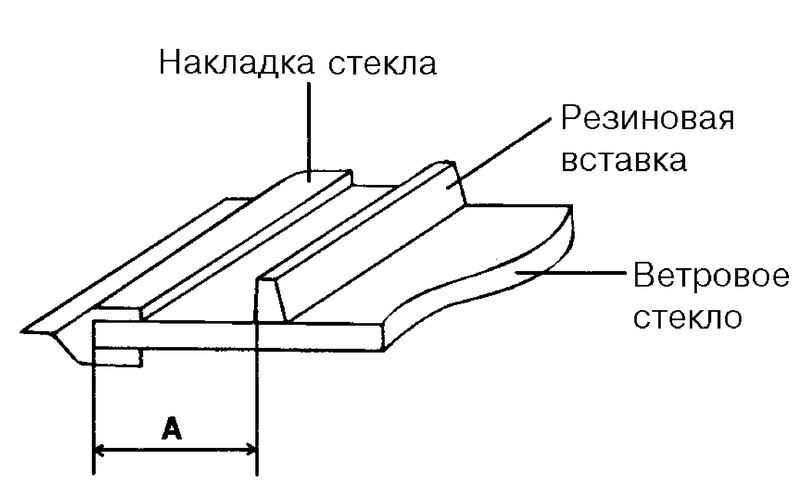
15. Apply a thin layer of glass adhesive primer to the outer surface of the rubber insert.
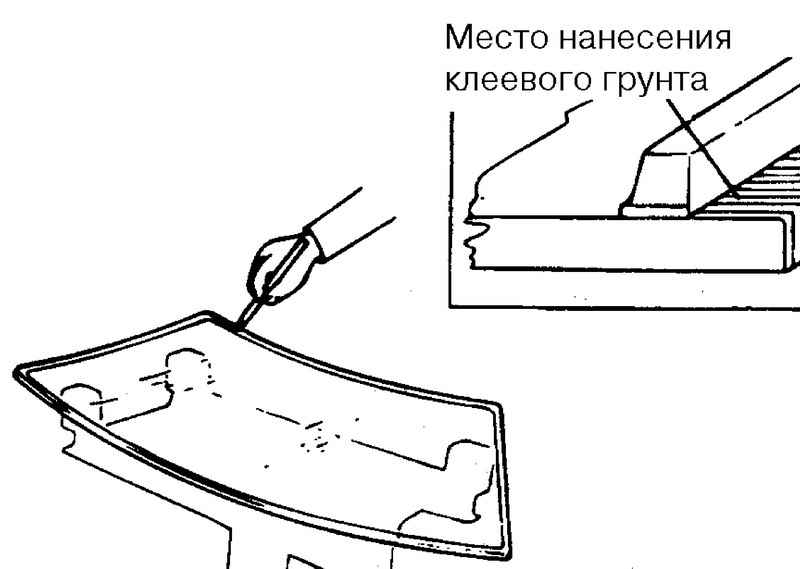
Attention:
Do not touch the glass with your hands, as this may degrade the bonding quality and cause leakage after the windshield is installed.
Do not apply adhesive primer for body parts to glass.
Do not allow water, dust and abrasive particles to get on the applied adhesive layer.
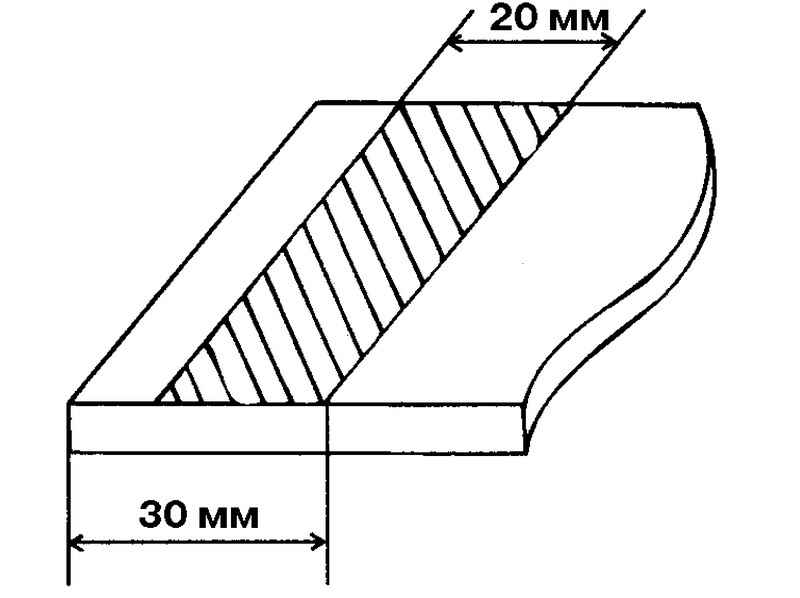
16. Apply adhesive primer to the bottom edge of the glass as shown.
17. Apply sealant to glass edges all around.
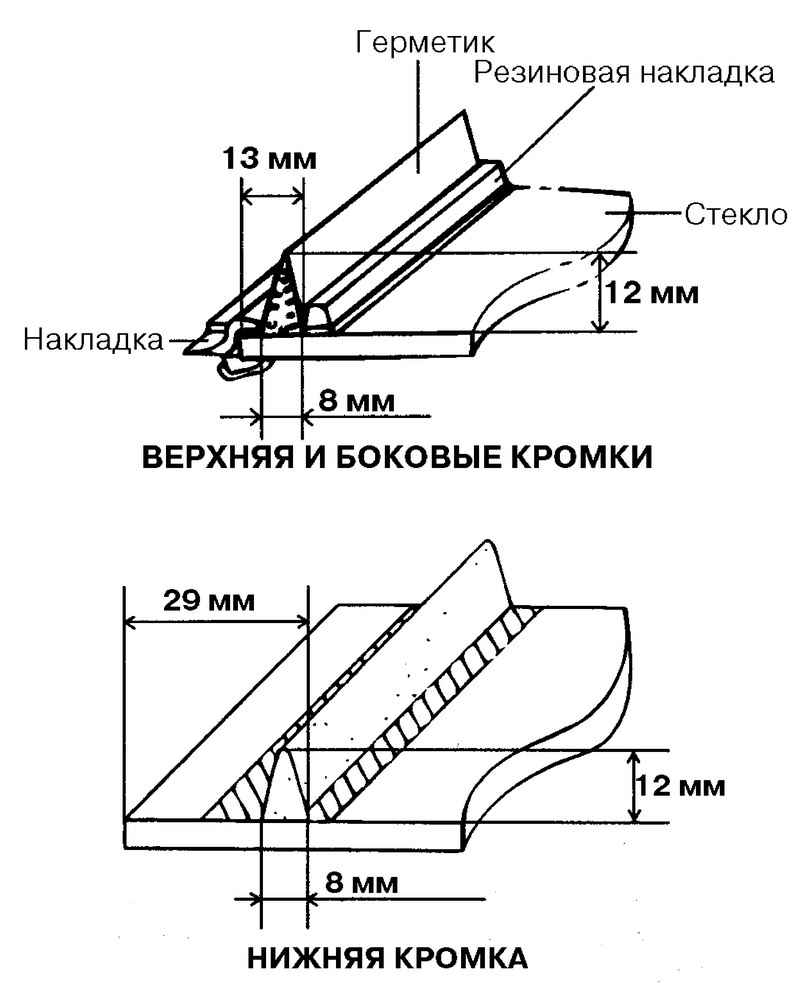
Notes:
Apply a layer of adhesive no more than 5 minutes after applying the adhesive primer.
18. Using suction cups 09861-31400, place the windshield on the opening, aligning the applied marks and press the glass to the sealant layer. Apply a thin layer of adhesive primer for body parts to the layer of sealant left on the flange of the glass opening. After applying the adhesive primer, install the glass within 5 minutes at the latest.
19. Remove excess adhesive with a spatula or wipe off with gauze. Fill with glue all the voids around the perimeter of the glass.
20. Make sure the windshield is sealed by spraying it with a jet of cold water, being careful not to damage the fresh adhesive layer with a strong jet. Water in such a way that water runs down the edges of the glass.
Attention:
If leaks are found, dry the leak and apply sealant.
21. Install previously removed parts.
Notes:
During the first hour after installation, do not allow water to enter the windshield.
Do not drive your vehicle for the first four hours after installing the windshield. If you need to travel for the first 8 hours, drive slowly. Do not forcefully slam doors.
Avoid subjecting the body to heavy torsional loads that occur when driving off or onto a roadway, or when driving on rough roads.
The article is missing:
-
Tool photo
-
Photo of parts and consumables
-
High-quality repair photos
Source: http://automn.ru/hyundai-matrix/hyundai-37402-10.m_id-4967.m_id2-4968.html


![1 generation [2001 - 2005]](/uploads/Hyundai_Matrix_2002-2006_.jpg)
