![4 generation [2001 - 2005]](/uploads/Volkswagen_Polo_2005_-_2009_.jpg)
![5 generation [2009 - 2015]](/uploads/Volkswagen_Polo_2009-2015_.jpg)

You will need: socket head "13", TORX T20 wrench, flat blade screwdriver.
1. Disconnect a wire from the minus plug of the storage battery.
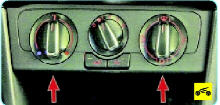
2. Turn out two screws of the top fastening of the console of the panel of devices.
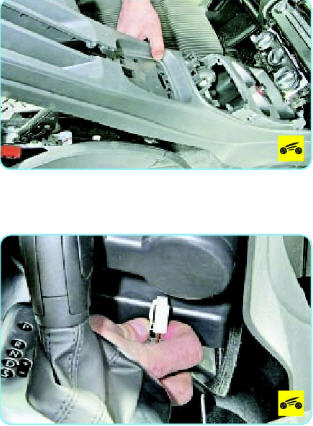
3. Remove the cover frame of the gear selector lever, overcoming the elastic resistance of its latches.
4. Turn out two screws of the lower fastening of the console of the panel of devices...
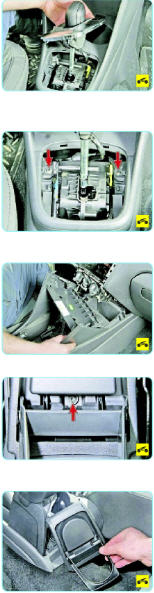
5 and remove the console.
6. Turn out the screw of fastening of a back coaster...
7. ... and remove it.
8. Remove the right ..
9. ... and left facings of the armrest hinge.
10. Turn away a nut of fastening of an armrest to an arm...
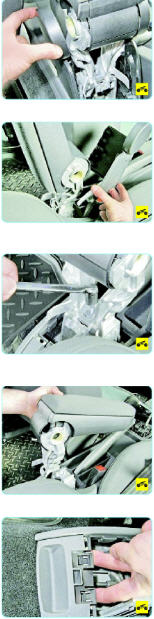
11. ... and remove the armrest.
12. Wring out two holders
13. ... and remove the rear lining of the floor tunnel.
14. Pry off a facing of the parking brake lever with a screwdriver and remove it.
15. Turn out one screw of back fastening of facing of a tunnel of a floor...

16. ...two front fixing screws...
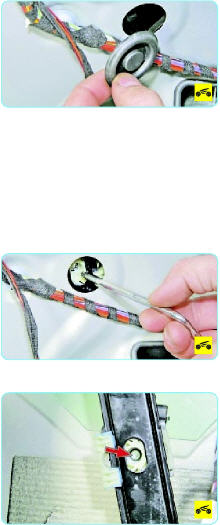
17. ...and one side fixing screw on both sides of the cladding.
18. Remove the lining of the floor tunnel from the base of the body.
19. On the inside of the lining, squeeze the clamp of the wiring harness block and disconnect the block from the cigarette lighter.
20. Remove the lining of the floor tunnel.
21. Install the removed parts in the reverse order of removal.
Source: http://www.polosdn.ru/news/snjatie_i_ustanovka_oblicovok_tonnelja_pola_i_konsoli_paneli_priborov/2012-06-17-176