![CM [2006 - 2010]](/uploads/Hyundai_Santa_Fe_2006-2010_.jpg)
![DM [2012 - 2016]](/uploads/Hyundai_Santa_Fe_2012_-_3.jpg)

- You will need: 12mm wrench, 22mm socket, TORX T40 wrench, flat and Phillips screwdrivers, marker.
- The steering column is one of the most important elements for ensuring road safety, so replace the steering shafts installed in the steering column or the column assembly if the following defects are present:
- – play in the cardan joint of the intermediate shaft or damage to its terminal connection with the steering column shaft;

- - deformation or damage to the intermediate shaft, play in the universal joints, damage to the terminal connection of the lower universal joint with the steering gear shaft;
- - Deformation or damage to the shaft and parts of the steering column, damage to the splines connecting the shaft to the steering wheel hub;
- – Damage to the mechanism for adjusting the position of the steering column (depending on the configuration).
- 1. Disconnect a wire from the minus plug of the storage battery.
- 2. Remove the driver's airbag module (see "Removing and installing the driver's airbag module").
- 3. Remove the steering wheel (see "Removing and installing the steering wheel").
- 4. Remove the casing of the steering column (see "Removing and installing the casing of the steering column").
- 5. Remove the steering column switches (see "Replacing the steering column switches").
- 6. Remove the slip ring from the bracket on the steering column (see "Removing and installing the slip ring").
- 7. Remove the left lower facing of the panel of devices (see. "Removal and installation of the panel of devices").
- 8. Pry off the two harness holders with a screwdriver ...
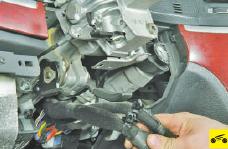
- 9. ... and remove the wire harness holders from the bracket on the steering column.
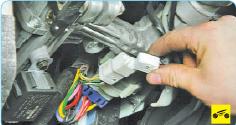
- 10. Squeeze the retainer of the immobilizer block antenna wiring harness block and disconnect the blocks.
- 11. Overcoming the resistance of the pad retainer, remove the pad from the bracket on the steering column.
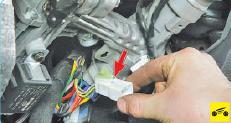
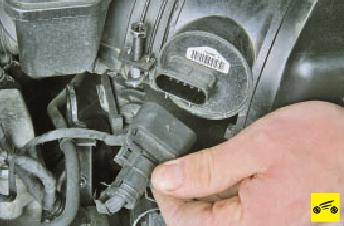
- 12. Squeeze the clamp of the wiring harness block and disconnect the block from the immobilizer.

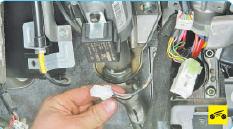
- 13. Squeeze the clamp of the wiring harness block and disconnect the block from the contact group.
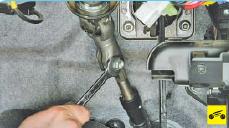
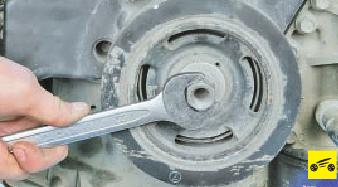
- 14. Turn out the bottom coupling bolt of fastening of the top universal joint of an intermediate shaft.
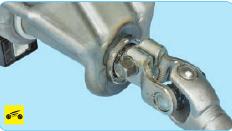
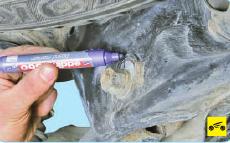
- 15. For ease of reinstallation, mark the position of the upper cardan joint relative to the intermediate shaft.
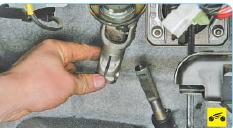
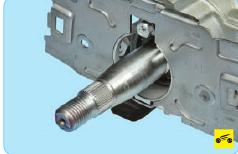
- 16. Remove the upper universal joint from the intermediate shaft.
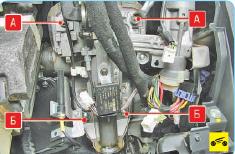
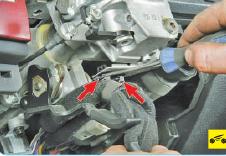
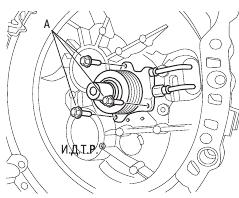
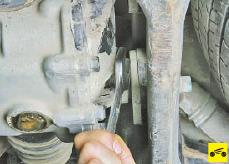
- 17. Remove two bolts B and unscrew two nuts A of the steering column mounting studs.
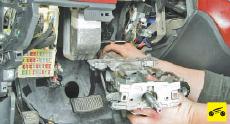
- 18. Remove the steering column.
- 19. Establish a steering column and all details in an order, the return to removal.
- WARNING
- When installing the steering column, be sure to align the marks on the cardan joints of the intermediate shaft with the marks on the end of the steering gear shaft.
- Source: Hyundai Santa Fe Owner's Manual, Third Rome Publishing House
Hyundai Santa Fe Clutch Release Slave Cylinder Replacement with Clutch Release Bearing
[[ article.getBookmarkIcon() ]]
Instrument
Hyundai Santa Fe Rear Suspension Lower Wishbone Replacement
[[ article.getBookmarkIcon() ]]
Instrument
Removing and installing the Hyundai Santa Fe air filter housing
[[ article.getBookmarkIcon() ]]
Instrument
Checking the level, topping up and changing the oil in the rear wheel drive gearbox Hyundai Santa Fe
[[ article.getBookmarkIcon() ]]
Instrument
Removal and installation of facings of forward racks of a body of Hyundai Santa Fe CM 2006-2012
5 - 30 minutes
[[ article.getBookmarkIcon() ]]
Instrument
Climate Control System Air Filter Replacement (for Evaporator and Fan Unit) Hyundai Santa Fe 2006 - 2010 Petrol
30 minutes - 1 hour
[[ article.getBookmarkIcon() ]]
No tools