![2 generation [2005 - 2009]](/uploads/Kia_Rio_2005_-_2011.png)
![3 generation [2011 - 2015]](/uploads/9b0bb8ba0203729f482ae8eb3b95c4f1.jpg)

Tools:
- L-shaped socket wrench 22 mm
- L-shaped socket wrench 17 mm
- L-shaped socket wrench 19 mm
- torque wrench
- Screwdriver flat medium
- Crankshaft pulley removal tool
- Collar for end nozzle
- Nozzle on the crank 10 mm
- Nozzle on the crank 14 mm
- Nozzle for crank 17 mm
- Nozzle for crank 19 mm
- Extension
- Pin
Parts and consumables:
- Cloth gloves
- sealant
- Motor oil
- Coolant
- Container for draining engine oil
- Container for draining coolant
- Reliable support
- Wood/Rubber Gasket
- Timing chain guide HYUNDAI/KIA 244312B000
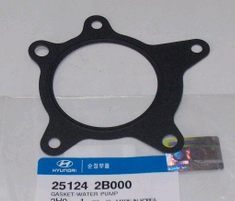
- Cooling pump housing gasket HYUNDAI/KIA 251242B000
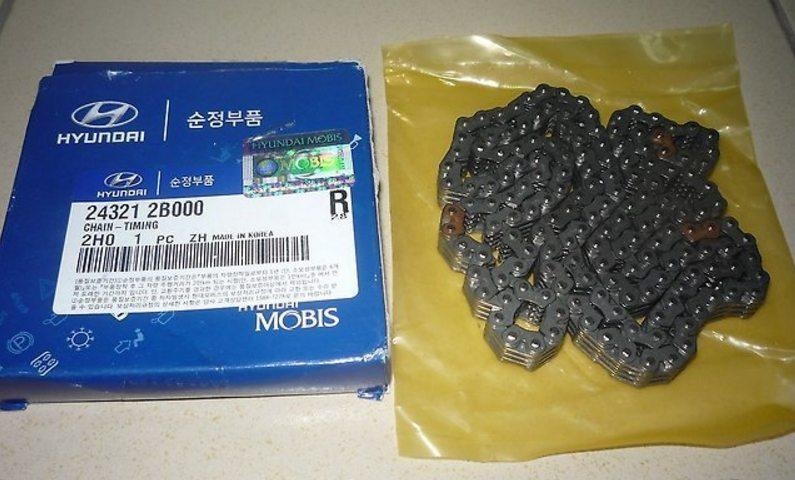
- Timing chain HYUNDAI/KIA 243212B000
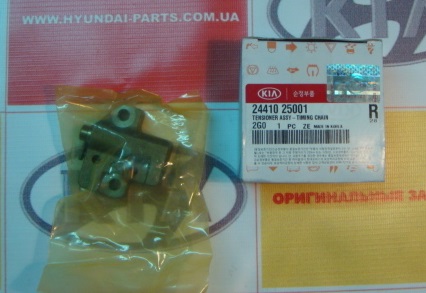
- Timing chain tensioner HYUNDAI/KIA 2441025001
- Timing Chain Guide HYUNDAI/KIA 244202B000
- Engine crankshaft oil seal, front HYUNDAI/KIA 214212B020

Notes:
The Kia Rio 3 timing chain is a fairly reliable element, much more reliable than a belt, but still its resource is not unlimited. The period for replacing the chain is not regulated, but it is recommended to check its tension after 70-90 thousand kilometers. In general, the chain should work out about 150-200 thousand km.
Symptoms of a circuit malfunction: knocking or clinking when the engine is running, the engine is unstable. In this article, we are talking specifically about how the timing chain is replaced on the Kia Rio.
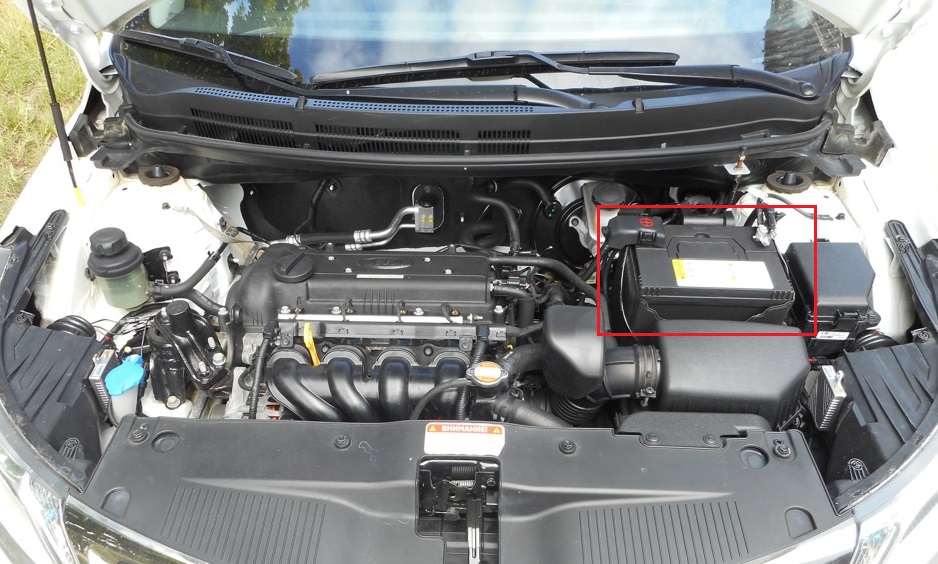
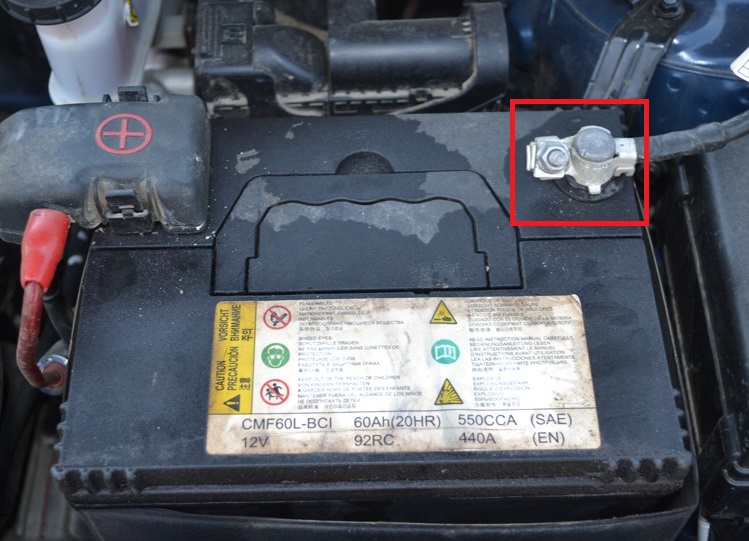
1. Disconnect a wire from the minus plug of the storage battery.
2. Using the “10” key, unscrew and remove the plastic cover on the engine.
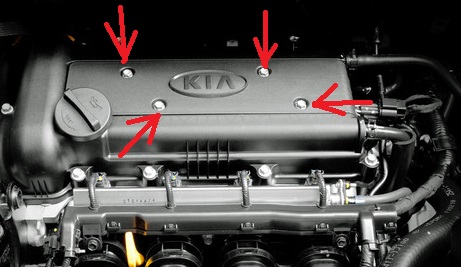
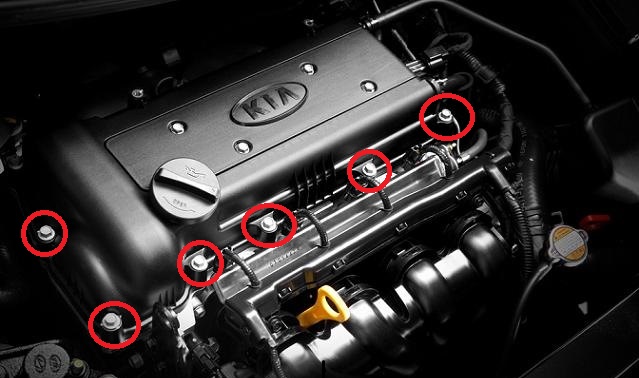
3. Turn off bolts and remove a cover of a head of the block of cylinders of the engine.
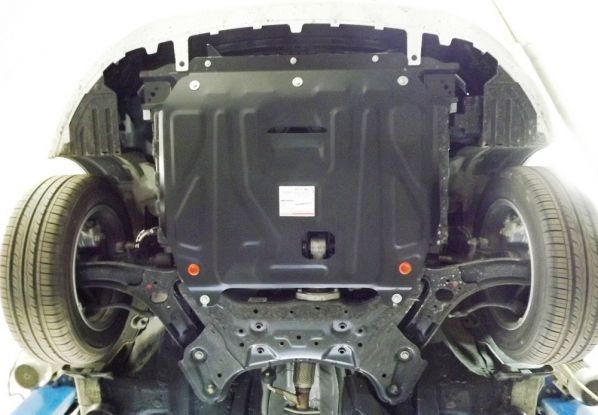
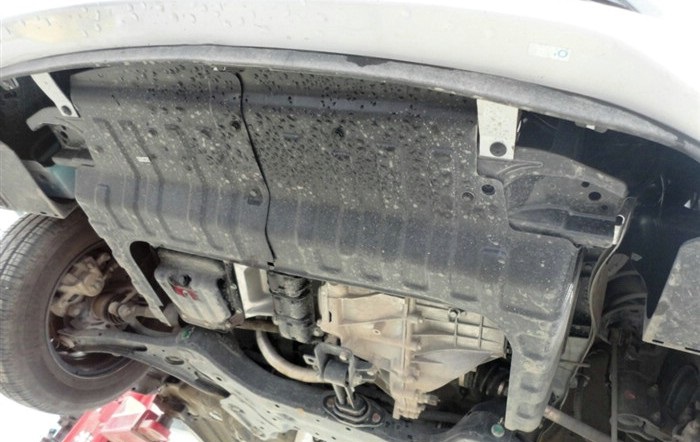
4. Remove the crankcase guard and right side engine mudguard from the vehicle.
5. Set the piston of the 1st cylinder to the TDC position of the compression stroke.
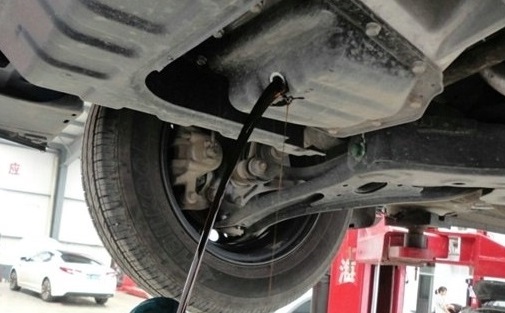
6. Drain the engine oil from the crankcase.
7. Establish a secure support under the engine oil sump through a wooden or rubber gasket.
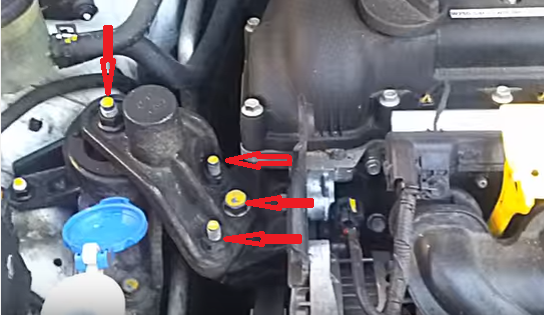
8. Turn away fixing bolts and nuts of an arm of the right support of a suspension bracket and remove it from the car engine.
9. Remove the accessory drive belt.
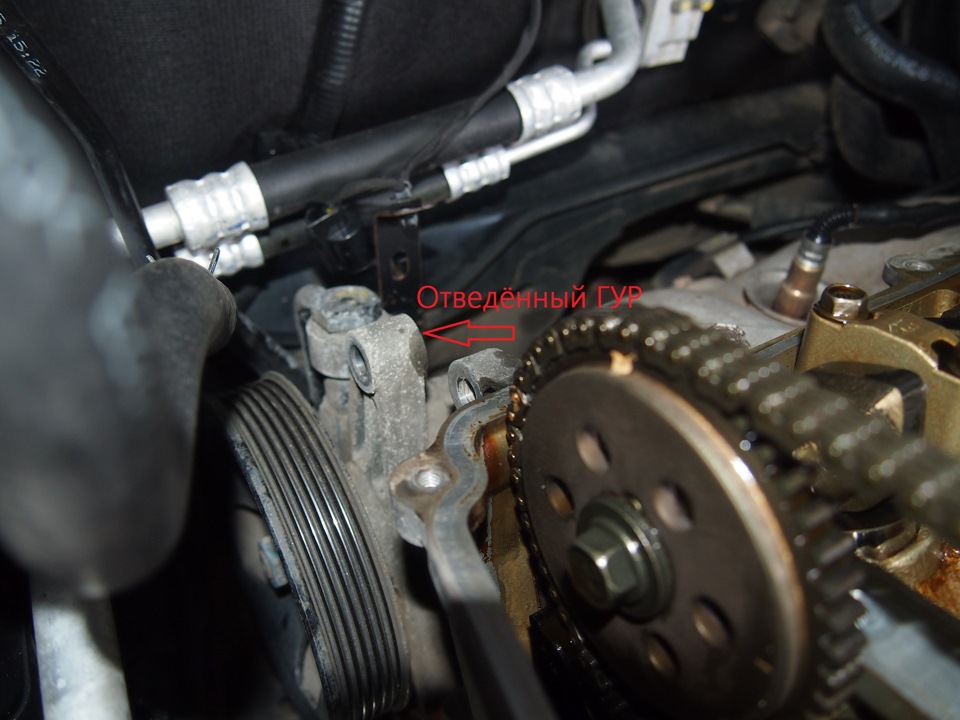
10. Turn out a bolt of the top fastening of the pump of the power steering.
11. Take the power steering pump Kia Rio 3 aside.
12. Loosen and remove the accessory drive belt tensioner mounting bolt (this bolt has a reverse thread). Remove the accessory drive belt tensioner.
13. Turn off 4 bolts of fastening of the bottom arm of the right support of a suspension bracket of the power unit to the engine and remove an arm.
14. Turn out a bolt of fastening of an intermediate roller of a belt of a drive of auxiliary units and remove a roller.
15. Remove the working fluid from the engine cooling system.

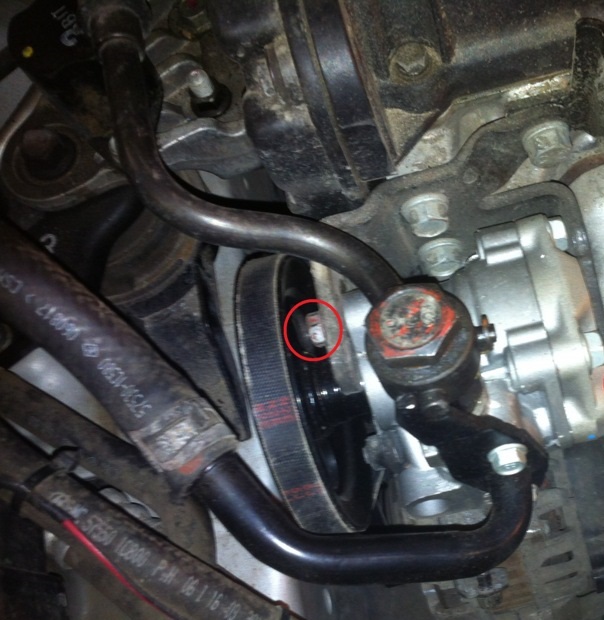
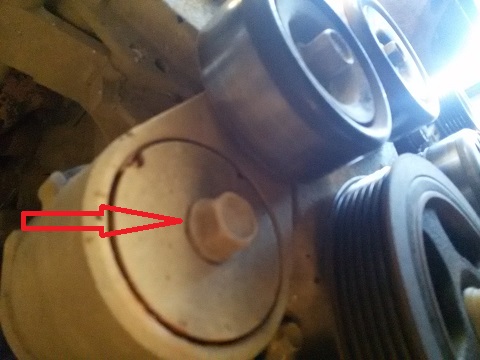
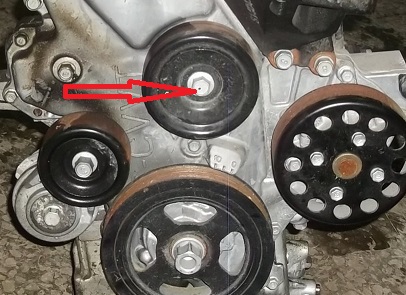
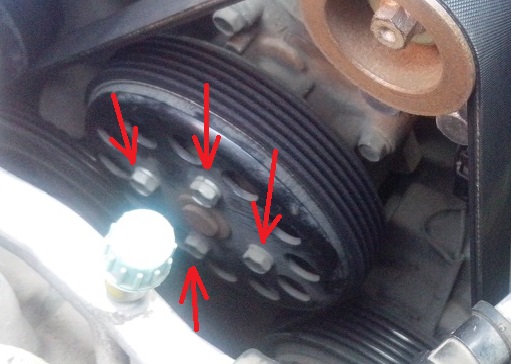
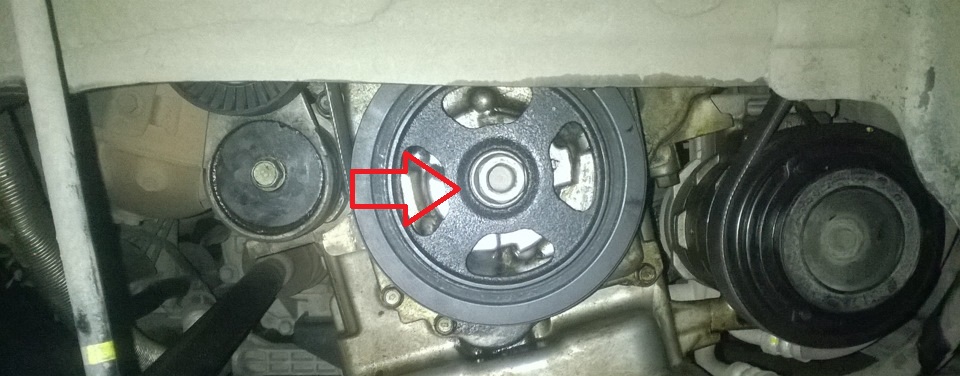
16. Loosen and remove the four coolant pump pulley mounting bolts while holding the pump pulley from turning. Remove the coolant pump pulley.
17. Turn away five fixing bolts of the pump of a cooling liquid to the block of cylinders of the engine and remove the pump.
18. Remove the gasket sealing the connection between the coolant pump and the engine block.
Note:
The seal gasket between the coolant pump and cylinder block must be replaced each time the pump is removed from the vehicle.
19. Holding the crankshaft pulley from turning with a special tool, unscrew the pulley mounting bolt and remove the pulley from the engine crankshaft.
Note:
If there is no tool to hold the pulley, then before unscrewing the bolt securing the accessory drive pulley, engage fifth gear in the gearbox and ask an assistant to depress the brake pedal.
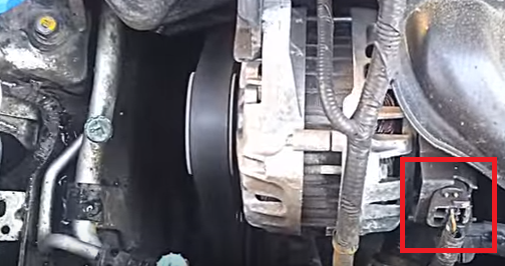
20. Wring out a fixing element of a block of a plait of wires, and then disconnect this block from an electric socket of the generator.
21. Remove from the generator the holder of a plait of wires together with wires.
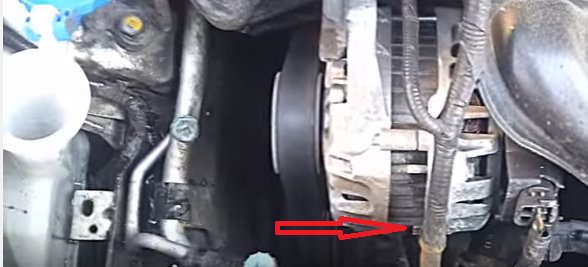
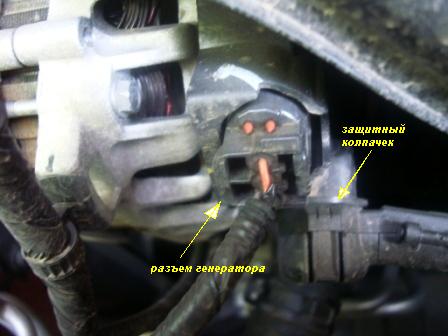
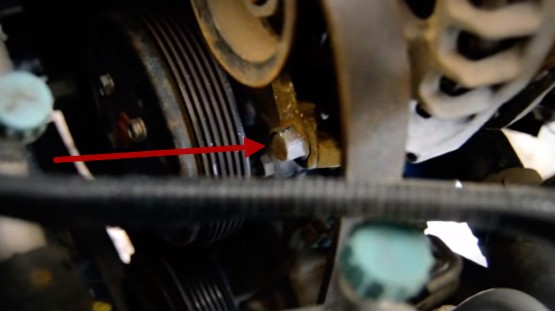
22. Fold away the cap protecting an output of the alternator. Unscrew and remove the fixing nut of the alternator power wire lug, and then disconnect the wire from the alternator.
23. Turn away and take the bottom fixing bolt of the generator.
24. Turn away and take the top fixing bolt of the generator to an arm.
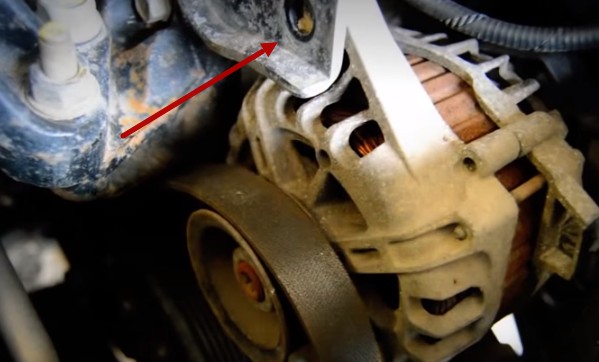
25. Remove the alternator from the vehicle.
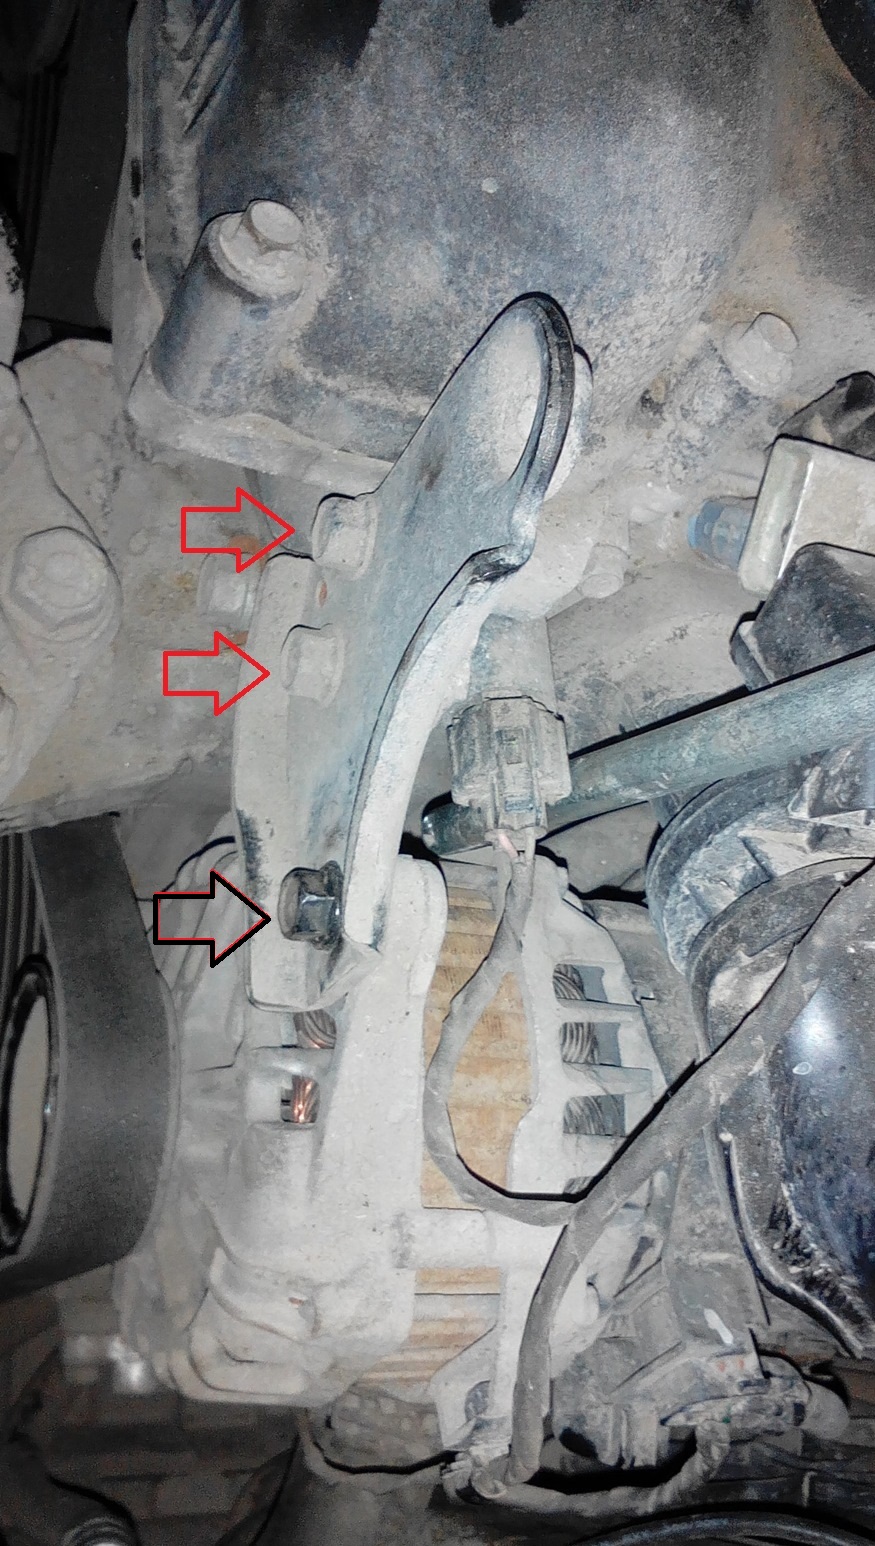
26. Turn away 2 bolts (red) fastenings of an arm of the generator and remove an arm.
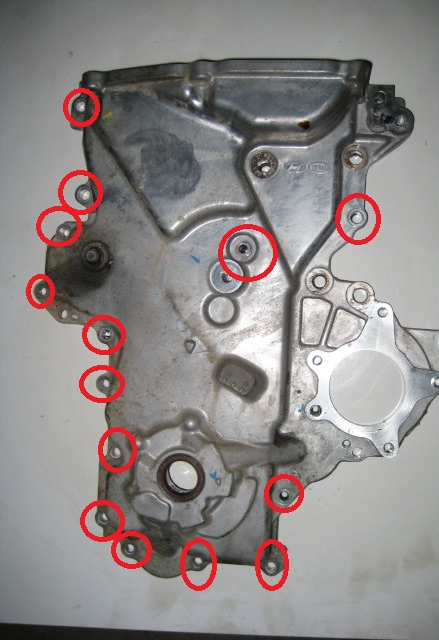
27. Turn away and take out fourteen fixing bolts of a protective cover of a driving chain of the gas-distributing mechanism and remove a cover.
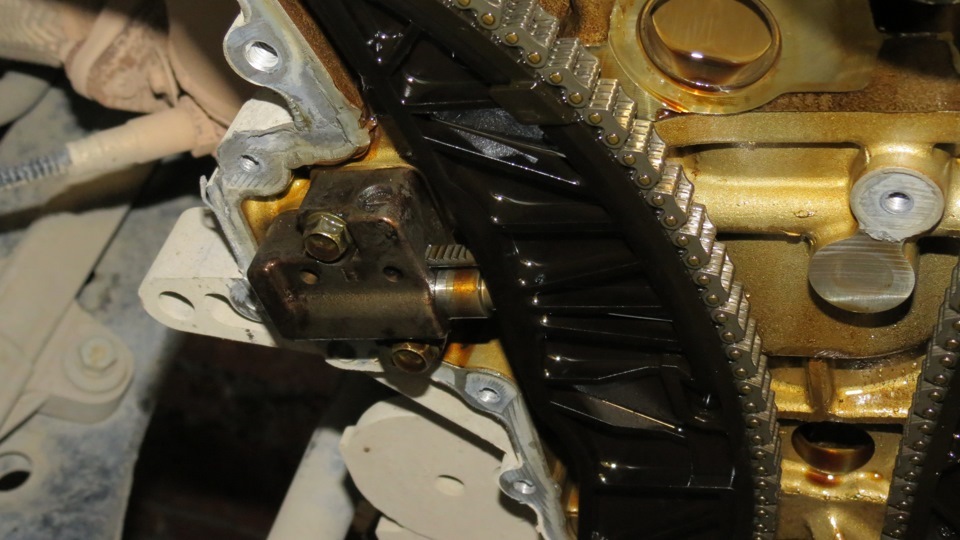
28. Using a special tool or a screwdriver, press the shoe of the timing chain tensioner, then fix the shoe from moving with the pin.
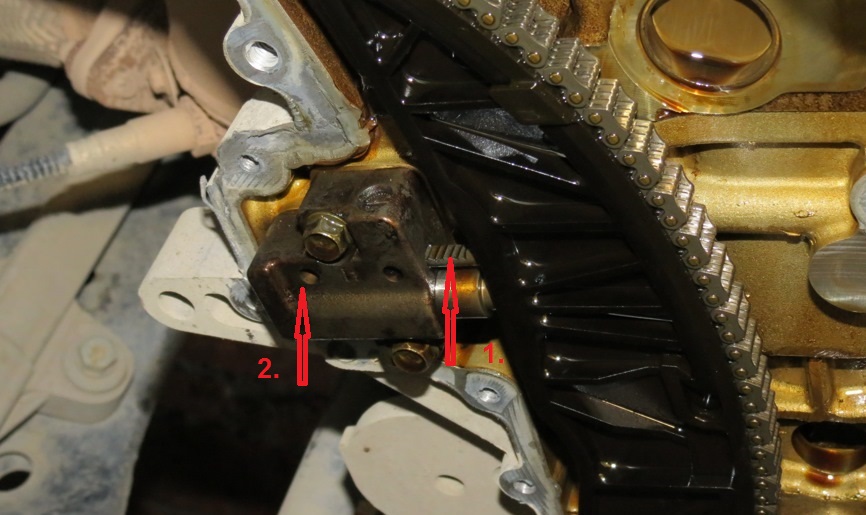
29. Loosen and remove the two timing chain tensioner mounting bolts.

30. Remove the timing chain tensioner.
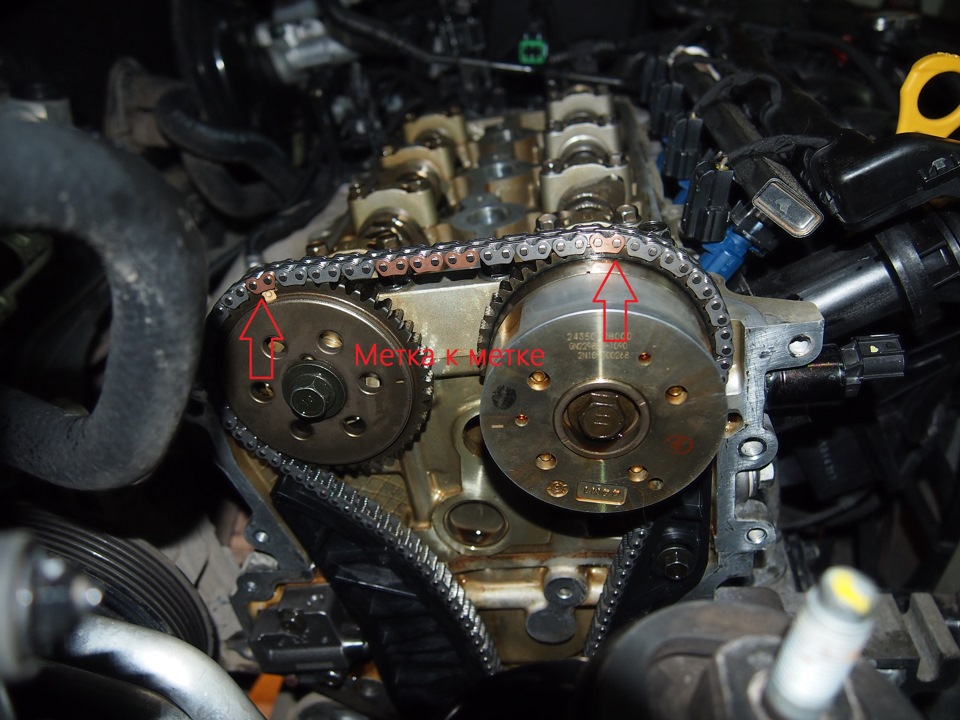
31. Slightly turn the exhaust camshaft clockwise and remove the chain from the camshaft gears and from the crankshaft gear.
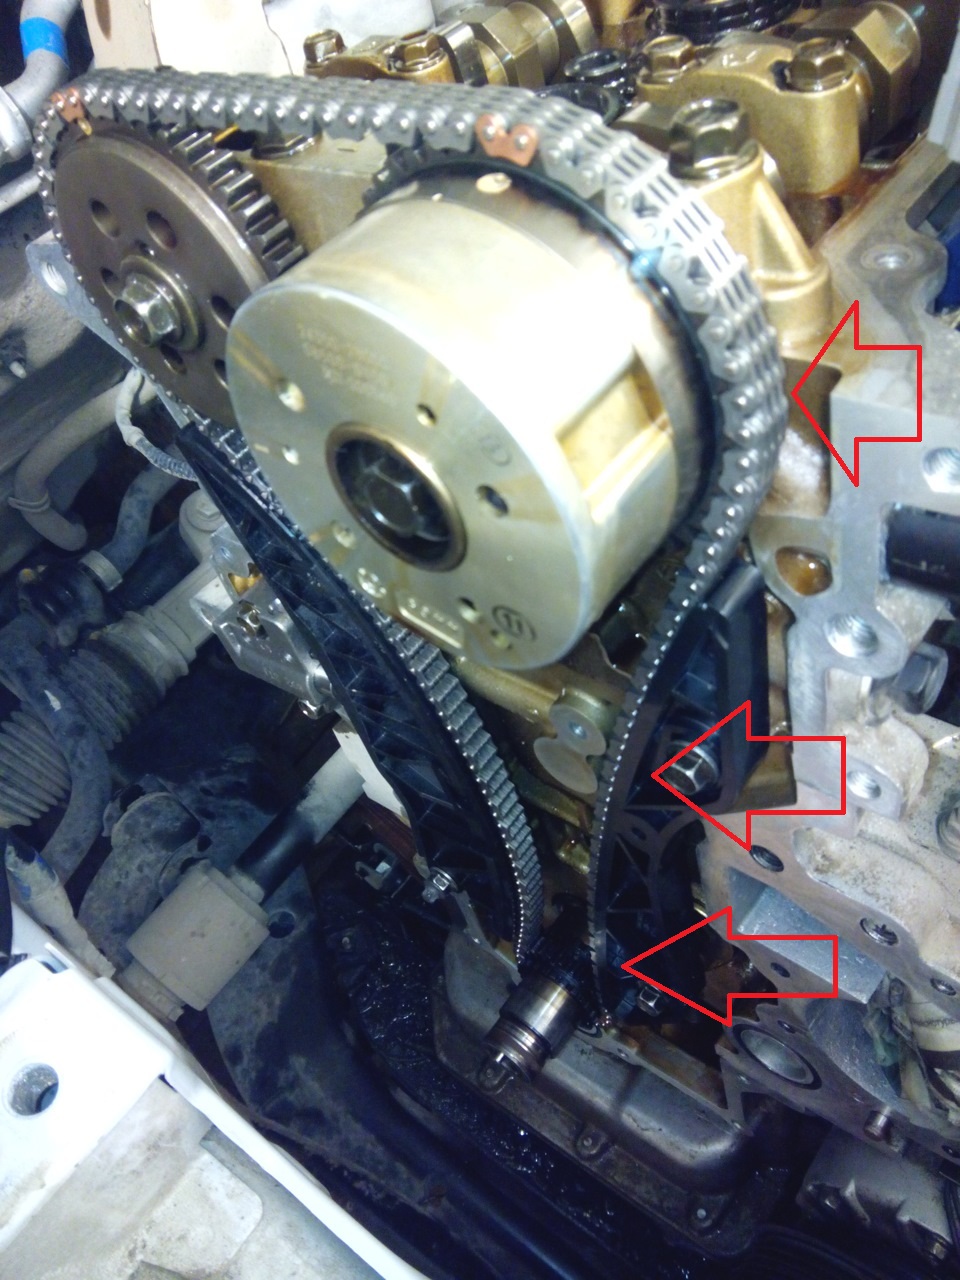
32. Install the chain in reverse order on the marks on the camshaft gears and on the chain (colored links), making sure that the locating pin on the crankshaft is at the top.
33. Install the timing chain tensioner, and then remove the pin from the hole in it.
34. Clean the mating surfaces of the timing chain tensioner and the engine block from the old sealant.
35. Apply a sealing agent to the mating surfaces of the engine block with a thickness of 3-5 millimeters, then install the cover.
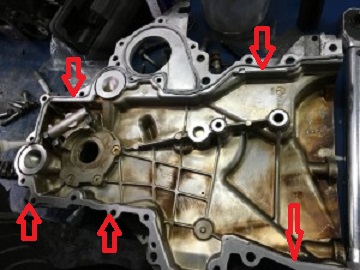
Note:
Screw in the fixing bolts and tighten evenly, in several stages:
- Ten-millimeter bolts with a torque of 9.8-11.8 Nm.
- Twelve-millimeter bolts with a torque of 18.6-23.5 Nm.
36. Check if the marks located on the gears of the camshafts and on the timing chain coincide, and then check the position of the engine crankshaft, the pin of which should be at the top.
37. Install all other parts in the reverse order of removal.
Note:
Replace the crankshaft oil seal every time you remove the timing chain cover .
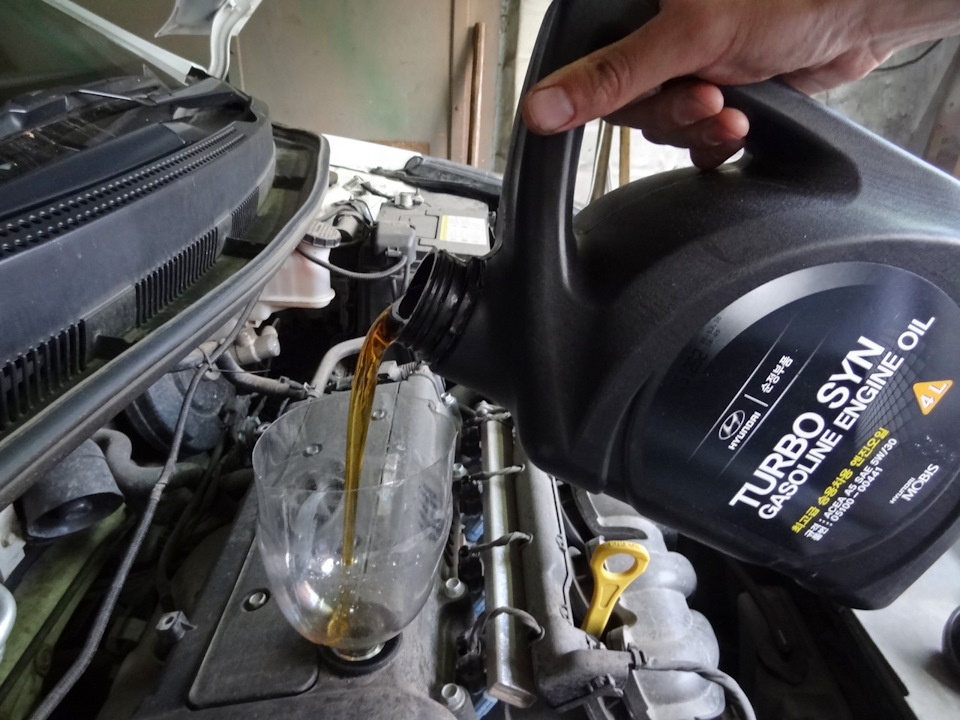
38. Fill the engine with engine oil.
The article is missing:
- Tool photo
- Photo of parts and consumables
- High-quality repair photos
- Repair Descriptions
Source: carpedia.club