![1 generation [2007 - 2010]](/uploads/Nissan_Qashqai_2007-2010_.jpg)
Tools:
- Small flat screwdriver
- Phillips screwdriver, medium
- Collar for end nozzle
- Nozzle on the crank 10 mm
Parts and consumables:
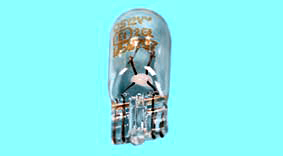
- Headlight bulbs
- side light lamp
- low beam lamp
- high beam lamp
- Reversing lamps
- Side turn signal lamp
- Additional brake light assembly
- Rubber seal for reversing lamp socket
- Fog lamps
- Rear fog lamp
- License plate lamps
- Luggage compartment lamps
- Clean gloves or rags
- Alcohol
Warning:
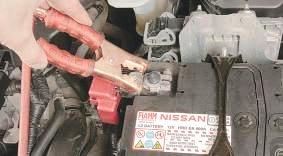
Before replacing bulbs in vehicle lighting, always disconnect the wire from the negative terminal of the battery.
To replace headlight bulbs, do the following:
1. Open the hood and place it on the stop.

2. Disconnect a wire from the minus plug of the storage battery.

Note:
For clarity, the replacement of the lamps is shown on the removed headlamp.
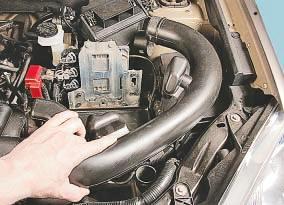
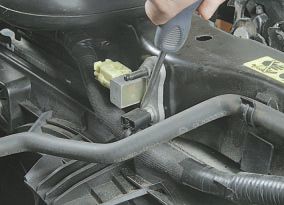
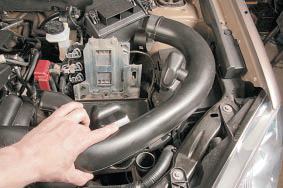
3. To replace the bulbs in the left headlight, remove the air intake as described here .
Note:
To replace the bulbs in the right headlight, you do not need to remove any elements.
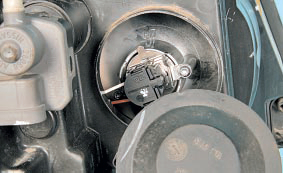
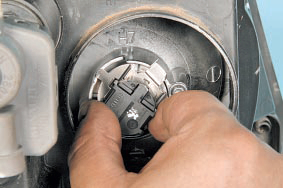
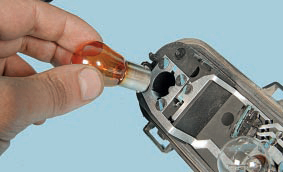
4. Turn the turn signal bulb socket counterclockwise 90°.
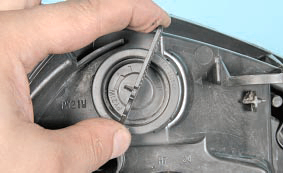
5. Remove the cartridge from the headlamp.
6. Grasp the bulb of the lamp with your fingers and turn it counterclockwise.
7. Remove the lamp from the socket.
8. Install the new bulb in the socket and the socket in the headlamp.
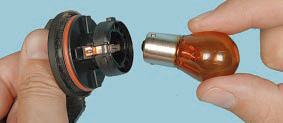
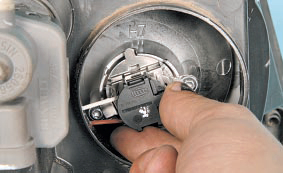
To replace the parking light bulb, do the following:
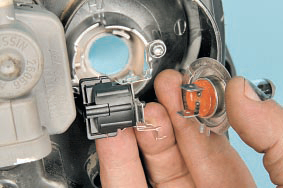
1. Turn its chuck clockwise.
2. Remove the cartridge from the headlamp.
3. Pulling on the bulb, remove the baseless lamp from the socket.
4. Install a new bulb in the reverse order of removal.
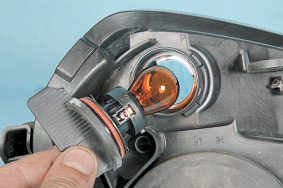
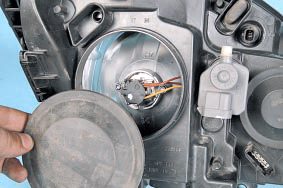
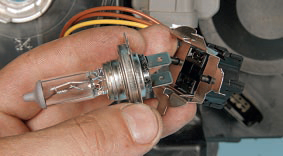
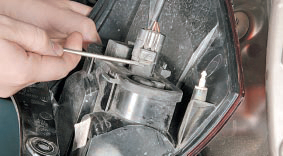
To replace the low beam bulb, do the following:
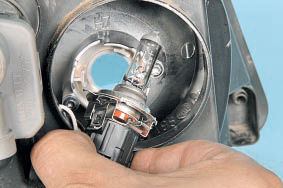
1. Peel back the rubber cover of this lamp opening and remove it.
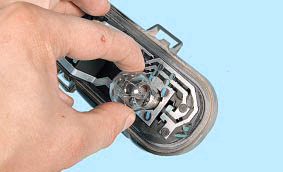
2. Grasp the low beam bulb holder.
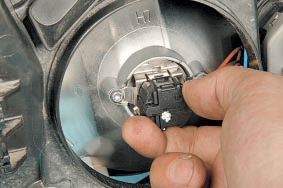
3. Turn the chuck counterclockwise.

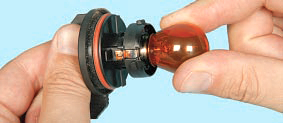
4. Remove the bulb holder from the headlamp.
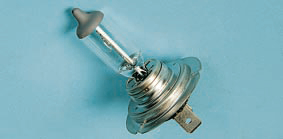
5. Remove the low beam bulb from the socket.
Warning:
Do not touch the lamp bulb with your fingers, as the lamp becomes very hot and greasy spots on it will cause the bulb to darken. Handle the bulb by the bulb only with clean gloves or a clean cloth. If there are still greasy stains on the lamp, remove them with alcohol.
6. Install a new bulb in the reverse order of removal.
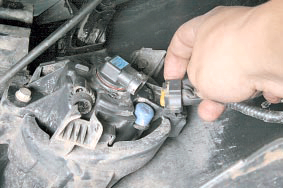
To replace the high beam bulb, do the following:
1. Peel back the rubber cover of the high beam bulb opening and remove the cover.
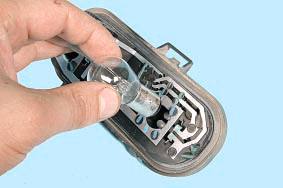
2. Grasp the high beam bulb holder.
3. Turn it counterclockwise.
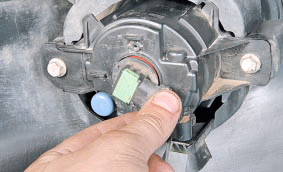
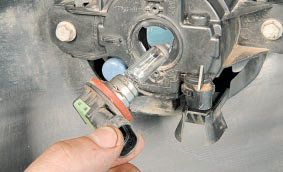
4. Remove the bulb holder from the block headlight.
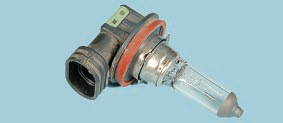
5. Remove the headlight high beam bulb from the socket.
Warning:
Do not touch the lamp bulb with your fingers, as the lamp becomes very hot and greasy spots on it will cause the bulb to darken. Handle the bulb by the bulb only with clean gloves or a clean cloth. If there are still greasy stains on the lamp, remove them with alcohol.
6. Install a new bulb in the reverse order of removal.

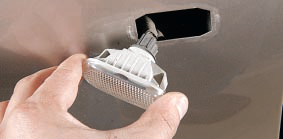
To replace the side turn signal bulb, do the following:
1. Disconnect a wire from the minus plug of the storage battery.

2. Move the side turn signal lamp forward in the direction of vehicle travel.
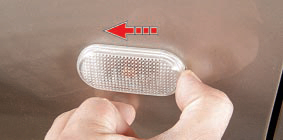
3. Take a lantern from an aperture of a forward wing.
4. Rotate the turn signal bulb holder.
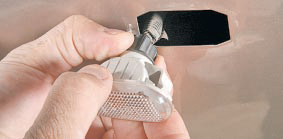
5. Remove the bulb holder from the lamp.
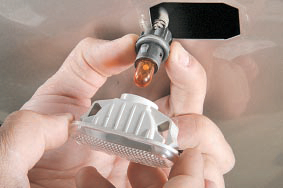
6. Pull on the lamp bulb.
7. Remove the lamp from the socket.
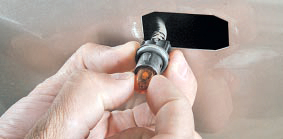
8. Install a new bulb in the reverse order of removal.
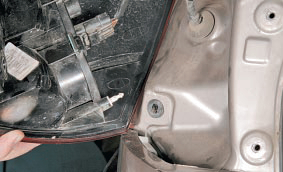
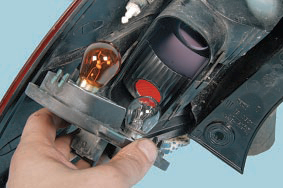
To replace the turn signal, brake and tail light bulbs in the tail light, proceed as follows:
1. Disconnect the wire from the "minus" terminal of the battery and open the tailgate of the car.

2. Turn out the top and bottom bolts of fastening of a back lantern.
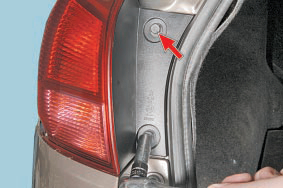
3. Overcoming the resistance of the clamps, remove the lamp from the body panel.
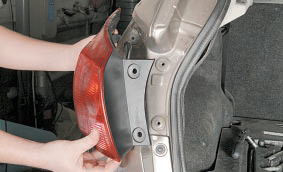
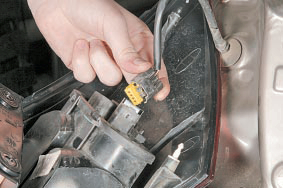
4. Unfold the lantern.
5. Use a screwdriver to pry up the wiring harness retainer.
6. Having disconnected block, remove a lantern.
7. Wring out a clamp of the holder of lamps.
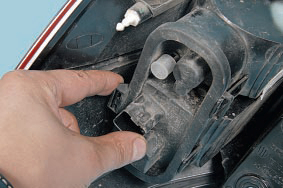
8. Take the holder with lamps from an aperture of a back lantern.
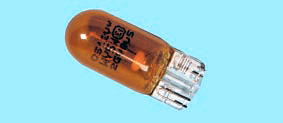
Note:
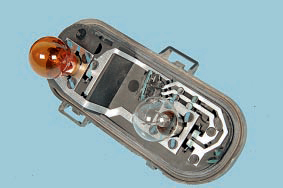
It looks like a holder with lamps, taken from the rear light of the car.
The designations of the lamps used are marked on the lamp holder.
9. Take the turn signal bulb bulb with your fingers.
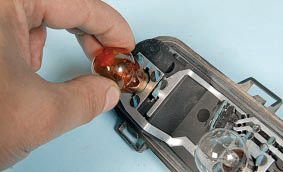
10. Turn the lamp counterclockwise to remove it from the holder.
11. Press on the bulb of the brake light and tail light.
12. Turning the lamp counterclockwise, remove it from the holder.
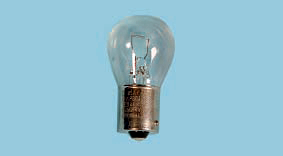
Note:
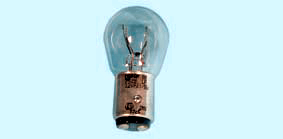
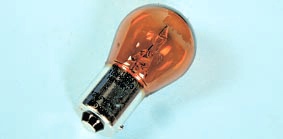
The rear light of the car uses a double-filament lamp.
13. Install new bulbs and all parts in the reverse order of removal.
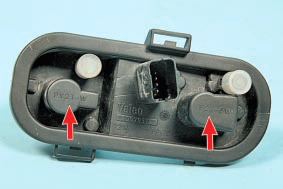
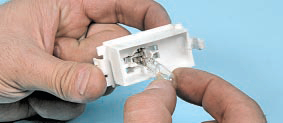
To replace the reversing light bulbs on the tailgate, proceed as follows:
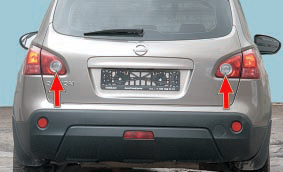
The location of the reversing lights on the tailgate of the car.
1. Disconnect the wire from the "minus" terminal of the battery and open the tailgate of the car.

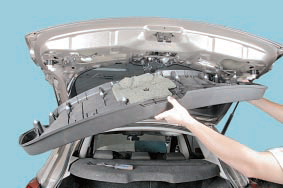
2. Remove the bottom part of facing of a door of a back.
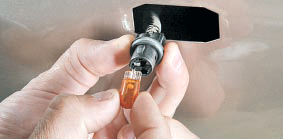
3. Turn the reversing light bulb socket counterclockwise.
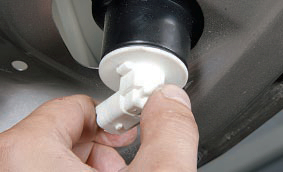
4. Remove the cartridge from the lamp.
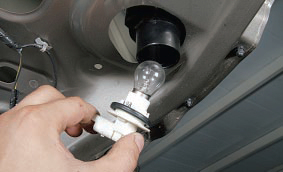
5. Press the reversing light bulb bulb.

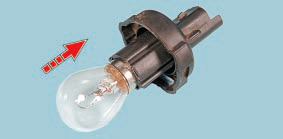
6. By turning the bulb counterclockwise, remove it from the socket (for clarity, shown on the removed reversing lamp socket).
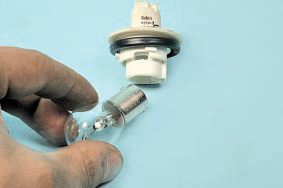
Note:
Replace the second reversing light bulb in the same way.
7. Inspect the rubber seal, replace a heavily hardened and cracked seal.
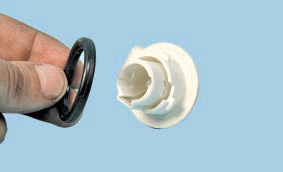
8. Install a new lamp and all parts in the reverse order of removal.
To replace the bulb in the fog lamp, do the following:
1. Disconnect a wire from the minus plug of the storage battery.
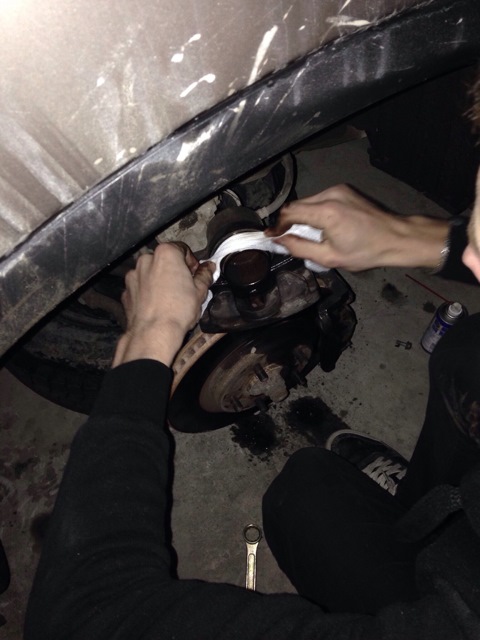
2. Remove the front engine mudguards as described here .
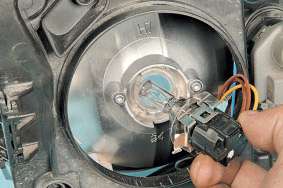
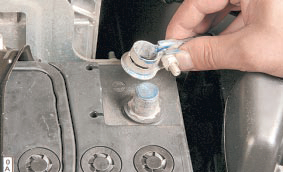
3. Wring out a clamp of a block of a plait of wires of a fog lamp.
4. Disconnect the block from the lamp.
5. Rotate the lamp counterclockwise by approximately 45°.
6. Remove the bulb from the fog lamp.
Warning:
Do not touch the lamp bulb with your fingers, as the halogen lamp gets very hot and greasy spots on it will cause the bulb to darken. Handle the bulb by the bulb only with clean gloves or a clean cloth. If there are still greasy stains on the lamp, remove them with alcohol.
7. Install a new fog lamp bulb and all removed parts in the reverse order of removal.
To replace the bulb in the rear fog light, do the following:
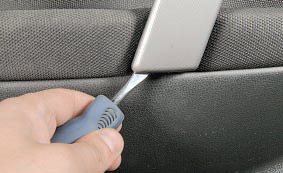
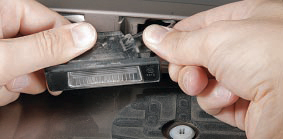
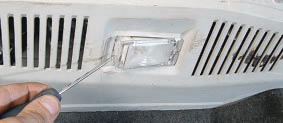
1. Pry off the rear fog light with a screwdriver.
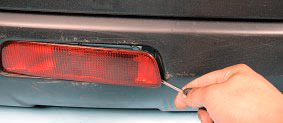
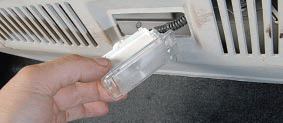
2. Overcoming the resistance of the clamps, remove the rear fog lamp from the niche in the rear bumper.
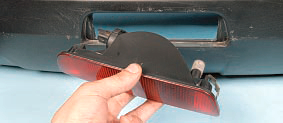
Note:
Further, for clarity, part of the operations is shown on the removed fog lamp.
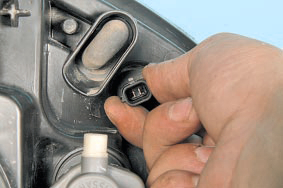
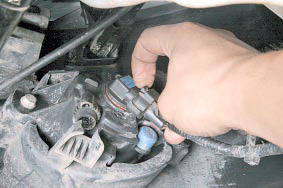
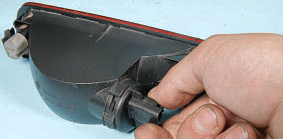
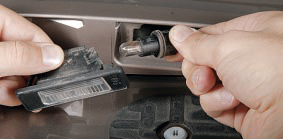
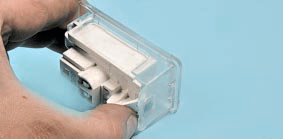
3. Press the retainer of the wire block of the fog light bulb socket and, having disconnected the block from the cartridge, release the lamp.
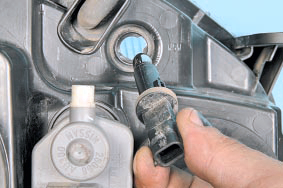
4. Rotate the lamp socket counterclockwise 45°.
5. Remove the cartridge assembly with the lamp.
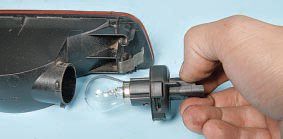
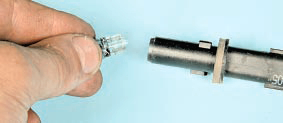
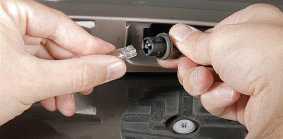
6. Press your fingers on the fog lamp bulb.
7. Turning the lamp counterclockwise, remove it from the socket.

8. Install a new lamp and all parts in the reverse order of removal.
To replace bulbs in license plate lights, do the following:
1. Disconnect a wire from the minus plug of the storage battery.

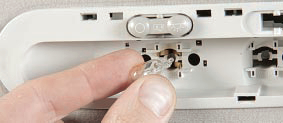
2. Pry off the edge of the license plate light with a screwdriver.
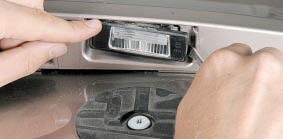
3. Overcoming the resistance of the spring clip, remove the lamp from the hole in the tailgate.
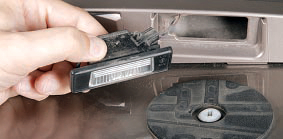
4. Turn the license plate light bulb socket counterclockwise.
5. Remove the bulb holder from the lamp.
6. Remove the baseless lamp from the socket.
7. Install the new bulb in the reverse order of removal.
8. Replace the bulb in the other license plate light in the same way.
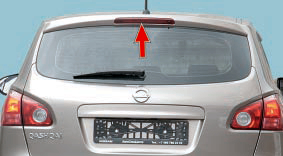
Replacing the LEDs of the additional brake light is not provided by the design, therefore, if the diodes fail, replace the additional brake light assembly.
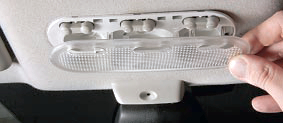
To replace the bulb in the front dome light, proceed as follows:
1. Disconnect a wire from the minus plug of the storage battery.

2. Pry off the edge of the diffuser of the front interior lighting with your fingers and remove the diffuser.
3. Remove the lamp from the spring contacts.
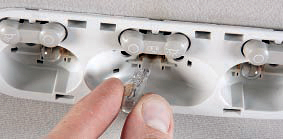
4. Install a new lamp and all parts in the reverse order of removal.
Note:
The remaining lamps of the front ceiling lamp are removed in the same way.
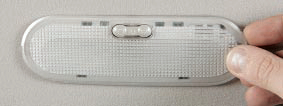
To replace the bulb in the rear dome light, proceed as follows:
1. Disconnect a wire from the minus plug of the storage battery.

2. Pry off the edge of the rear dome light diffuser with your fingers.
3. Remove the diffuser from the cover.
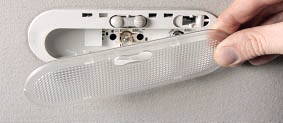
4. Remove the lamp from the spring contacts.
5. Install a new bulb in the reverse order of removal.
To replace the luggage compartment dome light bulb, proceed as follows:
1. Disconnect the wire from the "minus" terminal of the battery and open the tailgate of the car.

2. Use a screwdriver to pry off the edge of the luggage compartment lamp diffuser.
3. Take a plafond from an aperture of facing of a luggage carrier.
4. Press the Luggage compartment lamp diffuser latch and remove the diffuser (shown on the luggage compartment lamp removed for clarity).
5. Remove the lamp from the spring contacts.
6. Install a new bulb in the reverse order of removal.
The article is missing:
- High-quality repair photos
- Tool photo
- Photo of parts and consumables
Source: http://nissan-qashqai.dv13.ru/elektrooborudovanie/zamena-lamp/