The layout of the controls complies with the UNECE safety standards and regulations. For ease of use, the knobs, buttons and control devices located on the instrument panel and other additional control panels are marked with symbols of their functional purpose.
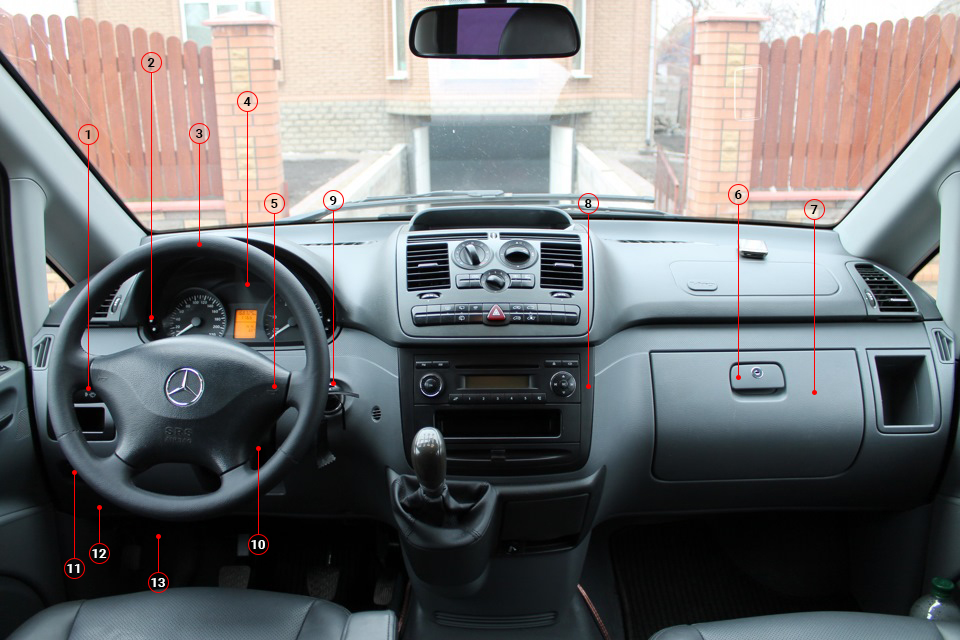
Vehicle controls
The instrument panel contains the following controls and instrumentation:
1 - Combination switch: turn signal, wiper, high beam.
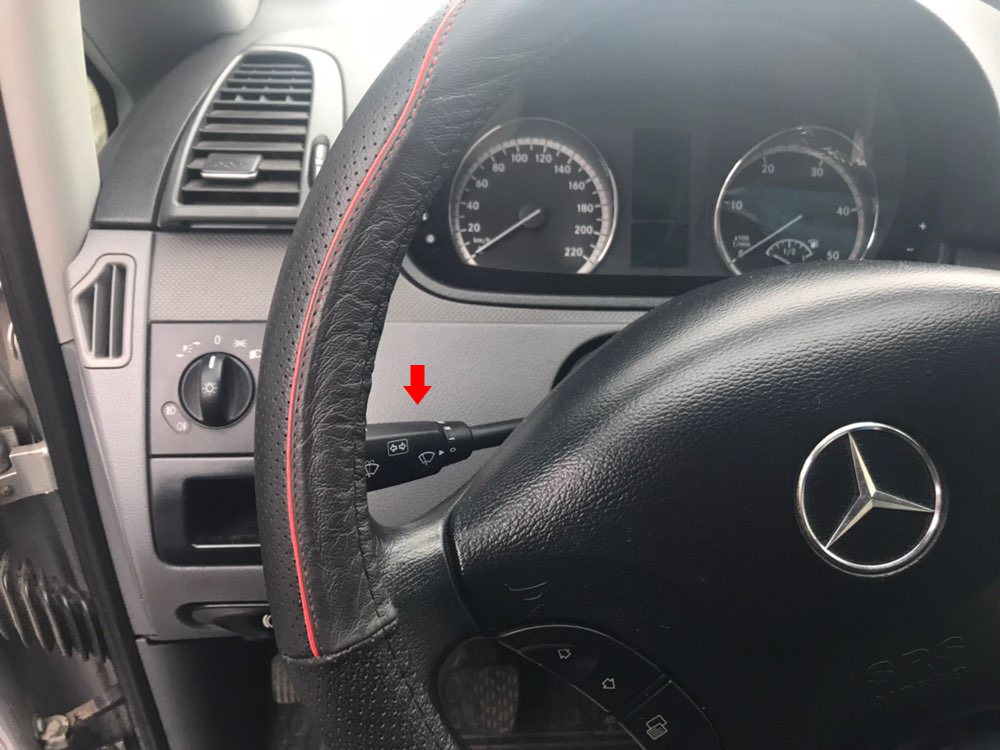
To control the high beam, use the switch located on the steering column (move the handle towards you or away from you). The main beam is on when the key is inserted into the ignition switch, in position 1 and the dipped beam is on.
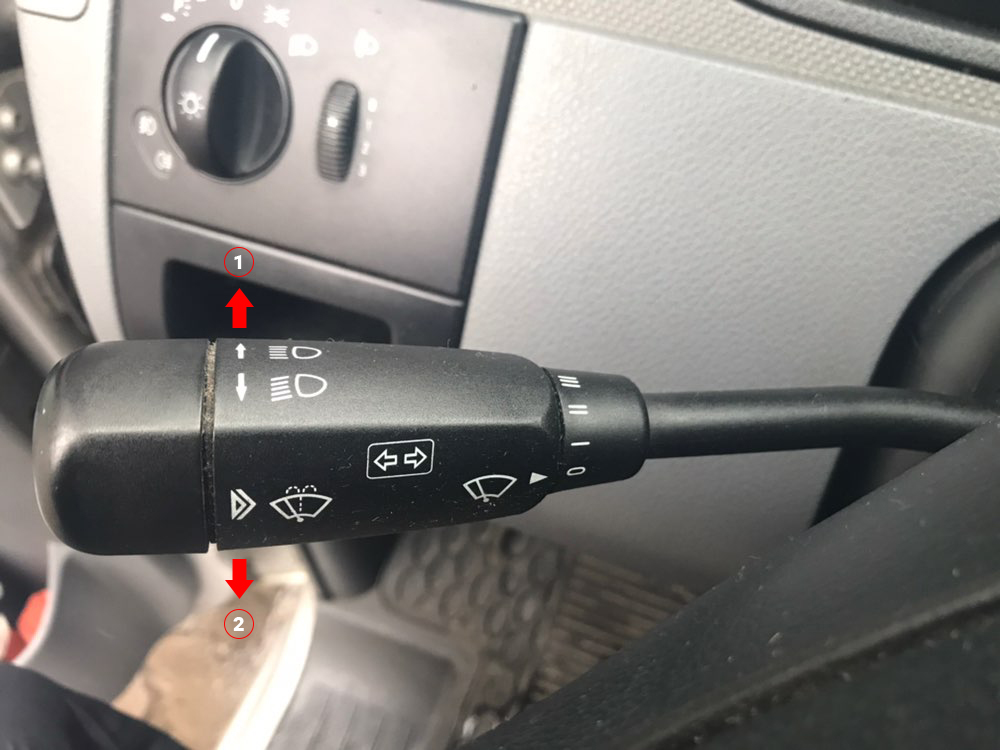
1. If you move the handle away from you, the high beam will turn on
2. If the handle is pulled towards you, the high beam warning light will be on
The high beam indicator lamp will illuminate in the instrument cluster.
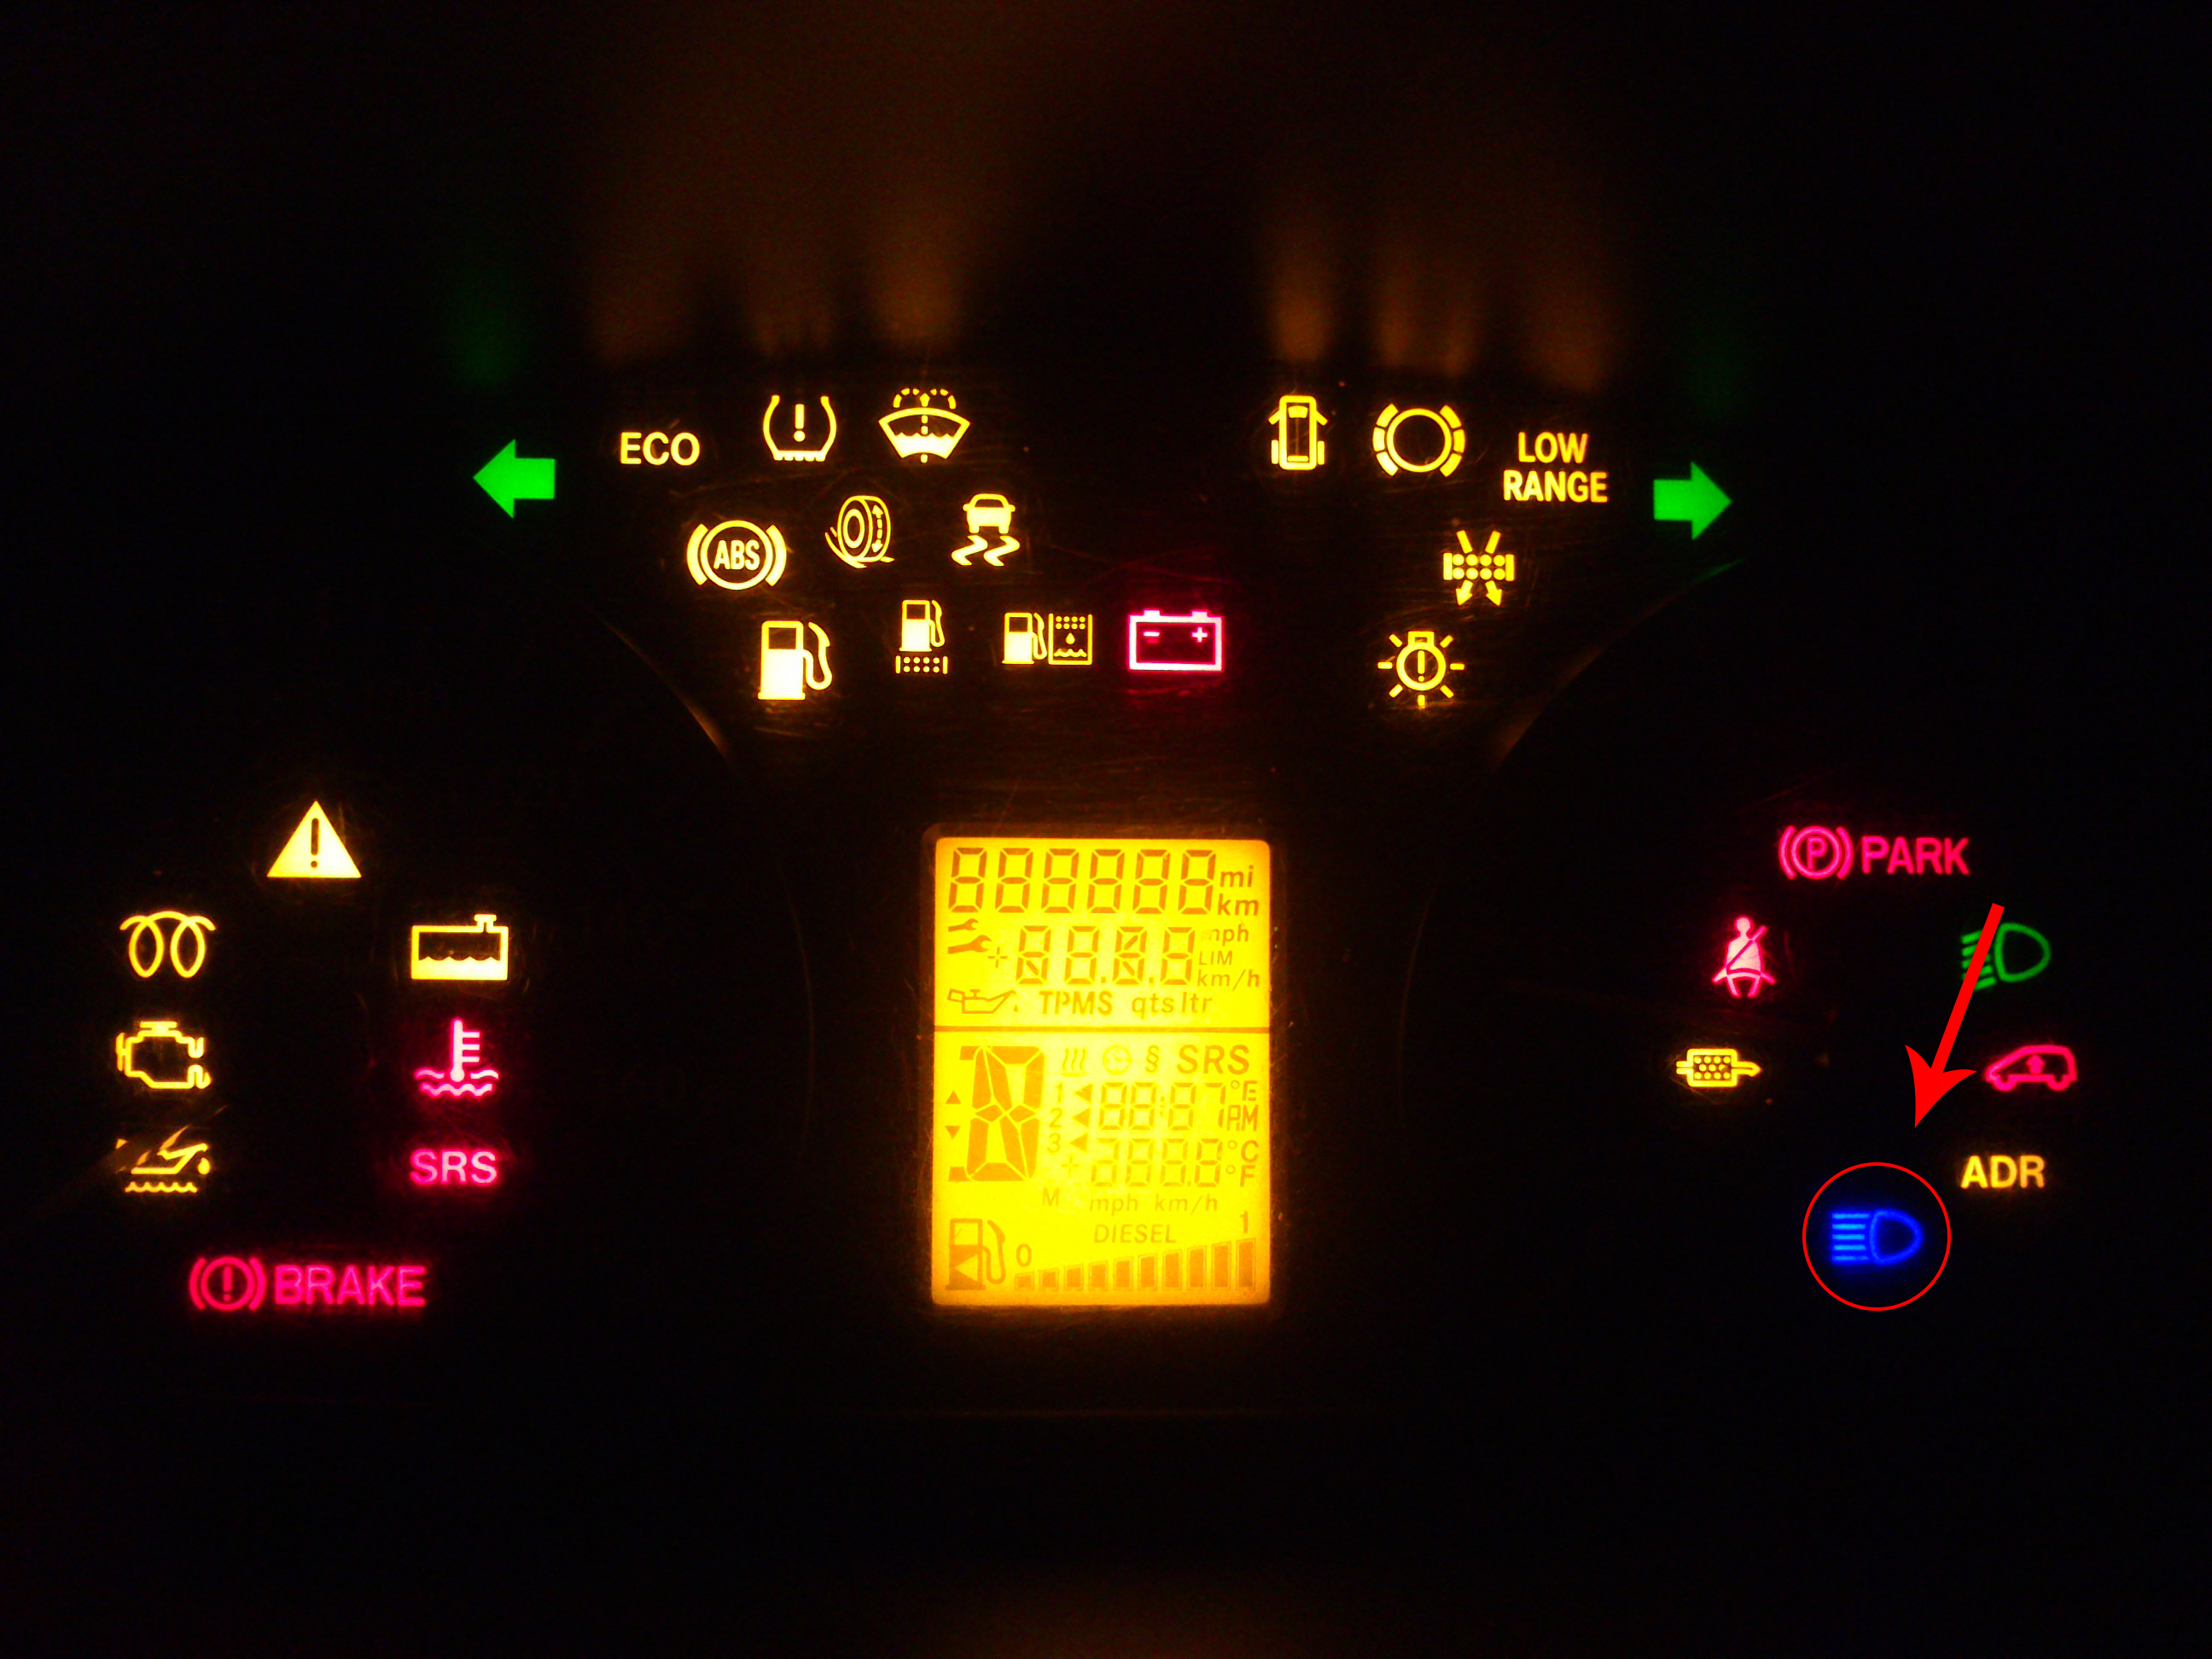
High beam indicator
Move the lever up or down until the direction indicators turn on. When the lever is moved up or down in the instrument cluster, the turn signal indicator starts flashing. When the steering wheel is returned to the straight-ahead position, the lever is automatically returned to its original position. When changing lanes, to turn on the direction indicator, it is enough to press the lever in the up or down direction only until the moment of tangible resistance, without fixing the lever. When released, the lever will return to its original position.
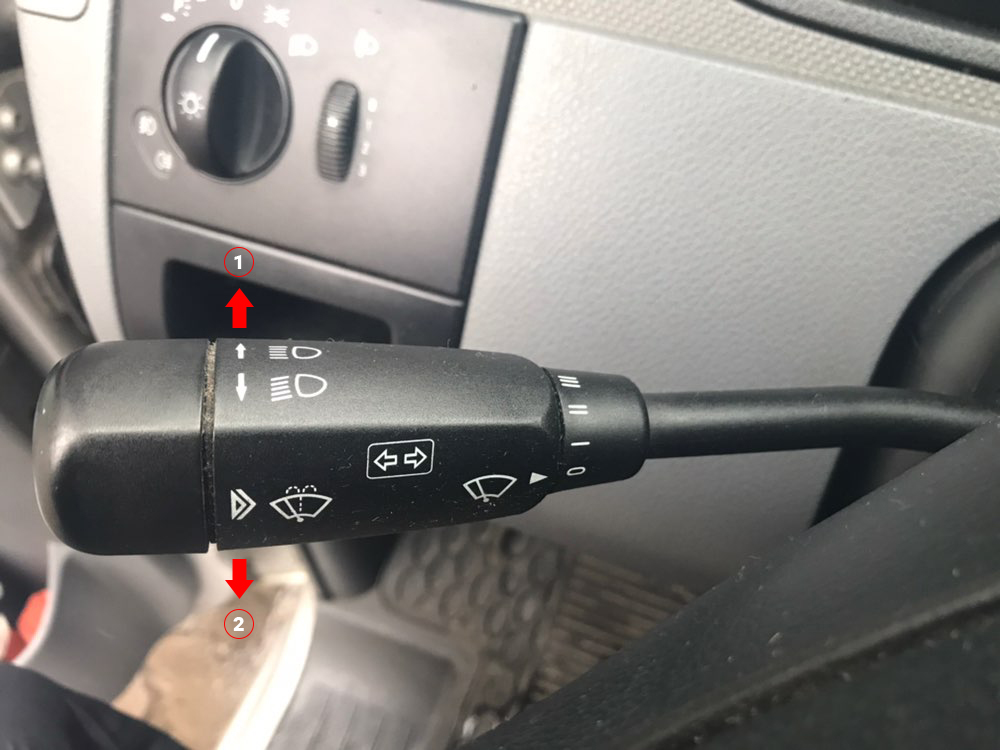
1 - If the handle is moved up, the right turn signal will turn
on 2 - If the handle is moved down, the left turn signal will turn on
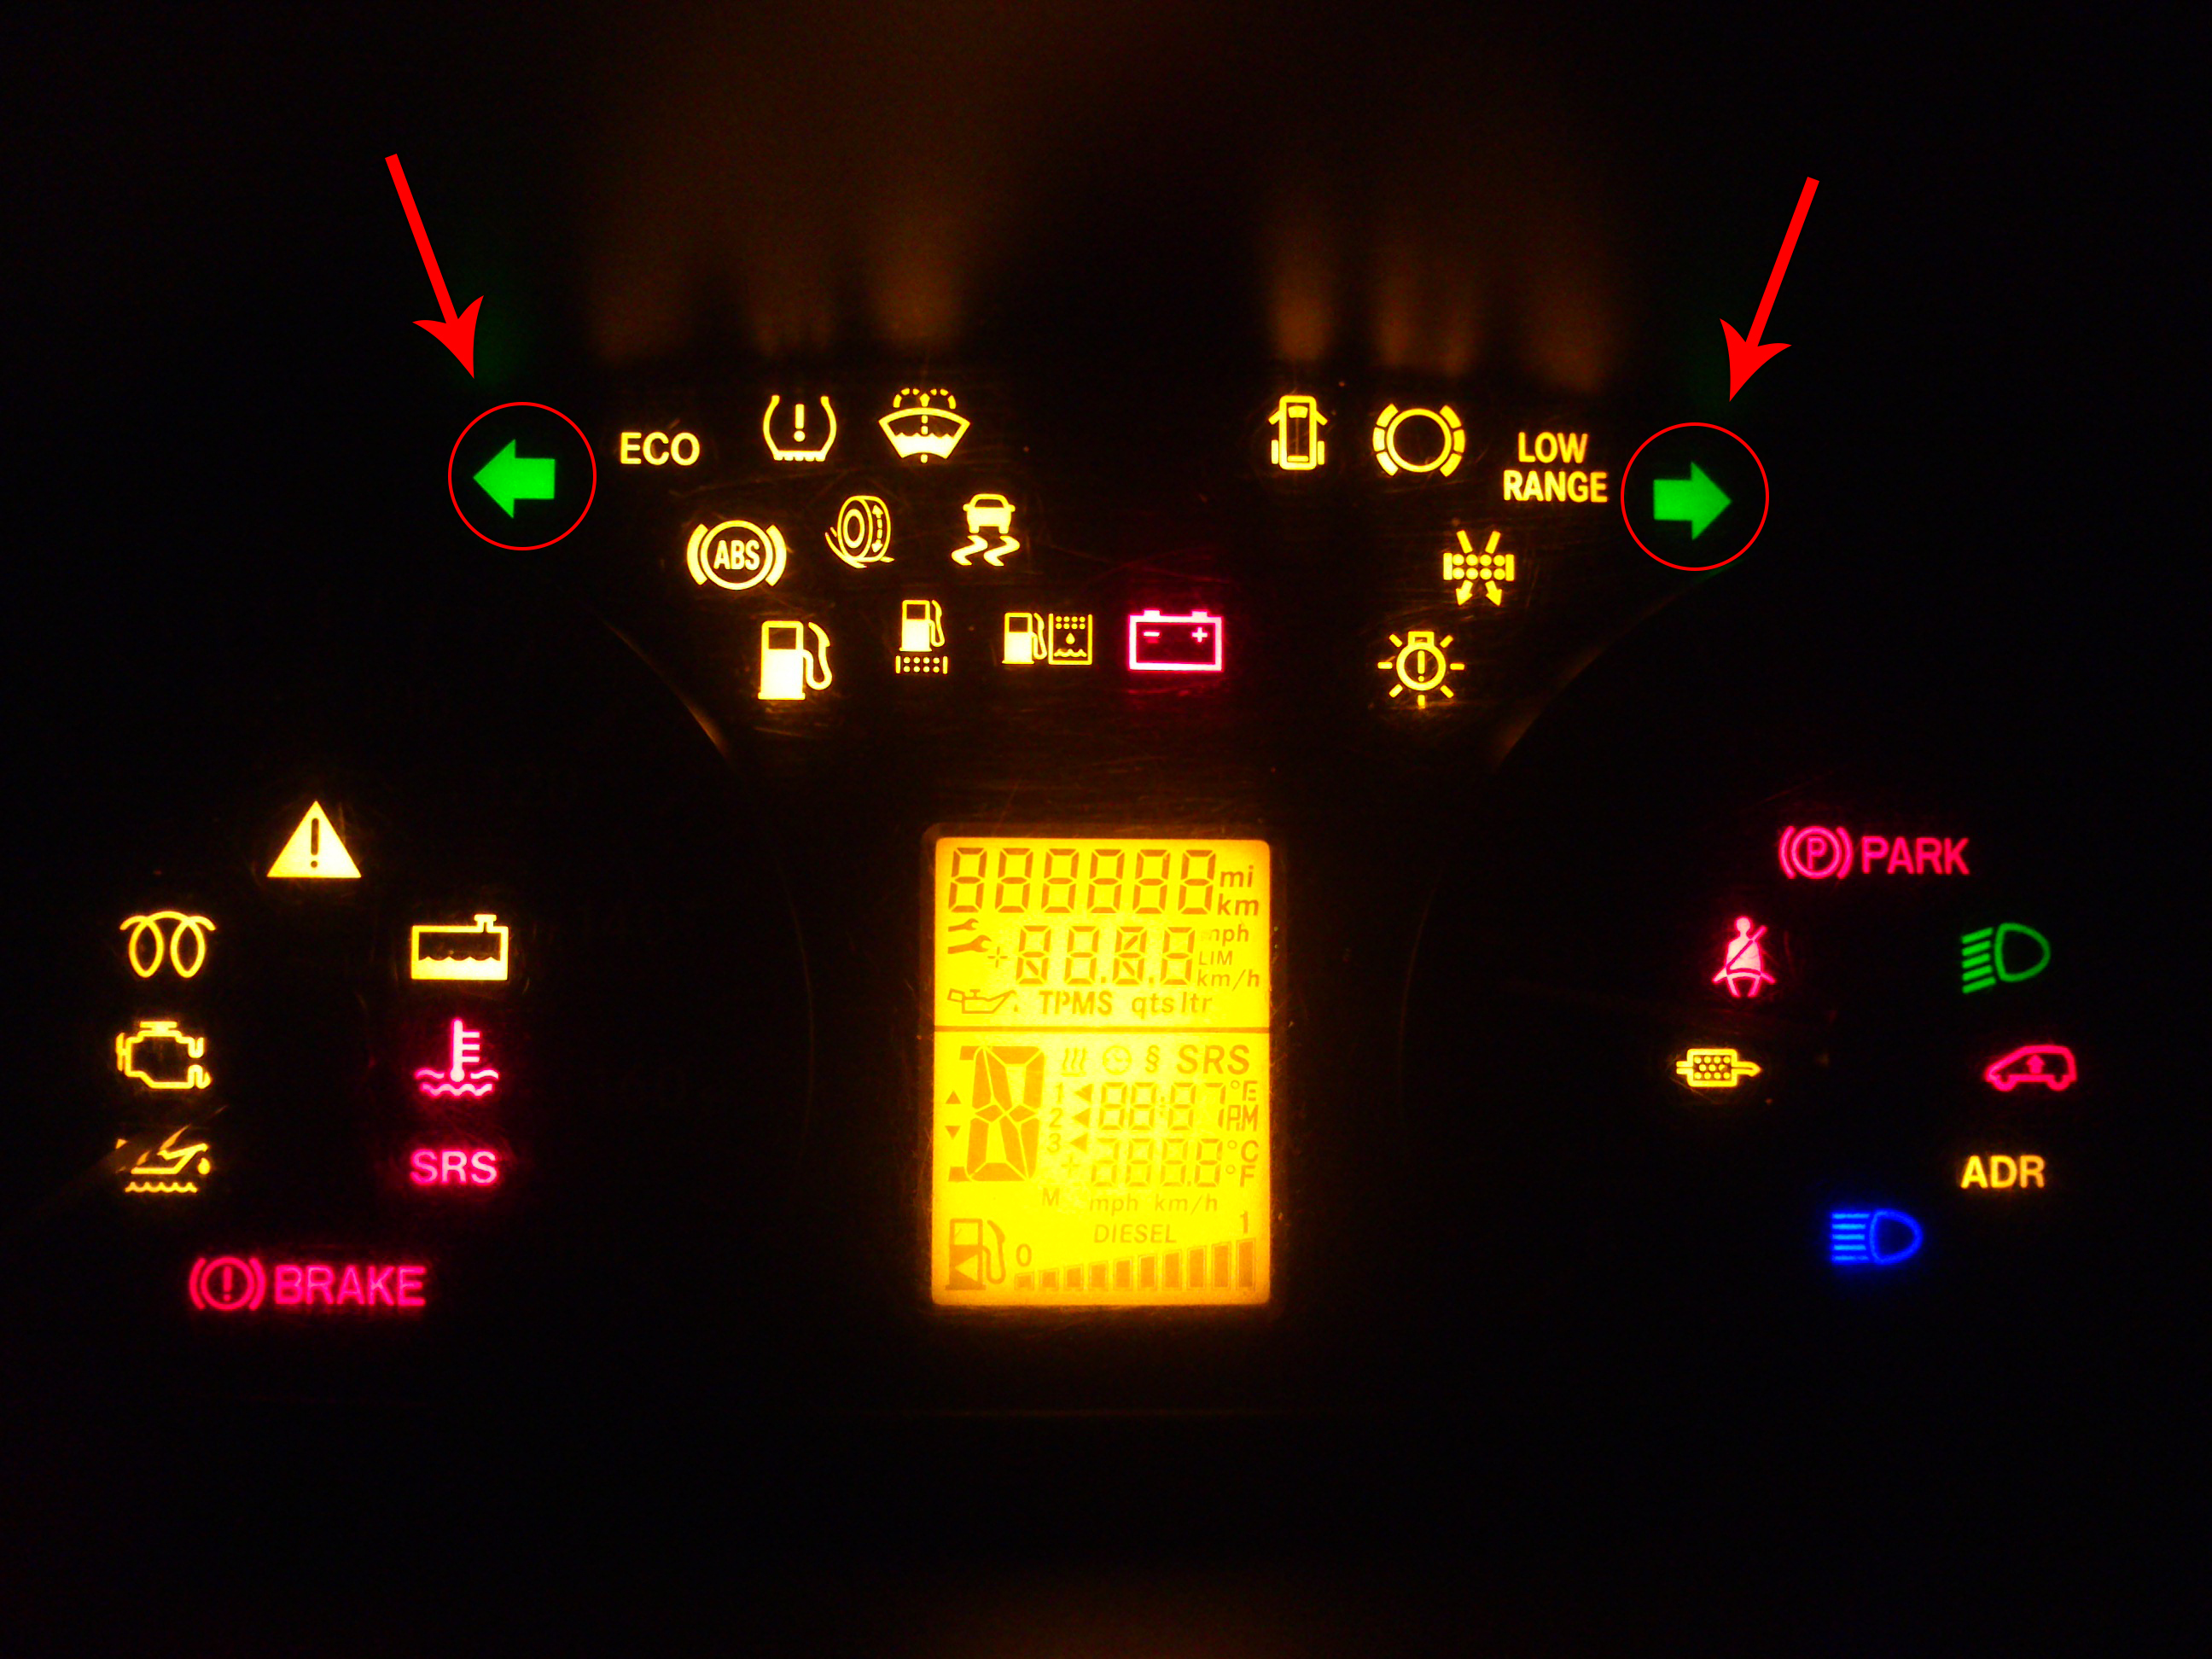
Turn Signal Indicators
The wiper is turned on by turning the combined lever. First make sure the ignition is on. Then turn the combination lever to the required position according to the intensity of the rain.
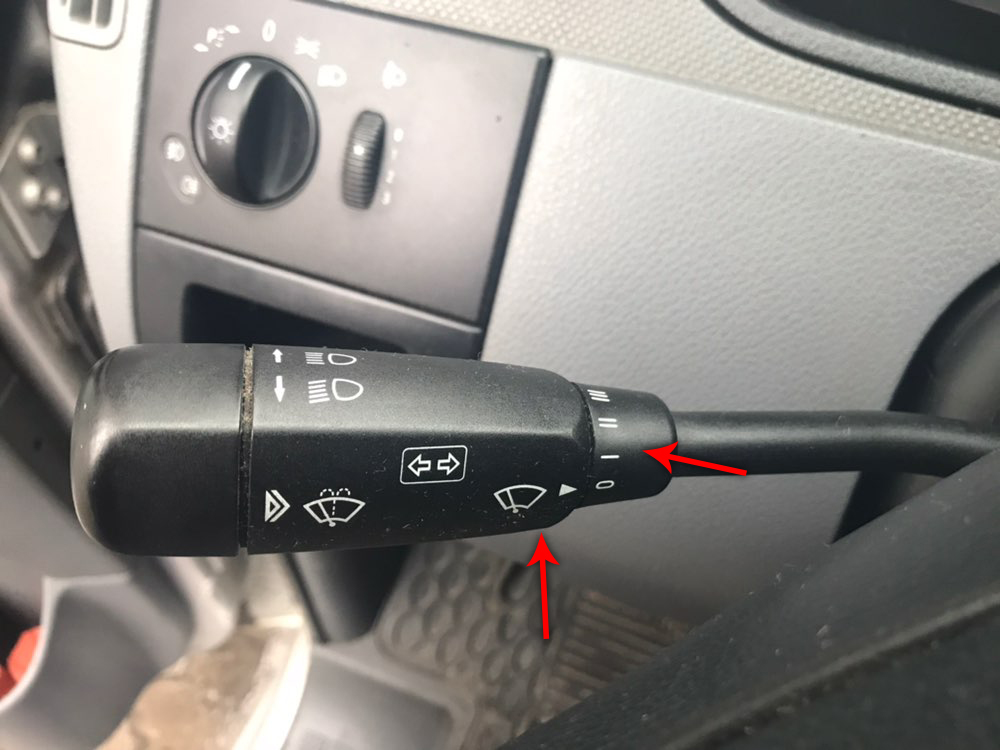
- 0 - The wiper is off;
- I - Intermittent operation (the interval depends on the amount of water);
- II - Normal operation;
- III - Accelerated mode of operation.
Note:
If the car moves at a speed of less than 5 km/h or stops, the switched on wiper automatically switches to the next lower operating mode stage.
One movement of the wiper blades:
Press the switch briefly in the direction of the arrow (towards the steering wheel). The wiper will perform one brush stroke without water supply from the washer reservoir.
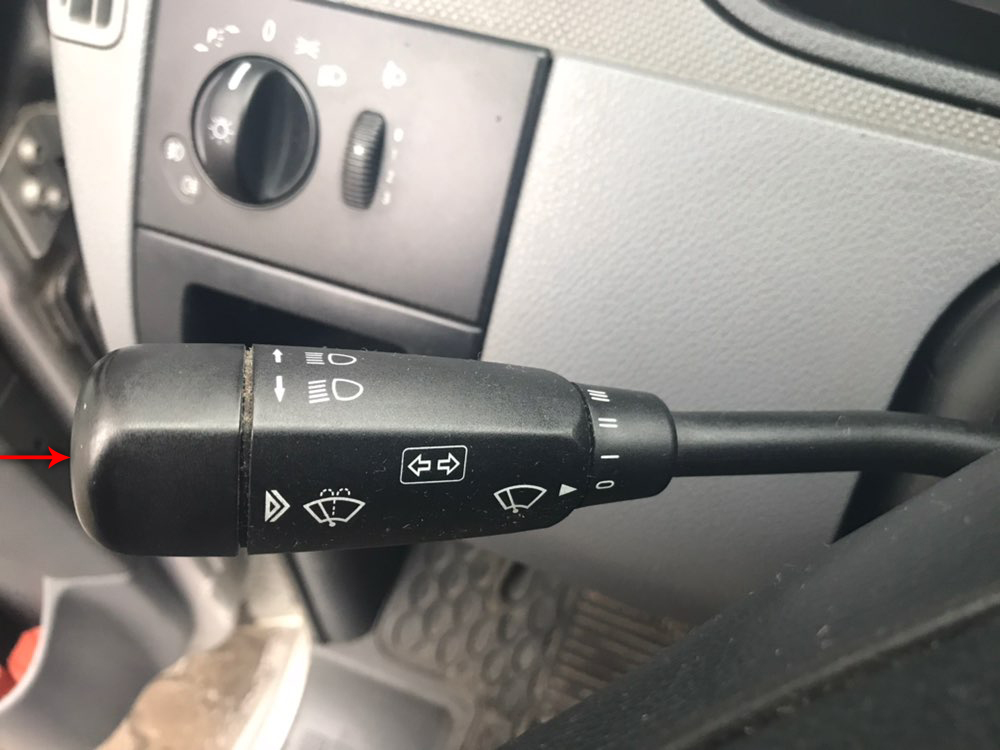
Cleaning windows with water supply from the washer reservoir:
Press the switch in the direction of the arrow to cross the resistance point. The wiper cleans the glass with water supplied from the washer reservoir.
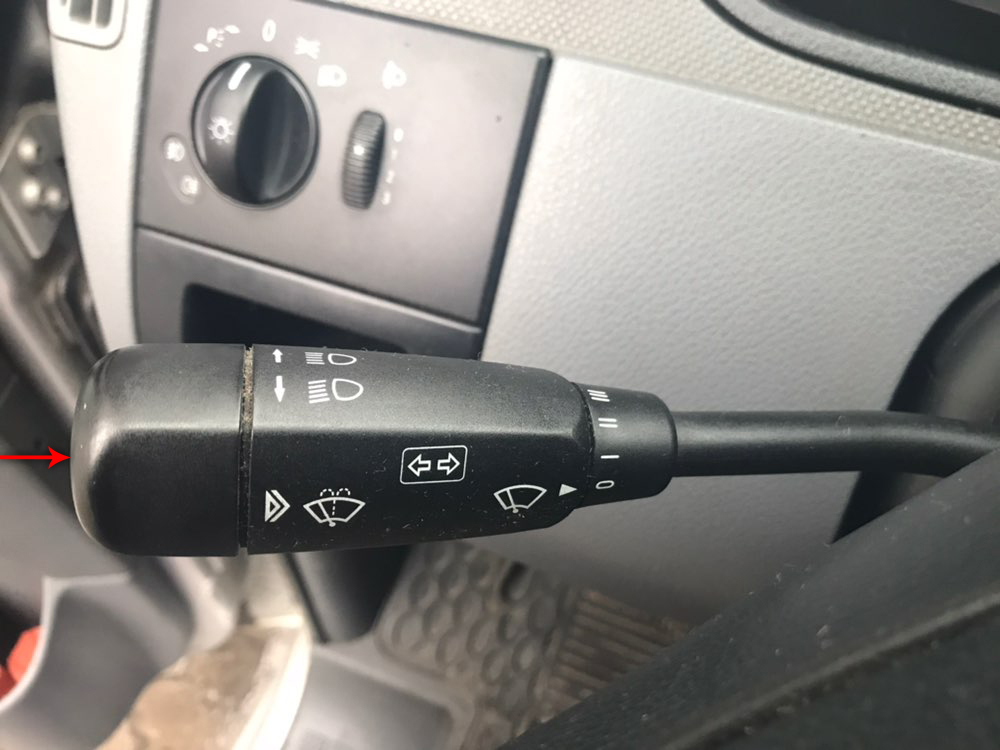
Note:
Switch on the windshield washer reservoir also in case of rain. This will prevent the formation of streaks on the windscreen. The rear screen wiper automatically cleans the glass when the windscreen wiper is on and in reverse gear.
2 - the Lever of the TEMPOMAT switch
- TEMPOMAT
- System "DISTRONIC"
- SPEEDTRONIC system
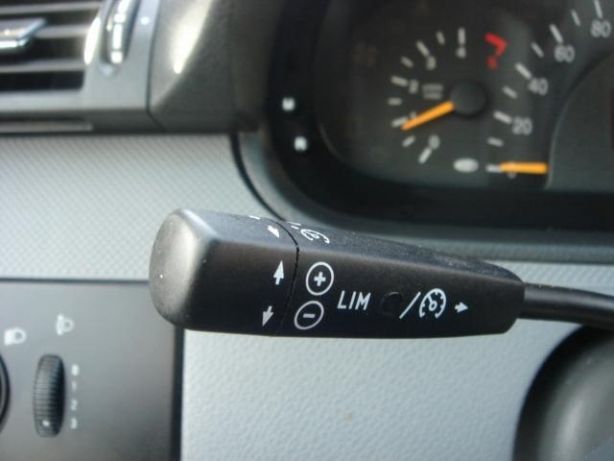
TEMPOMAT switch lever
3 - Multifunctional steering wheel
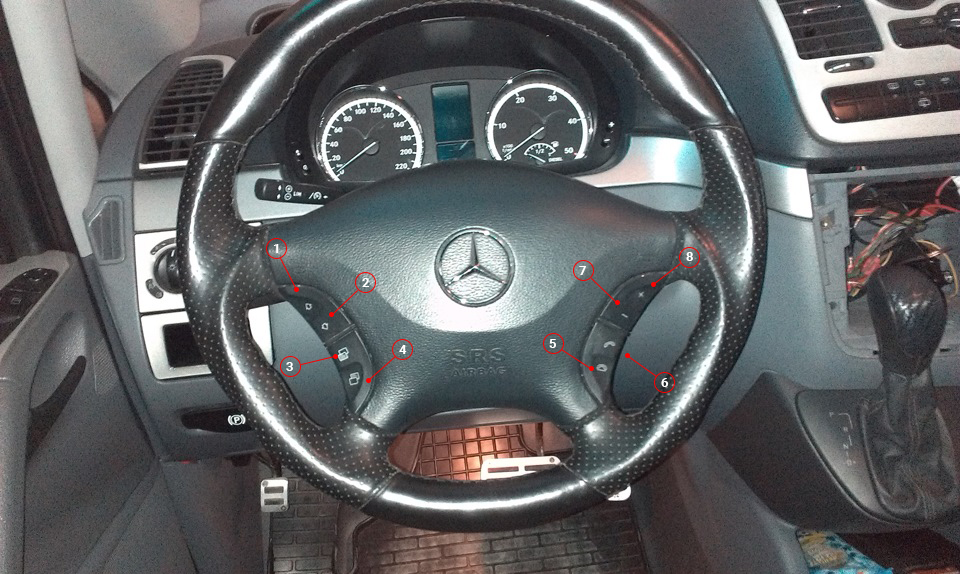
The steering wheel buttons may be installed depending on the vehicle equipment.
View menu items within one menu:
1 - Forward.
2 - Back.
Moving from menu to menu:
3 - Forward.
4 - Back.
Using the phone:
5 - End of telephone conversation.
6 - Receiving a telephone conversation.
Management system management. Volume control:
7 - Hush.
8 - Louder.
4 - Instrument cluster .
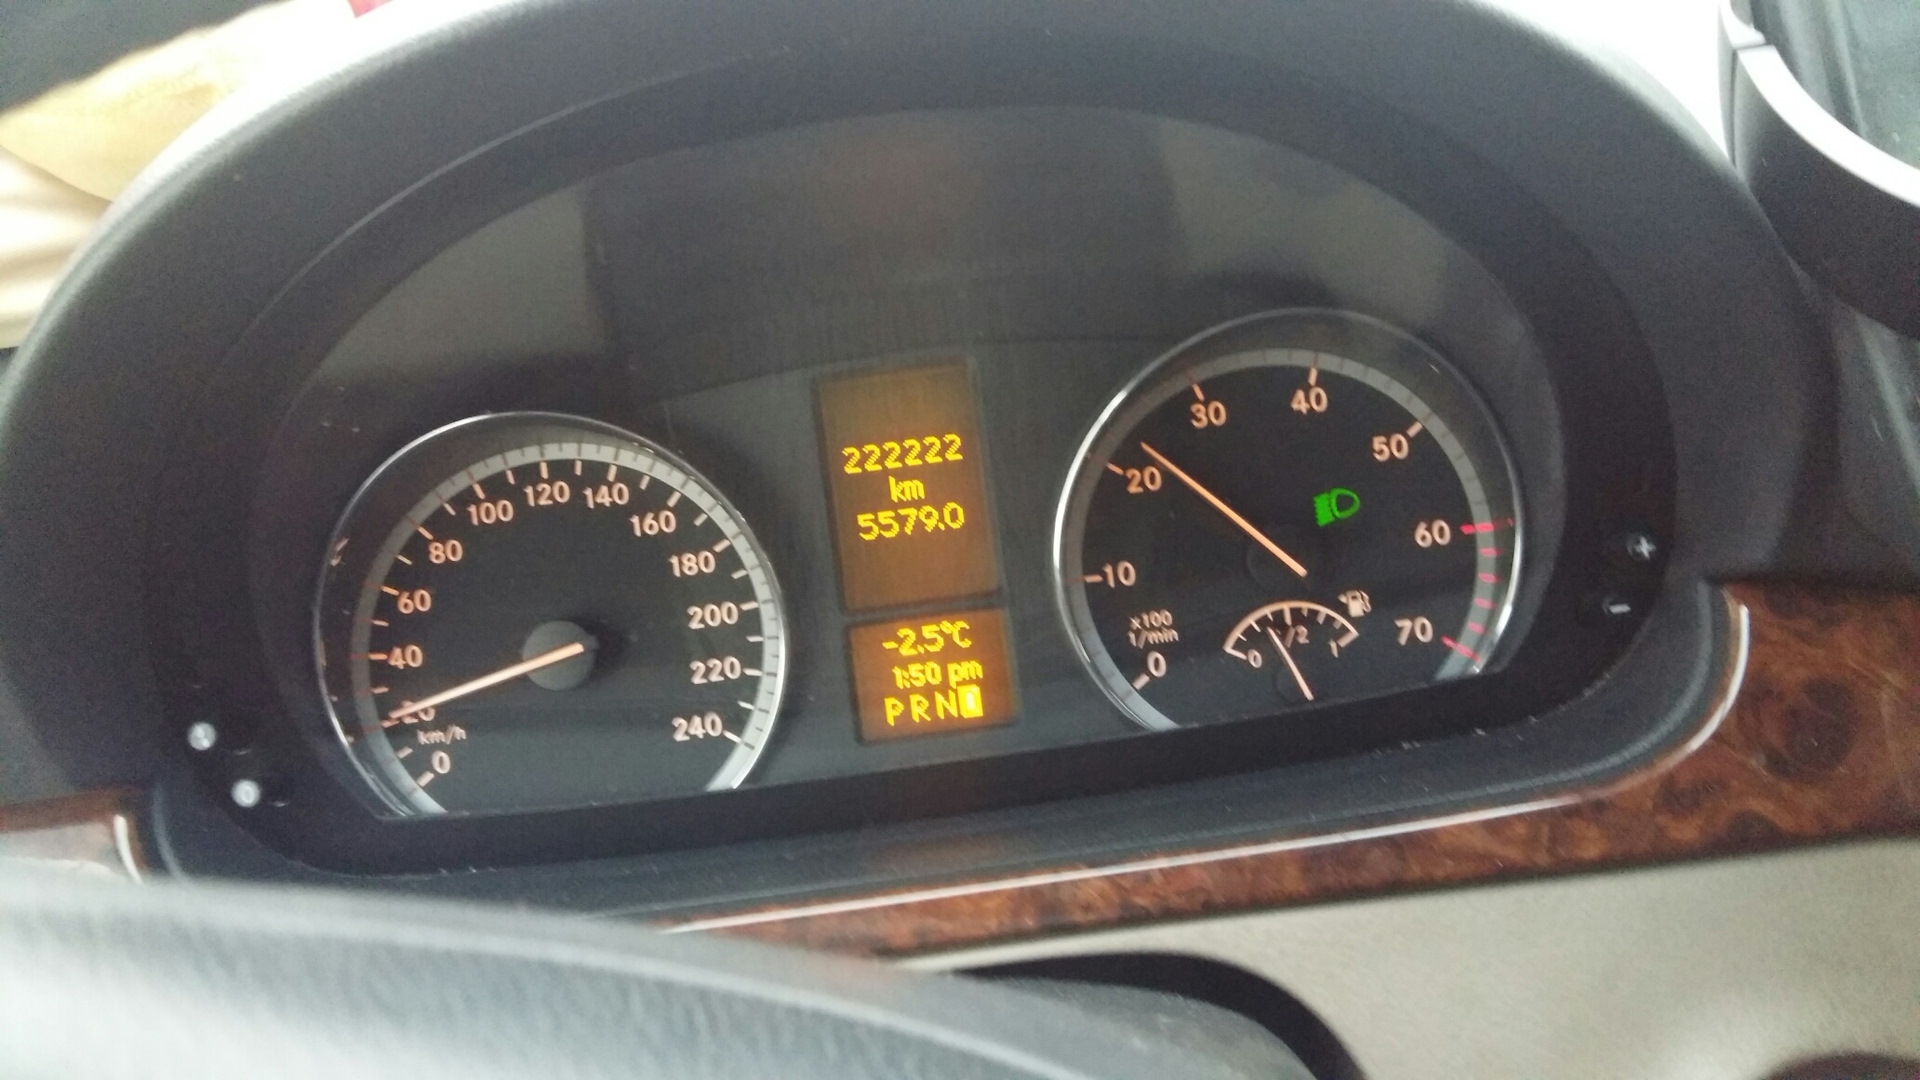
Dashboard for Mercedes Vito
5 - Sound signal
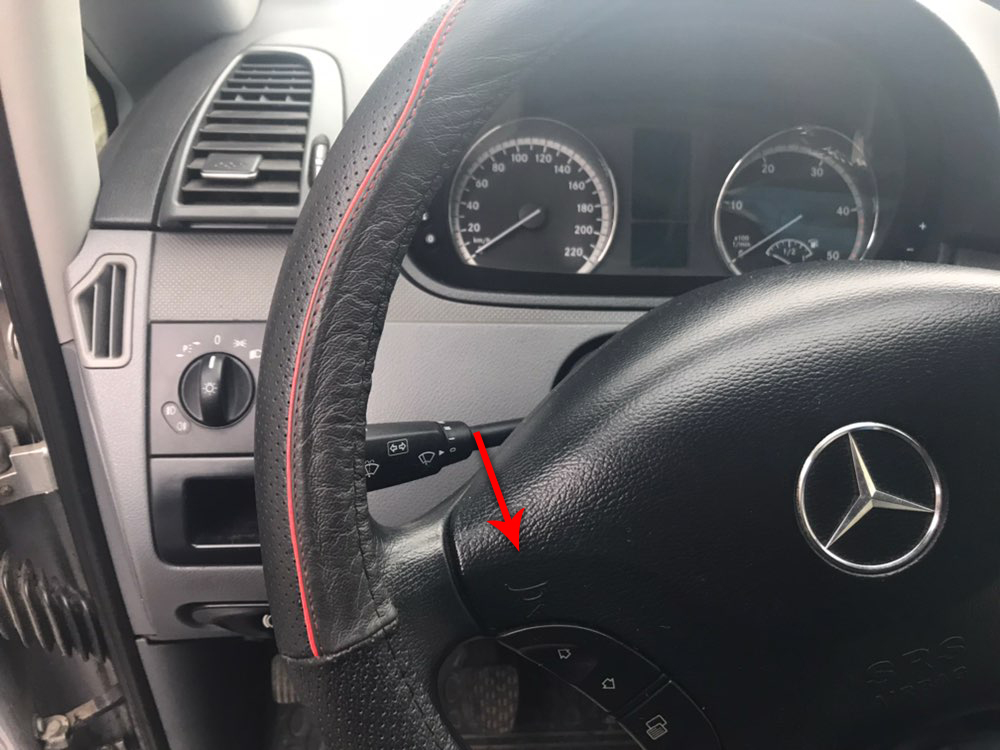
Beep on Mercedes Vito
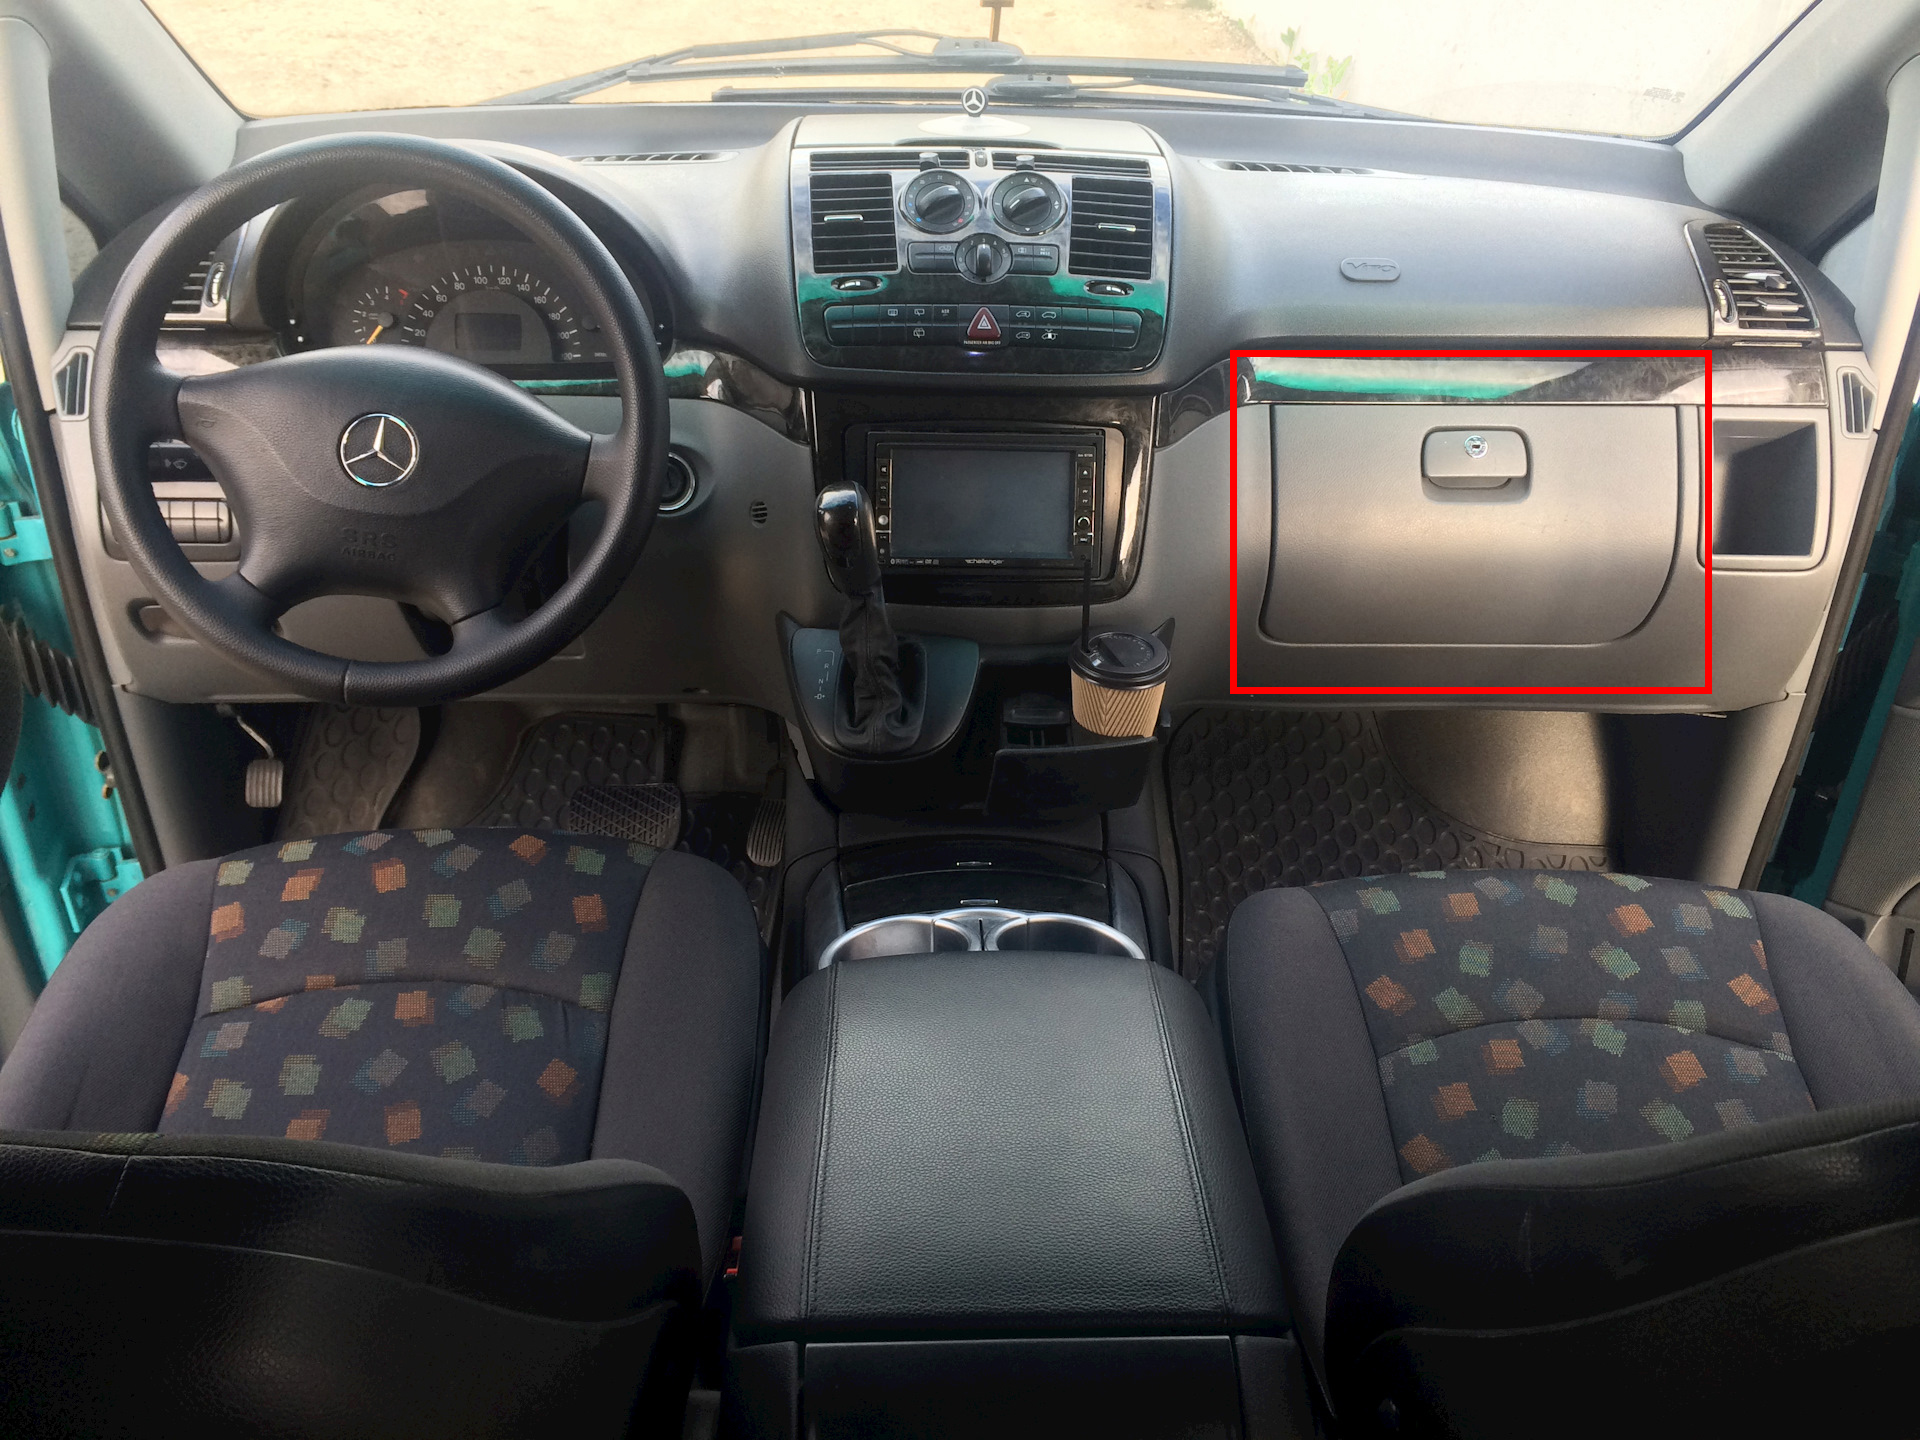
6 - 7 - Glove compartment Glove compartment.
8 - Central console COMAND or AUDIO
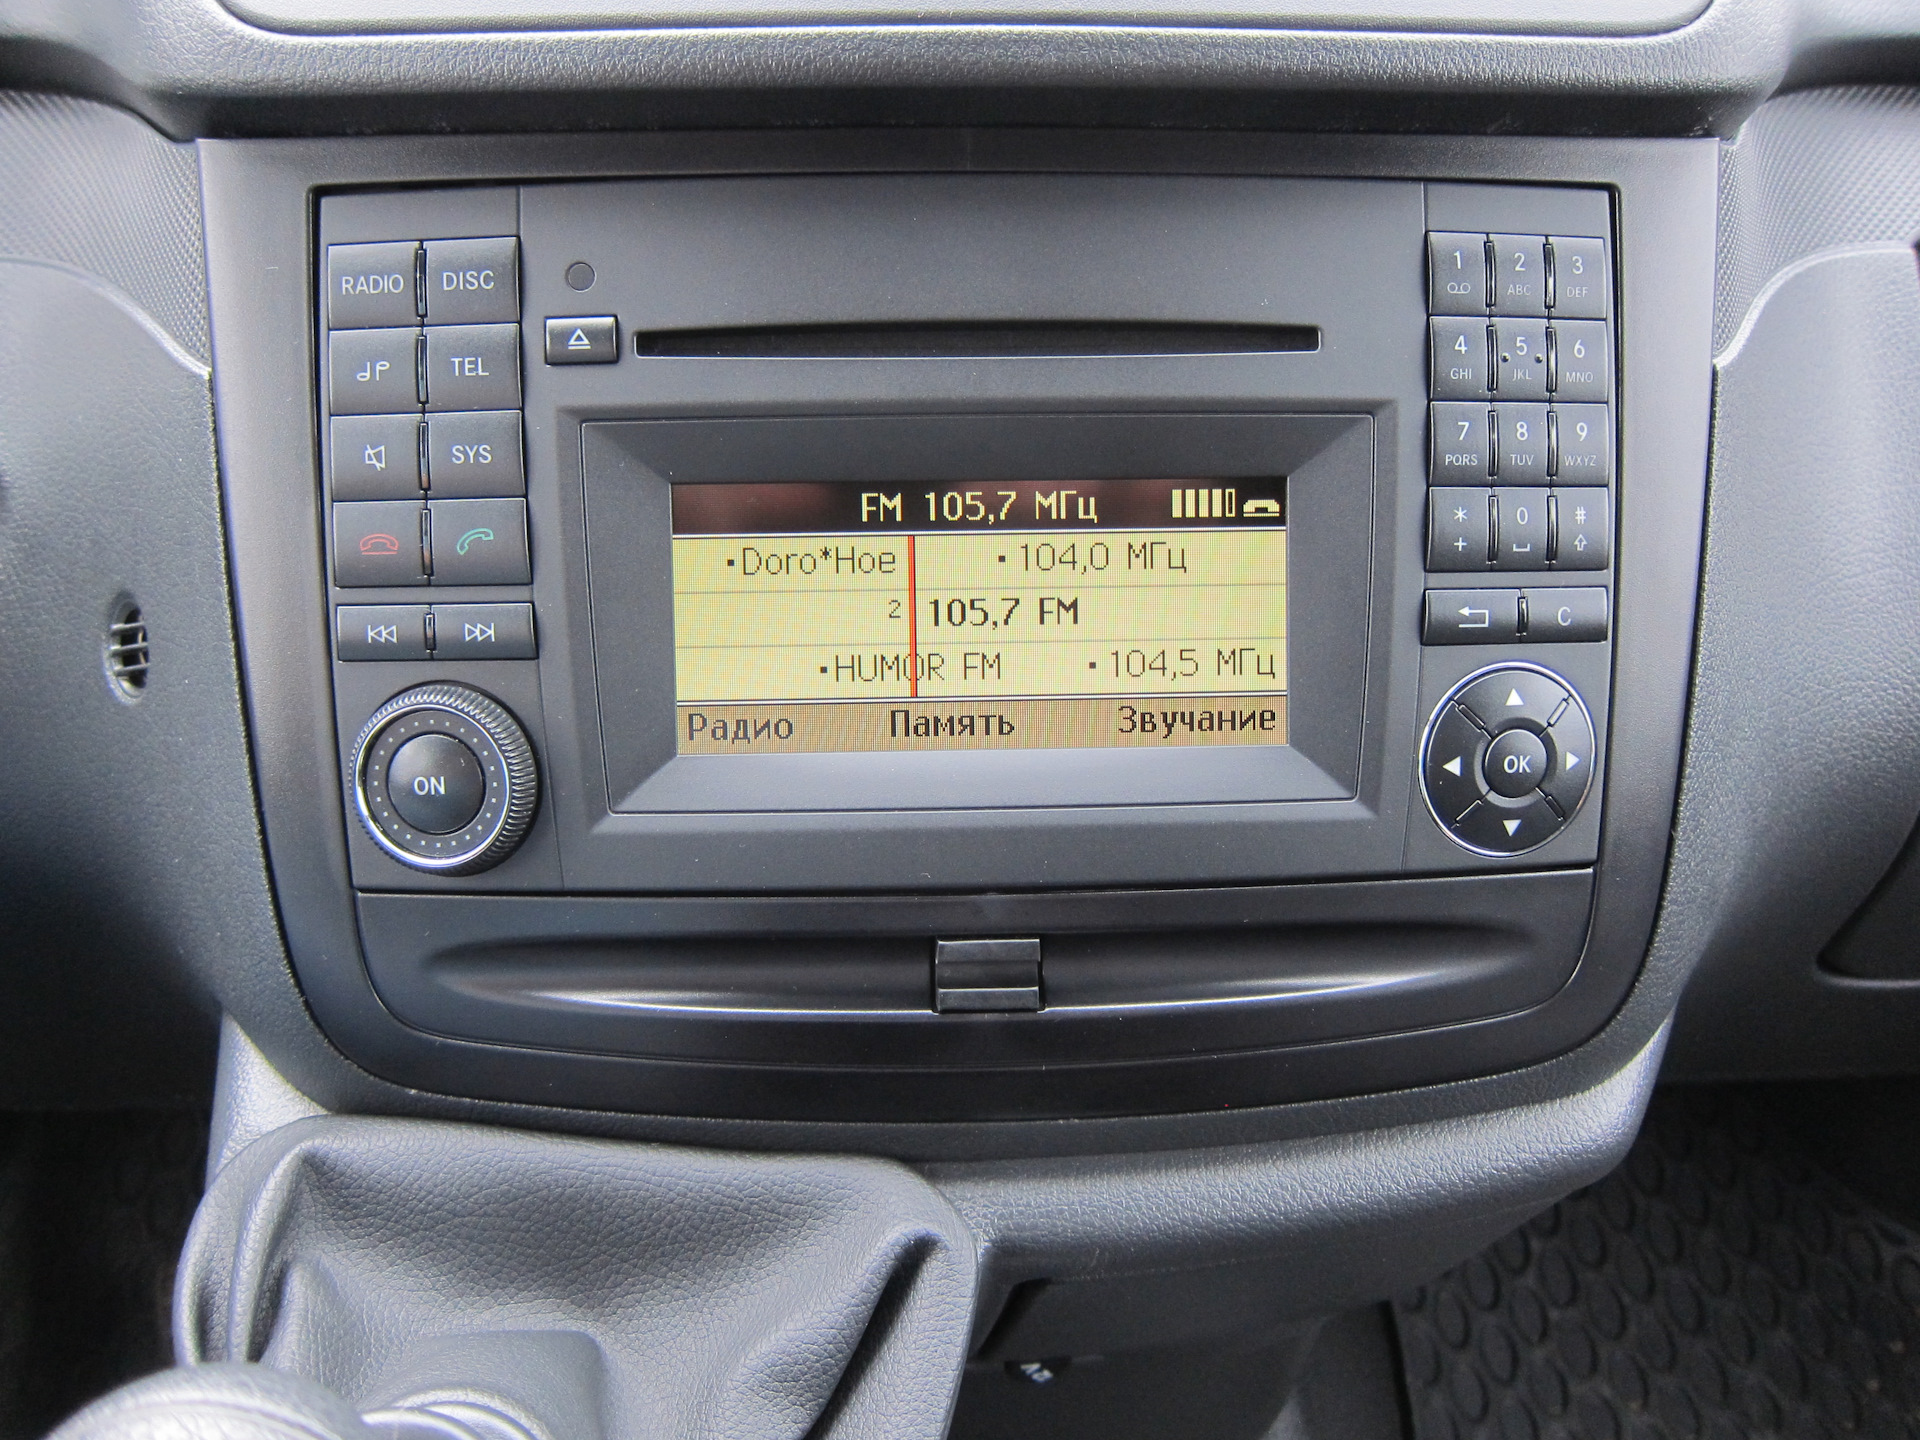
Radio tape recorder for Mercedes Vito
9 - the ignition lock
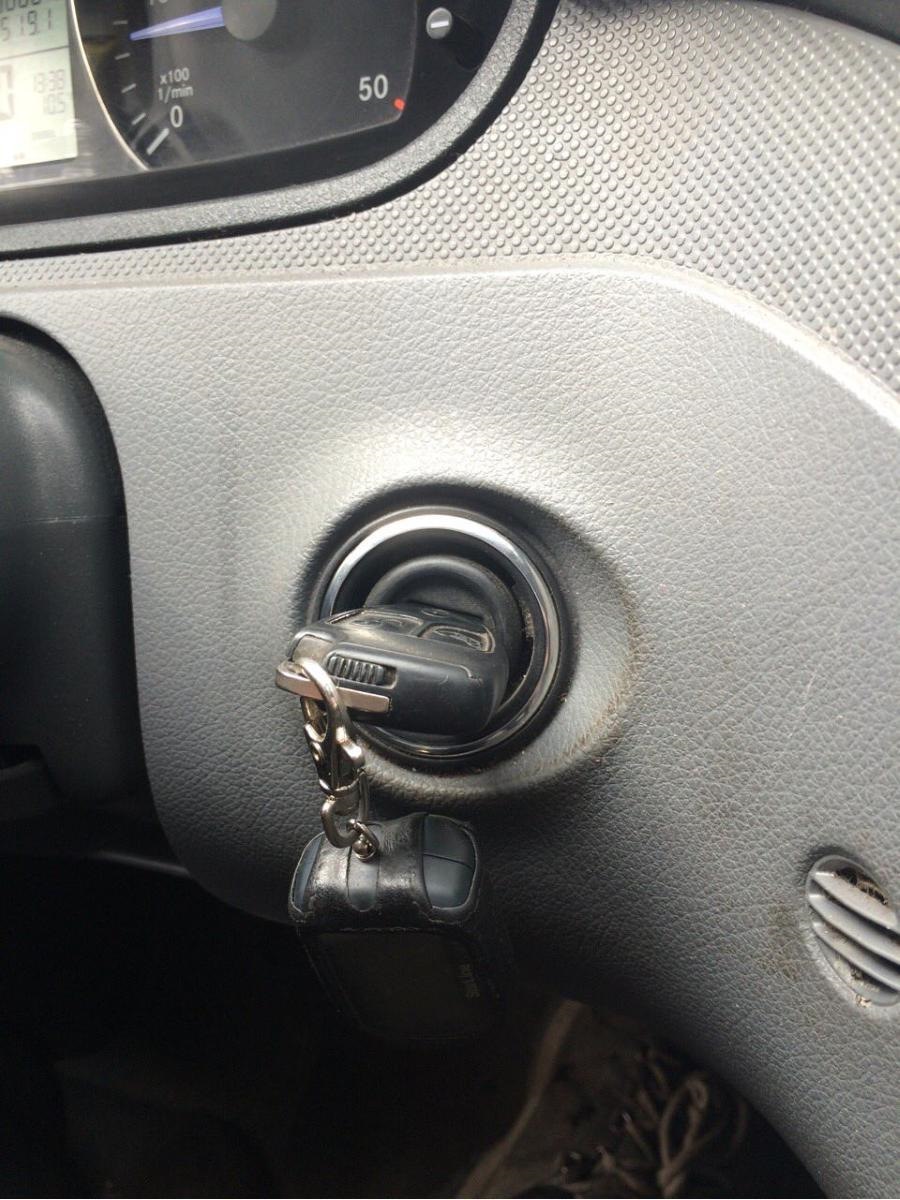
In order to remove the key from the ignition switch of a car with a manual transmission, press the key, keeping it pressed, turn it to the left until it stops. Then remove the key from the lock.
To remove the key from the ignition of a car with an automatic transmission, first move the transmission selector lever to the “P” (parking) position, and then turn the key in the lock to the left until it stops. Remove the key from the ignition.
1 turn of the key (additional equipment) - the ignition is off, the key cannot be removed, the steering is unlocked, the power circuits for the sound signal, exterior lighting, audio system, cigarette lighter, etc.
2 turns of the key (on) - the ignition is on, the key cannot be removed, the steering is unlocked. The ignition, instruments and all electrical circuits are on.
3 turns of the key (starter) - the ignition and starter are on, the key cannot be removed, the steering is unlocked. This key position is not fixed; when released, the key returns to position "2" under the action of the spring force.
10 - Adjusting the position of the steering wheel.
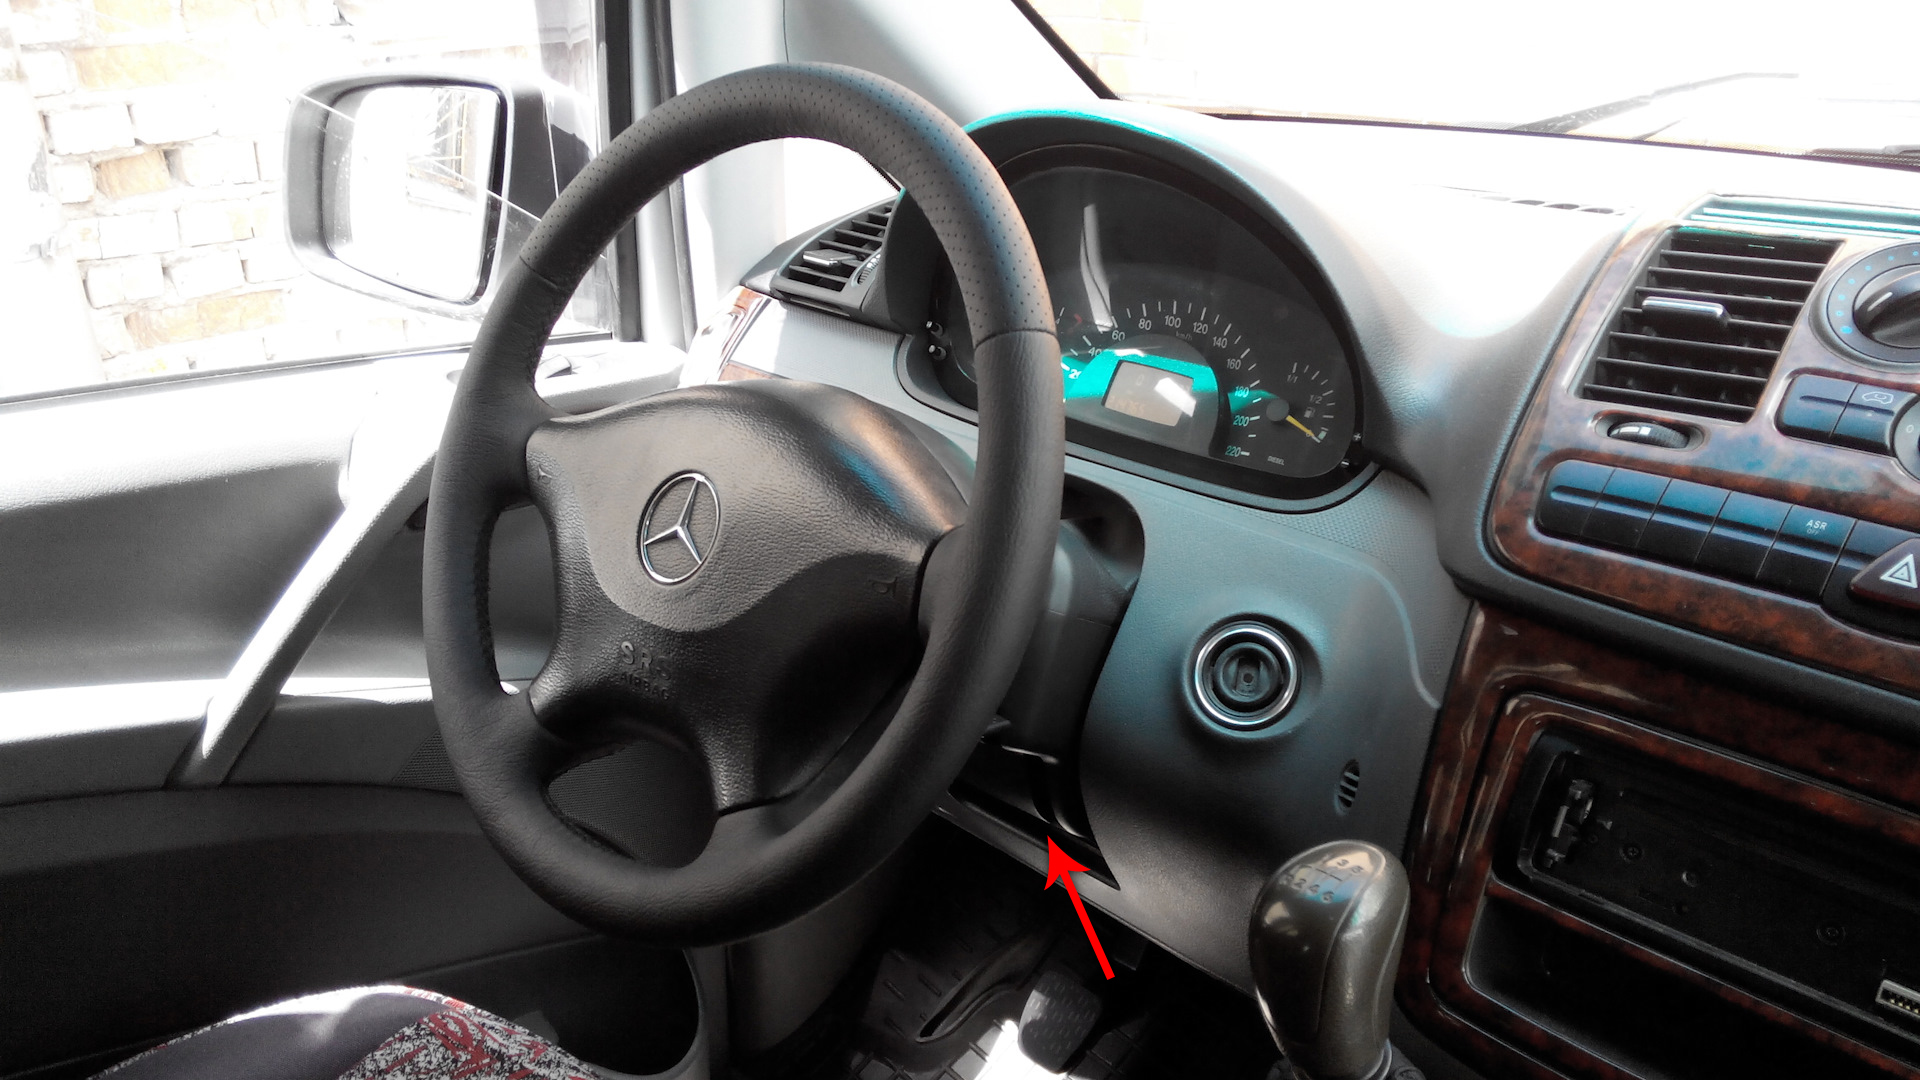
The position of the steering wheel is adjusted in height and length. Raise the lever until it stops, set the desired steering wheel position and again raise the lever all the way to lock the position.
11 - Release the parking brake.
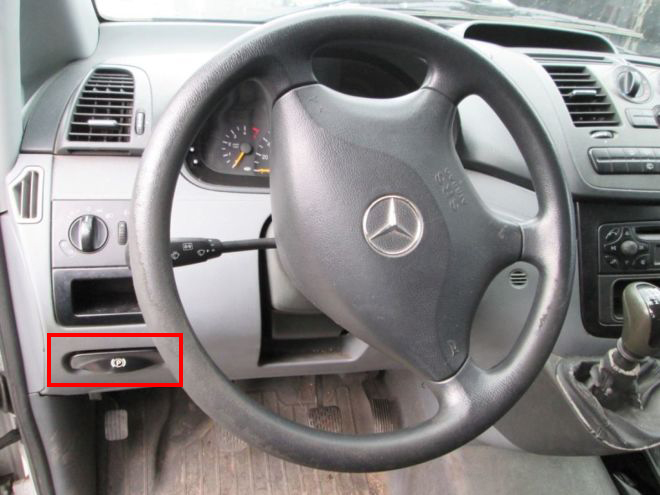
Parking brake release lever
Pull the handle towards you to release the parking brake. The parking brake indicator will then turn off.
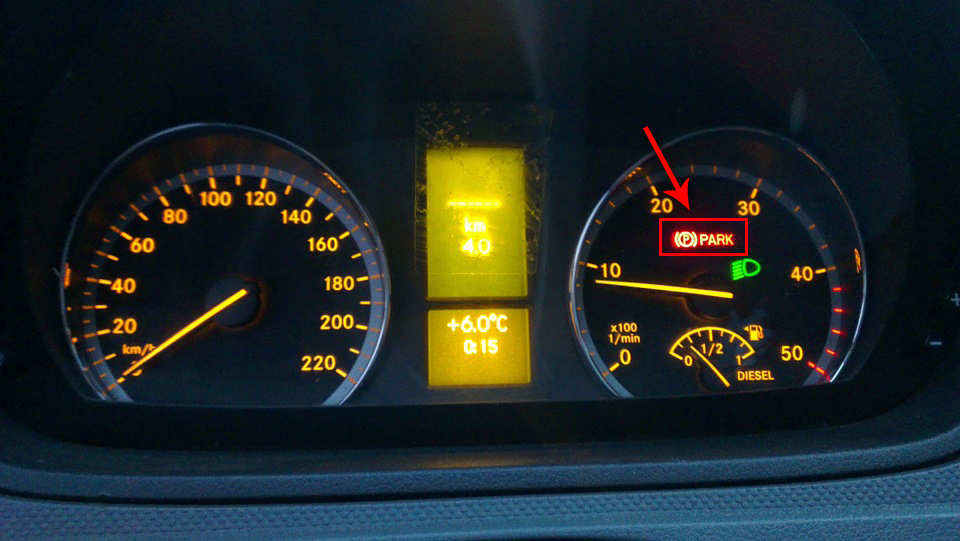
Parking brake indicator
12 - Opening the hood.
Pull the red bonnet release handle on the left under the dashboard to unlock the bonnet.
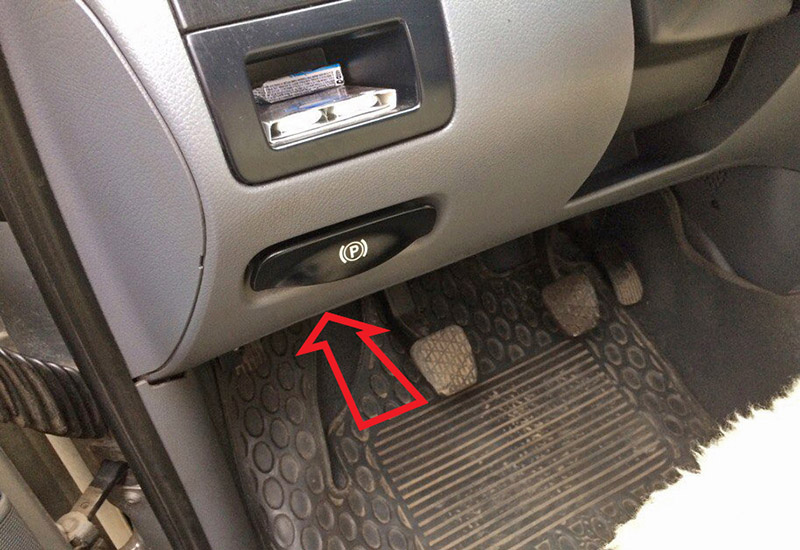
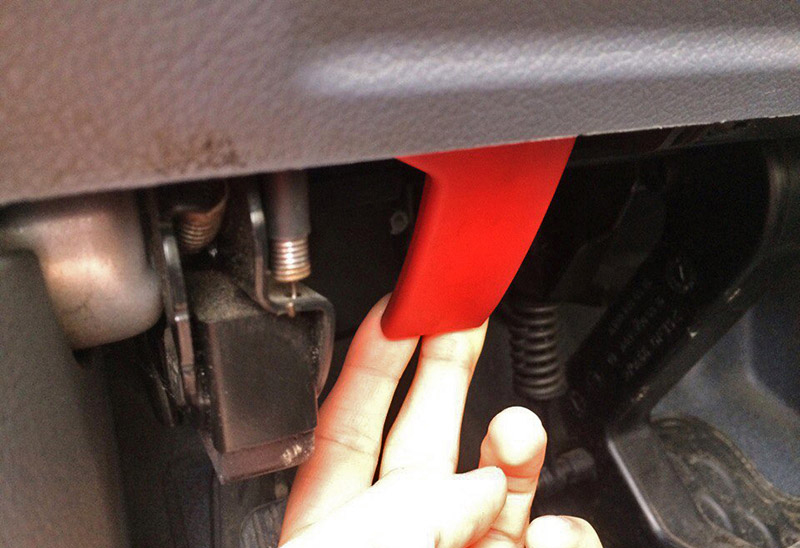
The handle that opens the hood of a Mercedes Vito
13 - the Parking brake.
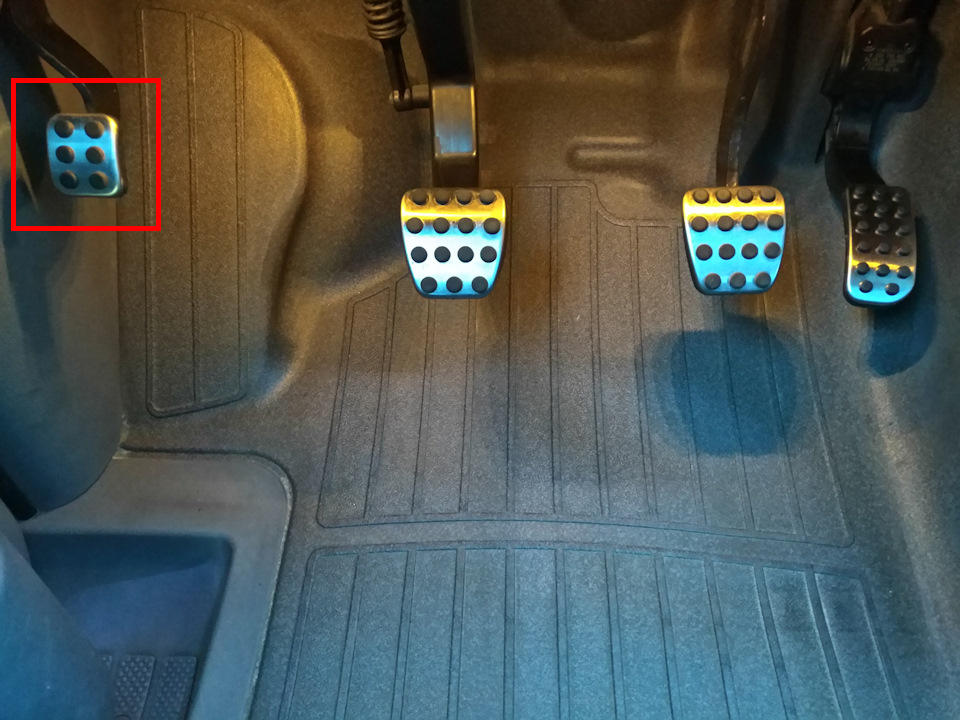
Parking brake pedal
14 - The central console of the car.
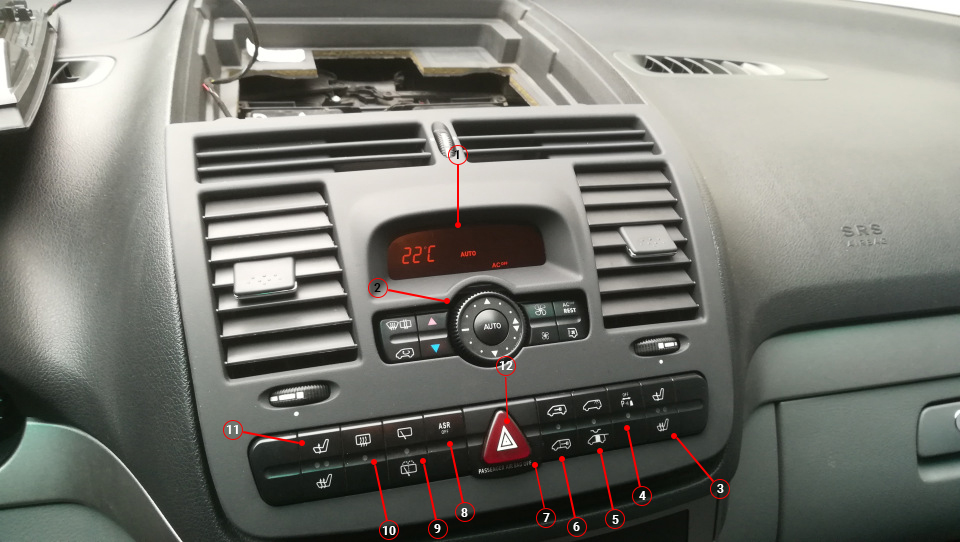
1 - Display climate control. More details about climate control are described in this article .
2 - Tempmatic:
Rear heating/rear air conditioning. Automated rear air conditioning.
Thermotronic:
Automated rear air conditioning.
3 - Heated front passenger seat.
4 - Turn on / off the parking sensors.
5 - Lighting in the rear of the passenger compartment.
6 - Central locking of the salon / rear.
7 - Indicator lamp for disabling the passenger airbag.
8 - Enabling / disabling the ASR system.
9 - Turning on / off the rear window wiper.
10 - Heated rear window.
11 - Heated driver's seat.
12 - Enabling / disabling hazard warning lights.
Note:
Some vehicle trims have less central control console functionality. More details about the heater block are described in this article .
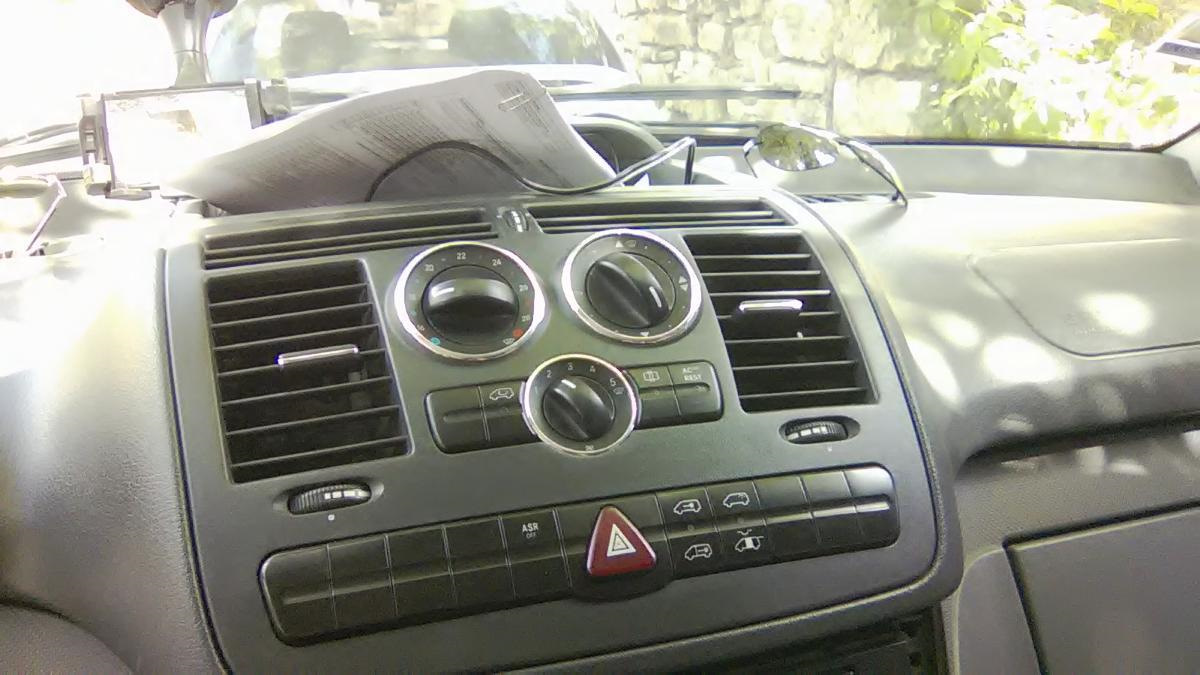
15 - The control unit for power windows and outside mirrors on the front doors.
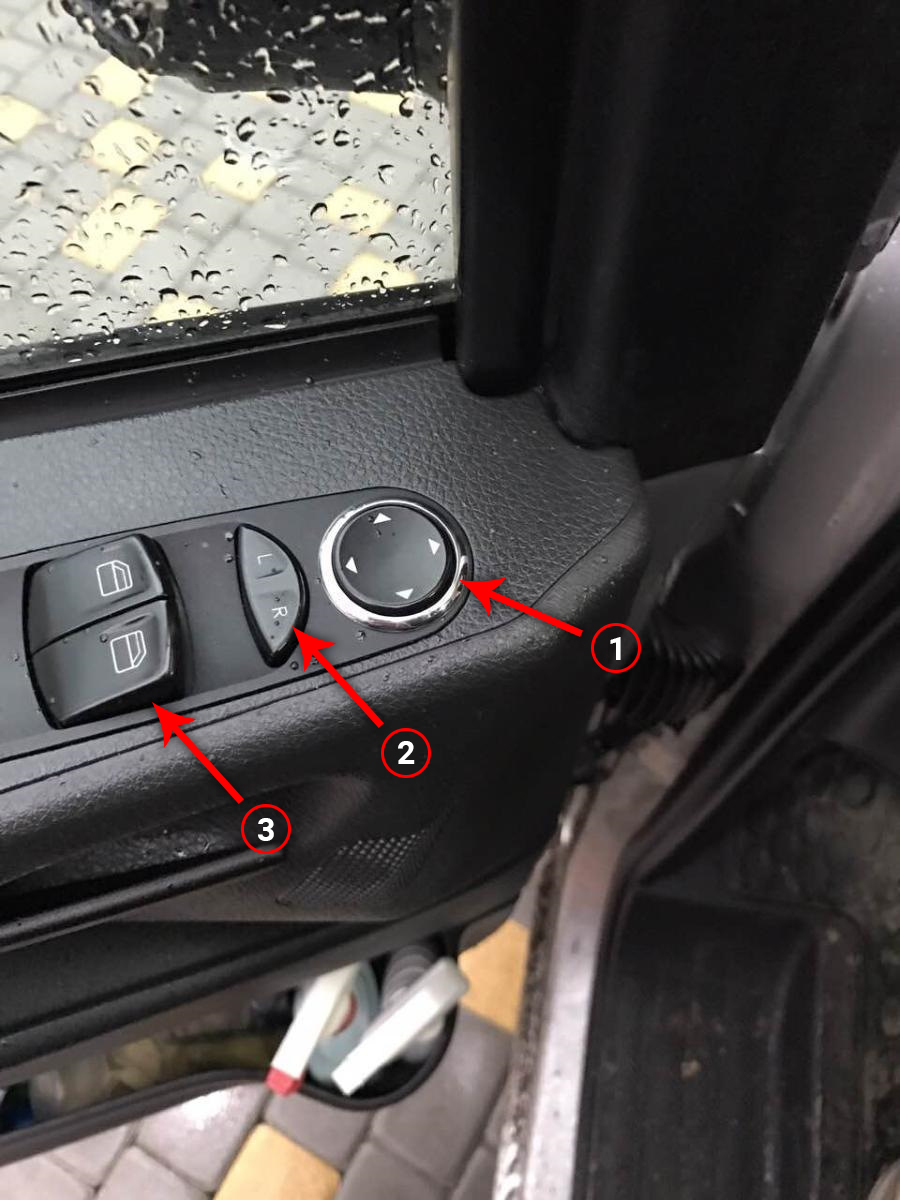
1 - Button for adjusting the position of external mirrors.
2 - Choice of left or right outside mirror.
3 - Buttons for lowering the glass.
To lower the driver's or passenger's glass, you just need to press the button ( 3 ). To adjust the position of the outside mirror, you must first select the left or right mirror on the button ( 2 ), and then use the button ( 1 ) to adjust the position of the mirror.
16 - Manual transmission control lever or automatic transmission selector lever. More details are described in this article .
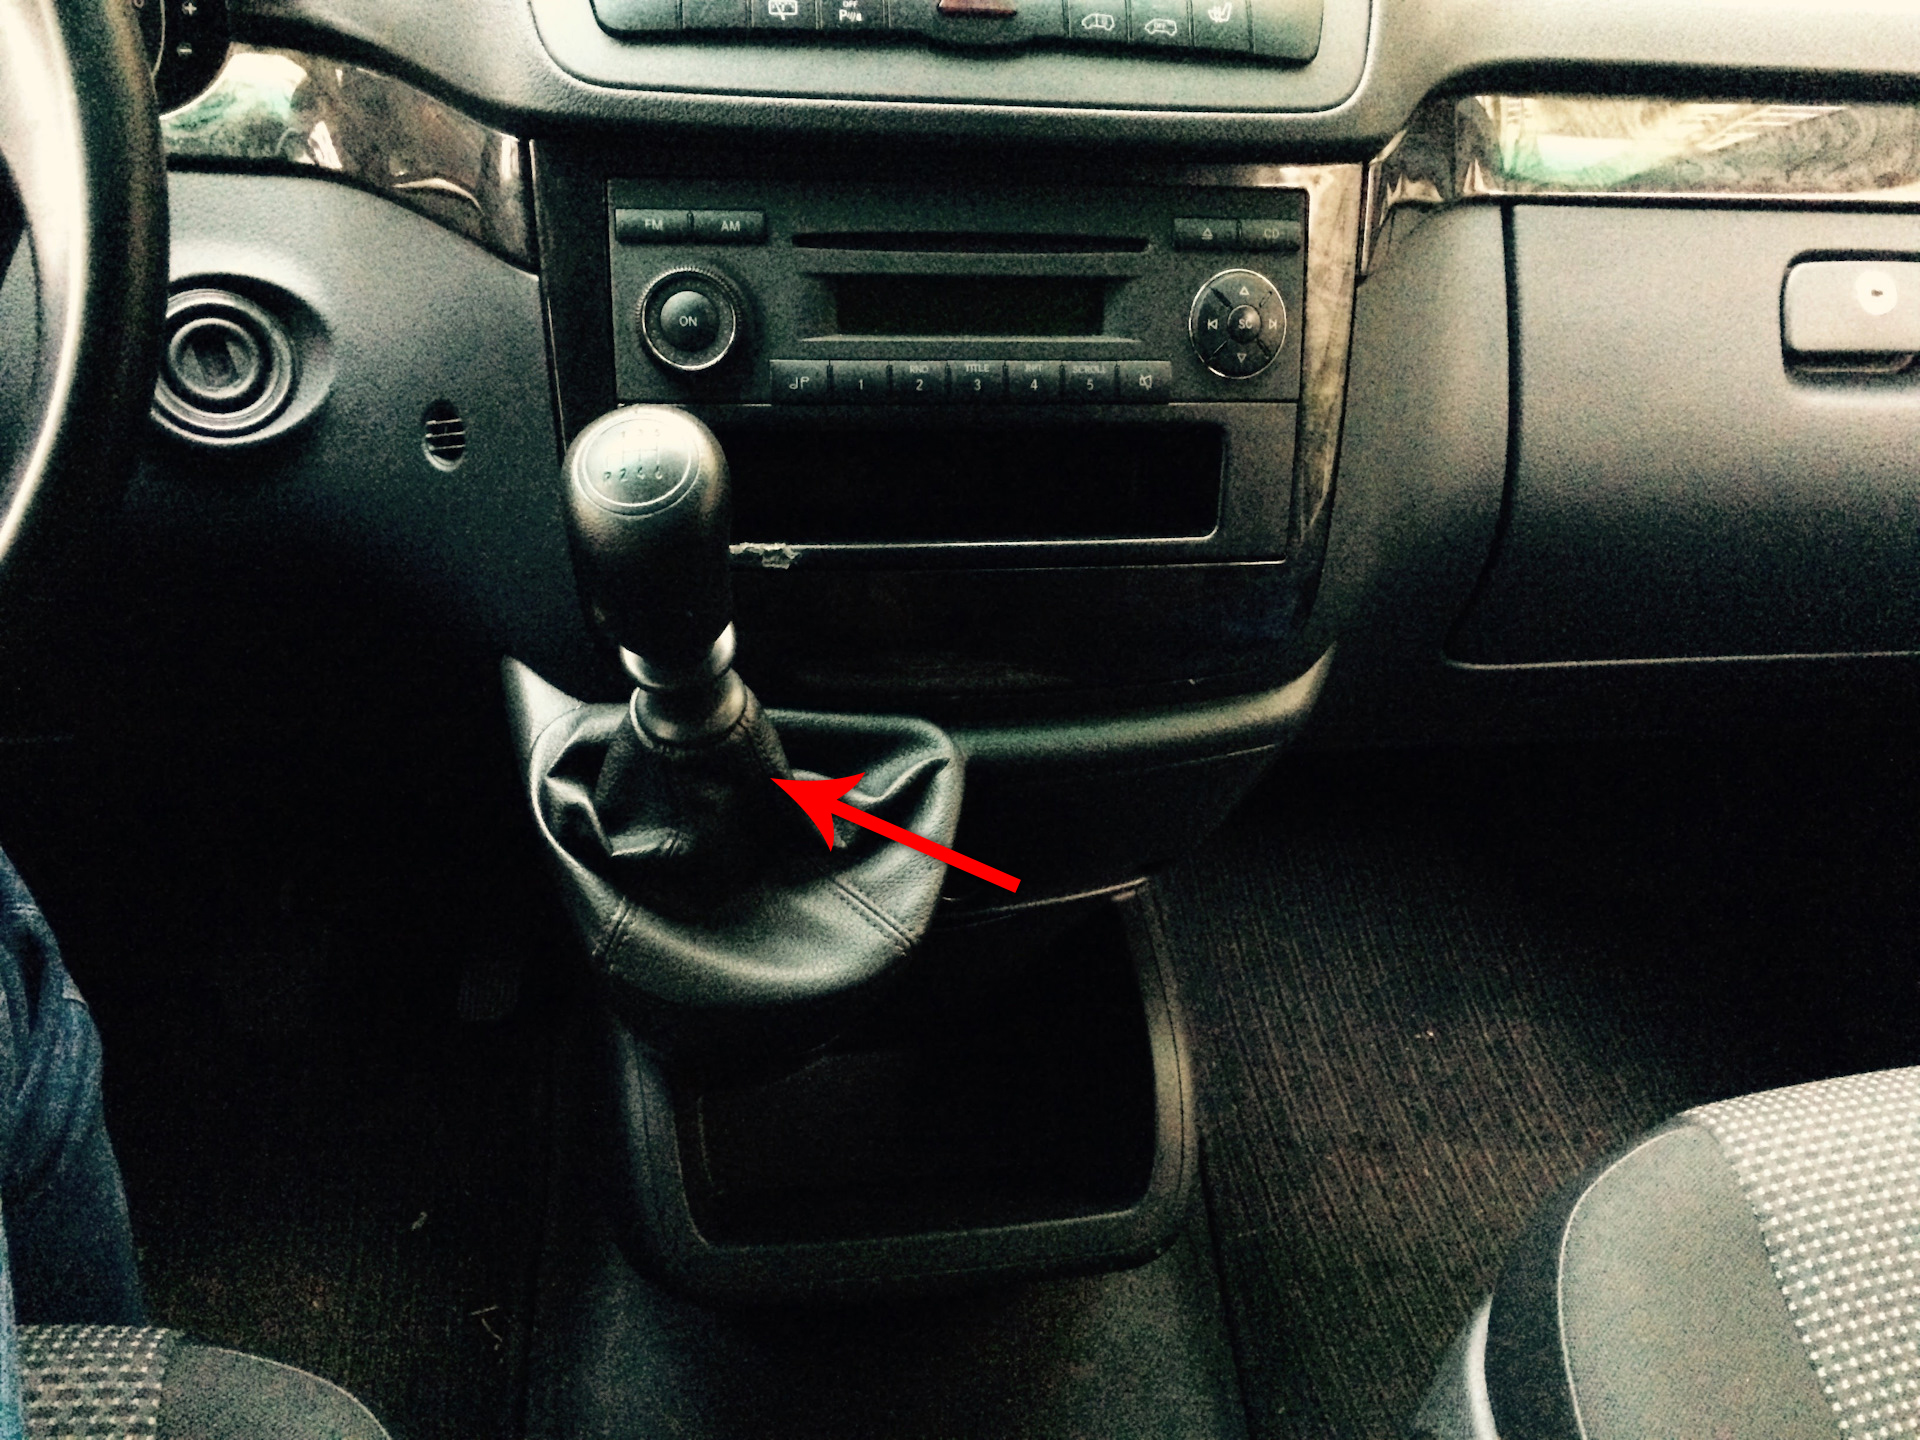
Manual transmission lever (manual transmission)
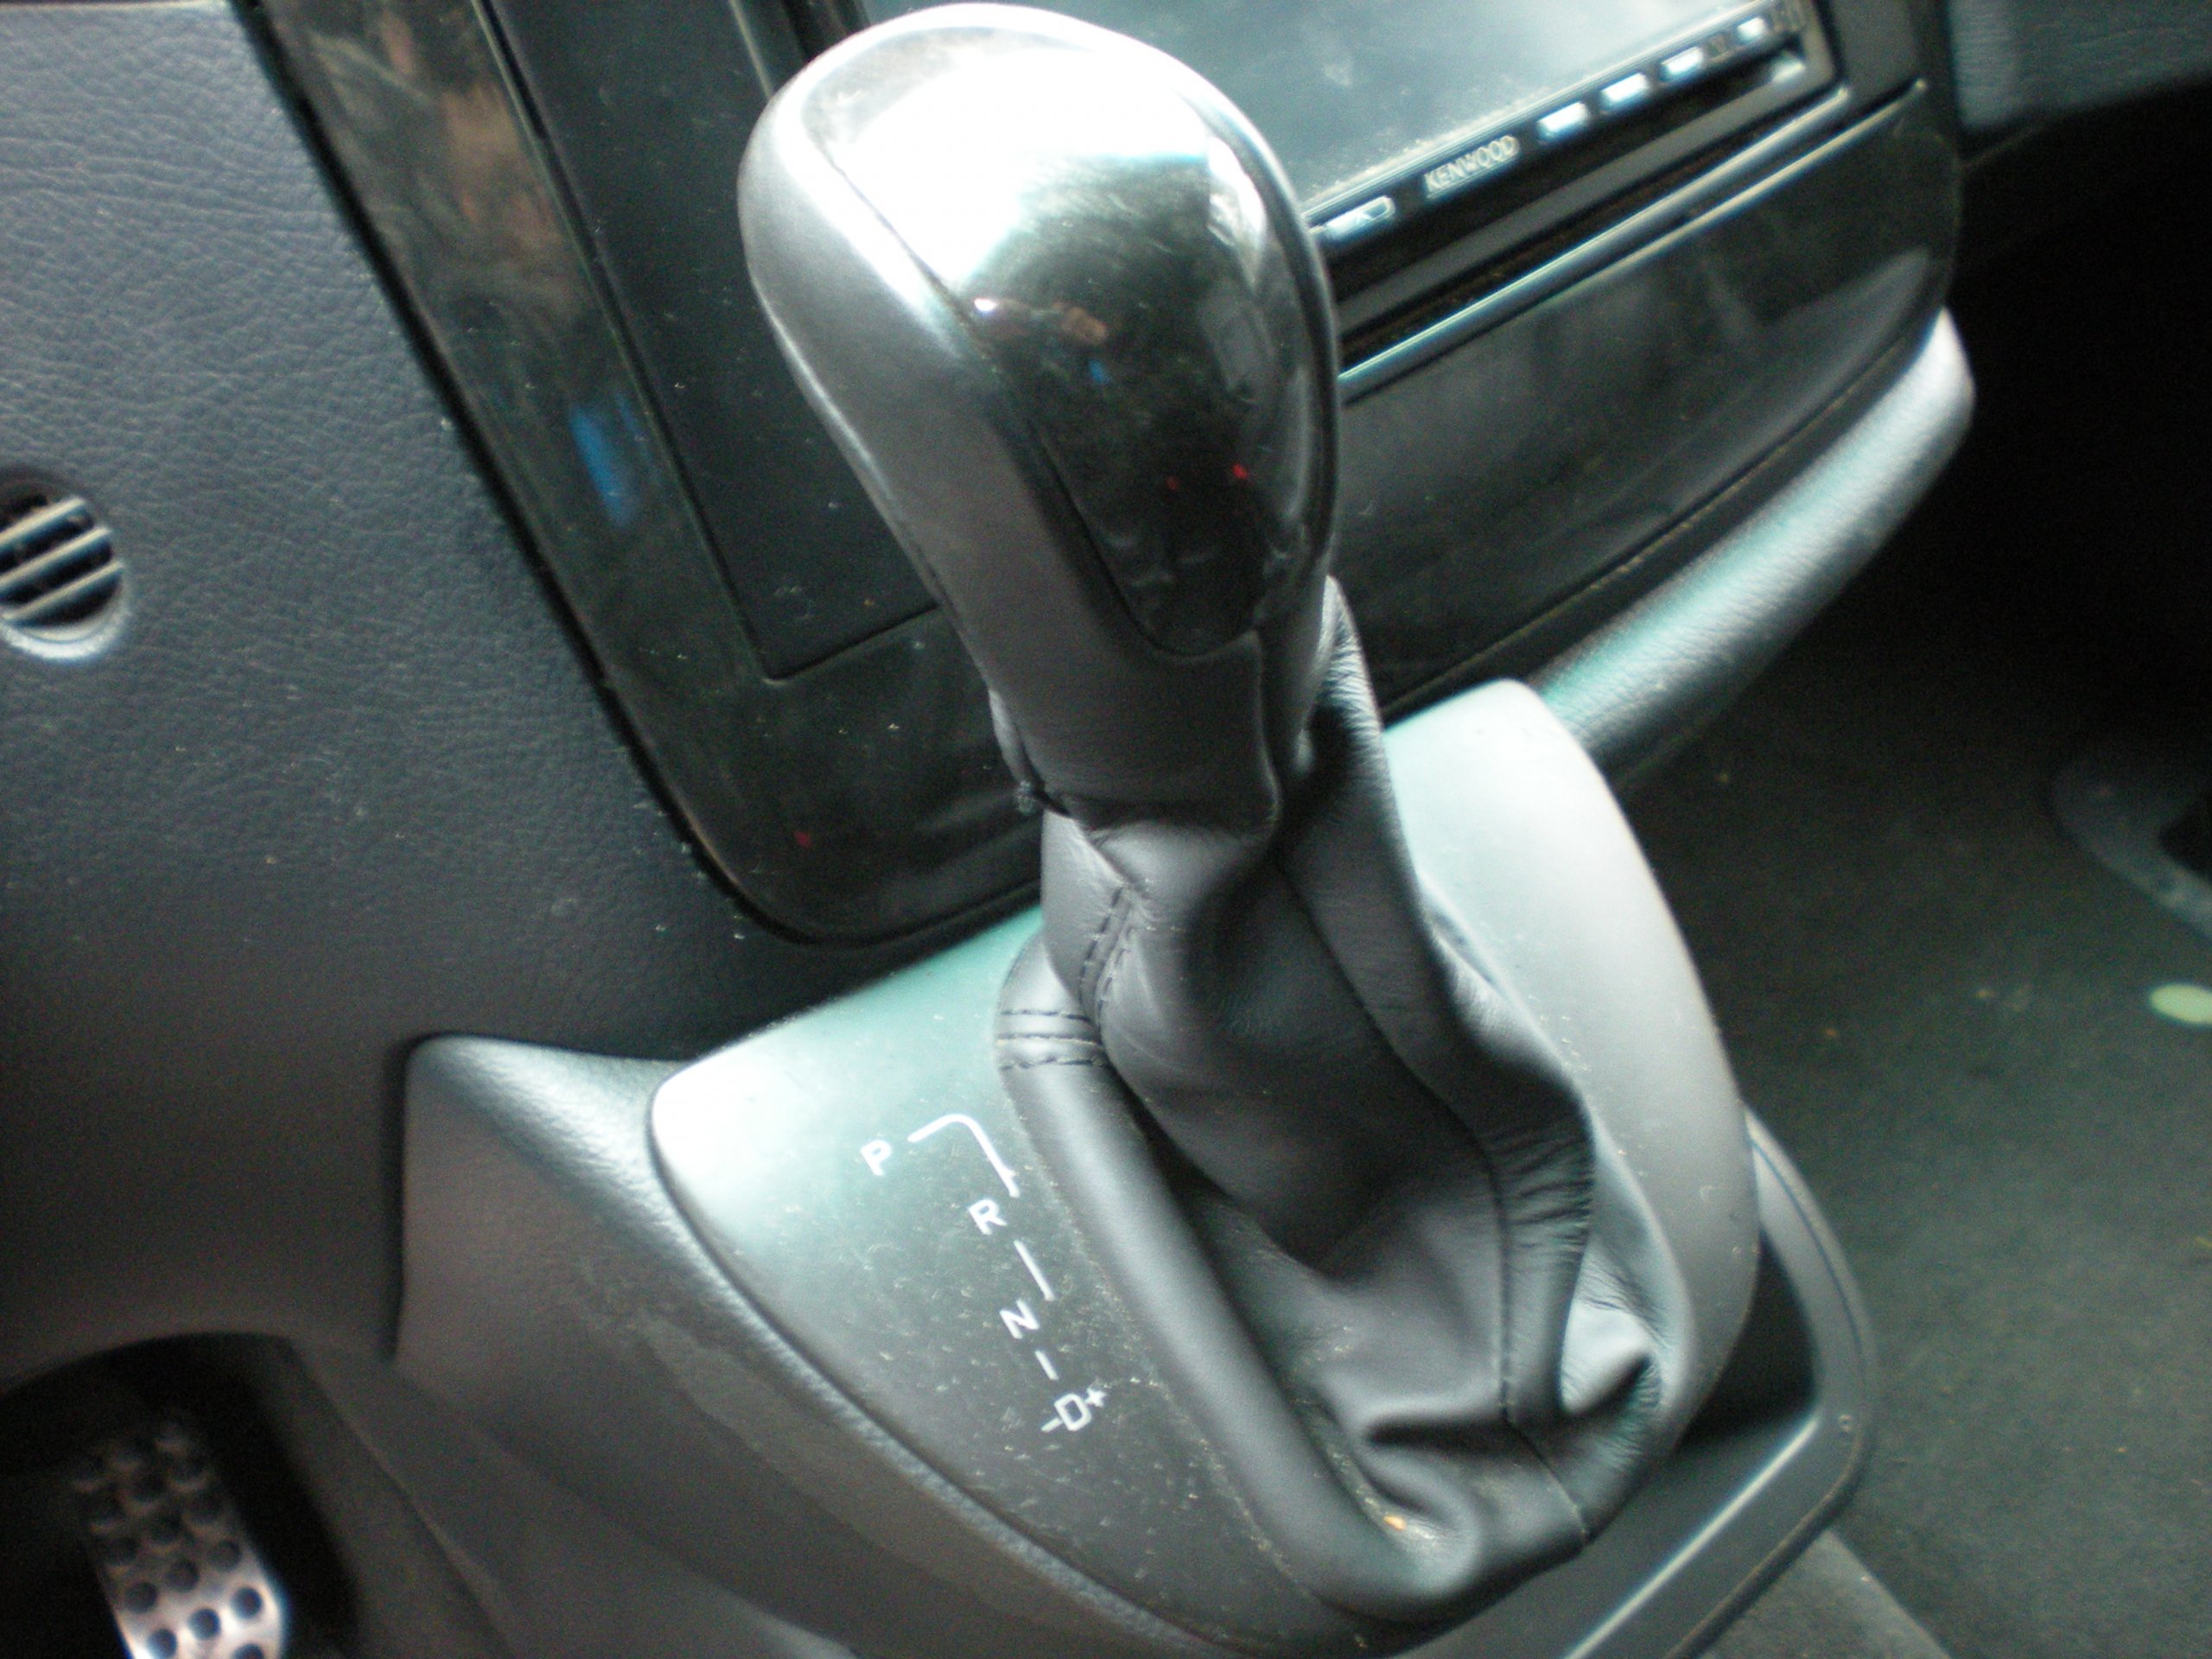
Automatic transmission lever (automatic transmission)
17 - Accelerator pedal (throttle actuator).
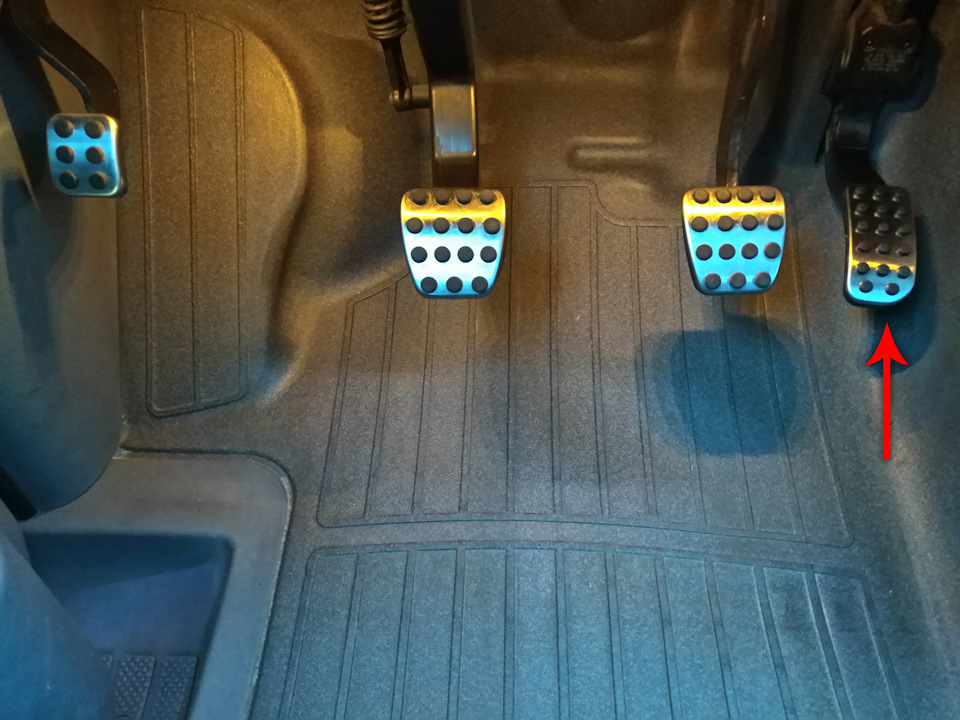
18 - Brake pedal.
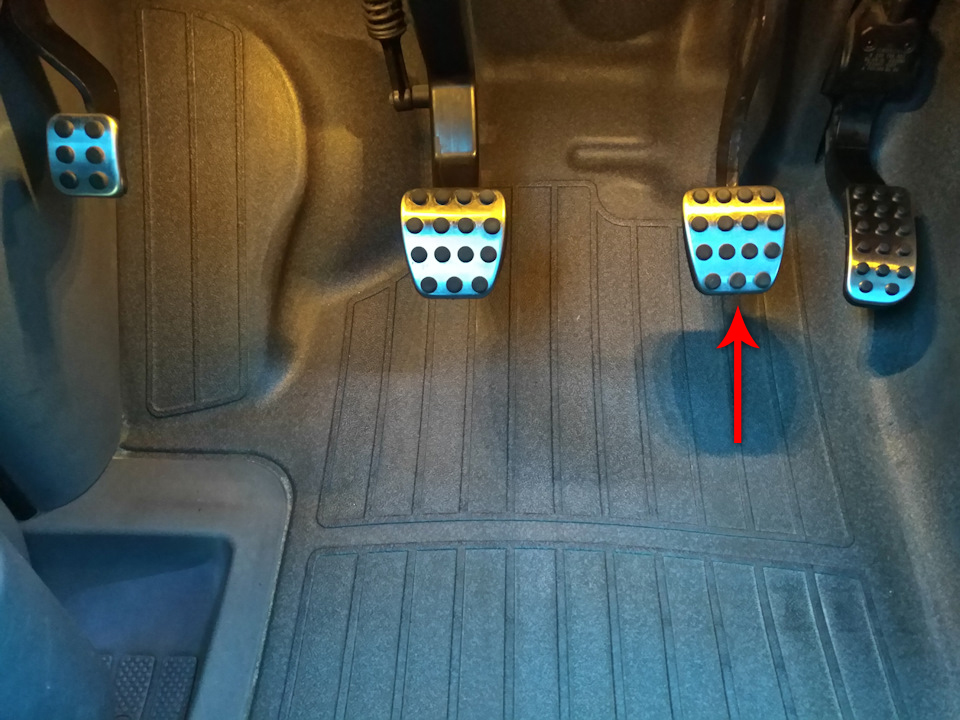
19 - clutch pedal. This pedal is not available on vehicles with an automatic transmission.
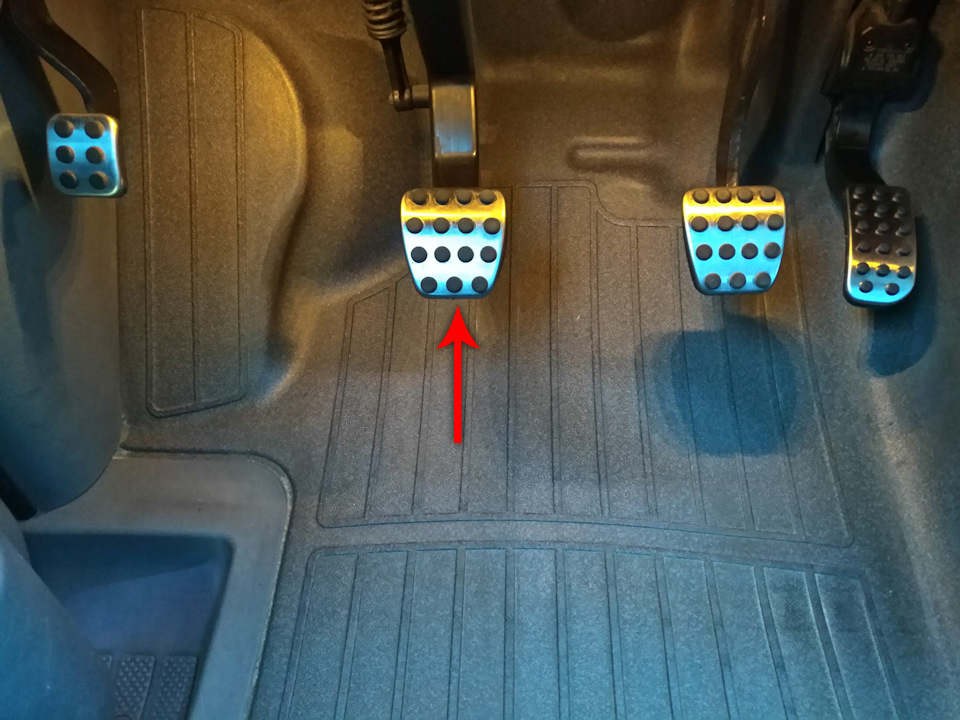
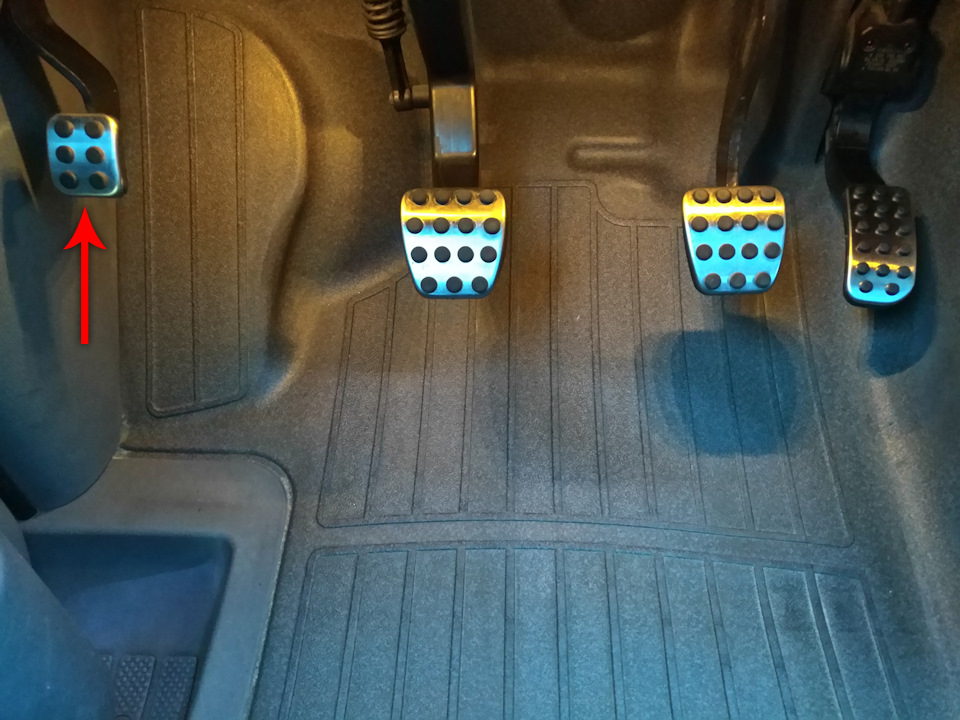
20 - Parking brake pedal.
21 - To control the dipped beam, side lights and fog lamps, use the switch located under the dashboard.
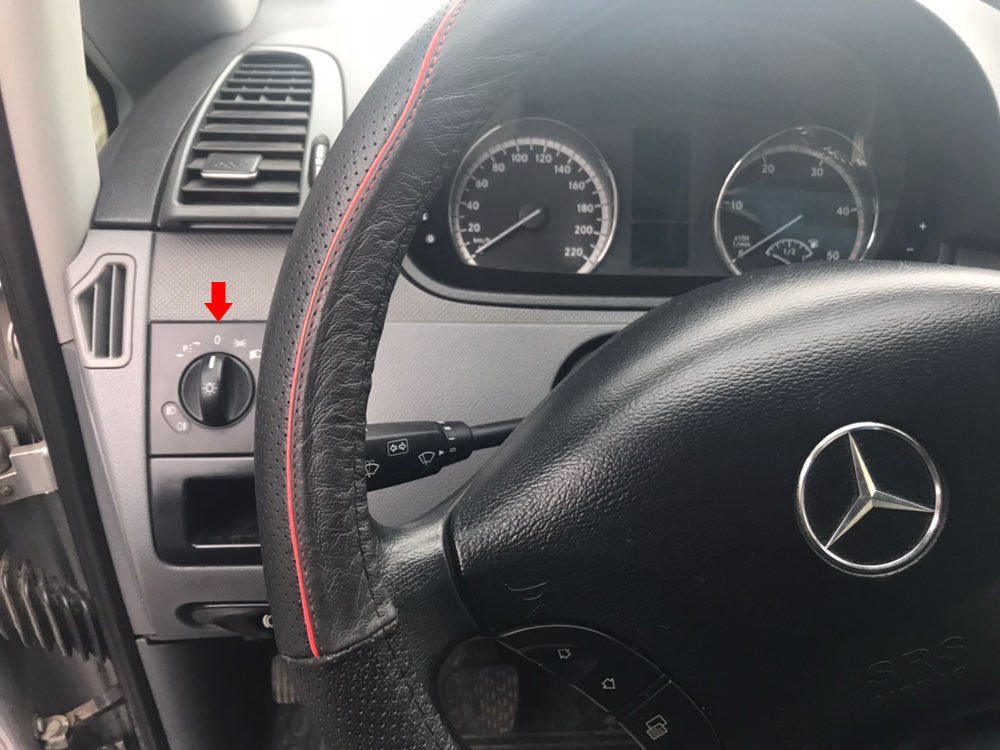
Light switch for Mercedes Vito
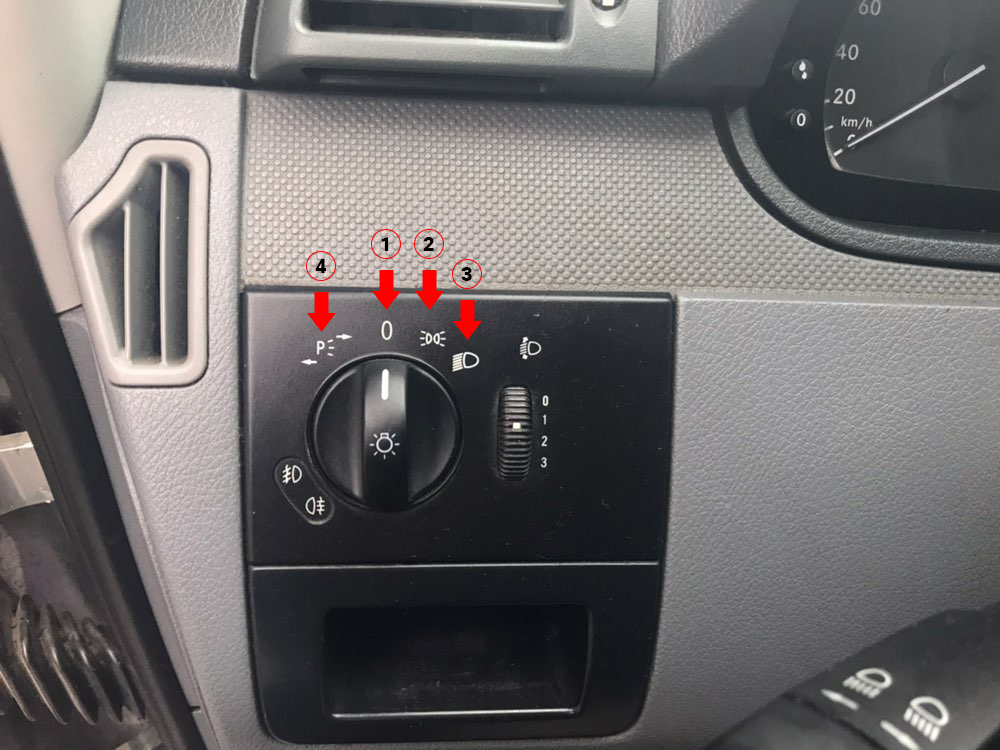
1 - The light is off.
2 - Side lights, license plate and instrument lighting are on.
3 - The dipped headlights are on.
4 - Parking lights are on.
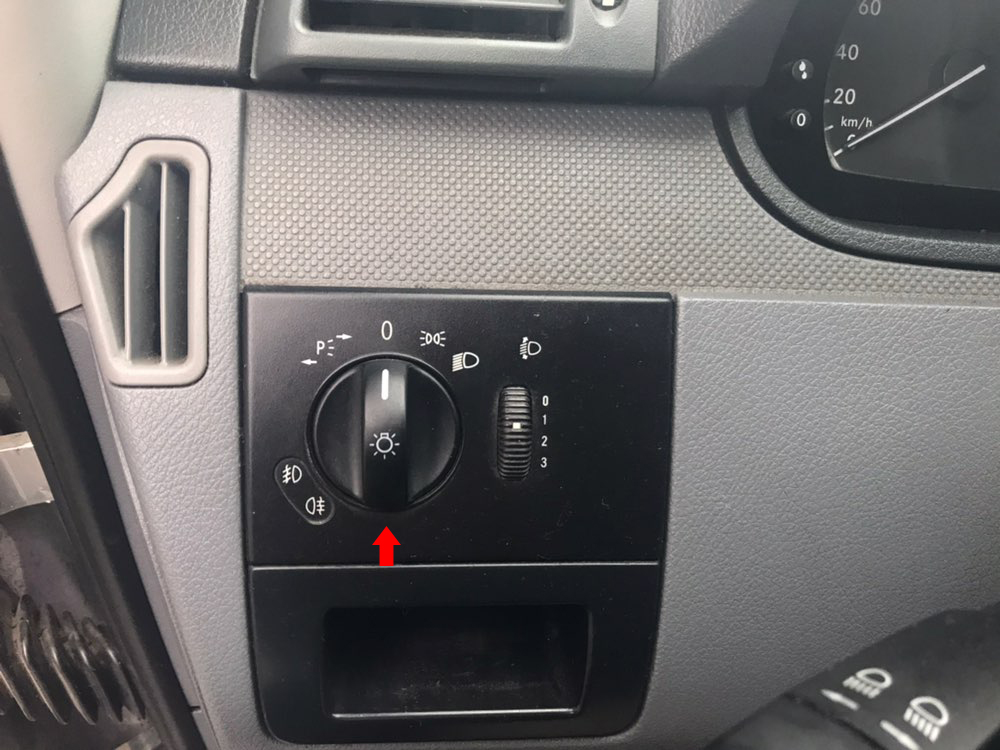
To turn on the front fog lamps, make sure the dipped beam is at least on. Pull the light switch knob toward you to the first lock position.
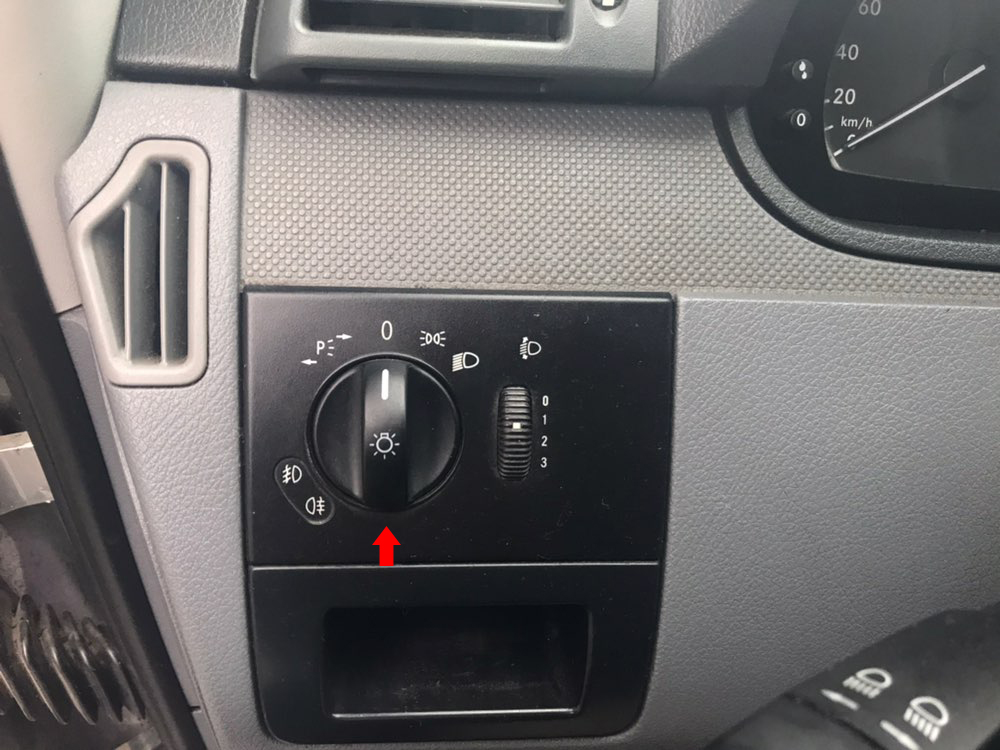
To activate the rear fog lamp, make sure the dipped beam is at least on. Pull the light switch knob toward you to the second lock position.
By rotating the knob of the headlight electrocorrector regulator, depending on the vehicle load, the angle of inclination of the headlight beam is changed in such a way as to exclude the dazzle of oncoming traffic drivers. The combination of the number on the knob of the adjuster and the mark on the panel of the unit ensures the appropriate adjustment of the position of the headlights under the following vehicle loading options:
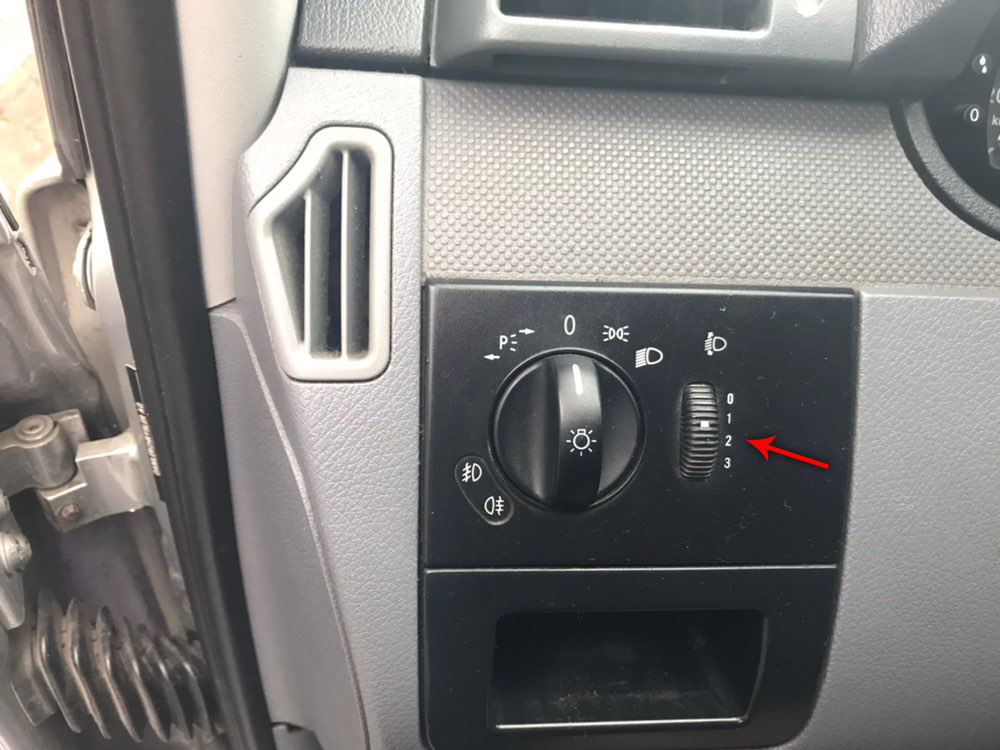
- 0 - one driver or driver and a passenger in the front seat.
- 1 - all seats are occupied.
- 2 - all seats are occupied and cargo is in the trunk.
- 3 - one driver and cargo in the trunk.
22 - Stowage compartment located in the front doors. Read more in this article .
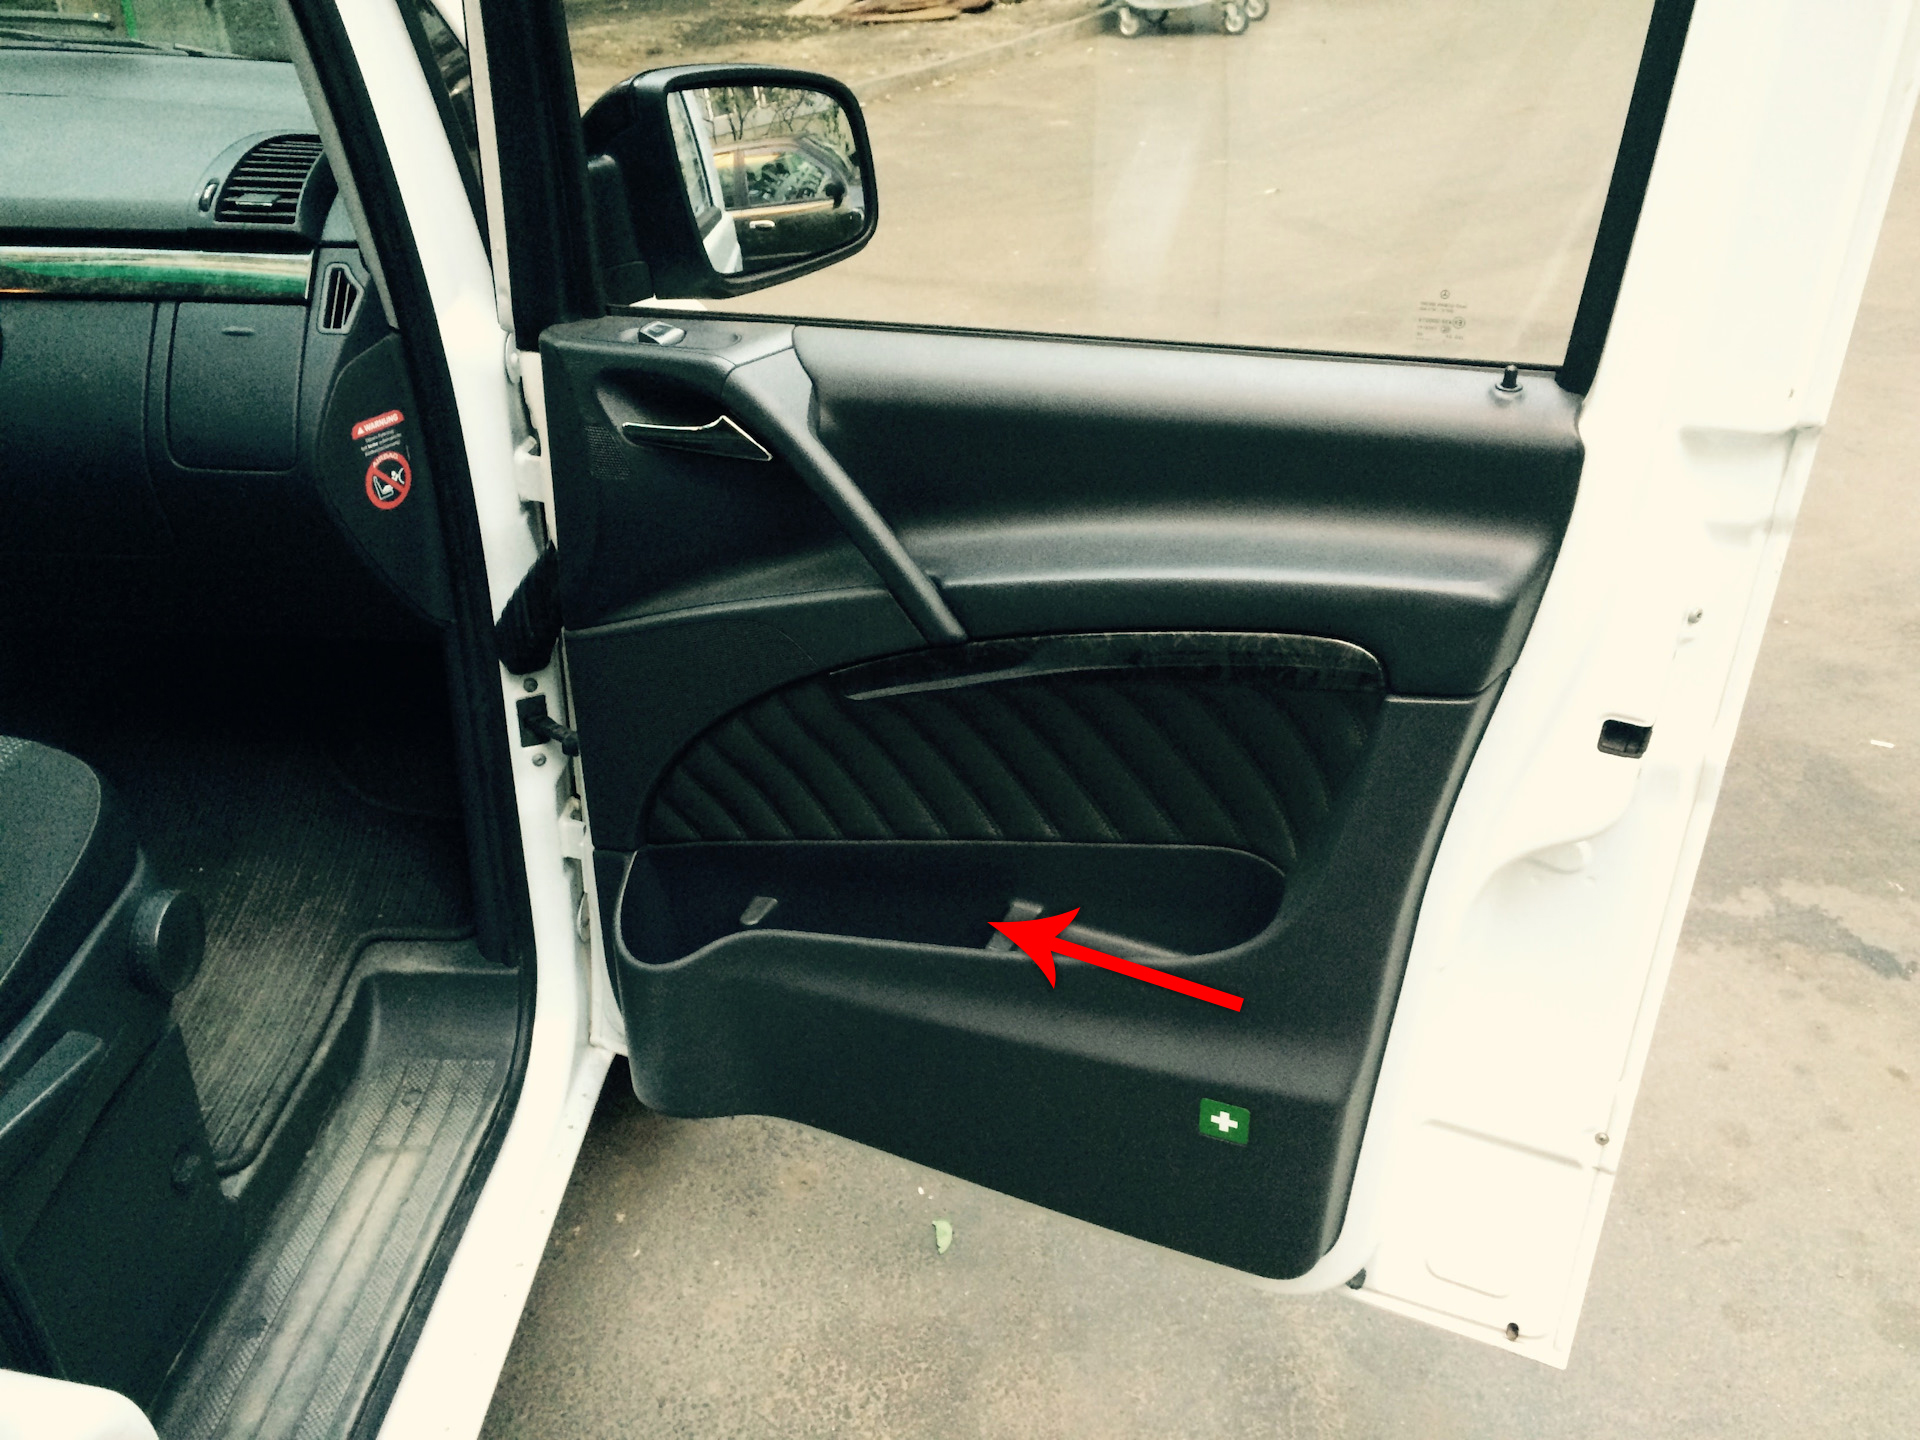
23 - Inner door handles allow you to open the doors from the passenger compartment.
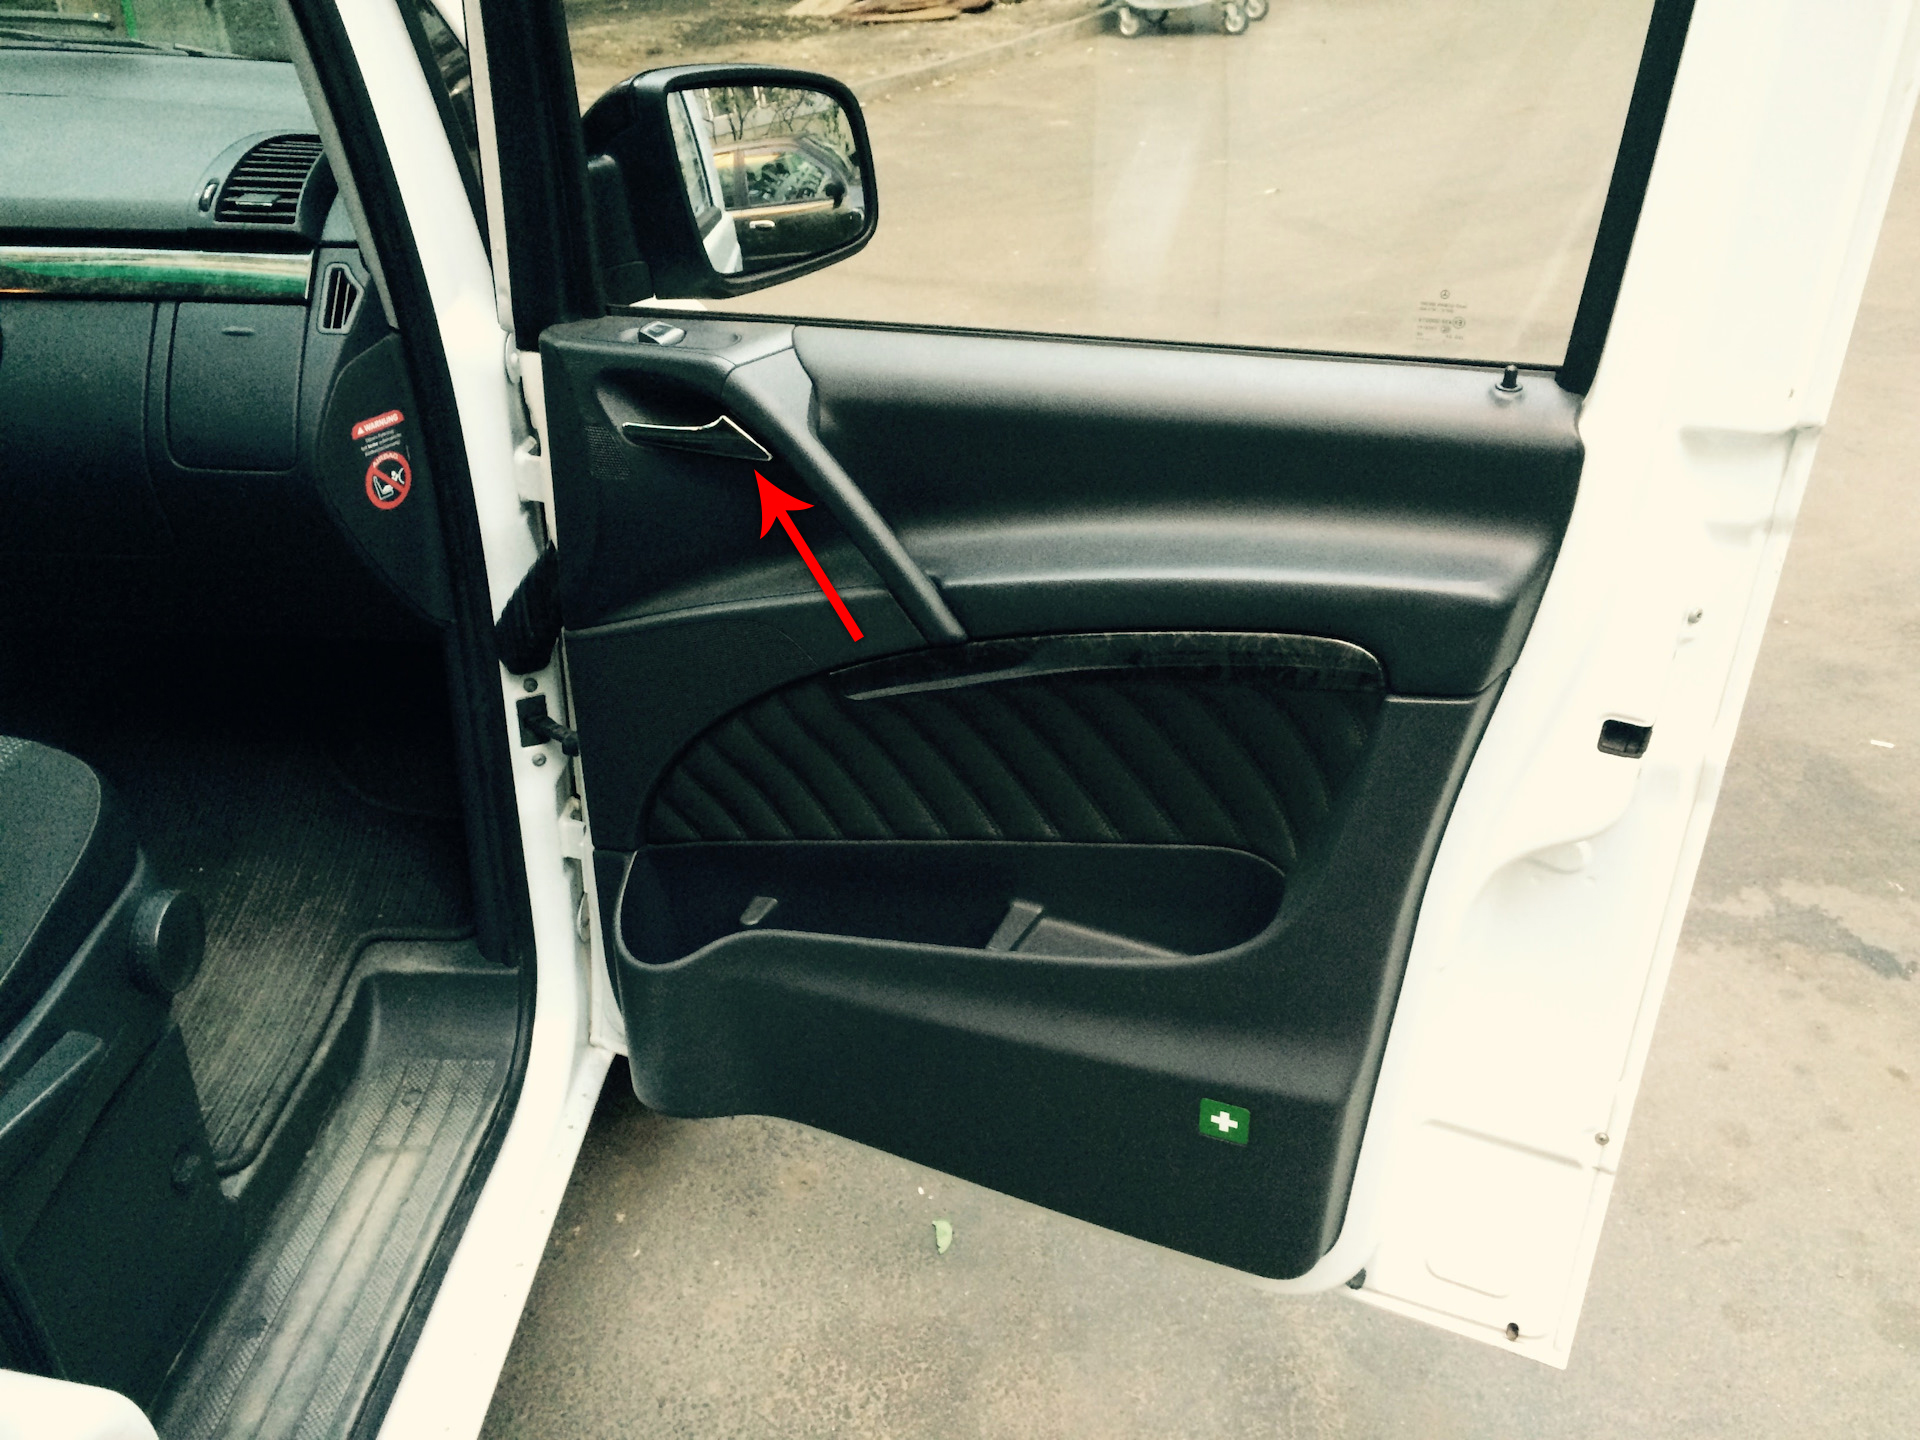
Mercedes Vito door handle
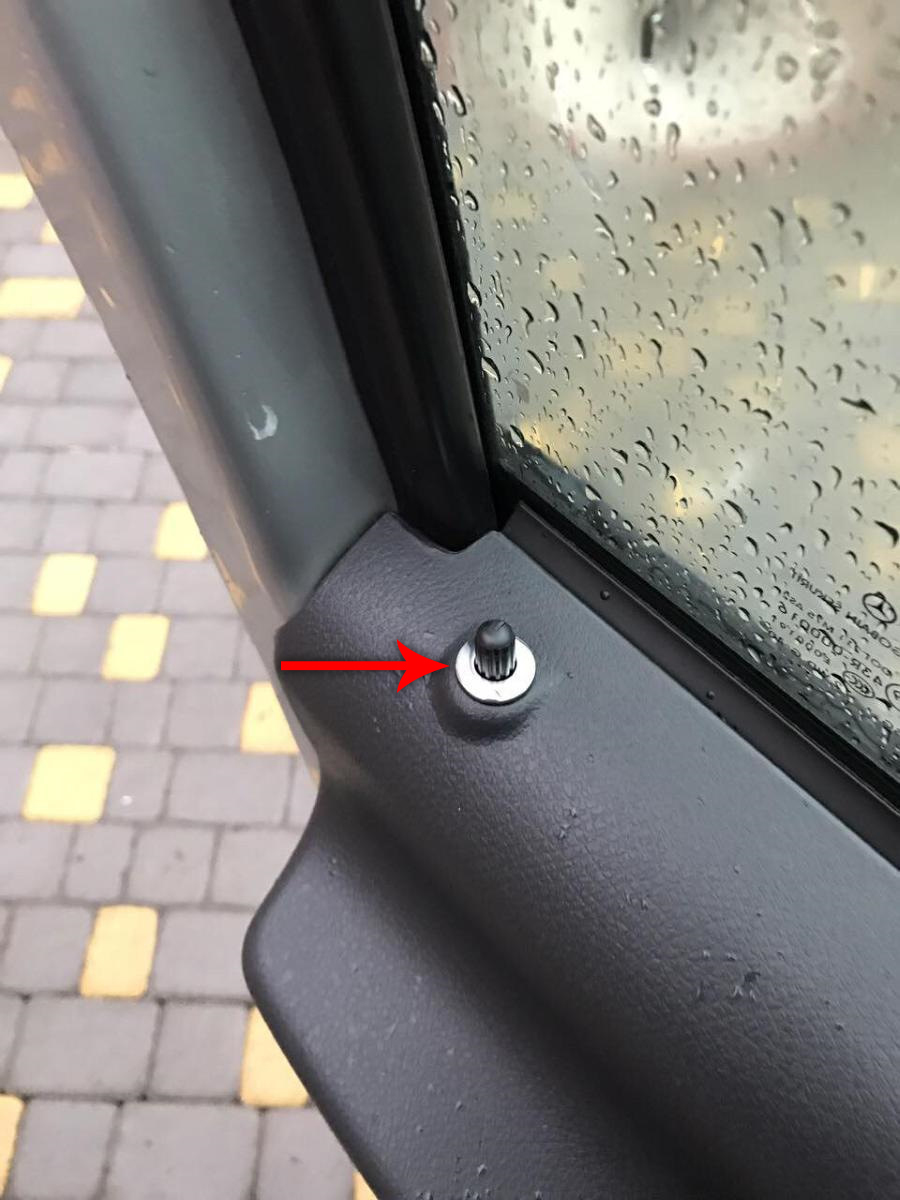
24 - Door closing lock.
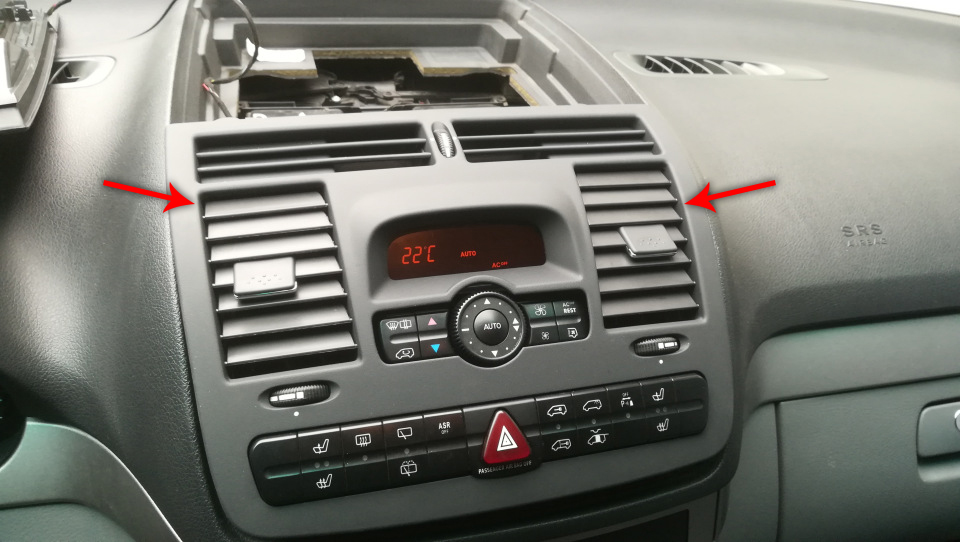
25 - Nozzles for heating (air conditioning) and interior ventilation. Designed to direct the air flow from the heater (air conditioner) and ventilation system. A description of this system can be found in this article .
The article is missing:
- High-quality photos of repair
Source: http://carpedia.club/
![W638 [1996 - 2003]](/uploads/Mercedes-Benz_Vito_I_W638_1996_-_2003_.jpg)
![W639 [2003 - 2010]](/uploads/Mercedes-Benz_Vito_2013.jpg)