![1 generation [2007 - 2010]](/uploads/Nissan_Qashqai_2007-2010_.jpg)

Tools:
- Pliers
- Nozzle on the crank 10 mm
- Collar for end nozzle
- Screwdriver flat medium
- torque wrench
- Torx wrench (star) E14
- Key XZN 12
- Circlip plier
- Hammer
- Stationery knife
Parts and consumables:
- Inserts
- Piston rings
- Marker
- Large paper clip
Note:
Disassembly of the engine oil sump is not allowed. For repair, only the tensioner can be removed, as well as the oil pump drive chain and balancing shafts.
Engine disassembly Nissan Qashqai
1. Remove the power unit.
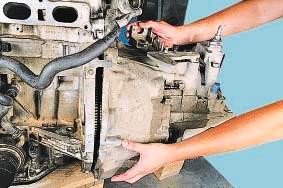
2. Remove a transmission.
3. Remove the cylinder head.
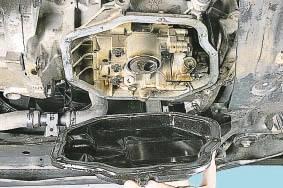
4. Remove the engine oil sump cover.
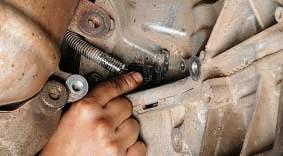
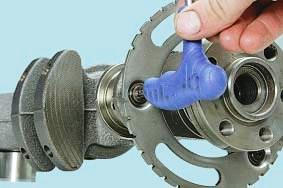
5. Press the shoe of the balance shaft drive chain tensioner and oil pump to align the holes in the plunger and tensioner housing.
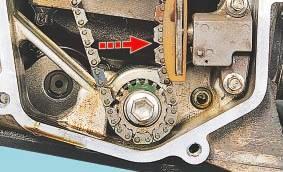
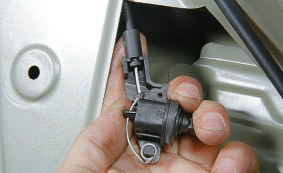
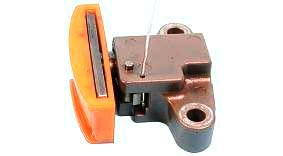
6. Insert a rod of suitable diameter (you can insert a large paper clip) into the hole to fix the tensioner plunger (shown on the removed tensioner for clarity). Remove the two mounting bolts and remove the chain tensioner.
7. Remove the drive chain of the balancing shafts and the oil pump from the drive shaft sprocket.
8. Turn out ten bolts of fastening of an oil crankcase of the engine in the order specified in drawing below, and remove a crankcase.

9. Clean the mating surfaces of the cylinder block and engine oil sump from the remnants of the old seal.
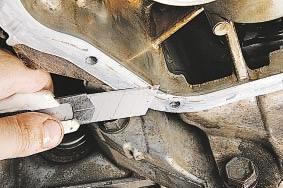
10. Rotate the crankshaft so that the piston to be removed is at bottom dead center (BDC).
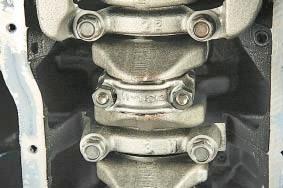
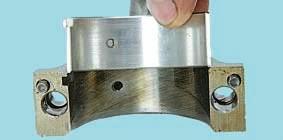
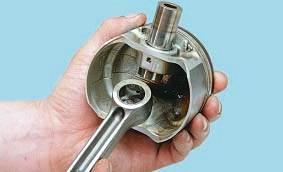
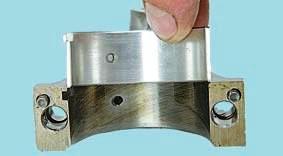
11. Turn away two nuts of fastening of a cover of a rod.
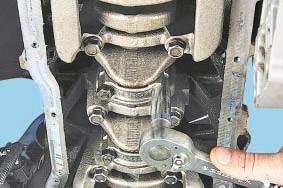
12. Remove the connecting rod cover. If the dismantling of the cover is difficult, first remove it with light blows of a hammer. The cylinder number is stamped on the side of the cover.
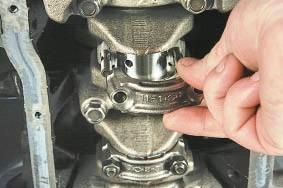
Warning:
The caps are machined complete with the connecting rod, so they are not interchangeable. Don't underestimate them in any way.
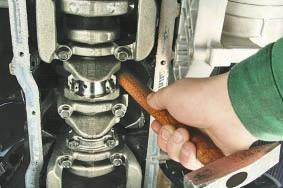
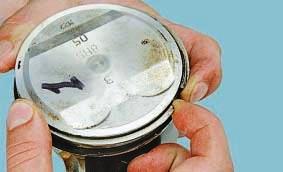
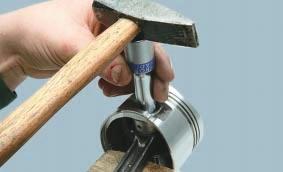
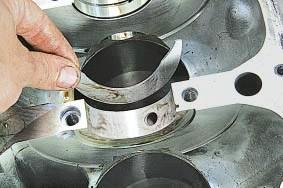
13. Push the connecting rod with a hammer handle into the cylinder and carefully remove the piston with the connecting rod from the cylinder. Make sure that the lower head of the connecting rod does not touch the mirror of the cylinder, otherwise the mirror may be damaged.
Remove the rest of the pistons in the same way.
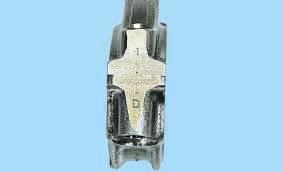
Note:
On the side surfaces of the lower heads of the connecting rods and their covers, the numbers of the cylinders in which they are installed are stamped. If you plan to remove the piston from the connecting rod, mark the piston with the cylinder number so as not to mix up the pistons during installation.
14. Take out loose leaves from a rod and its cover. If the liners remain on the crankshaft, remove them from the shaft. If it is not intended to replace the liners, mark them on the non-working surface with respect to the connecting rods and covers when removing them.
15. If replacement is necessary, remove the piston rings with a special puller. If it is not there, remove the rings from the piston, carefully spreading their locks.
Warning:
Do not spread the piston ring locks more than is required to remove them. Otherwise, a violation of the geometry or even breakage of the rings is possible.
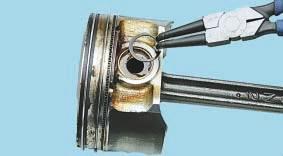
16. If it is necessary to replace the piston or connecting rod, squeeze the retaining rings holding the piston pin with a puller.
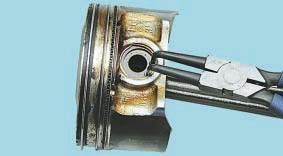
17. Remove the rings from the mounting sockets.
18. Heat the piston to 60-70 ° C, press the piston pin out of the piston and the upper head of the connecting rod using a mandrel with a diameter of about 17 mm.
19. Remove the piston from the connecting rod.
Note:
If the piston is to be removed from the connecting rod, mark the piston with the cylinder number so as not to mix up the pistons during installation.

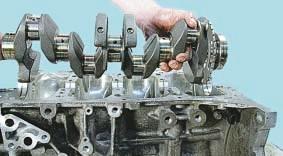
20. Turn out bolts of fastening of covers of radical bearings.
21. Remove the crankshaft from the beds of the crankshaft main bearings.
22. Remove the main bearing shells from the beds of the cylinder block.
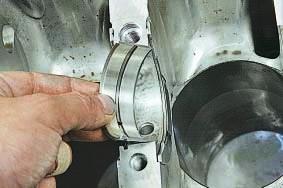
23. Remove the thrust semi-rings of the crankshaft from the end surfaces of the middle shaft bearing in the cylinder block.
24. Remove loose leaves from covers of radical bearings. If the liners remain on the crankshaft, remove them from the shaft. If the liners are not to be replaced, mark them on the non-working surface relative to the covers when removing them.
25. Turn out bolts of fastening of the setting disk of the gauge of position of a cranked shaft and remove a disk from a shaft.
The article is missing:
- High-quality repair photos
- Tool photo
Source: http://nissan-qashqai.dv13.ru/dvigatel/razborka-dvigatelya/