You will need: all the tools required to remove the rear wheel mudguards, as well as a 10 wrench.
Note:
Chery Tiggo rear bumper consists of three parts. The middle section of the bumper is secured with plastic clips on the tailgate, and the side sections are fastened with clips and bolts to the rear fenders.
Removing and installing rear bumper Chery Tiggo
1. On both sides of the vehicle, remove the rear wheel splash guards.
2. Open the tailgate.
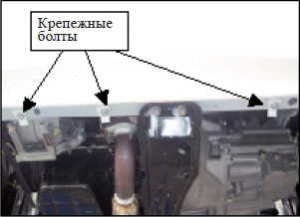
3. Remove the two bolts from the outside securing the left side of the rear bumper to the body.
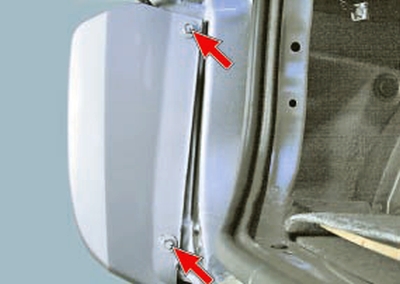
4. Overcoming the force of the clips, remove the left side of the Chery Tiggo bumper by pulling it back and down. The right side is removed in the same way.

Note:
This is the position of the inner fastening clips of the left side of the bumper.
The right side catches are located symmetrically about the longitudinal axis of the vehicle.

5. Remove the spare wheel.

6. Squeeze the spring clips and remove the spare wheel guard base stopper.

7. Remove the spare wheel guard base.

8. Using a screwdriver, remove the cores of the three clips of the middle part of the Chery Tiggo bumper.

9. Remove the clips from the holes.

10. Overcoming the force of the spring clips, remove the middle part of the Chery Tiggo bumper by pulling it back from the door.

Note:
This is how the clips are located on the inside of the middle part of the rear bumper.

11. Install the rear bumper and all removed parts in the reverse order of removal.
Source: http://chery-tiggo.dv13.ru/kuzov/snyatie-i-ustanovka-zadnego-bampera/
![T11 [2005 - 2014]](/uploads/Chery_Tigo_T11_2005_-_2014_.jpg)