Tools:
- Key 10 mm
- Key 13 mm
- Key 17 mm
- Flat blade screwdriver
- Pliers
Parts and consumables:
- Intake manifold gaskets
- Cloth gloves
- Rags
Mitsubishi Lancer X intake manifold gasket replacement
1. Decrease the pressure in the fuel supply system (see "Decreasing the fuel pressure in the fuel supply system", page 114).
2. Disconnect the wire from the negative terminal of the storage battery.
3. Drain the engine cooling system (see "Replacing the coolant", page 64).
4. Use a screwdriver to pry the plastic wiring harness holders.
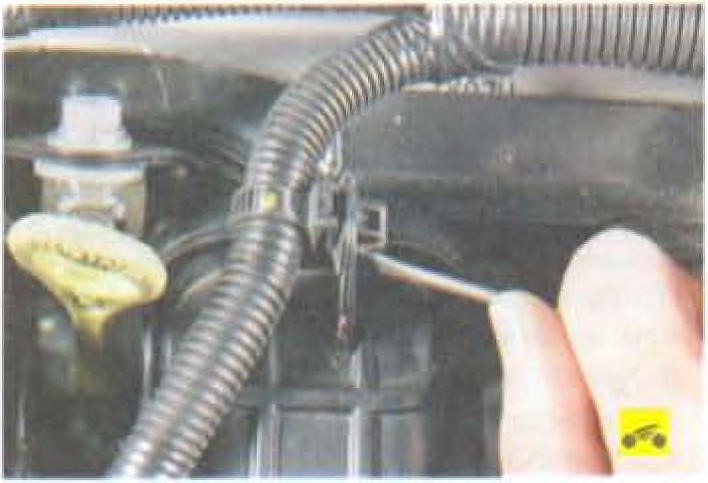
5. Remove them from the mounting brackets.

6. Disconnect the harness blocks from the engine management system sensors located on the intake manifold (see "Engine management system", page 198).
7. Remove the throttle assembly (see "Removal and installation of the throttle assembly", page 121).
8. Disconnect the pads of the harnesses from the terminals of the fuel rail and remove the fuel rail (see "Removing and installing the fuel rail", page 120).
9. Squeeze the clips of the clamps and remove the hoses of the crankcase ventilation system and the vacuum brake booster from the fittings of the Mitsubishi Lancer X intake manifold.
10. Remove the bolt securing the bracket for the air conditioning line and move the bracket to the side.
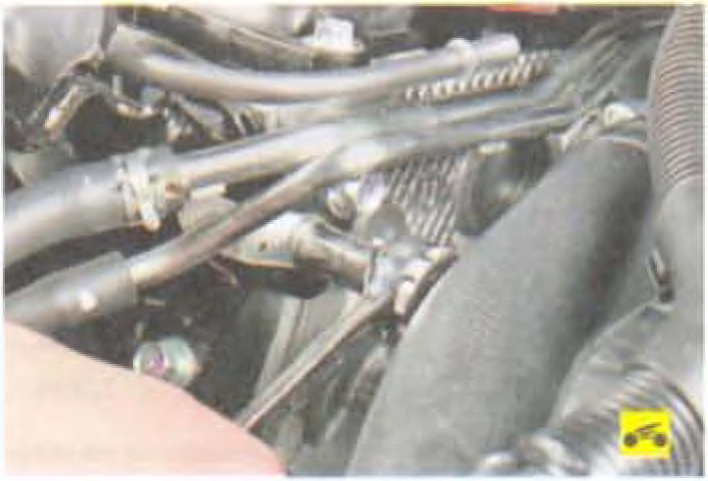
11. Remove the seven bolts securing the intake manifold to the cylinder head in the order shown in the illustration and remove the intake manifold.
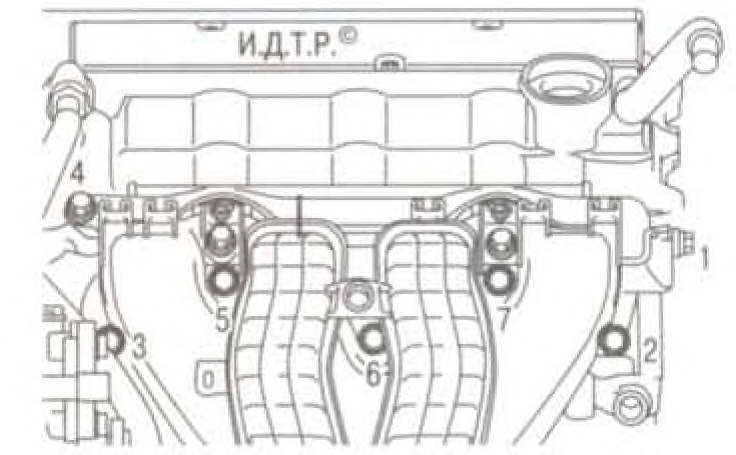
The procedure for removing the intake manifold mounting bolts
12. Replace the Mitsubishi Lancer X intake manifold gaskets.
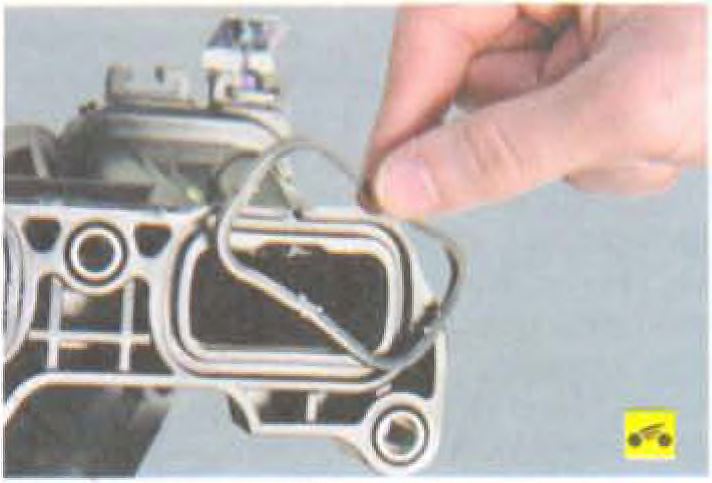
13. Install the intake manifold and all previously removed parts in reverse order, tighten the intake manifold retaining bolts in the order shown in the figure.
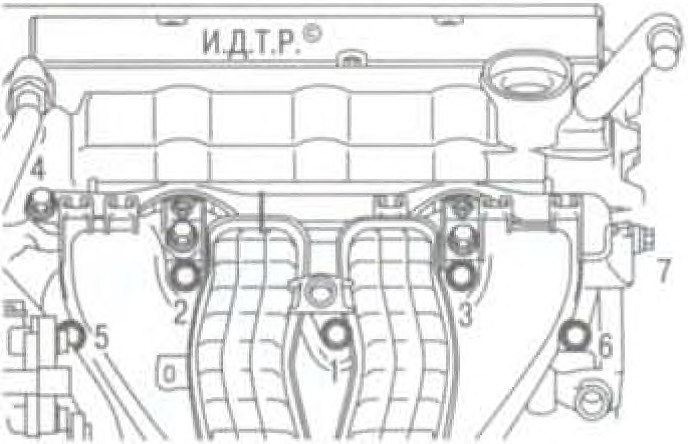
The order of tightening the intake manifold mounting bolts
Source: Mitsubishi Lancer X Owner's Manual

![IX [2000 - 2005]](/uploads/mitsubishi_lancer_2005_images_2.jpg)
![X [2007 - 2017]](/uploads/Mitsubishi_Lancer_Sedan_2007.jpg)