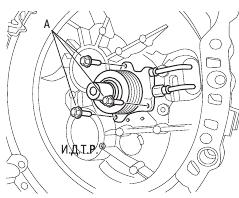
![CM [2006 - 2010]](/uploads/Hyundai_Santa_Fe_2006-2010_.jpg)
![DM [2012 - 2016]](/uploads/Hyundai_Santa_Fe_2012_-_3.jpg)


Tools:
- Key 10 mm
- Key 12 mm
- Key 17 mm
- Key 19 mm
- Key 24 mm
- Ratchet wrench
- socket extension
- Metal brush
- socket head 10 mm
- socket head 12 mm
- socket head 13 mm
- socket head 32 mm
- pliers
- Puller for ball joints
- balloon wrench
- Mounting blade
- Hammer
- Screwdriver flat medium
- Phillips screwdriver, medium
- Jack
- High engine mounts
Parts and consumables:
- Cloth gloves
- rags
- Drained coolant container
- Container for drained engine oil
- Capacity for drained working fluid
- Wire or cord
- Downpipe gaskets
- Motor oil
- Gearbox fluid
- Coolant
Note:
Remove the Hyundai Santa Fe engine assembly with gearbox by lowering it down from the engine compartment. This requires a lift to raise the front of the car higher. In garage conditions, in the absence of a lift, a jack will be required, as well as strong and high enough supports to install a raised front of the car on them, which will make it possible to remove the engine from under it, lowered to the garage floor.
The engine is very heavy, so we recommend removing it with helpers.
When removing and installing an engine with a large mass, use only fully serviceable lifting mechanisms designed for the appropriate load, and especially carefully control the correctness and reliability of connecting cables, traverses, etc. to the transport eyes of the engine.
Removal and installation of the Hyundai Santa Fe engine
1. Remove the decorative engine cover (see "Removing and installing the decorative engine cover").
2. Reduce the pressure in the supply system (see "Reducing the pressure in the supply system").
3. Remove the battery and its mounting shelf (see "Removing and installing the battery").
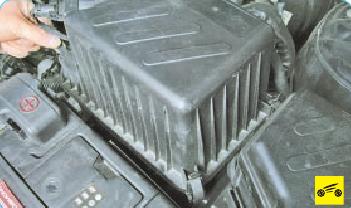
4. Remove the air filter housing and intake silencer (see "Removing and installing the air filter housing").
5. Remove the air intake (see "Removing and installing the air intake").
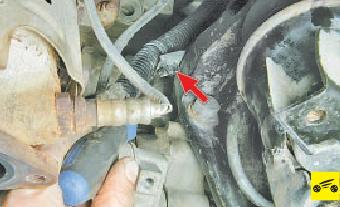
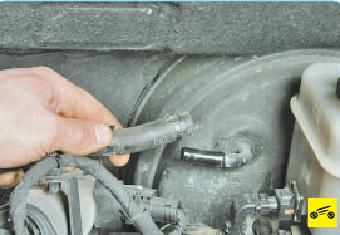
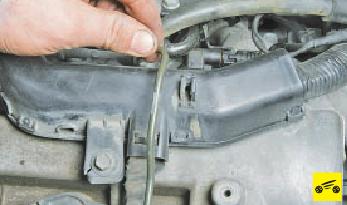
6. Remove the crankcase protection of the engine (see "Removing and installing the crankcase protection and engine mudguards").
7. Drain the coolant from the engine cooling system (see "Replacing the coolant").
8. If you are removing the Hyundai Santa Fe engine for repair, drain the oil from the engine crankcase.
NOTE:
On all-wheel drive vehicles, disconnect the flange fork of the front propeller shaft from the flange of the driven shaft and fasten the front propeller shaft to the body elements with wire (see "Removing and installing the driveline").
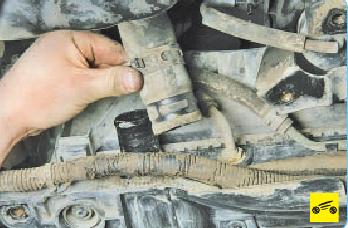
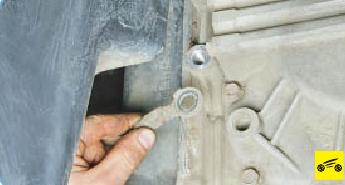
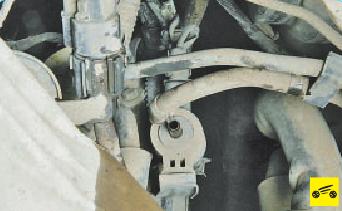
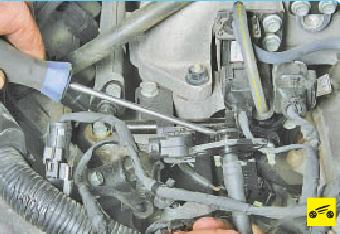
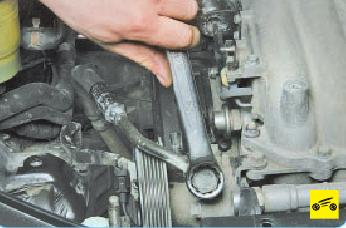
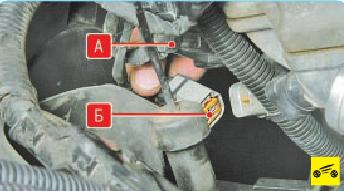
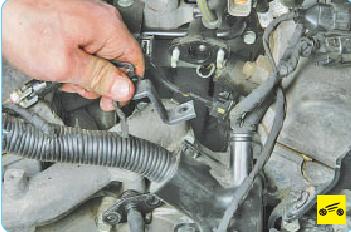
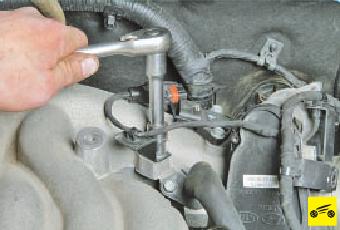
9. Turn away a nut A and turn out bolts B fastenings of a thermal screen of a starter.
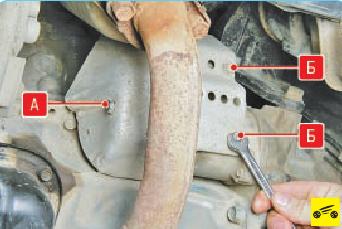
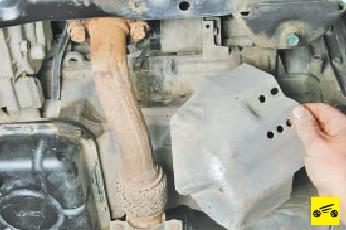
10. Remove the starter thermal screen.
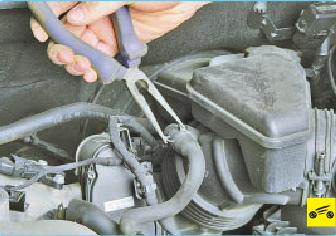
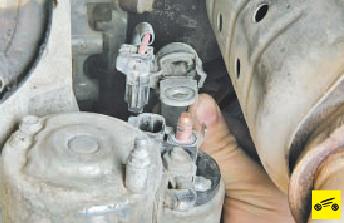
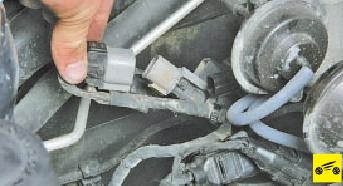
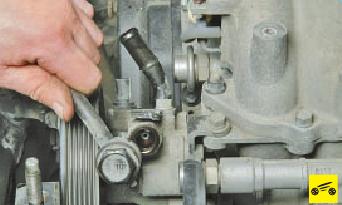
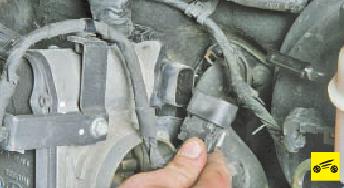
11. Take away a cover of a power wire of a starter.
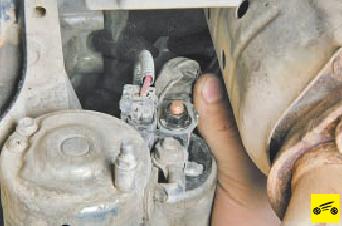
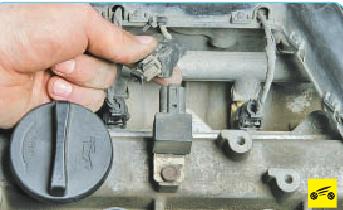
12. Pry off the retainer with a screwdriver and disconnect the wiring harness from the starter connector.
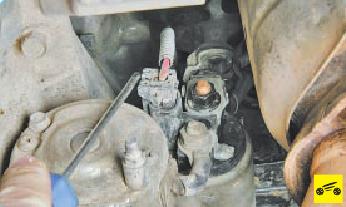
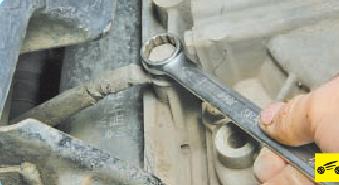
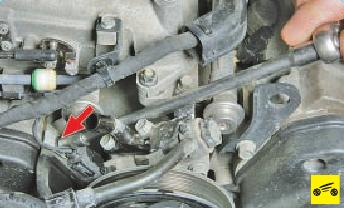
13. Turn away a nut of fastening of a power wire of a starter.
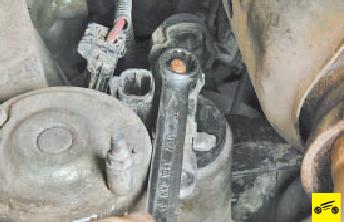
14. Move the wire aside.
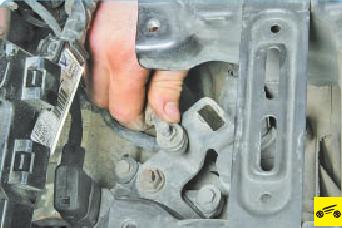
15. Remove the front suspension subframe (see "Removing and installing the front suspension subframe").
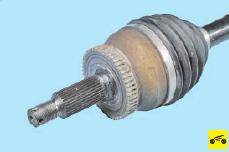
16. Remove the front wheel drives (see "Removing and installing front wheel drives").
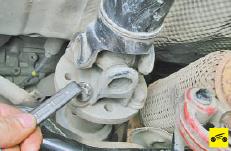
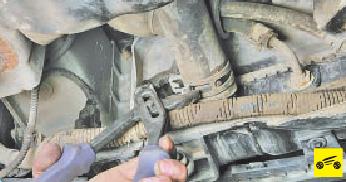
17. Remove a reception pipe (see. "Removal and installation of a reception pipe").
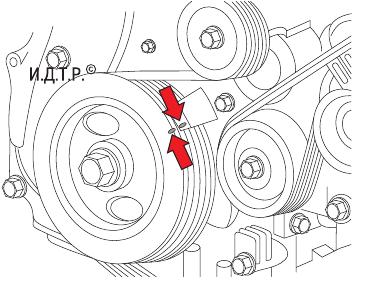
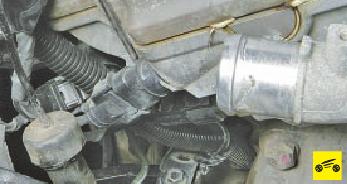
18. Remove the accessory drive belt (see "Replacing the accessory drive belt").
19. Remove the air conditioning compressor without disconnecting the pipelines, and fix it in any way (see "Removing and installing the air conditioning compressor").
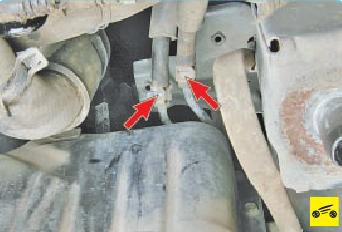
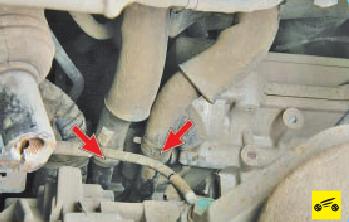
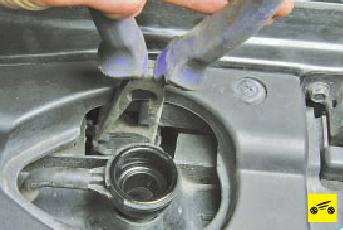
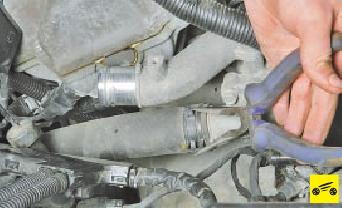
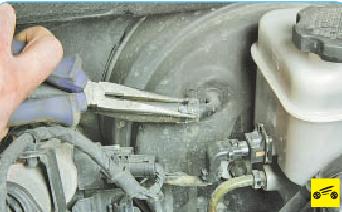
20. Squeeze the bent ears of the radiator outlet hose clamp, slide the clamp along the hose.
21. Disconnect a hose from a branch pipe on a radiator.
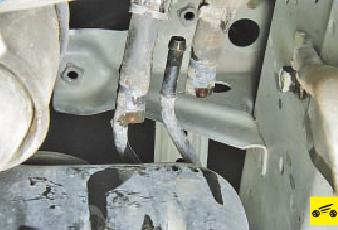
22. Squeeze the bent ears of the clamps for fastening the hoses of the radiator for cooling the working fluid, slide the clamps along the hoses.
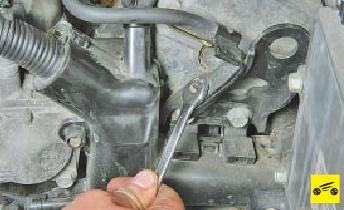
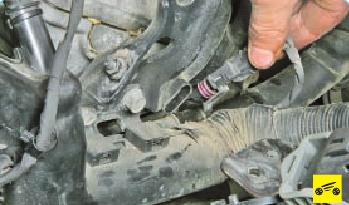
23. Disconnect hoses from pipelines.
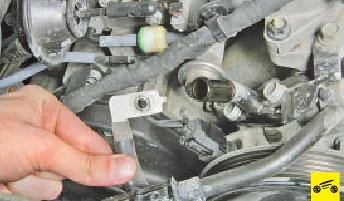
24. Turn out a bolt of fastening of a "mass" wire to a transmission.
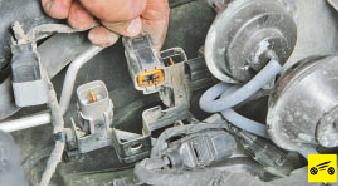
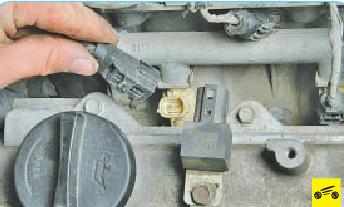
25. Take the wire to the side (the left mudguard of the engine is removed for clarity).
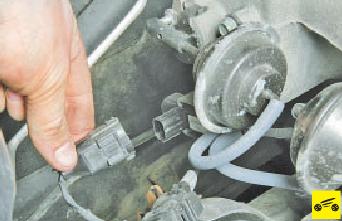
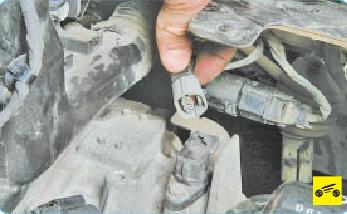
26. Wring out a clamp and disconnect a block of a plait of wires from a socket of the generator.
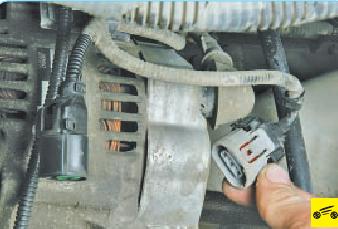
27. Turn away a nut of fastening of a power wire of the generator.

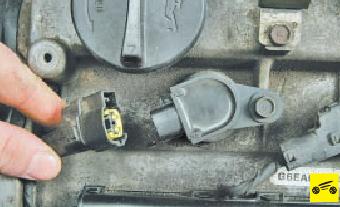
28. Take the wire to the side.
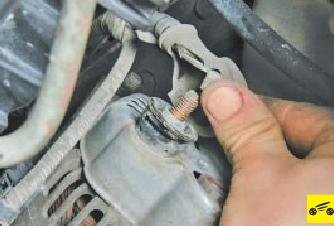
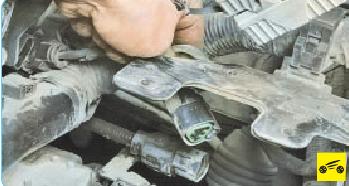
29. Wring out a clamp of the holder of a plait of wires and disconnect the holder from an arm.
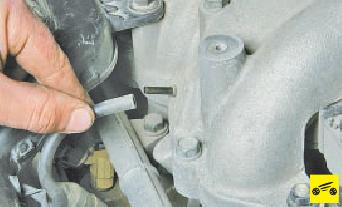
30. Squeeze the retainer of the harness holder and disconnect the holder from the bracket on the front suspension support of the power unit.
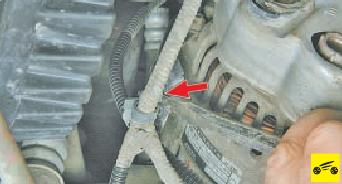
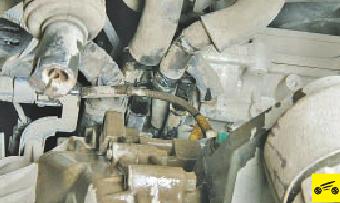
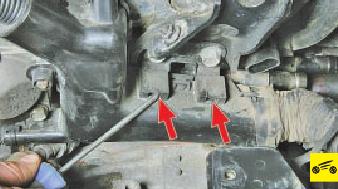
31. Squeeze the bent ears of the heater radiator hose clamps, slide the clamps along the hoses.
32. Disconnect the hoses from the nozzles.
33. Squeeze the bent ears of the clamp for fastening the inlet hose of the canister purge valve, slide the clamp along the hose.
34. Disconnect the hose from the valve fitting.
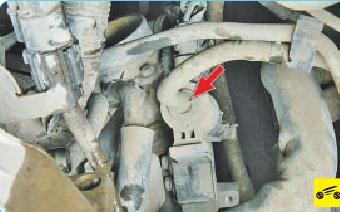
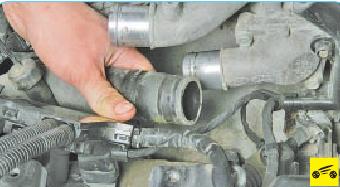
35. Squeeze the bent ears of the clamp for fastening the inlet hose of the radiator.
36. Holding a collar, disconnect a hose from a branch pipe of a radiator.
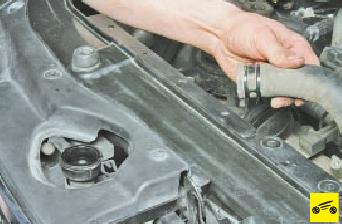
37. Similarly, disconnect the radiator inlet hose from the water distributor.
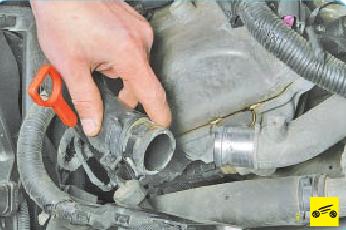
38. Squeeze the bent ears of the clamp that secures the outlet hose of the radiator to the thermostat cover, slide the clamp along the hose.
39. Disconnect the hose from the thermostat cover.
40. Turn away two nuts of fastening of a fuel line to the pipeline of fuel rails.
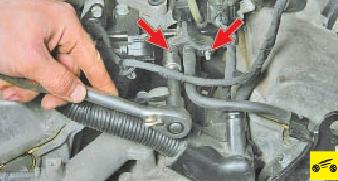
41. Take the fuel line to the side.
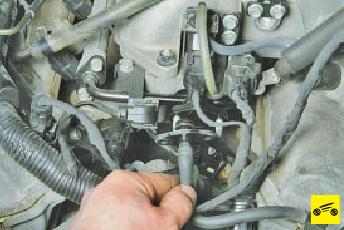
42. Pry with a screwdriver and remove the sealing ring of the fuel line, when assembling, replace the ring with a new one.
43. Turn away a nut of fastening of an arm of a fuel line.
44. Take the bracket with the fuel line to the side.
45. Squeeze the bent ears of the vacuum hose clamp, slide the clamp along the hose.
46. Disconnect the hose from the fitting on the vacuum booster.
47. Disconnect the tip of the transmission control cable from the lever on the gearbox (see "Adjusting and replacing the automatic transmission control cable").
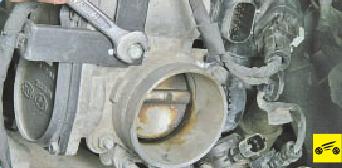
NOTE:
On vehicles with a manual transmission, disconnect the selector and shift cables and disconnect the pipes from the clutch slave cylinder (see "Removing and installing a manual transmission").
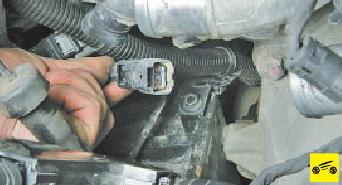
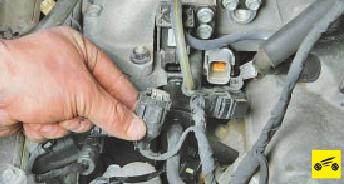
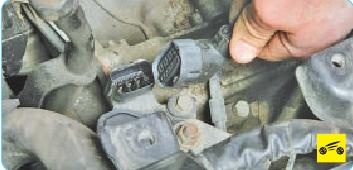
48. Press the latch and disconnect the wiring harness block from the right valve of the intake geometry change system.
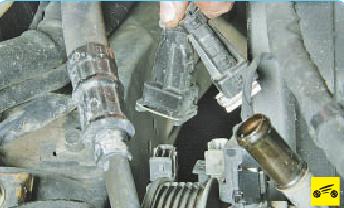
49. Wring out a clamp and separate blocks of a plait of wires of coils of ignition on a back head of the block of cylinders.
50. Wring out a clamp and separate blocks of a plait of wires of the diagnostic gauge of concentration of oxygen of a back final collector.
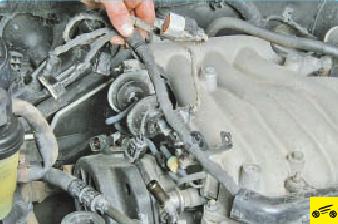
51. Wring out a clamp and separate blocks of a plait of wires of the operating gauge of concentration of oxygen of a back final collector.
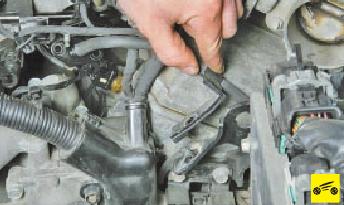
52. Squeeze the bent ears of the clamp for fastening the power steering supply hose, slide the clamp along the hose.
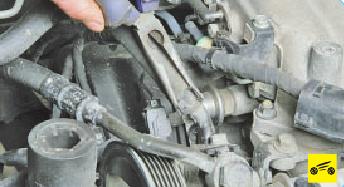
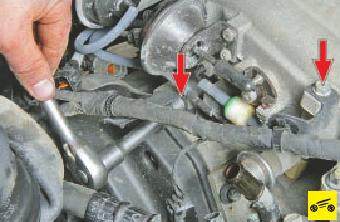
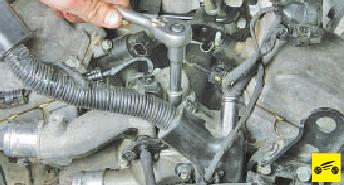
53. Disconnect the hose from the power steering pump fitting.
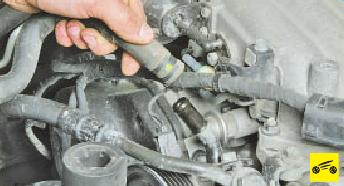
54. Turn out a bolt union of the pressure head pipeline of the pump of the hydraulic booster.
55. Take the pipeline aside.
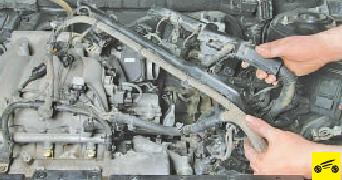
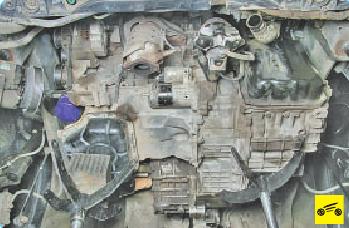
56. Turn out a bolt of fastening of a "mass" wire to a back head of the block of cylinders.
57. Take the wire to the side.
58. Wring out clamps of pads of a plait of wires of gauges of a detonation and separate pads.
59. Wring out a clamp of a block of a plait of wires and disconnect a block from a socket of the pump of the hydraulic booster of a steering.
60. Turn out two bolts of fastening of a plait of wires to the right part of a receiver.
61. Take the wiring harness to the side.
62. Press the latch and disconnect the wire block from the antenna amplifier.
63. Wring out clamps and disconnect blocks of a plait of wires from fuel atomizers on a forward fuel stage.
64. Wring out clamps and disconnect blocks of a plait of wires from coils of ignition on a forward head of the block of cylinders.
65. Disconnect the tip of the vacuum hose of the front suspension mount of the power unit from the fitting on the receiver.
66. Remove the hose from the retainer on the large harness holder.
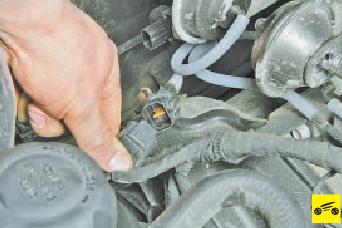
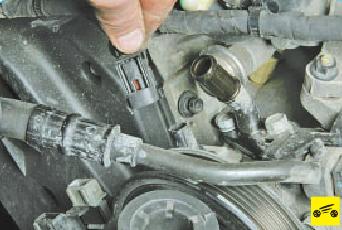
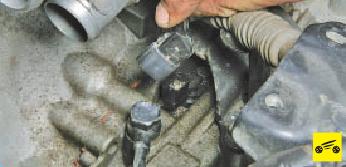
67. Wring out a clamp and separate pads of a plait of wires of the gauge of pressure of oil.
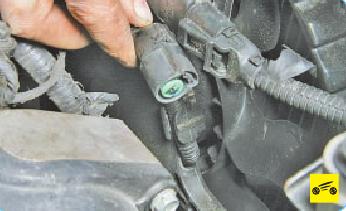
68. Wring out a clamp and disconnect a block of a plait of wires from the gauge of position of camshafts of a forward head of the block of cylinders.
69. Wring out a clamp and disconnect a block of a plait of wires from the gauge of temperature of a cooling liquid.
70. Press the clamps and disconnect the wiring harness pads of the diagnostic oxygen concentration sensor B on the front exhaust manifold and the crankshaft position sensor A.
71. Similarly disconnect pads of a plait of wires of the operating gauge of concentration of oxygen on a forward final collector.
72. Turn away nuts A and turn out a bolt B fastenings of the big holder of a plait of wires.
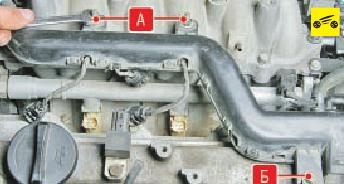
73. Turn out two bolts of fastening of the small holder of a plait of wires.
74. Take the wiring harness away from the front cylinder head.

75. Wring out a clamp and separate pads of a plait of wires of wires of fuel atomizers of a back fuel rail.
76. Press the latch and disconnect the wiring harness block from the left valve of the intake geometry change system.
77. Wring out a clamp and separate pads of wires of the gauge of the index of temperature of a cooling liquid.
78. Press the latch and disconnect the wiring harness block from the solenoid valve for changing the valve timing in the front cylinder head.
79. Press the latch and disconnect the wiring harness block from the solenoid valve for changing the valve timing in the rear cylinder head.

80. Turn out a bolt of fastening of an arm of a wire of the electromagnetic valve of change of phases of gas distribution.
81. Take the bracket with the wire to the side.
82. Press the latch and disconnect the wiring harness block from the camshaft position sensor in the rear cylinder head.
83. Press the latch and disconnect the wiring harness block from the speed sensor of the secondary shaft of the gearbox.
84. Wring out a clamp and separate pads of a plait of wires of the gauge of speed of the car.
85. Press the latch and disconnect the wiring harness block from the transmission control unit.
86. Press the latch and disconnect the wiring harness block from the gearbox input shaft speed sensor.
87. Wring out a clamp and disconnect a block of a plait of wires from a socket of the electromagnetic valve.
NOTE:
On vehicles equipped with a manual transmission, disconnect the wiring harness connector from the reverse light sensor.
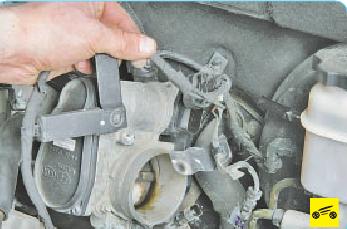
88. Press the latch and disconnect the wiring harness block from the canister purge valve.
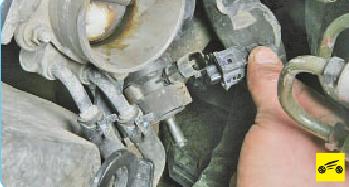
89. Press the latch and disconnect the wiring harness block from the throttle position sensor.
90. Remove the throttle position sensor harness bracket bolt.
91. Take the bracket with the harness to the side.
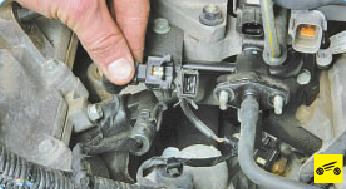
92. Wring out a clamp and disconnect a block of a plait of wires from the gauge of absolute pressure in a receiver.
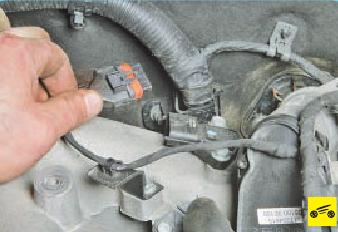
93. Turn out a bolt of fastening of an arm of a plait of wires of the gauge of absolute pressure in a receiver and take away an arm with a plait aside.
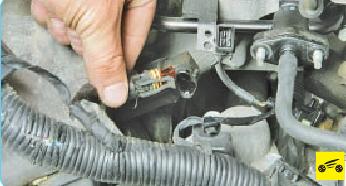
94. Squeeze out the retainers of the left holder of the wiring harness.
95. Move the wiring harness to the side.
96. Install supports under the crankcases of the engine and gearbox.
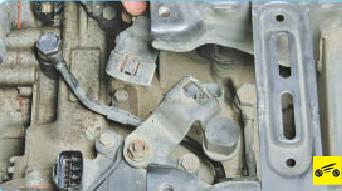
97. Remove the bracket for the right power unit suspension support (see "Replacing the right power unit suspension support").
98. Remove the left support of a suspension bracket of the power unit (see. "Replacement of the left support of a suspension bracket of the power unit").
99. Check again that all wires, hoses and attachments are disconnected from the engine.
100. Lower the engine on supports, holding it from falling. If it is not possible to lower the engine on supports, hang the front of the car (raise the car on a lift) to a height sufficient to remove the power unit from under the car, and place reliable supports under the body.
101. Install the power unit, as well as all removed components and parts in the reverse order of removal, taking into account the following:
- before installing the power unit, clean the threaded holes for fastening its supports with a tap;
– Necessarily replace with new laying of a reception pipe;
– when connecting wires and pipelines, carefully monitor their correct location in the engine compartment, avoiding contact with heating and moving elements of the power unit.
After installing the engine, do the following:
1. Fill the engine with oil (see "Changing the engine oil and oil filter").
2. Fill the oil (working fluid) into the gearbox (see "Checking the level, topping up and changing the oil in a manual gearbox"; "Checking the level and topping up the working fluid in an automatic transmission").
3. Fill the oil in the transfer case (see "Checking the level, topping up and changing the oil in the transfer case").
4. Fill in coolant and remove air plugs from the engine cooling system (see "Replacing the coolant").
5. Remove air from the hydraulic clutch release.
6. Fill in the working fluid in the power steering system and remove air from it (see "Replacing the working fluid in the power steering").
7. Start the engine and check for fuel, oil and coolant leaks. Check oil pressure. Listen to the engine: it should run smoothly, without extraneous noise and knocks.
Source: Hyundai Santa Fe Owner's Manual, Third Rome Publishing House