![2 generation [2005 - 2009]](/uploads/Kia_Rio_2005_-_2011.png)
![3 generation [2011 - 2015]](/uploads/9b0bb8ba0203729f482ae8eb3b95c4f1.jpg)

Tools:
- Screw jack (optional)
- Vehicle stands (optional)
- Nozzle for crank 8 mm
- Nozzle on the crank 10 mm
- Collar for end nozzle
- Phillips screwdriver large
- Phillips screwdriver, medium
- Large flat screwdriver
- pliers
Parts and consumables:
- Cloth gloves
- New clips for mounting the bumper (if replacement is needed)
Notes:
It is advisable to carry out repair work on a lift or a pit / overpass. But if this is not possible, you can use a jack and supports under the car. The job can be done without jacking up the car and removing the front wheels, but access to some bolts will be difficult. It is advisable to remove the bumper itself with an assistant.
1. Open the hood and place it on the stop.
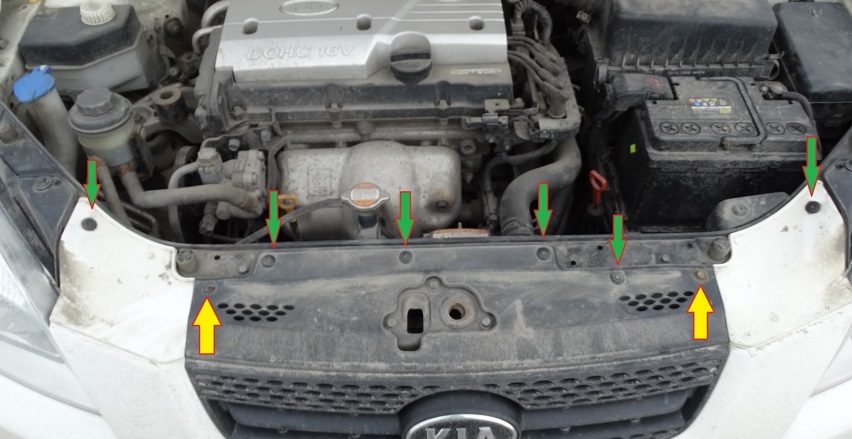
2. Using a Phillips screwdriver, unscrew the clips and remove the six caps (green) that secure the bumper to the upper cross member of the radiator frame.
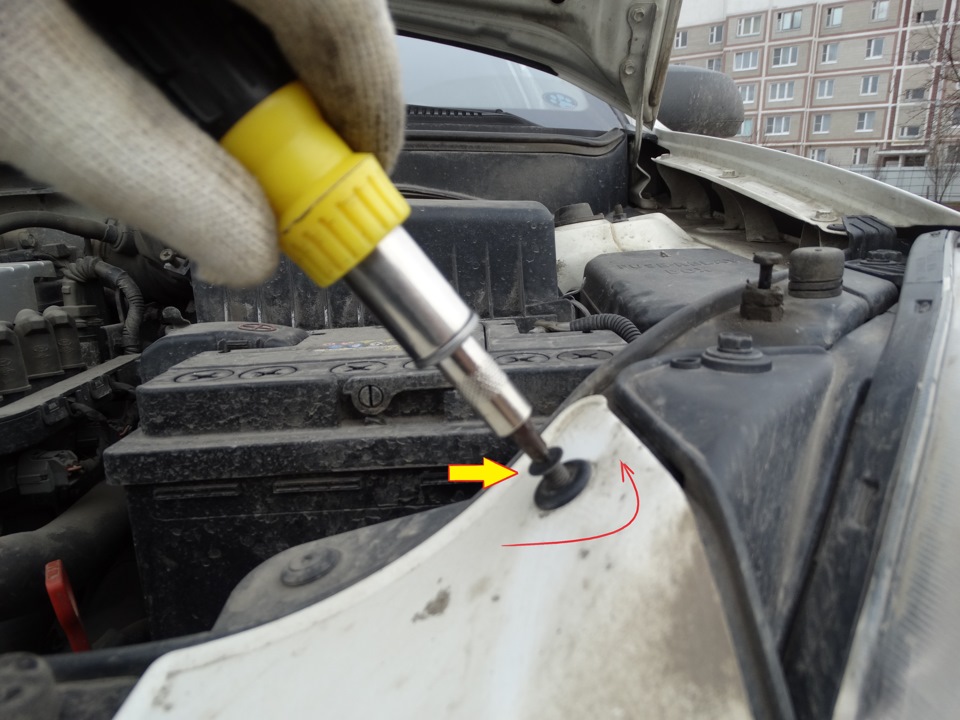
Unscrewing one of the bumper clips
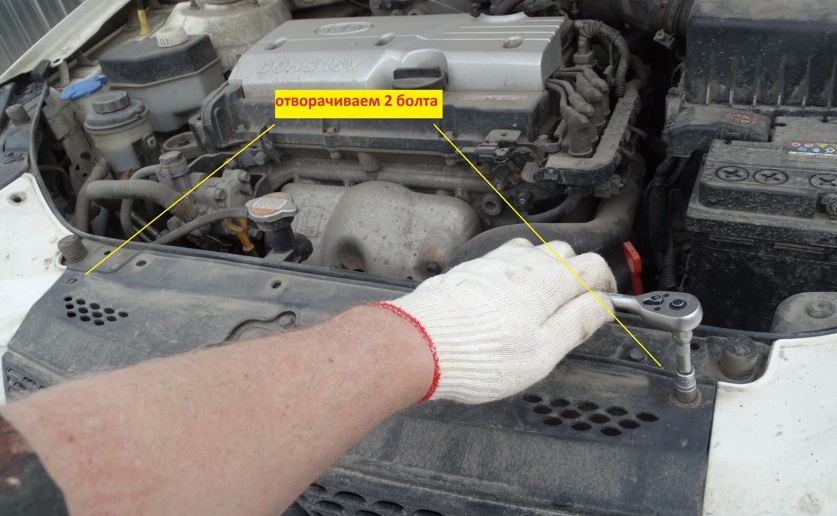
3. Head on "10" turn out two bolts of the top fastening of a bumper.
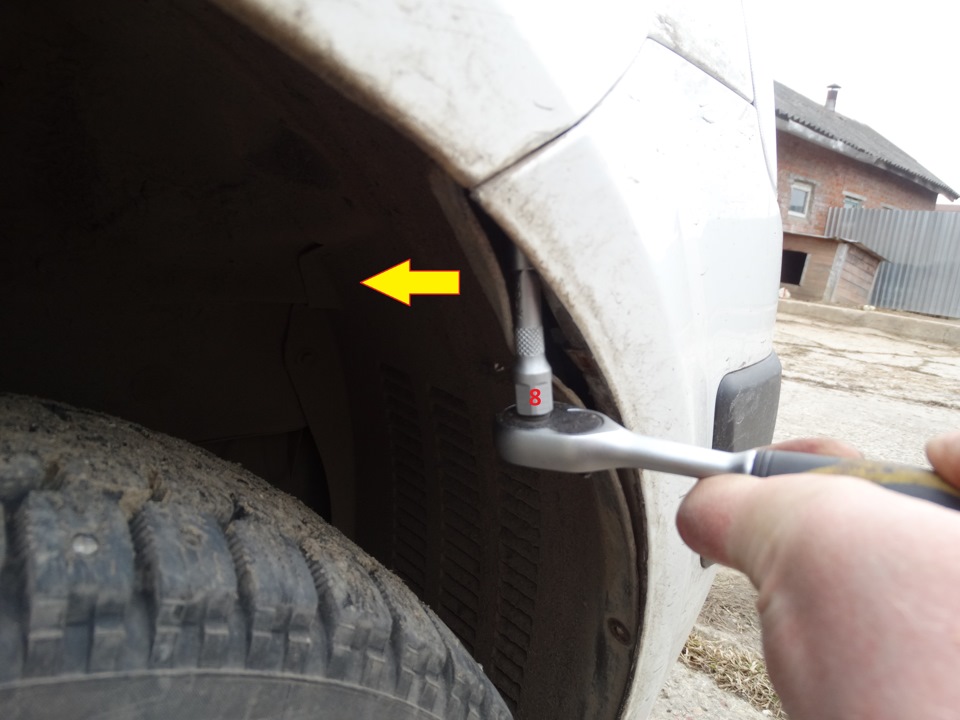
4. With a head on “8”, unscrew the three screws securing the fender liner to the bumper.
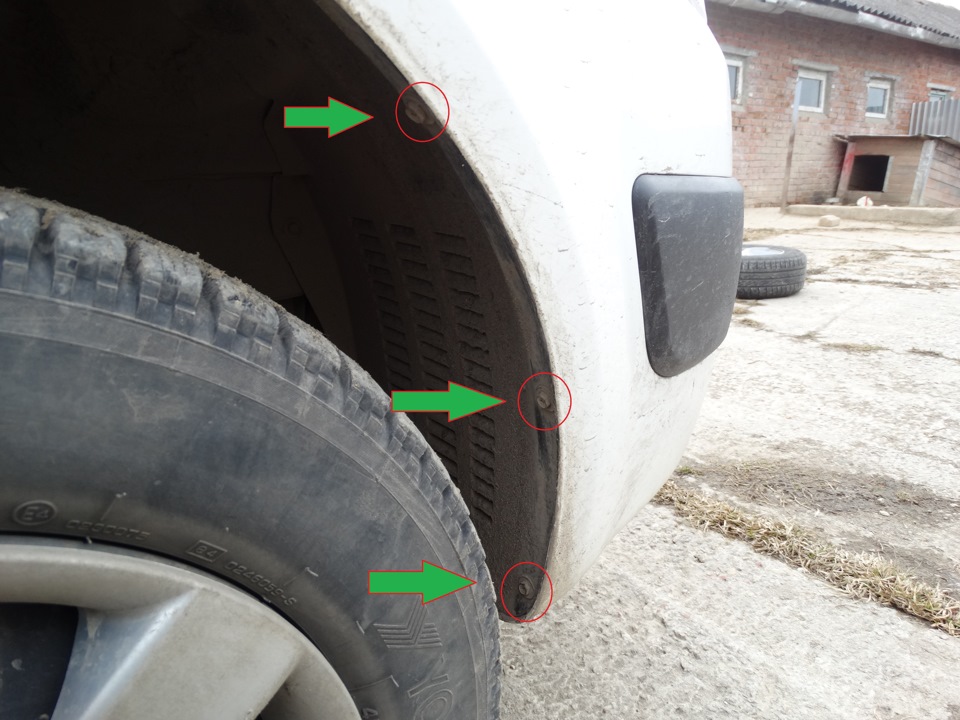
5. Bend the fender liner at the junction of the bumper and fender. Locate and unscrew the head on the "8" screw securing the bumper to the wing. Do the same on the other side of the car.
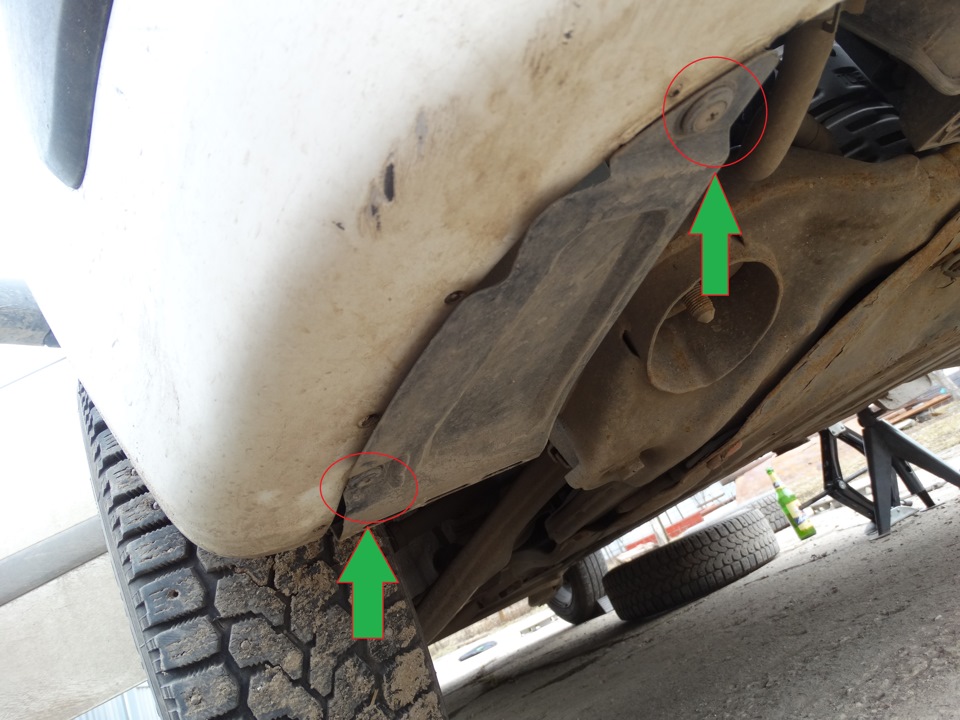
6. In the lower part, the fender liner is also attached to the bumper with caps. Look under the bumper from one end and find the two attachment points for the fender liner to the bumper. Unscrew and remove the caps with a Phillips screwdriver without pressure. Do the same on the other side of the car.
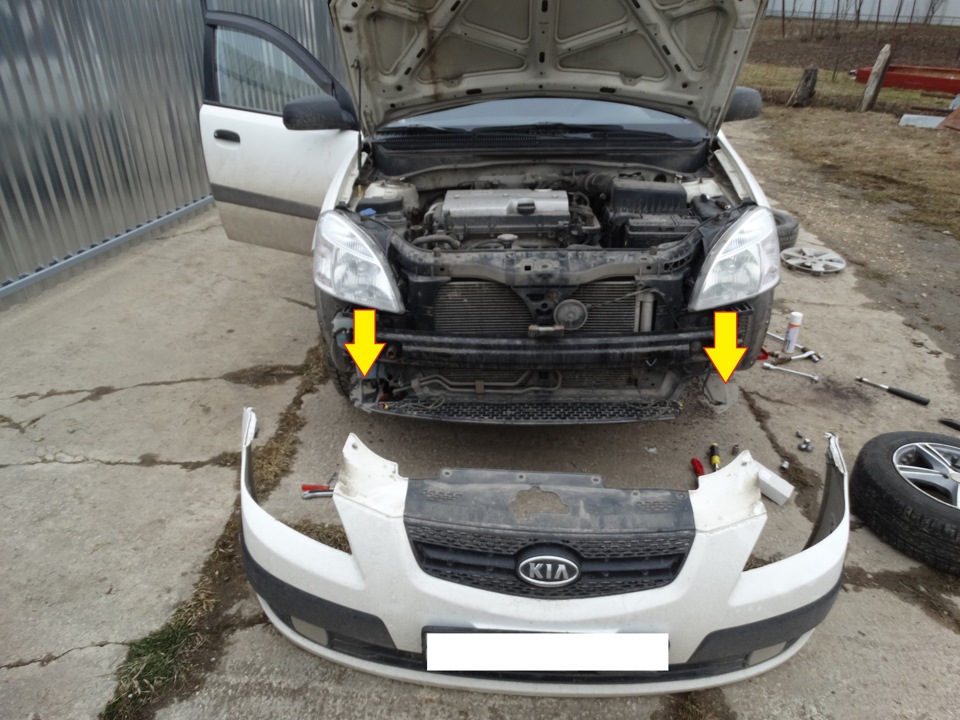
7. Turn out two bolts of the bottom fastening of a bumper.

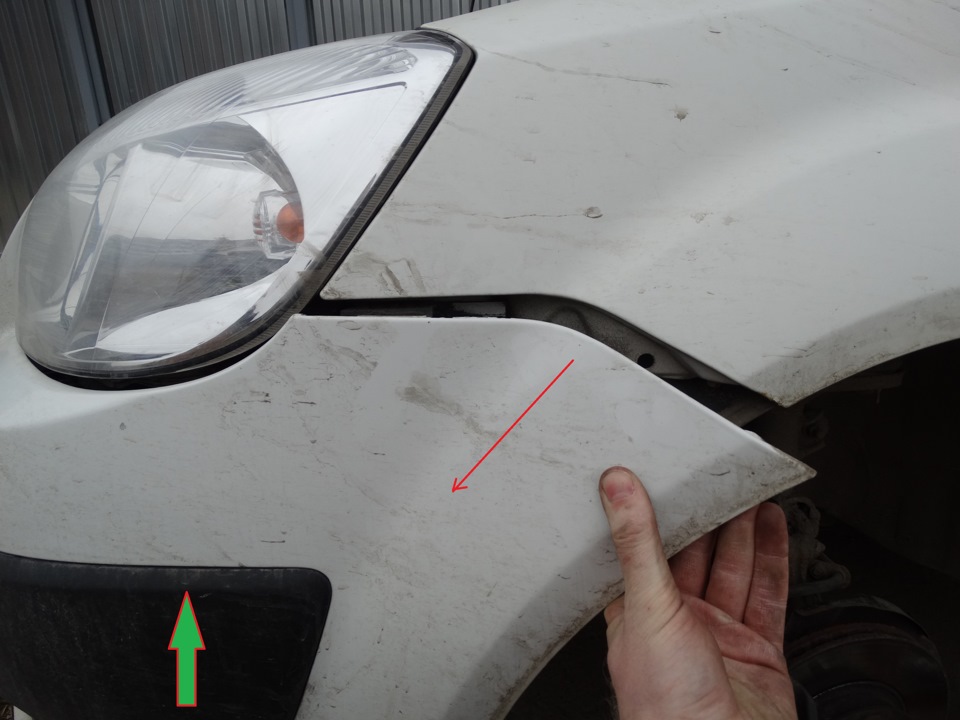
8. Grasp the bumper near the fender with one hand and the bottom of the bumper with the other hand. Pressing with one hand on the bumper from the bottom up, with the other, with loosening movements back and forth, pull the bumper towards you. Repeat the same procedure on the other side of the car.
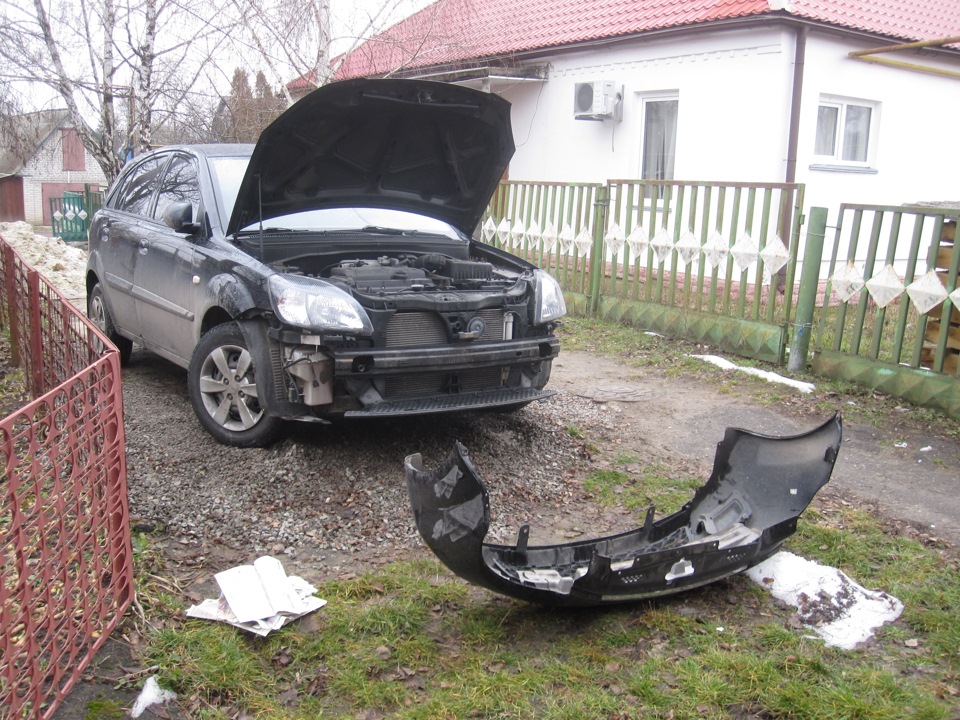
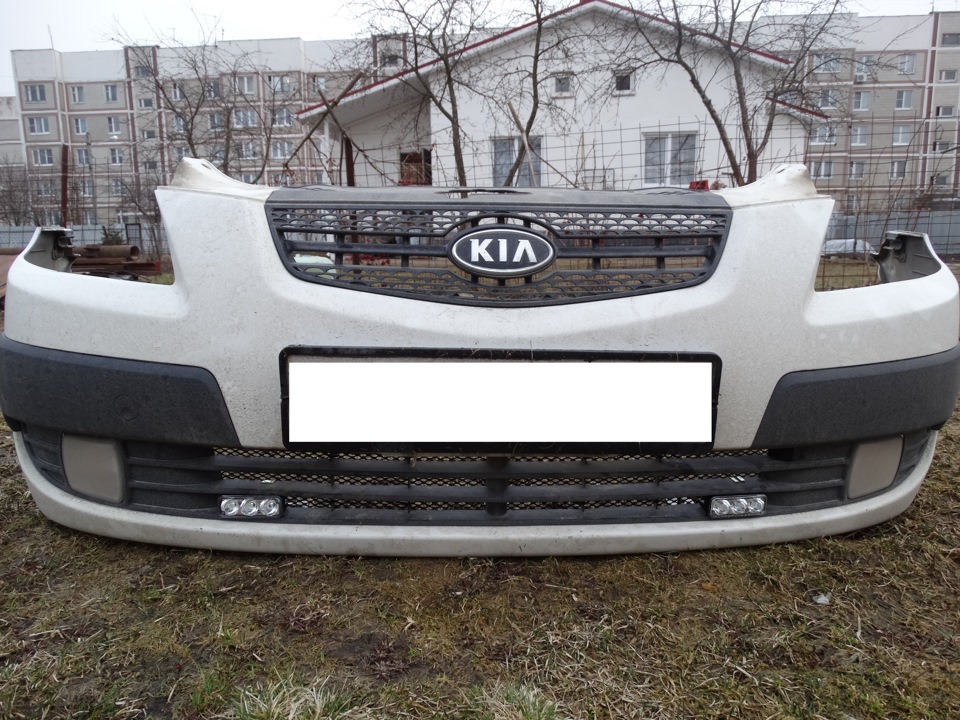
9. Grasp the upper part of the bumper with both hands and pull it towards you, but not abruptly. Remove the bumper.
Notes:
If you have PTFs on your car, then before removing the bumper, you need to disconnect the wires from them.
Places for disconnecting wires from PTF
10. Install the parts in the reverse order of removal.
The article is missing:
- Tool photo
Source: carpedia.club