![W203/S203/CL203 [2000 - 2004]](/uploads/mercedes-c-klass-w203.jpg)

Tools:
- open end wrench
- Removal tool e.g. HAZET 1966-05
- torque wrench
Parts and consumables:
- Insulating tape
Withdrawal
1. Moisten the windshield with water.
2. Run the windshield wiper for a short time and turn it off with the switch. The brushes should stop in the end position.
3. Mark the position of the brush with correctly adjusted levers on the glass, eg with adhesive tape.
4. Open the hood.
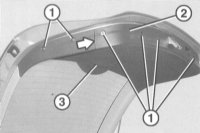
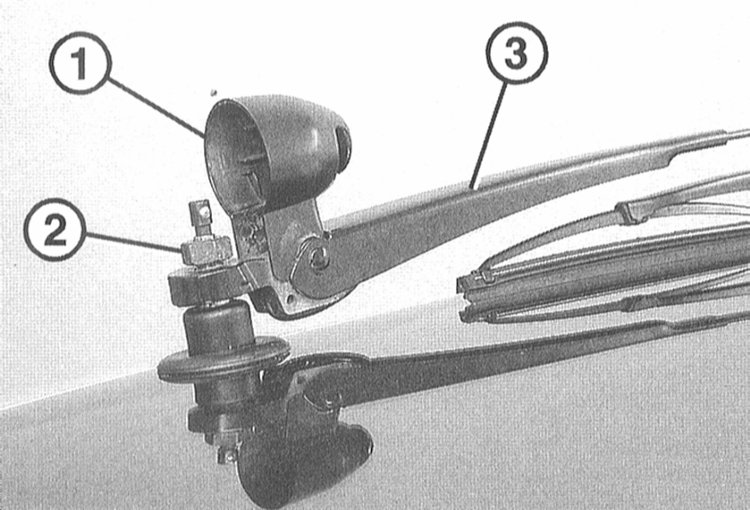
5. Loosen the nut about 2 turns, but do not completely loosen it. Slightly move the left lever in different directions so that it comes off the axis. Completely unscrew the nut and remove the lever from the axle.
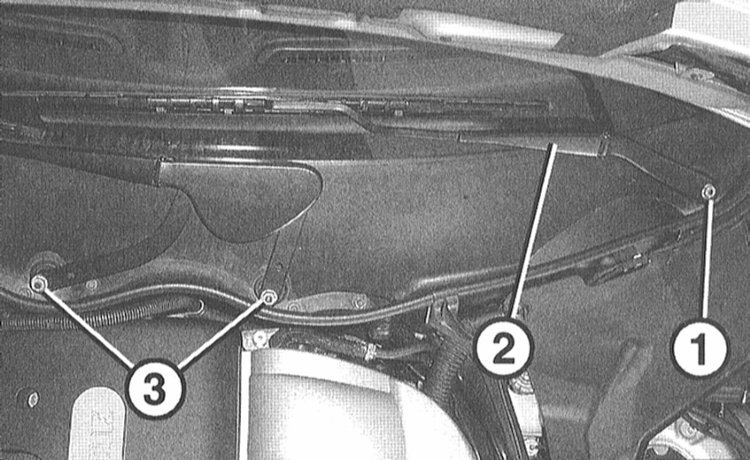
1 - nut;
2 - left lever;
3 - two nuts.
Note:
If the lever is difficult to separate, move a wrench under it and carefully remove the lever. A special removal tool, such as HAZET 1966-05, can also be used for this purpose.
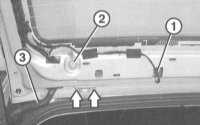
6. Turn away 2 nuts and remove the right lever.
Installation
1. Make sure the wiper motor is in the end position. If necessary, start the motor for a short time and stop with the switch.
2. Install the wiper arms on the axle and align according to the marks made with adhesive tape during removal.
3. Screw on the nuts and tighten them by hand.
4. Check the end position of the levers again. To do this, close the hood, moisten the glass with water and run the wiper for a short time. The levers should return to their set position and should not extend beyond the glass when cleaning the glass.
5. If necessary, loosen the nuts again and repeat the adjustment.
6. Tighten the nuts with a torque of 20Nm.
The article is missing:
- Tool photo
- Photo of parts and consumables
- High-quality repair photos
Source: http://www.auto-knigi.com/model/mb_c/13_1_9/