![1 generation [2003 - 2007]](/uploads/Mitsubishi_Outlander_I_2003_-_2008_.jpg)
![3 generation [2012 - 2014]](/uploads/3.png)
![XL [2005 - 2012]](/uploads/4d137205da66f_.jpg)

Tools:
- screw jack
- car support
- balloon wrench
- Wheel chock (shoe)
- Metal brush
- Large flat screwdriver
- Calipers
- Box wrench curved 15 mm
- Nozzle on the crank 15 mm
- Nozzle on the crank 14 mm
- Nozzle for crank 12 mm
- Collar for end nozzle
Parts and consumables:
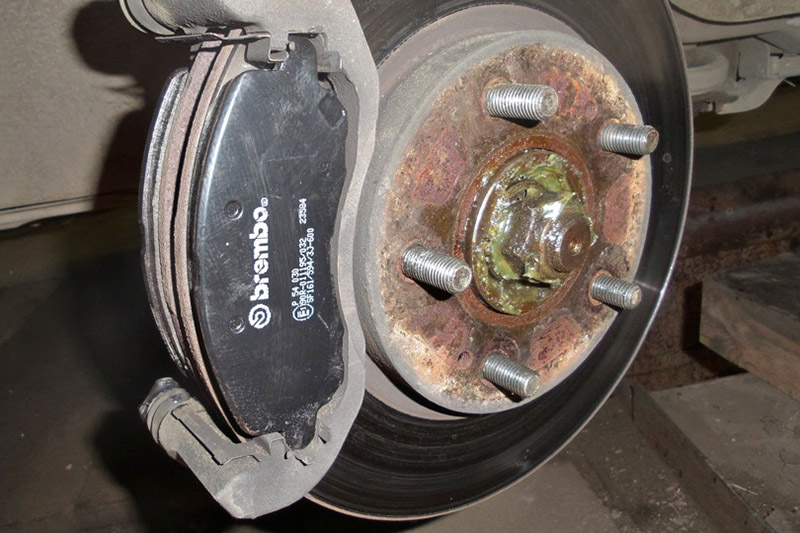
- Front wheel brake pads, "American" version (MR527674)
- Brake pads, front wheel, "European" version (MN116923)
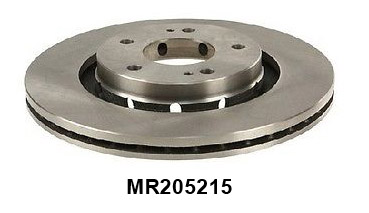
- Front wheel brake disc (MR205215)
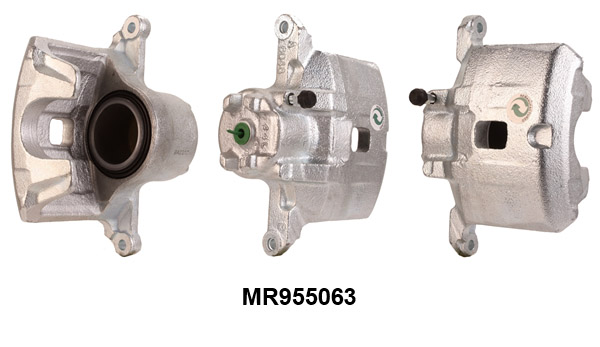
- Front wheel brake caliper, "American" version, left/right (MR955063 / MR955064)
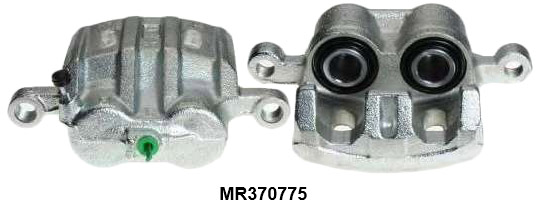
- Front wheel brake caliper, "European" version, left/right (MR370775 / MR370776)
- Caliper bracket, "American" version (MR569361)
- Caliper bracket, "European" version (MR307282)
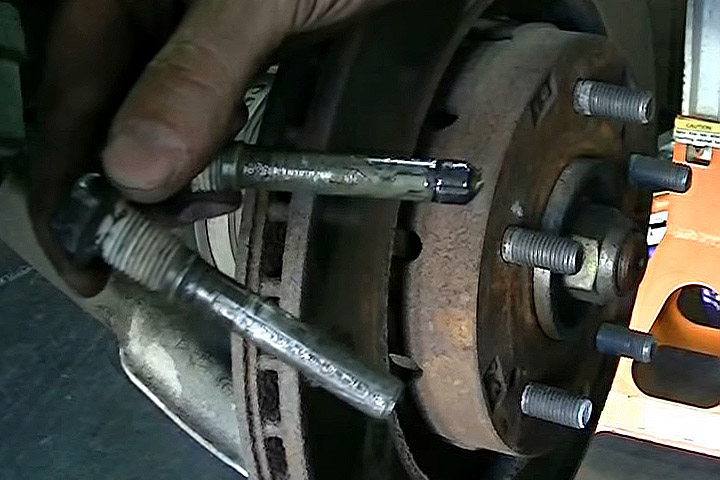
- Caliper guides, "American" version, top / bottom (MR407742 / MR407741) (if necessary, replace)
- Caliper guides, "European" version, top/bottom (MB618228/MB618227) (if necessary, replace)
- Brake fluid (if necessary)
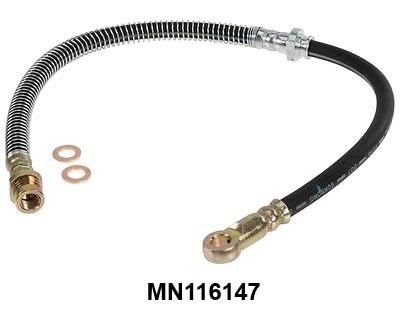
- Brake hose, "European" version (MN116147) (when changing caliper type)
- Aerosol lubricant type WD-40
- rags
- Latex gloves
- Wire
- Coins / valve adjustment washers (for measuring the thickness of the brake disc)
- Lubricant for caliper guides
Notes:
The front brake mechanisms of the 1st generation Mitsubishi Outlander were made in slightly different versions for the " American " and " European " versions. The "American" version used single-piston calipers, the "European" version used two-piston calipers. The numbering for interchangeable parts is clarified.
The workflow for both versions is the same. Images may show both versions. Where it is important, it will be specified for which version of the image. According to the reviews of the owners and based on the general nominal characteristics of the modifications, the "European" version has advantages over the "American" one (the brakes become more powerful and more responsive). Sometimes, owners change part of their brakes to a "European" version, which will also be described along the way.
Brake discs or pads are always replaced on both sides on the same axle.
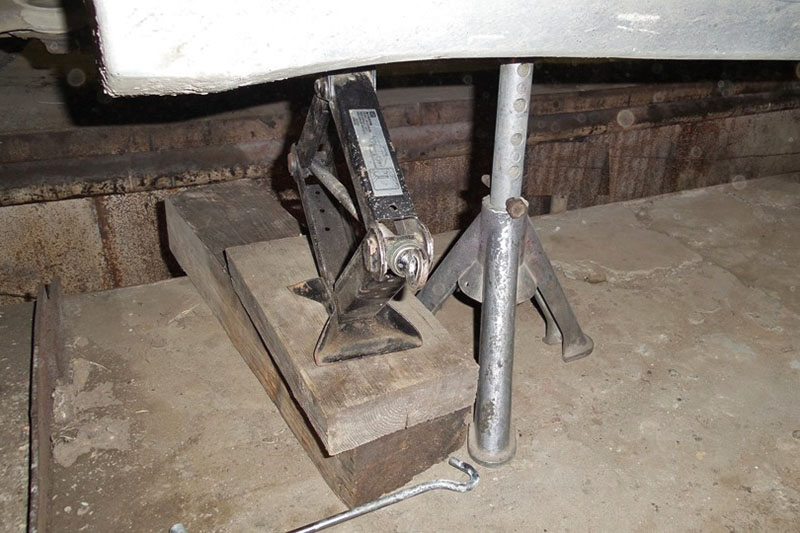
1. Loosen the front wheel bolts. Raise the car with a jack, place it on reliable supports. Place a stop (shoe) under the diagonal rear wheel to be removed.
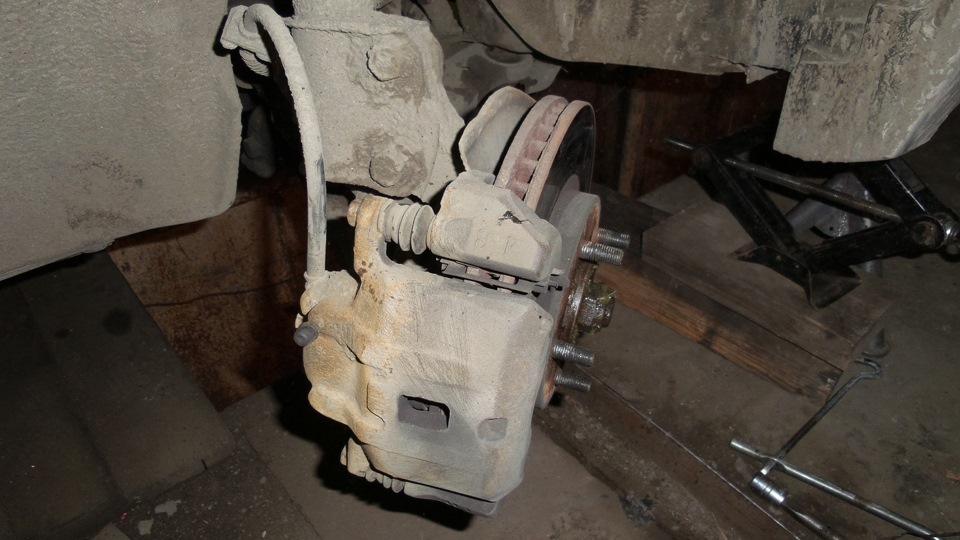
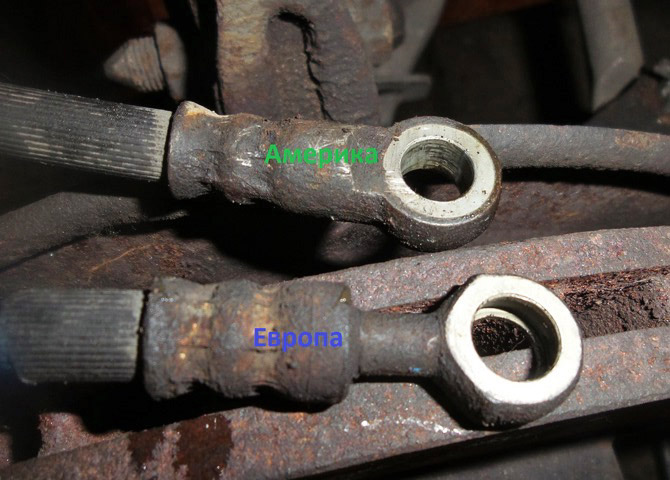
2. Turn off bolts up to the end and remove a wheel. The pictures show two variants of the brake mechanisms (it is easy to visually distinguish by the brake caliper).
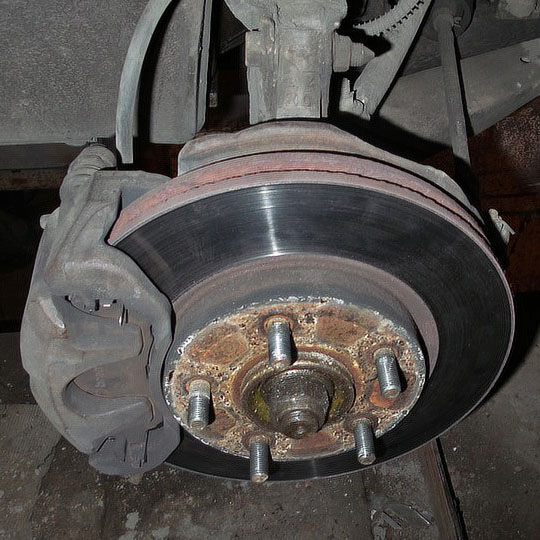
Brake mechanism ("American" version)
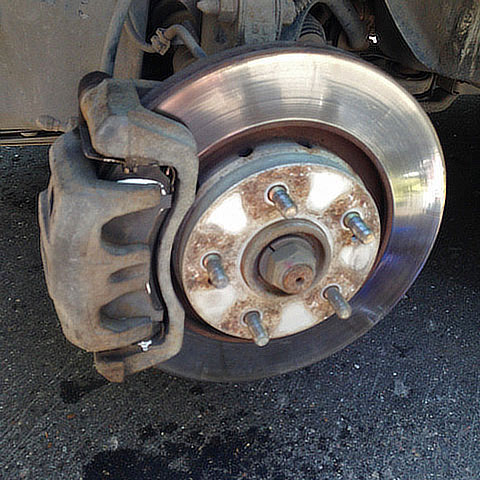
Brake mechanism ("European" version)
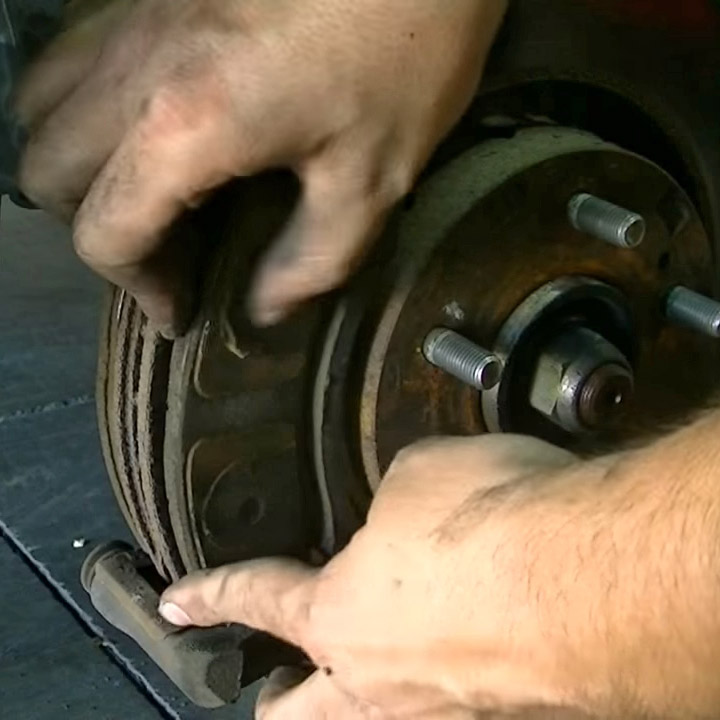
3. Clean all dirt from the sensors with a wire brush.
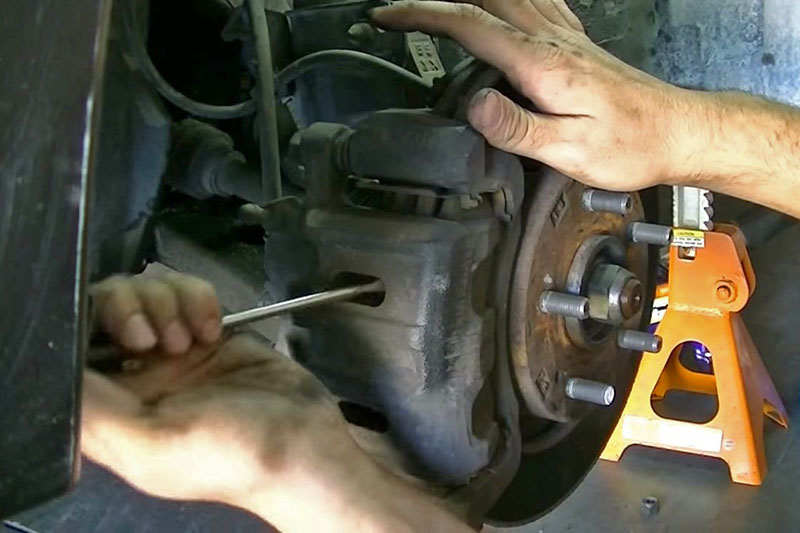
4. Use a screwdriver to spread the brake pads through the slots in the caliper.
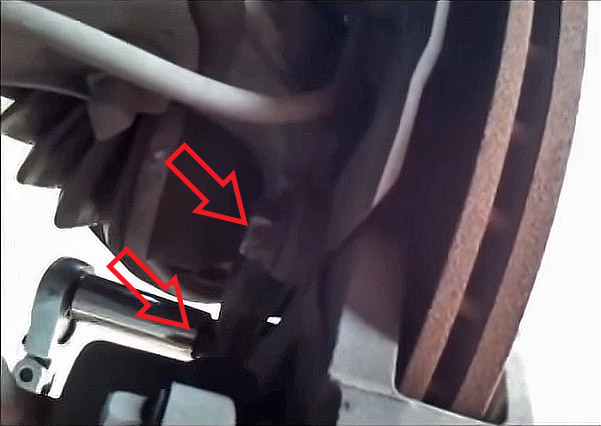
5. Turn off the top and bottom directing fingers of a support. If necessary, to facilitate unscrewing, you can pre-treat the heads of the guides with an aerosol lubricant such as WD-40.
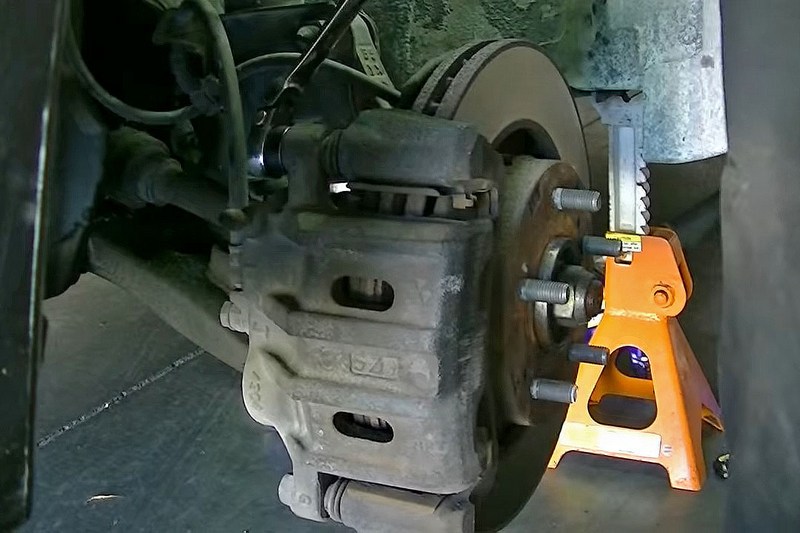
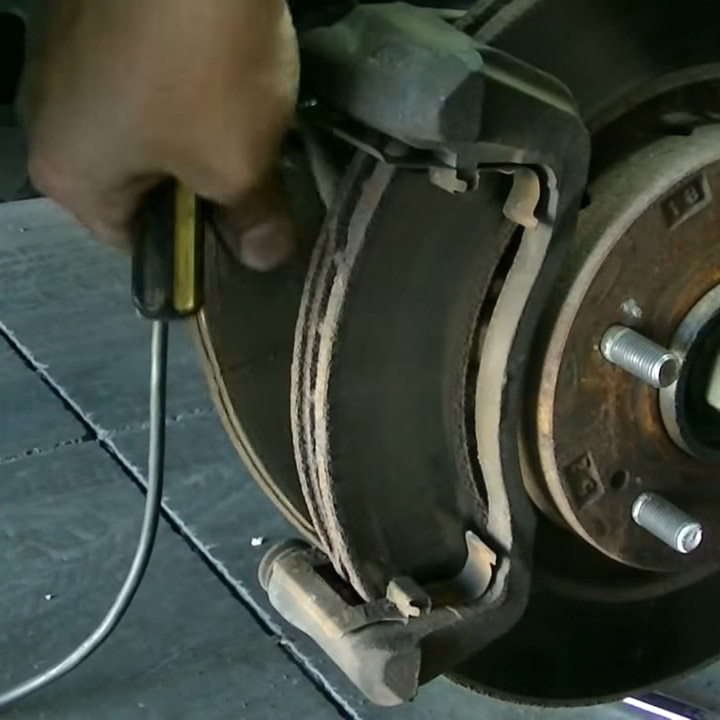
6. Carefully remove the caliper so as not to break the brake hose and hang the caliper by a wire or cord to the strut spring.
7. If you plan to replace the "American" version (single-piston) caliper with a two-piston caliper, then the caliper will need to be disconnected from the brake hose. It is not necessary to drain the brake fluid for this. You just need to choose a bolt of a suitable diameter and plug the hose with it.
Note:
When replacing a caliper with a two-piston caliper, the hose from the single-piston caliper cannot be connected without additional alterations. The choice is between replacing the hose with the caliper, or turning a new caliper to fit the old version of the hose.
Differences between the "American" and "European" versions of the brake hoses
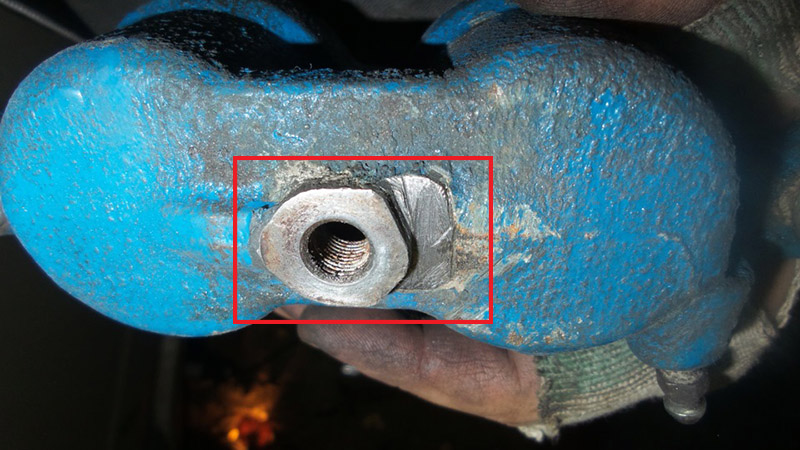
Due to the lack of constriction as on the "European" hose, the "American" hose cannot simply be connected to the "European" caliper. Replace also the hose with a new type.
Or modify a new caliper. To do this, you can file a part of the caliper with a hacksaw, at the connection point of the hose.
Connect a new brake caliper to the hose.
Single piston brake caliper, "American" version
Dual piston brake caliper, "European" version
Note:
A complete replacement of the caliper can be done after dismantling all the parts of the old one, incl. caliper brackets.
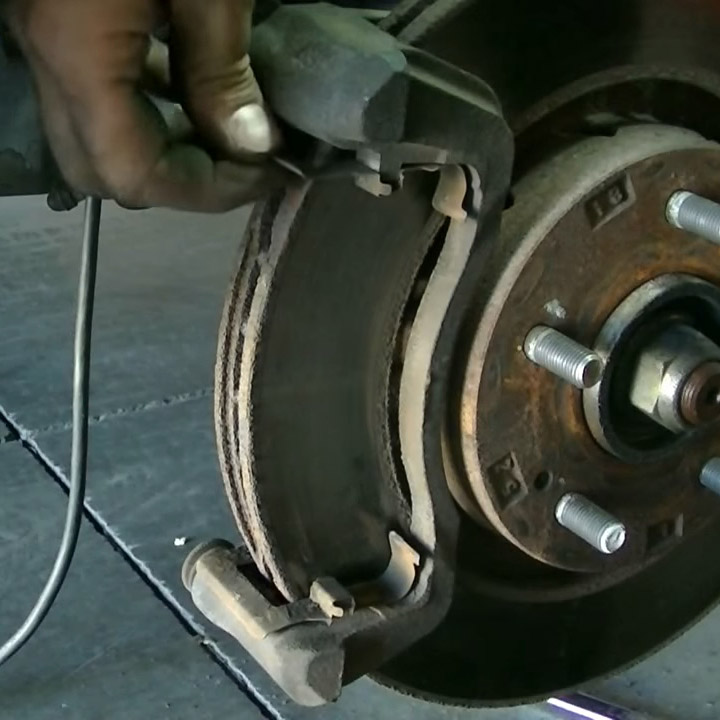
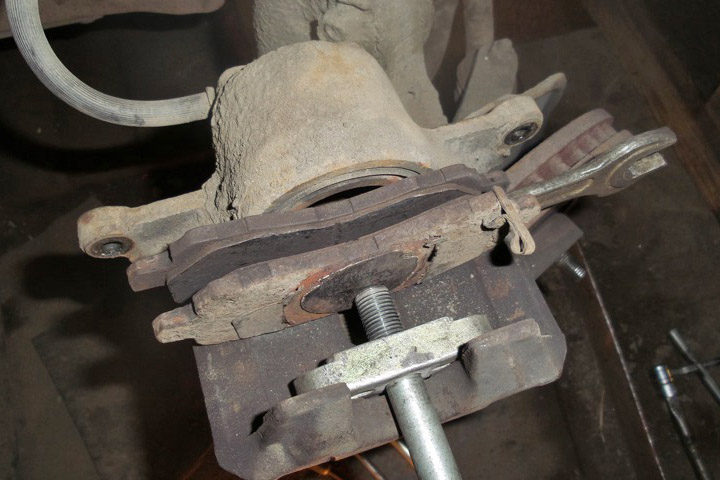
8. Remove the brake pads from both sides of the disc.
9. Remove the top and bottom mounting brackets.
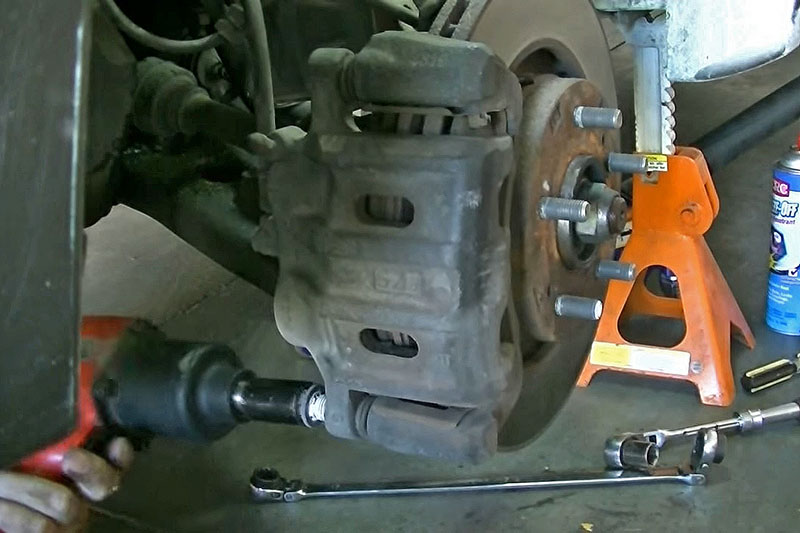
10. Turn off bolts of fastening of a bracket of a support which heads are located from the inside of the brake mechanism. Remove the caliper bracket.
11. Measure the brake disc thickness with a caliper or micrometer. If the disk already has a groove and an outer diameter with a notch, then the caliper can only be measured using coins or rings of known thickness. Then subtract the thickness of these rings from the result obtained.
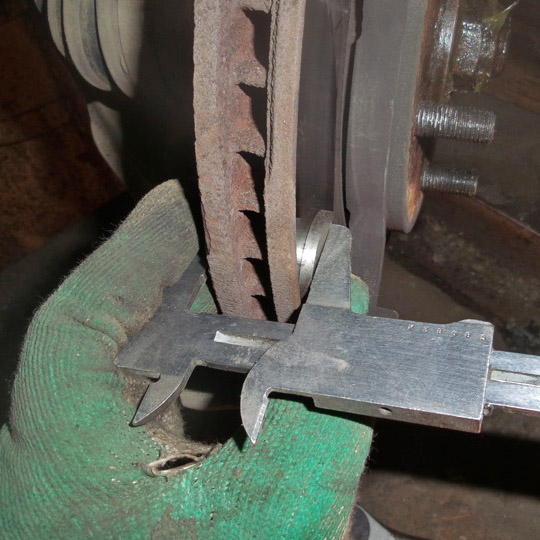
The limiting minimum thickness of the rear disc is 22.4 mm. If the Mitsubishi Outlander brake discs are thinner or show damage/cracks, they need to be replaced.
12. Remove the brake disc from the hub by simply pulling it towards you.
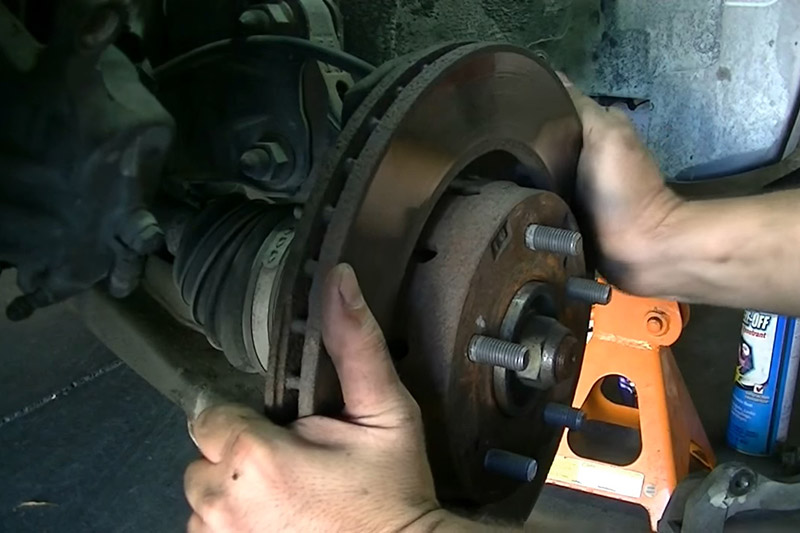
13. If necessary, replace the brake disc and install in reverse order.
14. Check brake pad wear. The minimum residual thickness of the pad working surface is 2 mm.
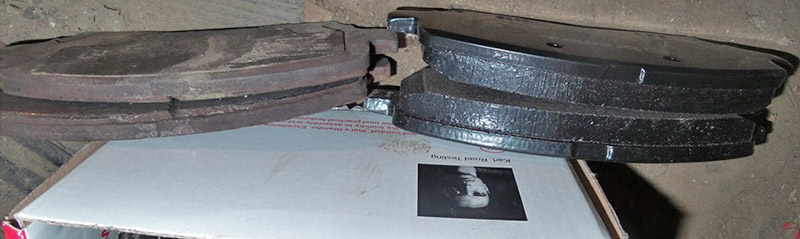
Worn and new Mitsubishi Outlander brake pads
15. Press the caliper piston all the way in with a mandrel or an old brake pad. You need to press evenly and slowly, avoiding distortions.
At the moment of indentation, it is necessary to control the level of brake fluid in the expansion tank. If the pads are worn and the caliper piston(s) have come out nearly to their full height when pushed in, the brake fluid can rise up in the reservoir and spill out.
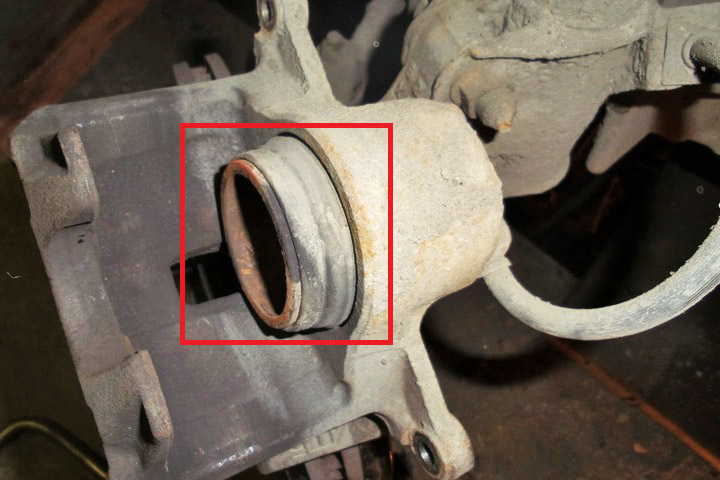
Full height brake caliper piston (single-piston version).
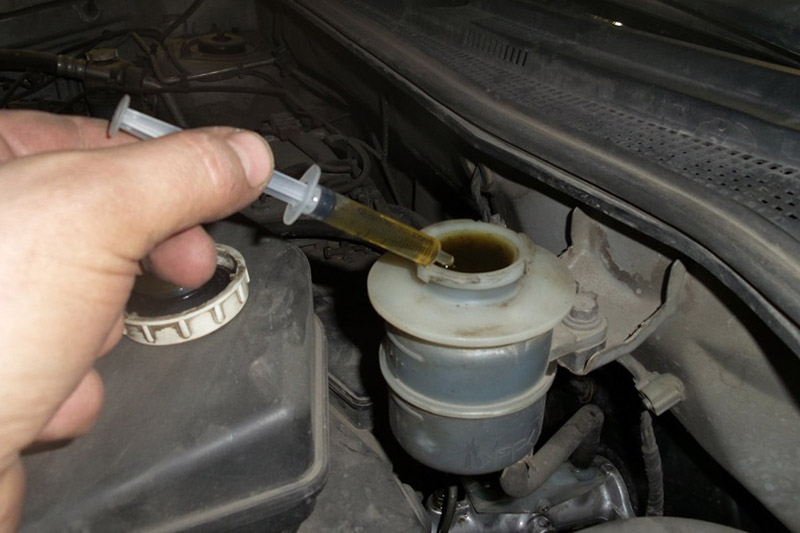
Remove excess fluid from the expansion tank with a syringe.
16. Install, if removed, the caliper bracket and fixing brackets with brake pads.
17. Lubricate the caliper guides with special grease (supplied in repair kits or purchased separately).
Warning:
Use the correct lubricant for the caliper guides. Do not use anti-squeal, graphite or other lubricants. They do not match the characteristics of this node. Carefully study the instructions that come with the lubricant if you purchase it separately.
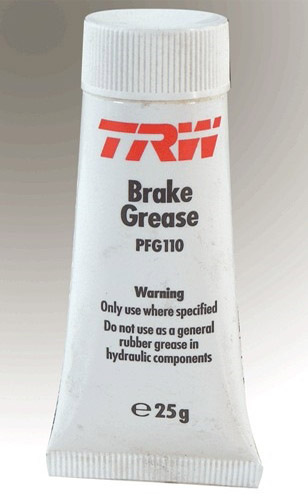
Grease for brake caliper guide pins
Note:
It is recommended to replace the caliper guides every two brake pad changes. In addition, the guides will need to be changed if the brake caliper itself is to be replaced.
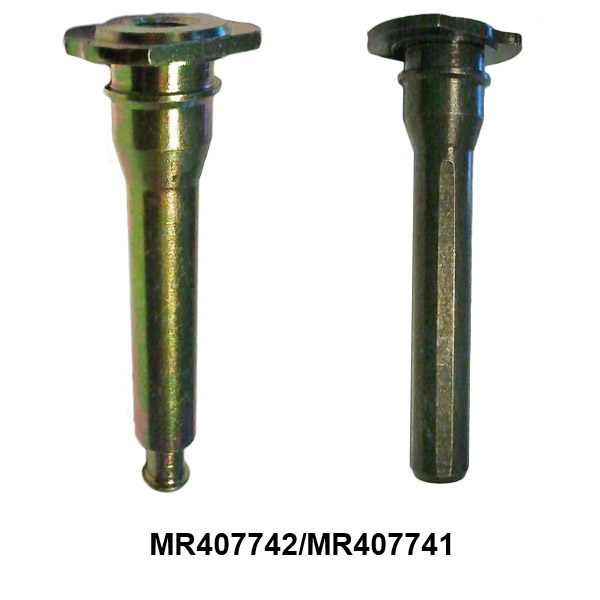
Brake caliper guides, "American" version
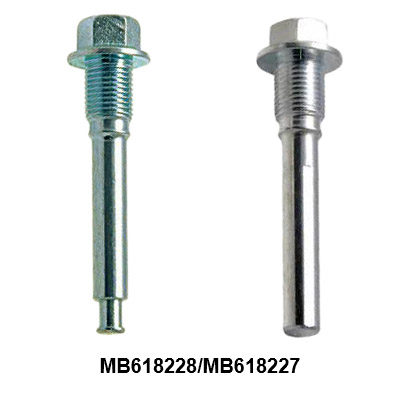
Brake caliper guides, "European" version
18. Install the brake caliper, secure it with guides and assemble all other parts in reverse order.
19. Add brake fluid and bleed the brake system if necessary. Check the operation of the brakes before driving.
The article is missing:
- Photo of tools
- High-quality repair photos
Source: carpedia.club