Tools:
- Collar with a square
- Nozzle for crank 12 mm
- Nozzle for crank 21 mm
- Nozzle for crank 22 mm
- Powerful wrench or suitable pipe
- rolling jack
- Metal brush
- Electric drill
- Syringe
Parts and consumables:
- Copper based protective grease
- High temperature brake grease
- Degreaser for new brake discs
- pads
- Guide anthers
- Anthers plates
- Brake fluid
- Respirator
- Piston boot
- Brake discs
1. Open the hood and remove the cap from the brake fluid reservoir. If the liquid is added to the MAX mark, then we remove a little with a syringe (when the calipers are brought together, the liquid returns to the tank and if a lot of it can overflow).
2. We put the car on the handbrake, jack it up, put the stop and remove the wheel. For the convenience of work, you can carefully (so as not to drop the car) unscrew the steering wheel (for the right caliper to the right, for the left - to the left).
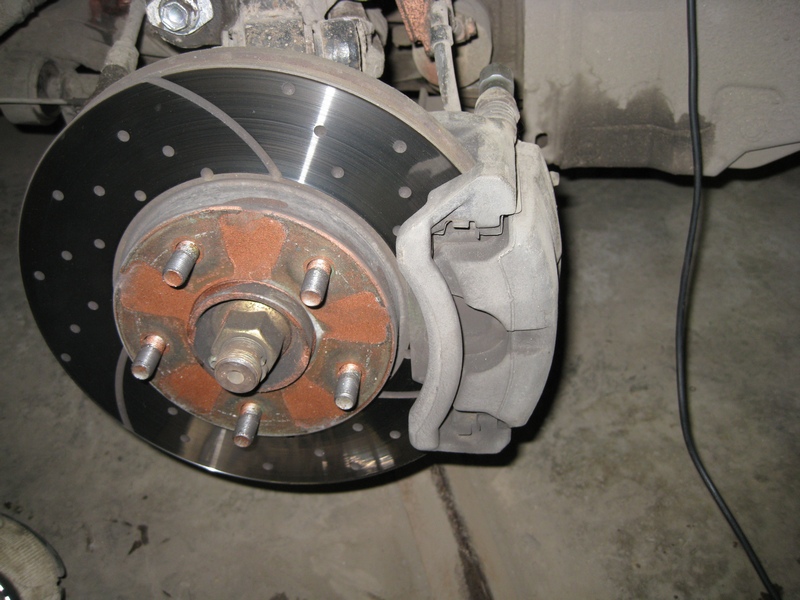
3. Using a 12 head, unscrew the two bolts connecting the caliper and bracket.
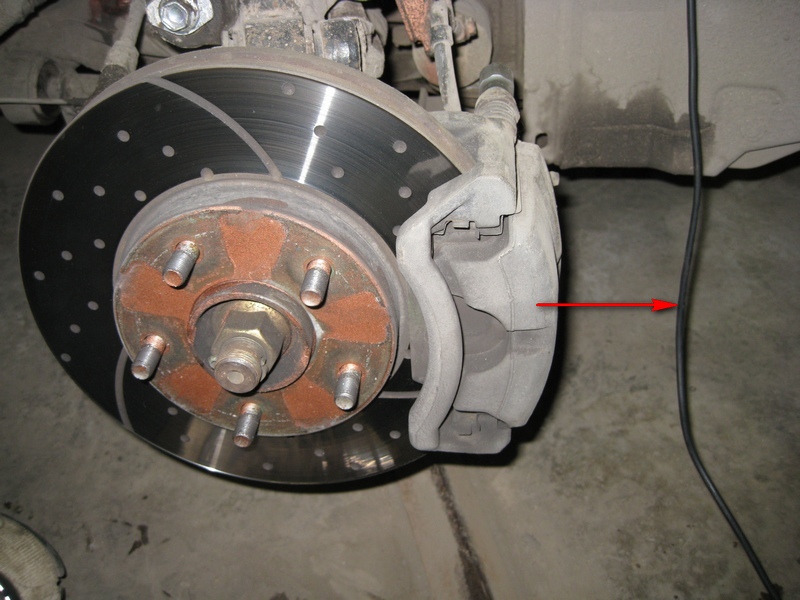
4. Remove the caliper in the direction indicated by the arrow, turn it over and put it on the steering knuckle.
5. Visually evaluate the piston boot (green arrow) for damage. Cuts, tears and cracks in the anther are an indication for an urgent overhaul of the caliper, otherwise the sand that gets under the anther will very quickly destroy the caliper mirror (it will wedge) and damage the piston cuff (there will be a brake fluid leak) and you will have to change the caliper assembly.
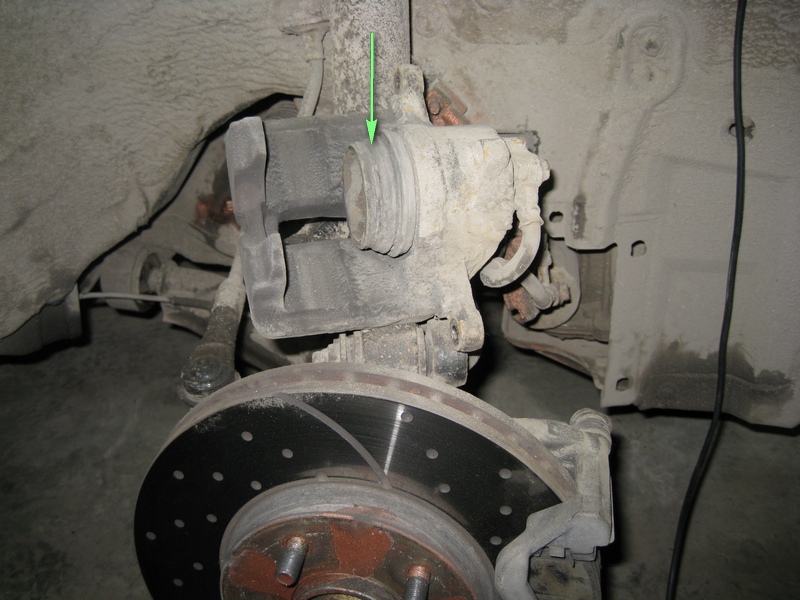
6. We sink the piston back into the caliper.
Notes:
I use a special device for this (it's much more convenient), but you can get by with a regular installation.
7. We take out the old pads from the caliper bracket in the direction.
8. We clean the caliper and bracket from dirt and shoe dust. For this operation, you can use small-scale mechanization - for example, el. drill with a metal brush, but do not damage the rubber boot of the piston.
Notes:
For global cleaning, I advise you to use a respirator, because. the dust from the pads is very harmful to the lungs.
9. If you need to replace the brake discs, then remove the caliper bracket. I always take it off, because on the removed bracket, it is more convenient to clean and lubricate the guides and plates in which the pads run. To do this, with a 22 head and a powerful wrench, unscrew the two bolts securing the bracket to the hub.
10. With the bracket removed, the disc is easily removed from the hub.
11. We clean the hub with a metal brush and install a new disk.
12. Remove the caliper guides from the bracket (green arrows), carefully clean them from old grease and dirt. We also clean the wells into which these guides are inserted. We visually evaluate the anthers of the guides for the absence of damage, if there are gaps or the anthers have lost their elasticity, they must be replaced. We apply fresh grease for the brake mechanisms to the guides and install them in place. We check the course of the guides - they should move freely, with little resistance, without "biting".
We remove and clean the metal brackets in which the pads move (red arrows) from dirt. We put in place and cover with protective grease.
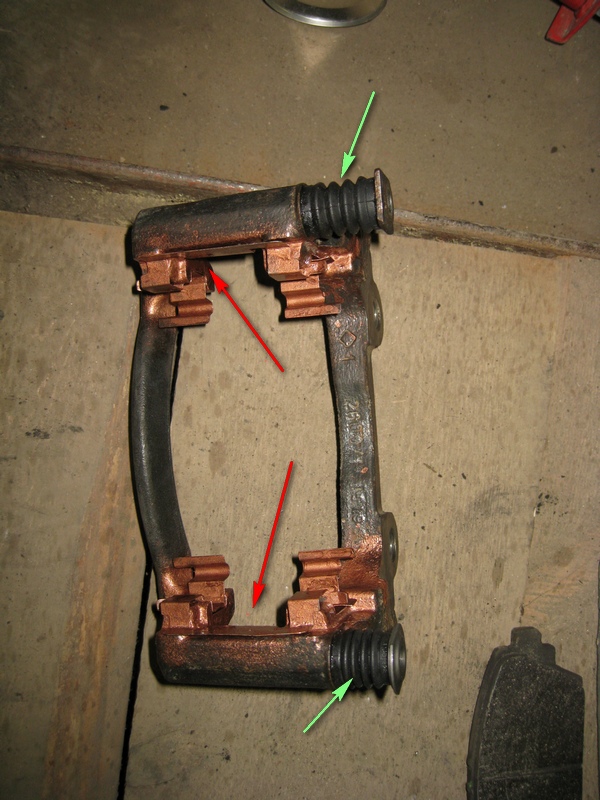
Notes:
Work according to item 12 can be done without removing the bracket from the hub.
13. Screw the bracket into place.
14. We put new pads.
15. Install the caliper.
16. We put the wheel, remove it from the jack, check the fluid level in the reservoir (correct if necessary) and tighten its cap.
17. We press the brake pedal several times so that the caliper pistons stand up as they should.
Notes:
Be careful, new brake pads cannot provide good braking performance until they are worn in. They need to be "run in" - approx. 200-500 km., trying not to slow down "to the floor" in order to prevent overheating of the brake disc.
The article is missing:
- Tool photo
- Photo of parts and consumables
- High-quality repair photos
Source: http://www.primera-club.ru/f/baza-znaniy-hodovaya-p12/17193-zamena-perednih-tormoznyh-kolodok-i/
![P12 [2001 - 2008]](/uploads/Nissan_Primera_Primera_1.9_DCi_Sedan.jpg)
