![P12 [2001 - 2008]](/uploads/Nissan_Primera_Primera_1.9_DCi_Sedan.jpg)

Tools:
- Retaining ring puller
- Pliers
- Side cutters
- punch
- Hammer
Parts and consumables:
- External constant velocity joint
- Internal constant velocity joint
- Covers of hinges of constant angular speeds
- Wheel drive shaft
- Retaining ring
- Kerosene
- Clamps
Notes:
If knocks are heard in the front drive while the car is moving in turns, check the constant velocity joints. If play is felt when the drive shaft is rocked by hand or protective covers are torn, such a hinge must be replaced.
It makes little sense to disassemble the outer hinge (Birfield). This work is time-consuming, and with a torn cover, the dirt that got into the hinge has already rendered the hinge parts unusable. It is impossible to replace the hinge parts individually, so the best solution is to replace the hinge assembly.
In extreme cases, disassembly is allowed to replace the lubricant of the internal hinge (Tripod) as simpler and less susceptible to water and road dirt. The appearance of traces of grease on the hinge indicates that the cover is torn.
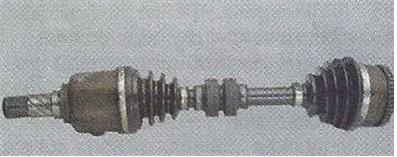
1. Remove the front wheel drive from the vehicle. More details here .
2. Clean the parts and inspect the drive, the protective covers of the outer and inner hinges should not be cracked. Replace damaged covers.
3. The external CV joint must turn with a slight effort, without jerking and jamming, radial and axial play. If present, replace the hinge.
4. The inner hinge should move in the angular and axial directions with a slight effort, while jerking, jamming and radial play should not be observed. Otherwise, replace the inner joint.
5. The wheel drive shaft must not be deformed. Replace the deformed shaft.
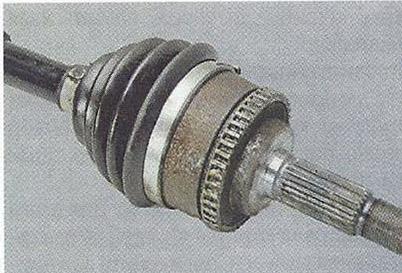
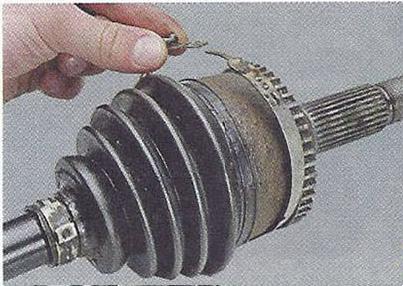
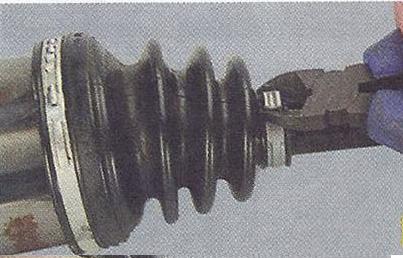
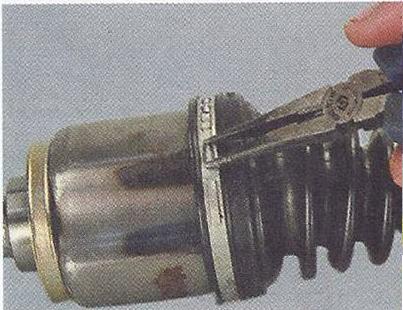
6. Squeeze the antennae of the lock fastening the collar of the large cover of the outer hinge.
7. Remove the clamp.
8. Similarly remove the second collar of fastening of a cover.
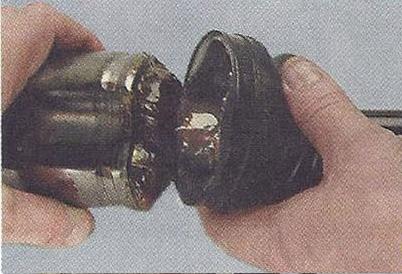
9. Slide the protective cover off the hinge housing.
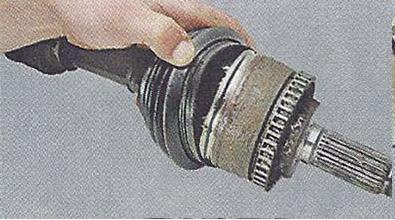
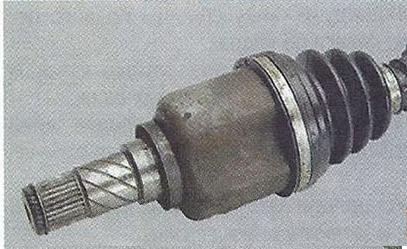
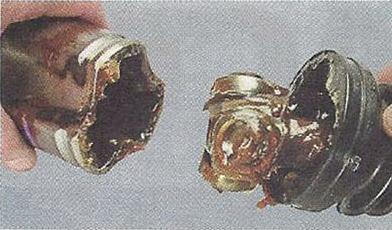
10. Clear the hinge of greasing and check up a condition of its details.
11. Knock the clip off the shaft with a hammer through the beard.
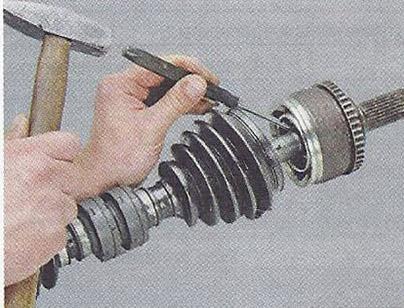
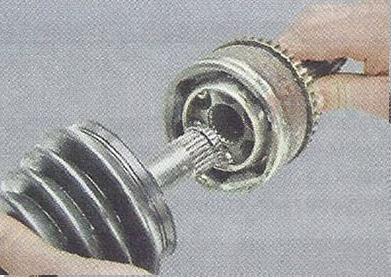
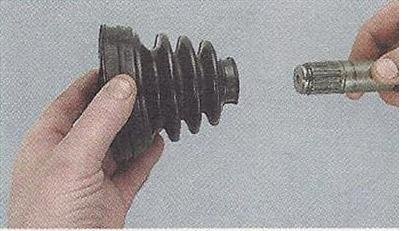
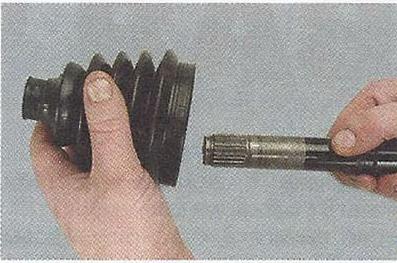
12. Remove the outer joint from the shaft splines.
Note:
When assembling, replace the circlip with a new one. As a rule, the ring is included in the kit of the new hinge.
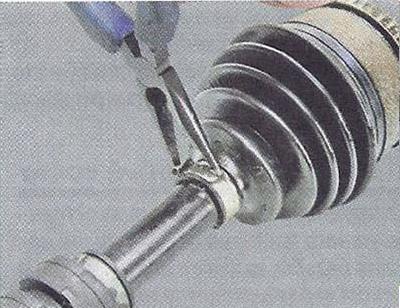
13. Remove the clamp securing the inner hinge boot to the drive shaft and to the hinge housing.
14. Slide the inner pivot boot over the drive shaft.
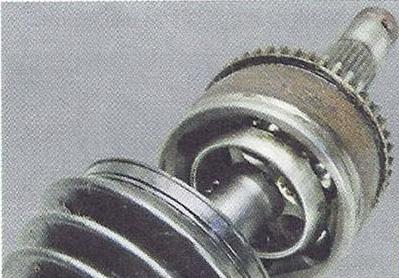
15. Disconnect the inner pivot housing from the drive.
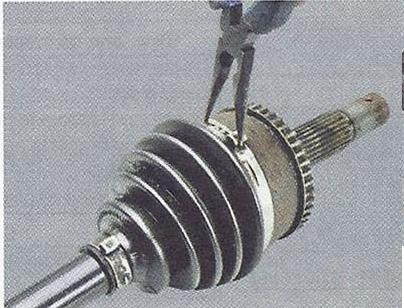
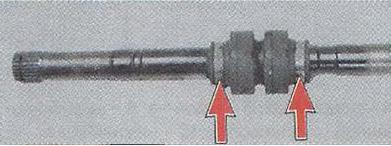
16. Mark the mutual position of the hinge cross and the drive shaft. Unclench the retaining ring of the hinge cross with a puller.
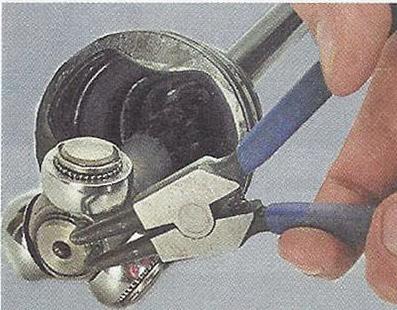
17. Remove the ring by pulling it out of the shaft groove.

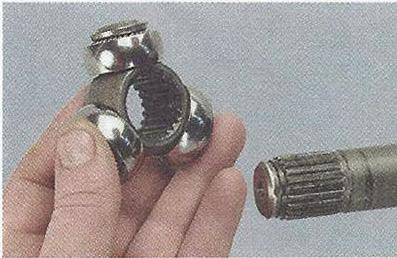
18. Remove the cross with rollers from the splines of the drive shaft.
19. Remove the protective cover from the shaft.
20. Having bitten the fastening clamps of the dynamic damper clamps, remove the damper from the drive shaft.
21. Remove from a shaft a protective cover of the external hinge of equal angular speeds.
22. Wash all metal parts with kerosene until the old grease is completely removed.
Note:
When assembling the drive, replace the protective covers and clamps for their fastening with new ones.
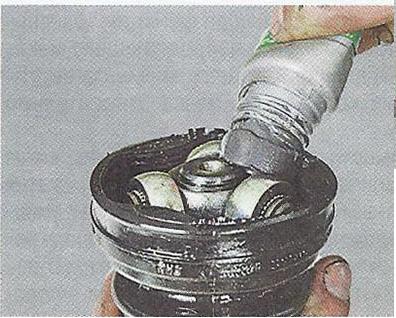
23. Before assembly, fill the cavities of the outer hinge with grease.
24. Install the outer joint cover on the front wheel drive shaft, pre-filling it with grease.
25. Gently distributing the lubricant inside the boot.
26. Establish a cover of the external hinge in an order, the return to removal.
Note:
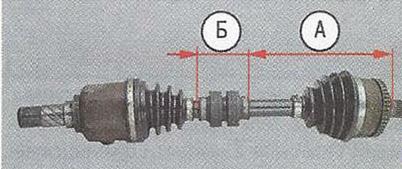
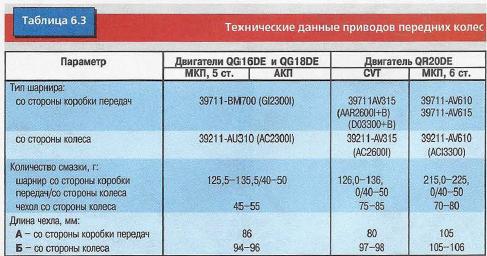
When installing the cover of the outer and inner hinges, in order to avoid leakage of the hinge in operation, the distances A and B between its clamps (with the hinge fully compressed in the axial direction) must correspond to the data in Table. 6.3.
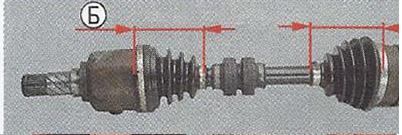
27. Assemble the outer hinge in the reverse order of disassembly, maintaining the installation length of the cover B (see Table 6.3).
28. Install the dynamic damper.
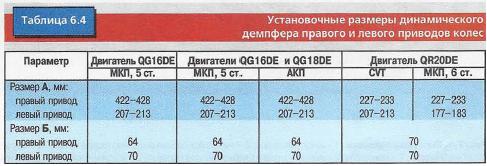
29. If the dynamic damper is removed, fix it on the drive shaft in accordance with the dimensions A and B , indicated in Table. 6.4.
30. Install the cross with rollers, lubricating the rollers, and fill the inner hinge housing with grease (see Table 6.3).
31. After assembling the drive, check the fit of the belts of the covers and the reliability of the fastening of the clamps. Covers should not rotate on the hinges and the shaft, and clamps - on the covers. Otherwise, replace the clamps.
The article is missing:
- Tool photo
- Photo of parts and consumables
- High-quality repair photos
Source: Nissan Primera P12 Operation, Maintenance and Repair Manual. Publishing house "Third Rome".