![IX [2000 - 2005]](/uploads/mitsubishi_lancer_2005_images_2.jpg)
![X [2007 - 2017]](/uploads/Mitsubishi_Lancer_Sedan_2007.jpg)

Attention:
If someone creaks "cold" - there is no reason to change them until you yourself visually verify their wear. There are different pads - some are squeaky by nature, the second are more or less, and all of them will someday creak if they are not "greased". And if, leaving after the service where you changed them, a month later your pads creaked - be sure that you replaced them "on the fly" as they say...
Grease.
And they creak - it is necessary to lubricate, wherever the ears of the pads and anti-creak plates and brackets are in contact, with a special high-temperature grease, you can use high-temperature silicone, best of all universal! If anyone needs it, in fact, the choice is not large - Slipkote 220-R, the newer Slipkote® 211-R, domestic MS-1600, (the cost of a tube is approximately 600 rubles, a bag of 10 grams is 100 rubles) I did not find either one or the other in Volgograd , but by acquaintance I was lucky to have a German universal high-temperature grease BERNER BMP 5 Bremsen Montagepaste (Art Nr 12099.8) in bags of 5 grams, temperature: up to +1400 degrees Celsius, white, designed specifically for the brake system.
Pads.
As for the pads themselves - a huge choice. Taste and color! I chose between Nisshinbo and Brembo. My choice fell on Brembo P54030. Ordered in existential, cost 950 rubles. In appearance - ordinary pads, without perforation, trapezoidal, good for replacing regular ones.
Tools.
Ideally, only a key or a 14 head. But since there are no ideal conditions, some additional devices were needed: a flat screwdriver, a clamp-type clamp, a large 20 ml syringe, 100 grams of brake fluid, gloves, rags.
Replacing the front brake pads on the Mitsubishi Lancer X
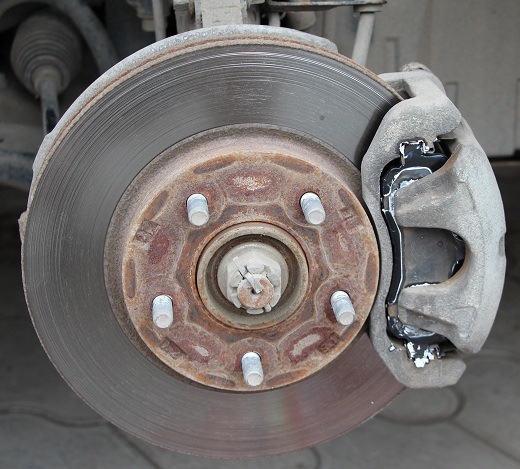
1) Jack up and remove the wheel. We remember about safety precautions - we substitute the "log" next to the jack for safety net.
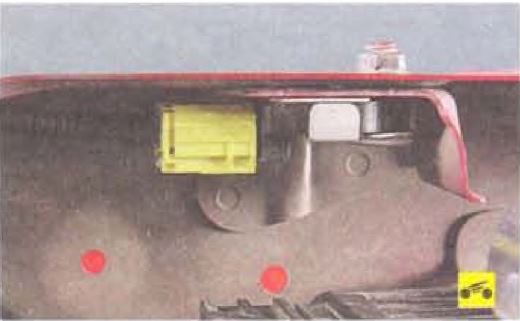
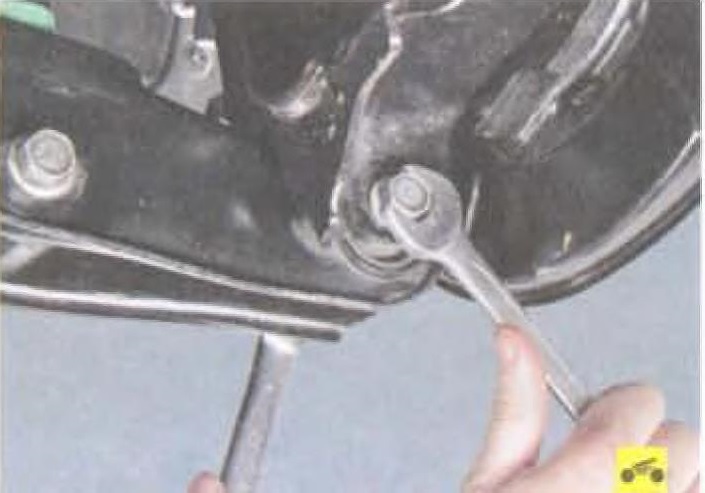
2) Unscrew the wrench on the 14 caliper guides, upper and lower.
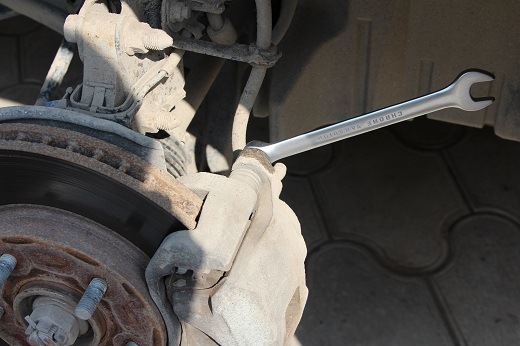
unscrew the guides
Carefully take out the guides, while remembering which one is the top and which is the bottom.
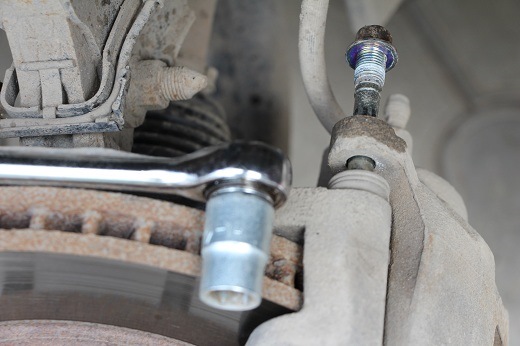
take out the guides
. Inspect for wear or any damage, put aside, cover with some rags.
3) Slightly loosen the moving part of the caliper with your hands, remove it.
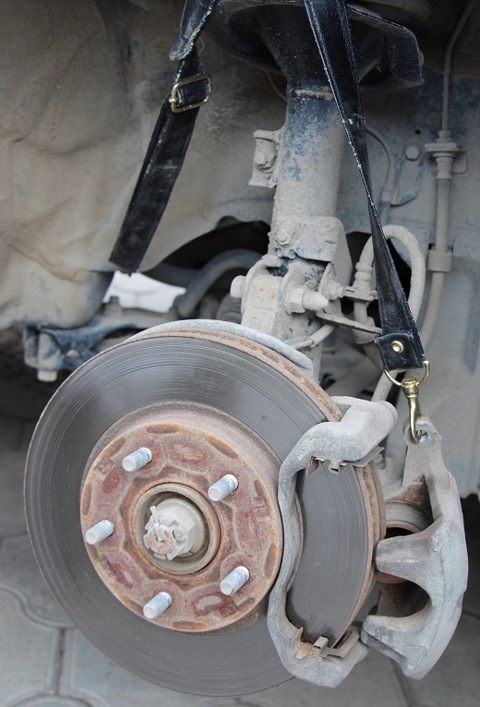
We hang it on a belt so that the brake hose does not twist
Now, in order not to damage the brake hose, we hang it nearby, on a belt for example.
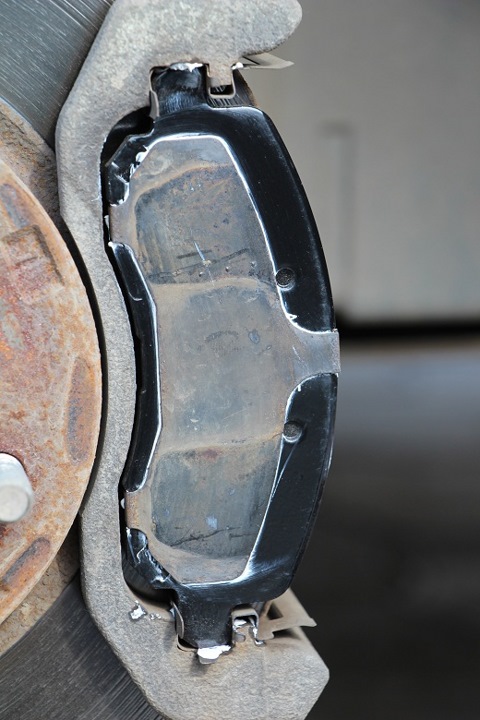
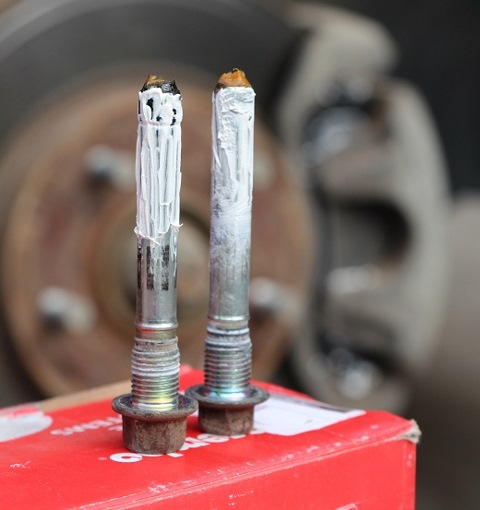
4) With a flat screwdriver, we "pick" the brake pads on both sides of the disc, help with our hands and remove them. Check it out if anyone is interested. Separate the anti-creak plate.
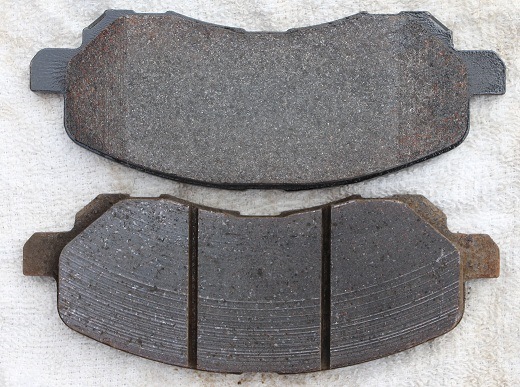
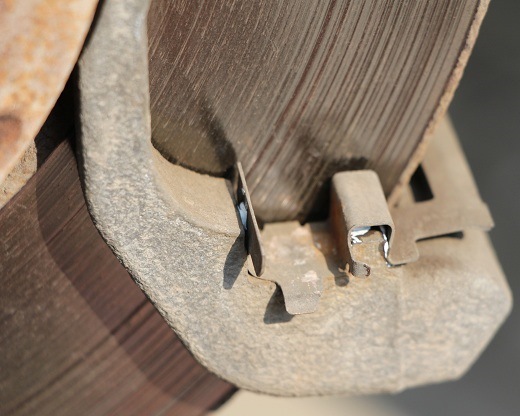
new pad at the top, old one at the bottom in the image

side view, top - new, bottom - old, it is clear that the working surface area of the new Brembo pads is smaller, and will increase with wear.
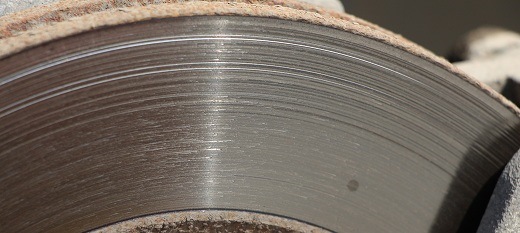
the result of the work of the old pads Akebono
According to the marking, I determined that I had Akebono — NS243H, turned out to be not the worst in terms of sensations, but! - badly spoil the disk!
5) We also remove the upper and lower brackets (not necessary, but desirable) to lubricate them. Lubricate with a thin layer on all sides.
lower bracket pads
Lubricate the anti-creak plate, a thin layer, without fanaticism, of course.
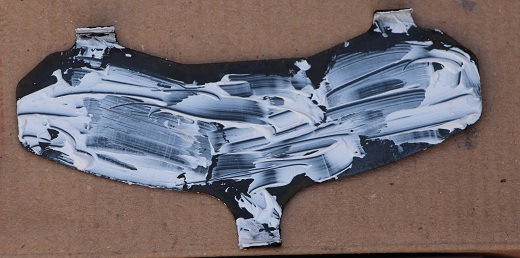
the process of lubricating the anti-creak plate, we remove excess lubricant.
6) We prepare new pads. We lubricate the ears of the pads and where the anti-creak plate is attached.

red indicates areas where you need to lubricate
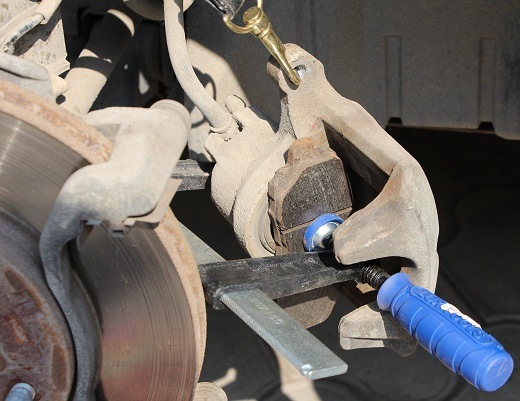
7) We put the pads in place, if they do not climb, we help with the help of a clamp - we tighten them.
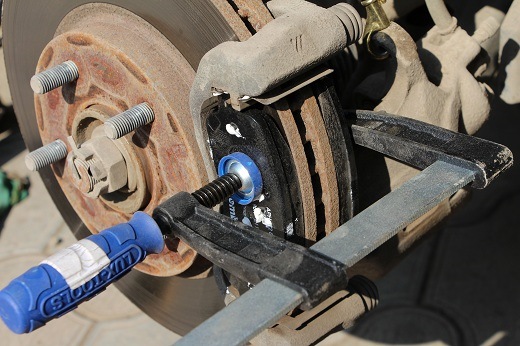
tightening pads, WARNING! You can't hit with a hammer!
remove excess grease with a rag
8) We try on whether that part of the caliper that we removed before, where the piston fits. If it doesn’t fit, you need to press the piston a little with a clamp. To do this, put an old block under the piston so that the piston drowns evenly. This process is done carefully so as not to damage the piston boot. And it is also necessary at this stage or before opening the hood, pump out brake fluid as much as possible from the brake fluid reservoir with a syringe (I managed to pump out 120 - 130 ml in this way).
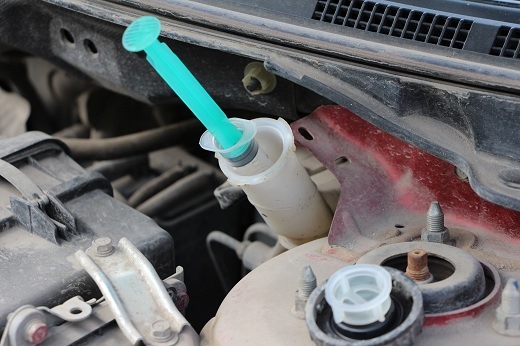
pumping out the brake fluid
This is necessary because when you press the piston in, the brake fluid level will rise and it may overflow through the filler neck. I decided that when I finish, I will add a new DOT4 liquid, because over time it loses its properties, gains moisture, so I just threw out the old drained one. So, we press the piston.
piston indentation
9) We smear with grease around the perimeter of the piston, it can also be smeared under its anther.
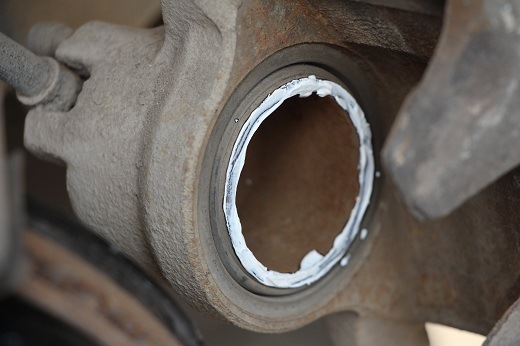
piston smeared with grease
10) We dress this part of the caliper back. It is also done carefully so as not to damage the anthers of the guides. Dressed, now we prepare the caliper guides themselves - we lubricate them with a thin layer of grease.
lubrication process guides
11) We twist the guides to the stop, but without fanaticism.
caliper assembly result
12) Put the wheel back. On both sides, changing the brake pads took me about 40 minutes.
Note:
There was nothing complicated in replacing the brake pads, everyone can do it with their own hands. Once again, let's return to lubrication, as you can see, it is necessary to lubricate the guides, anti-creak plates, under the piston boot. Therefore, it is MORE PROFITABLE to use a universal high-temperature grease, rather than buying expensive three tubes with different grease purposes. One sachet of 5 grams was just enough for me on both sides.
Source: https://www.drive2.ru/l/1167642/