![1 generation [2003 - 2007]](/uploads/Mitsubishi_Outlander_I_2003_-_2008_.jpg)
![3 generation [2012 - 2014]](/uploads/3.png)
![XL [2005 - 2012]](/uploads/4d137205da66f_.jpg)

Tools (for 4B12/4B11 engines):
- Screwdriver flat medium
- screw jack
- balloon wrench
- torque wrench
- Ratchet wrench
- Extension (with cardan)
- Head 10 mm
- Head 12 mm
- Straight ring wrench 16 mm
- Straight ring wrench 19 mm
- Marker
- Hex wrench for fixing the tensioner (or pin)
- Wheel chock (shoe)
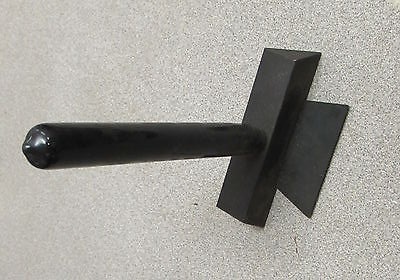
- Oil pan puller MD998727
- Hammer medium
- Knife (or scraper)
- Flute brush
- Metal brush
- torque wrench
- Funnel
Tools (for 6B31 engines):
- Ratchet wrench
- Head 10 mm
- Straight ring wrench 19 mm
- Screwdriver flat medium
- Oil pan puller MD998727
- Hammer medium
- Knife (or scraper)
- Flute brush
- Metal brush
- torque wrench
- Funnel
Parts and consumables:
- Engine pan drain plug gasket MD050317
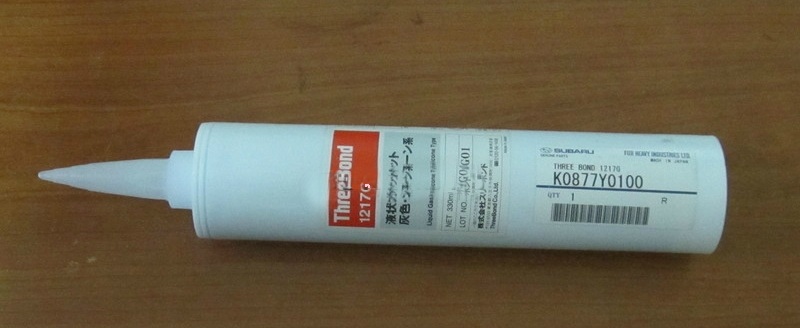
- Sealant Loctite 5900 or 5970, Three Bond 1217G (1000A923)
- Technical capacity
- Wire or rope (for 4B12/4B11 engines)
- Cleaner (or solvent)
- Degreaser
- Motor oil
- rags
Notes:
The oil pan flange is installed with sealant, there is no gasket of any kind. If oil leaks in the oil pan and crankcase connector, tightening the oil pan mounting bolts will not lead to the desired result. You need to know how to remove the engine sump and replace its seal.
Oil pan seal replacement work is shown on the 4B12 engine, but seal replacement on the 6B31 engine is almost the same.
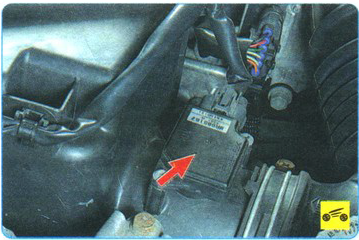
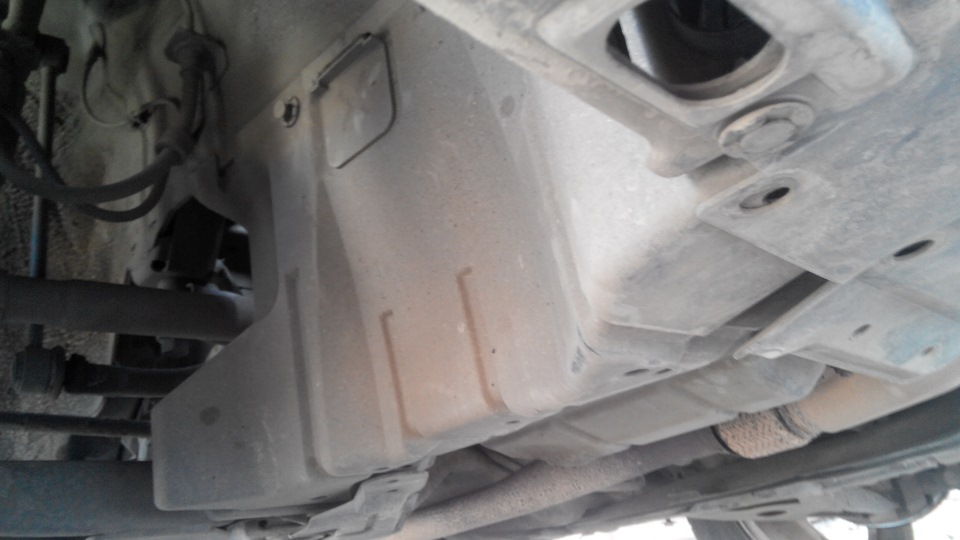
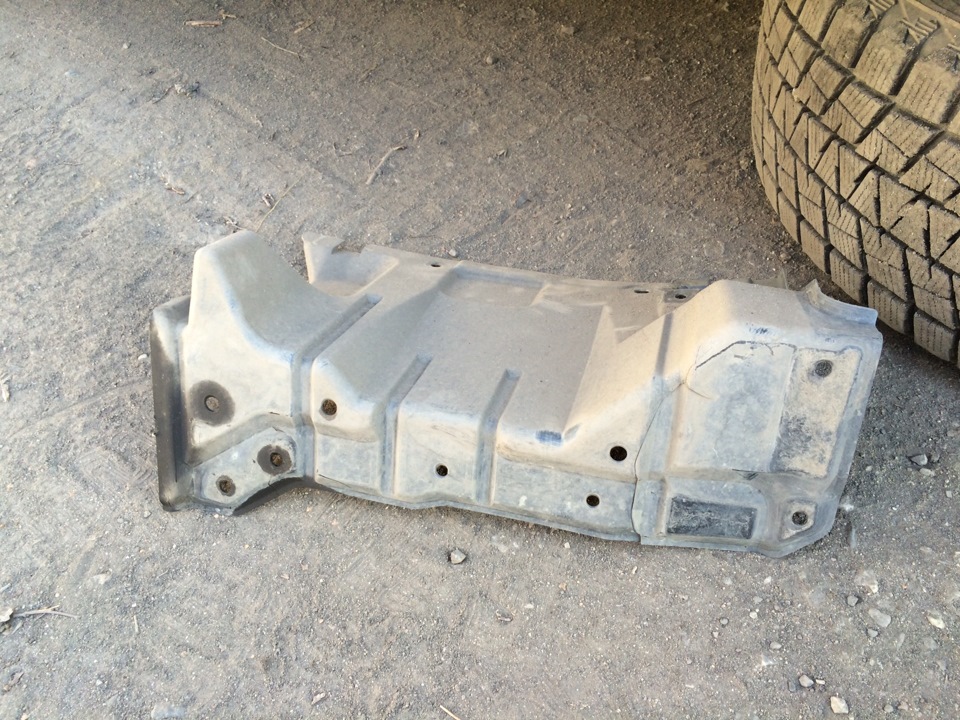
1. Remove the crankcase and mudguards (lower, front, rear and side) of the engine, as described in this article .
2. Drain engine oil as described here .

3. (4B12/4B11 engines) Remove the accessory drive belt as described here .

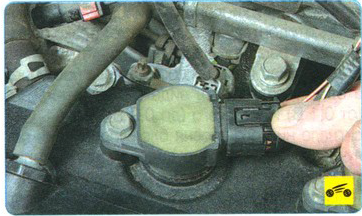
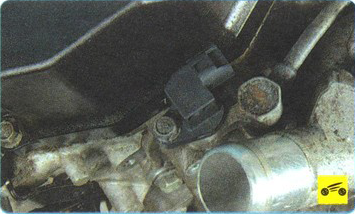
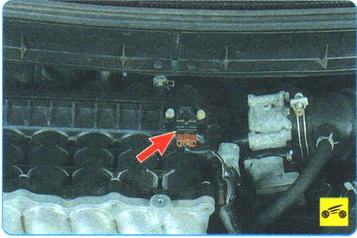
4. (4B12/4B11 engines) Disconnect the air conditioning compressor solenoid clutch wiring harness from the engine management system wiring harness (shown on the removed air conditioning compressor for clarity).
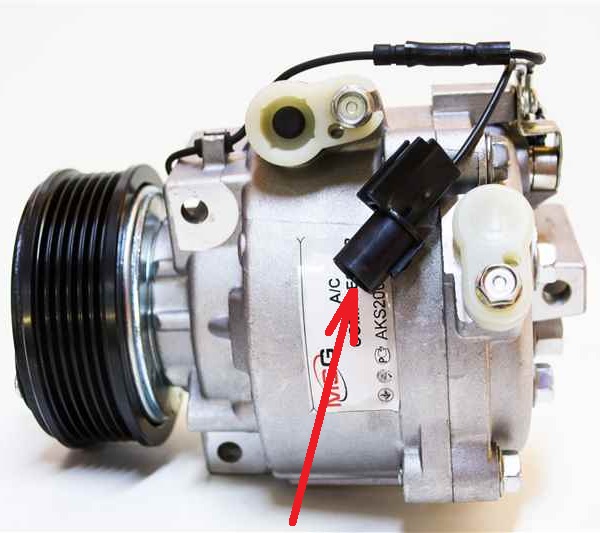
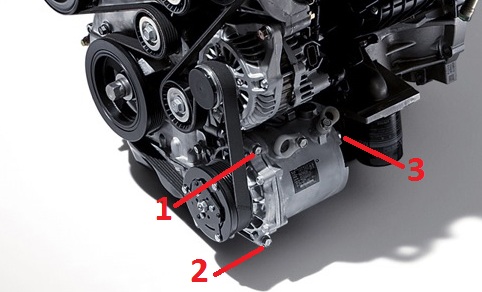
5. (Engines 4B12/4B11) Using a 12 mm socket, loosen the bolts securing the air conditioning compressor and electromagnetic clutch assembly in the sequence shown in the figure below (shown on the removed engine for clarity).
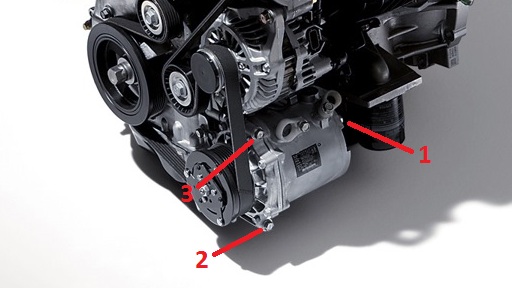
6. (4B12/4B11 engines) Remove the A/C compressor and magnetic clutch assembly from its bracket along with the connected hoses.
Note:
Once removed, use a wire or rope to hang the A/C compressor assembly and hoses on the body in a location where they will not interfere with the removal and installation of the engine tray.
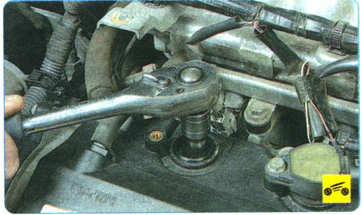
7.1. (engines 4B12/4B11) Turn away bolts of fastening of the oil pallet.
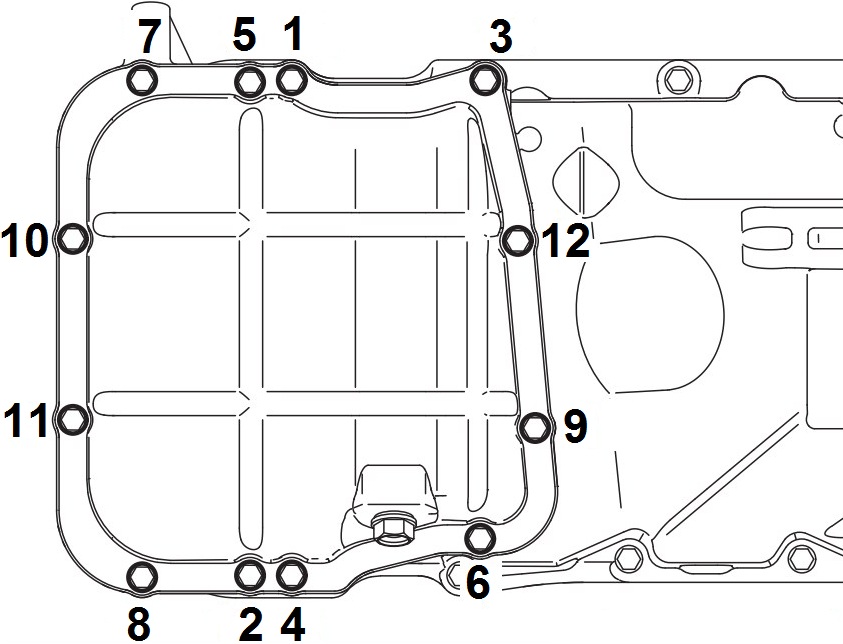
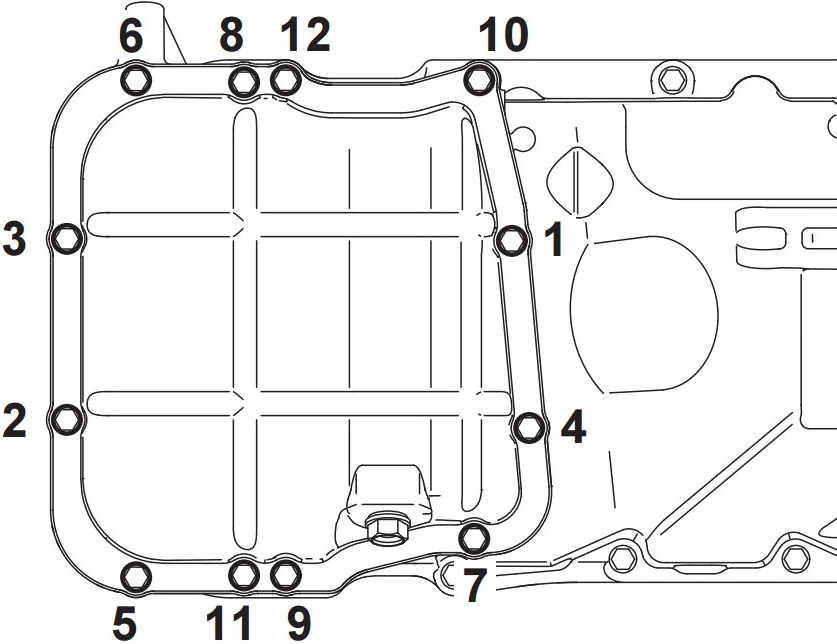
7.2. (engine 6B31) Loosen the oil pan mounting bolts in the sequence shown in the figure below.
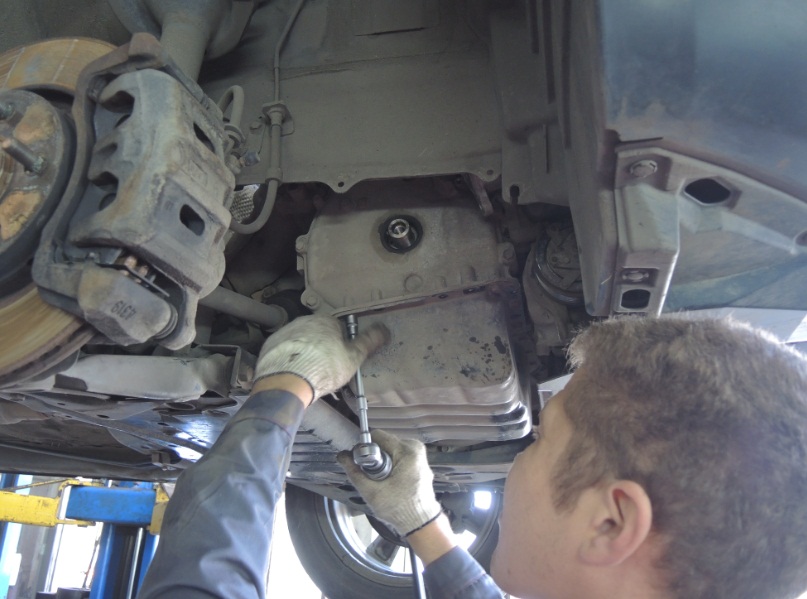
8. Insert the special oil pan remover (MD998727) into the slot between the oil pan and crankcase. Cut off the sealant by hitting the special stripper.
Note:
(engines 4B12 / 4B11) The first slot is located to the left of the crankshaft pulley (see photo below), the second is on the diametrically opposite side.
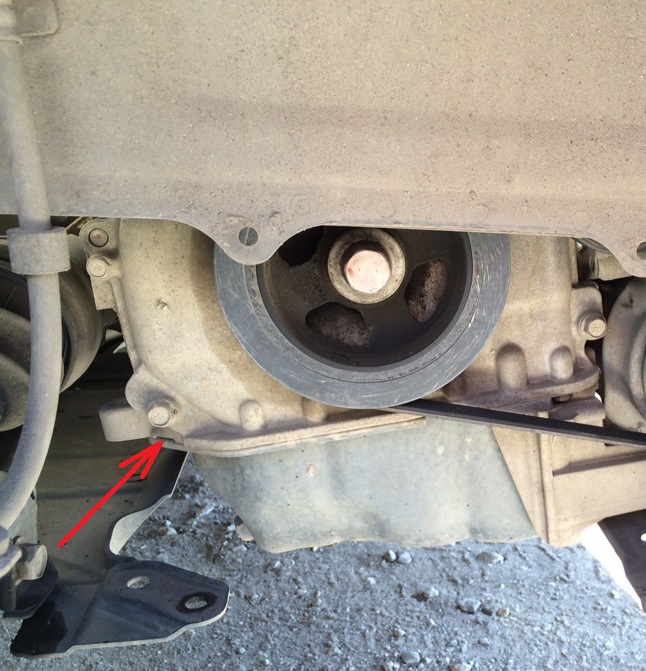
(engine 6B31) The slot is to the right of the crankshaft pulley.
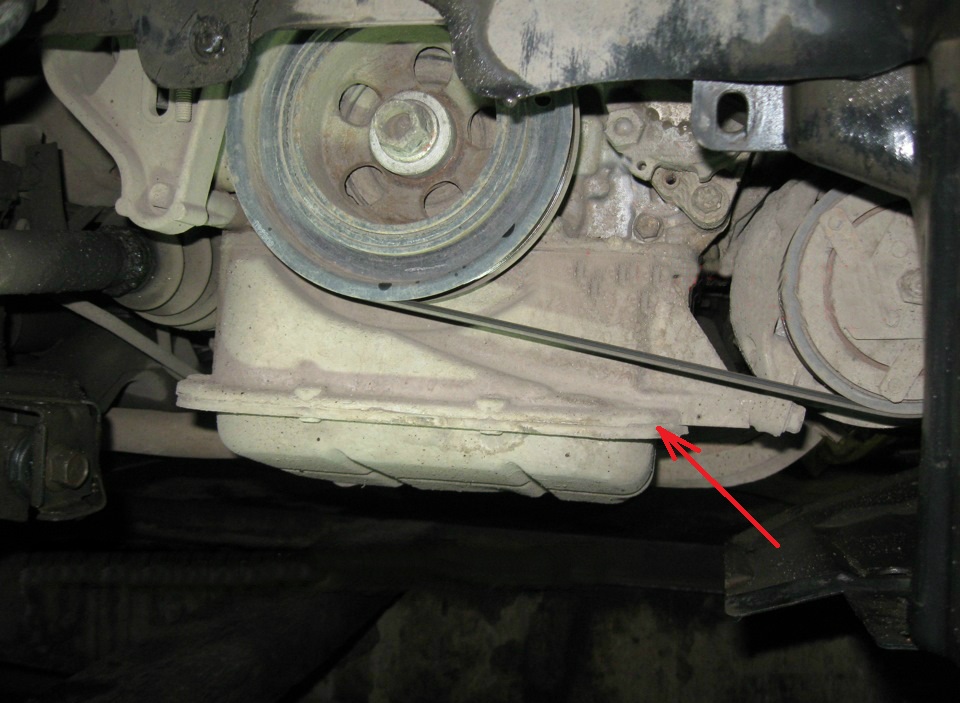
Using a screwdriver or chisel instead of a dedicated oil pan remover may damage the gasket (sealant) surface and cause oil to leak.
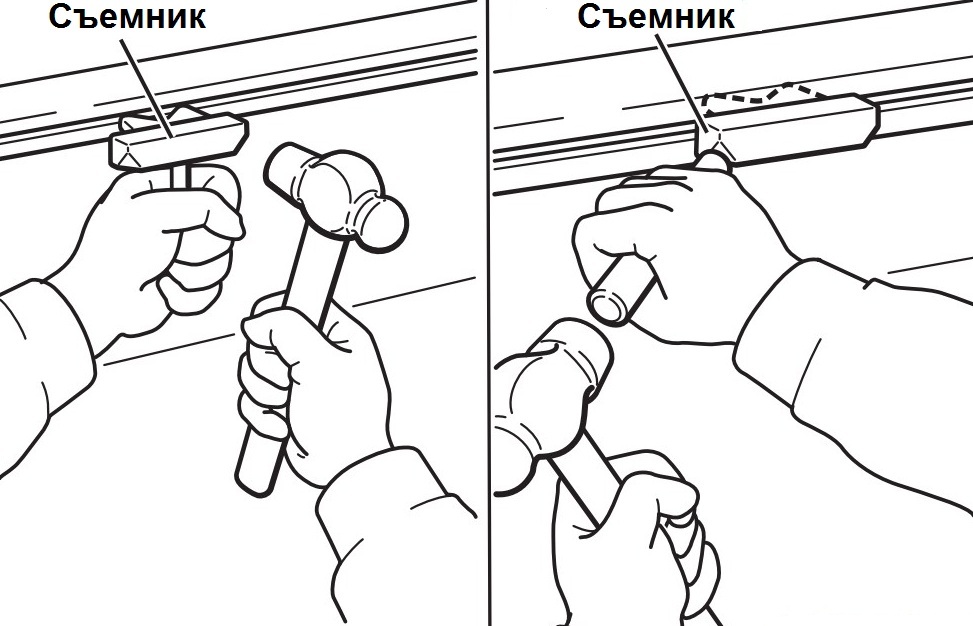
9. Move the special puller along the edge of the oil pan, hitting it to separate the pan from the crankcase.
Note:
Do not strike the special puller with great force, otherwise the oil pan flange may be damaged.
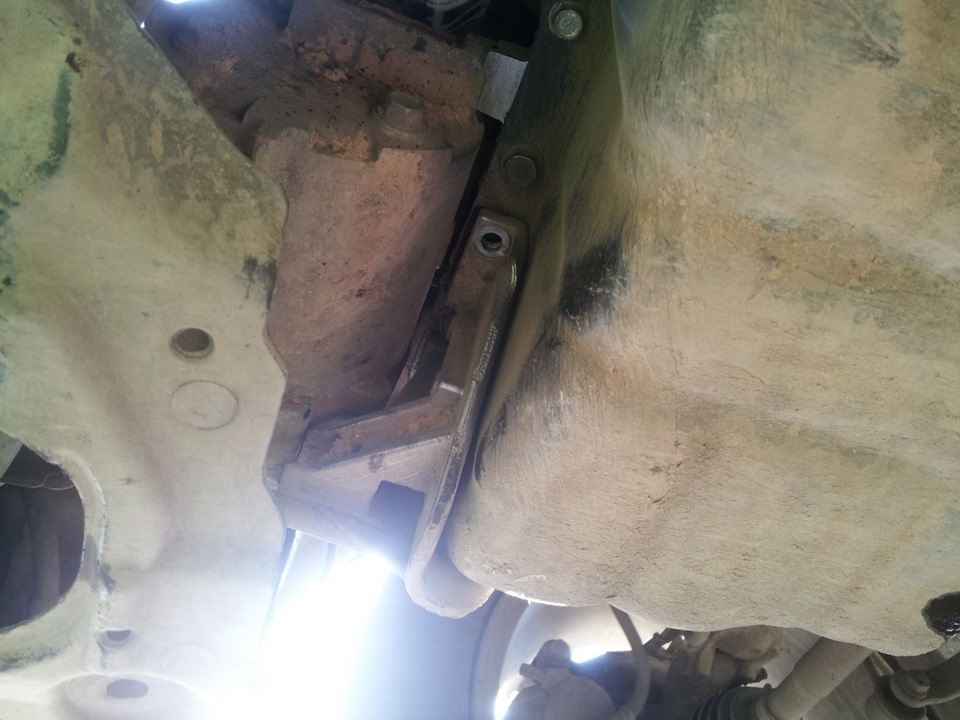
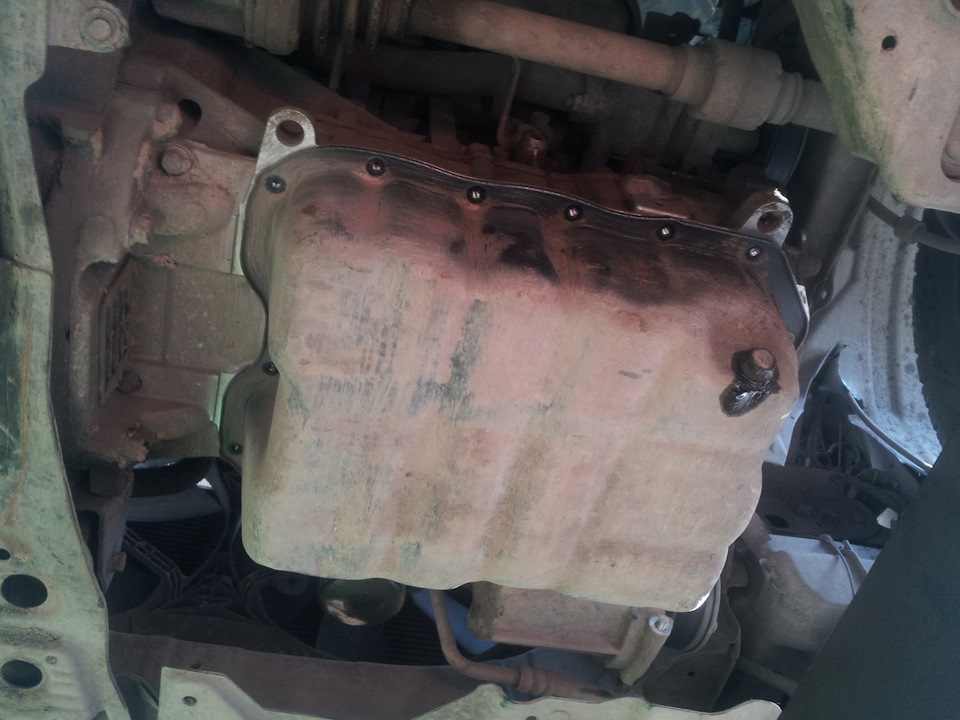
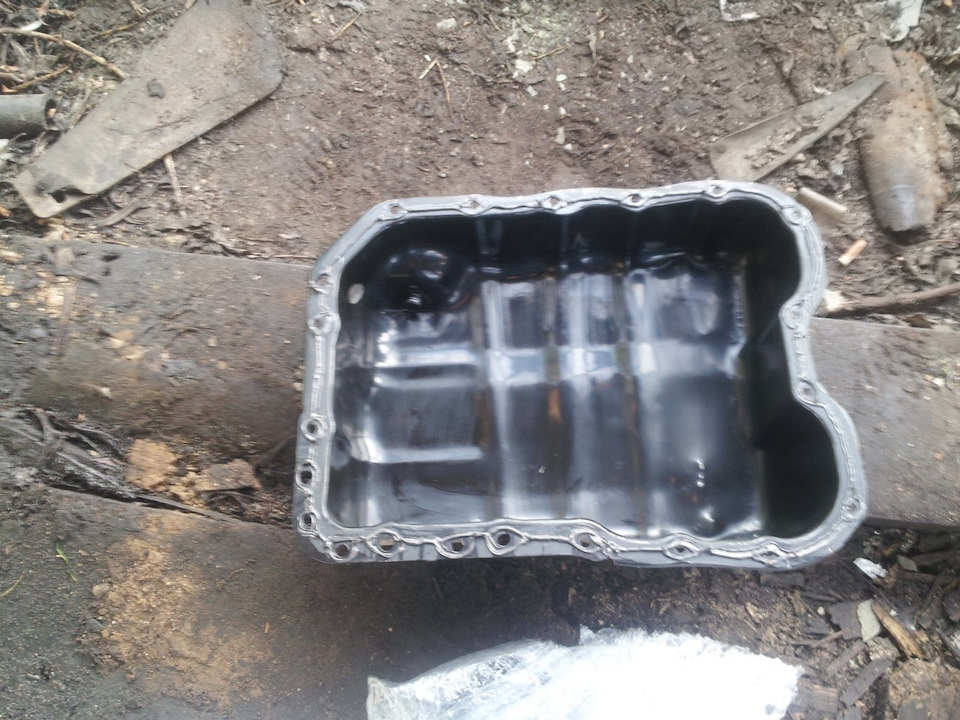
10. Remove the oil pan Outlander HL (the first two photos are the 4B12 / 4B11 engine, the third photo is the 6B31 engine).
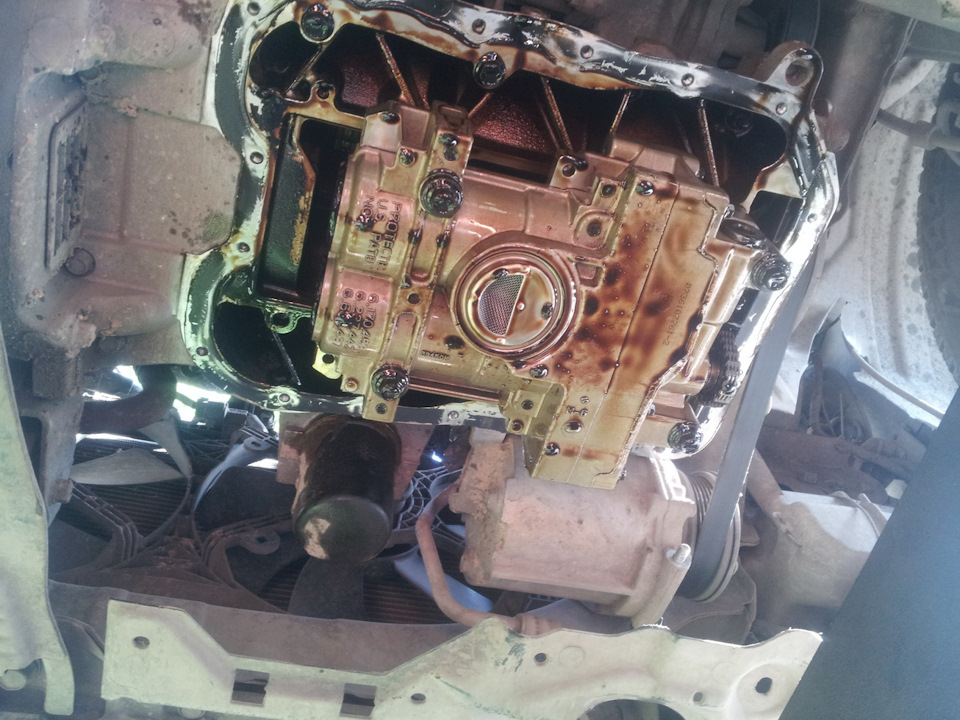
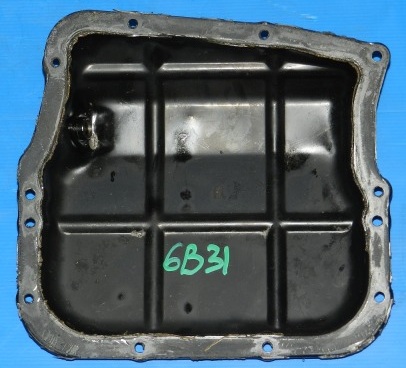
11. Check the oil pan for cracks.
12. Check the oil pan flange (sealant application surface) for damage or deformation. Correct if possible or replace the pan.
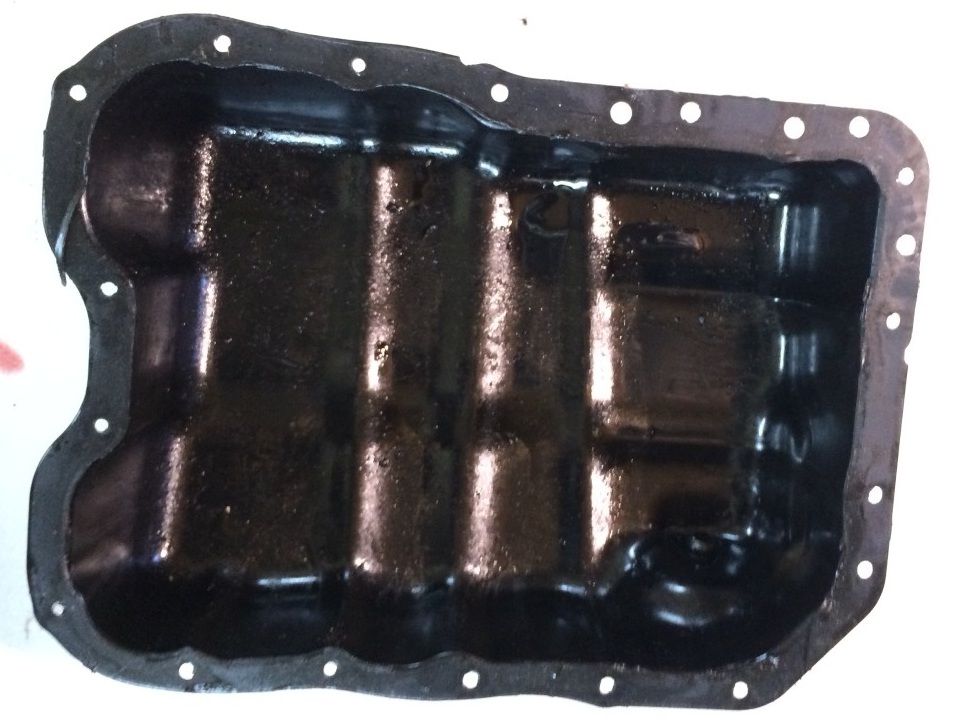
13. Clean the mating surfaces of the crankcase and oil pan flange from the remnants of the old sealant. After cleaning, degrease surfaces to be sealed. Also clean the pan from oil deposits.
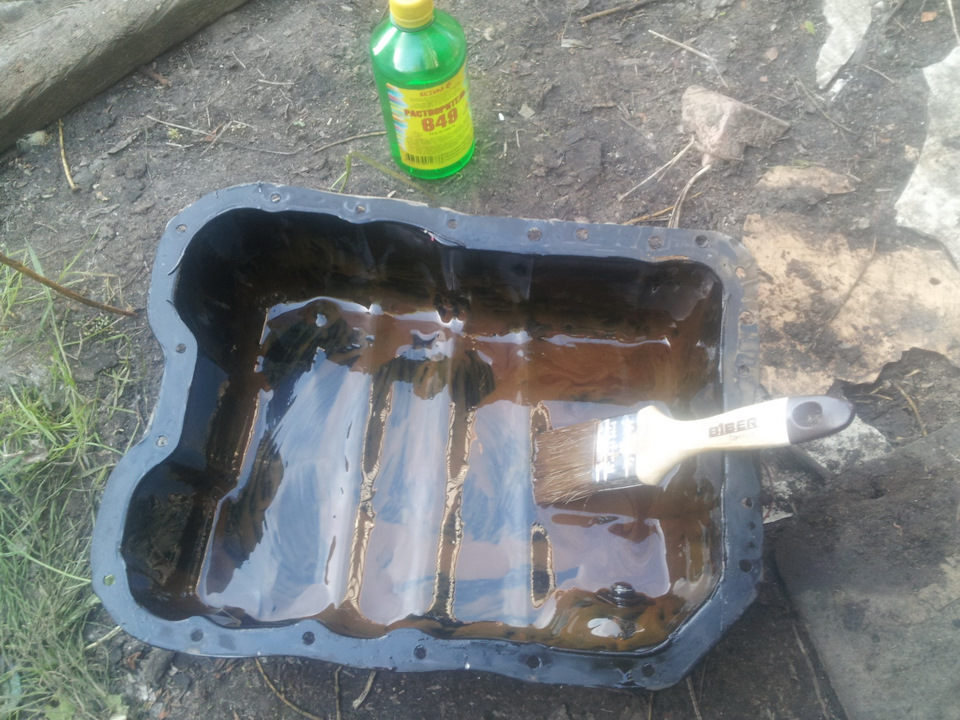
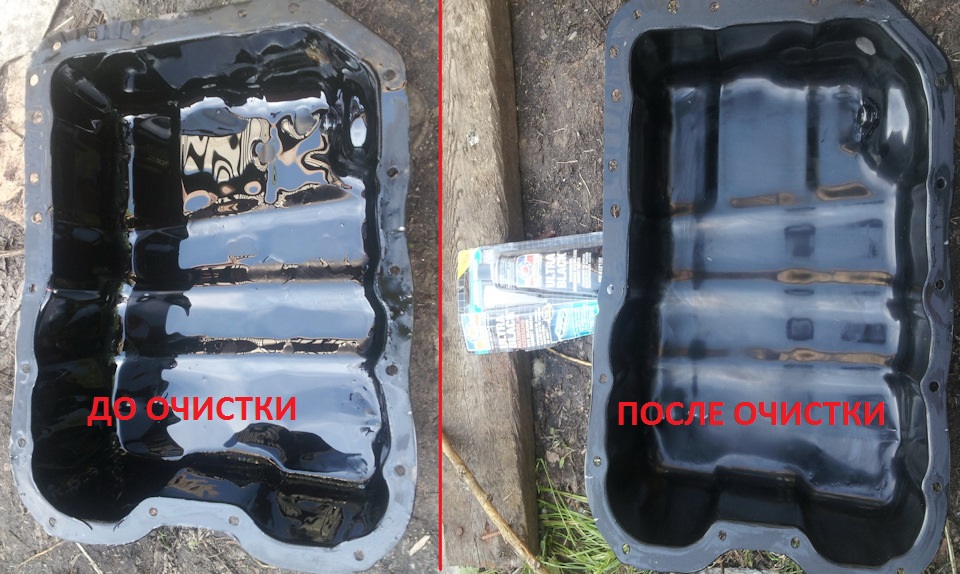
Note:
Degreasing is necessary for better adhesion of the sealant to these parts.
14. Apply sealant in a continuous strip with a diameter of 2-3 mm along the entire flange of the oil pan (the first two photos are the 4B12 / 4B11 engine, the third photo is the 6B31 engine).
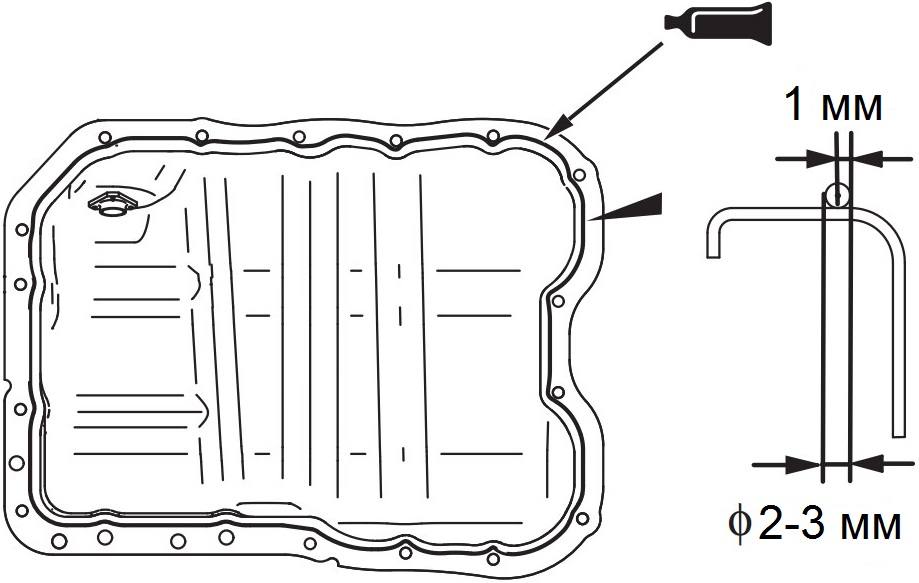
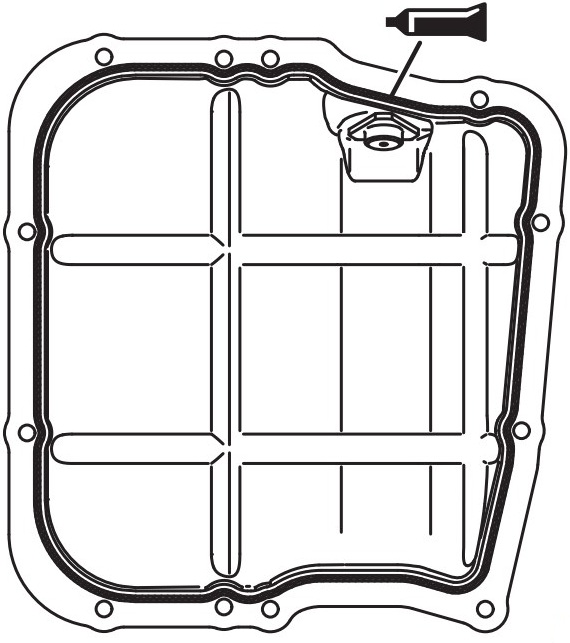
Note:
Do not over-apply sealant, as tightening the bolts may cause sealant to enter the inside of the sump.
15. Install and fix the oil pan within 3-5 minutes after applying the sealant. Tighten the oil pan bolts gradually (in several steps) and diagonally (for 4B12/4B11 engines). For the 6B31 engine, the bolt tightening diagram is shown in the second photo below.
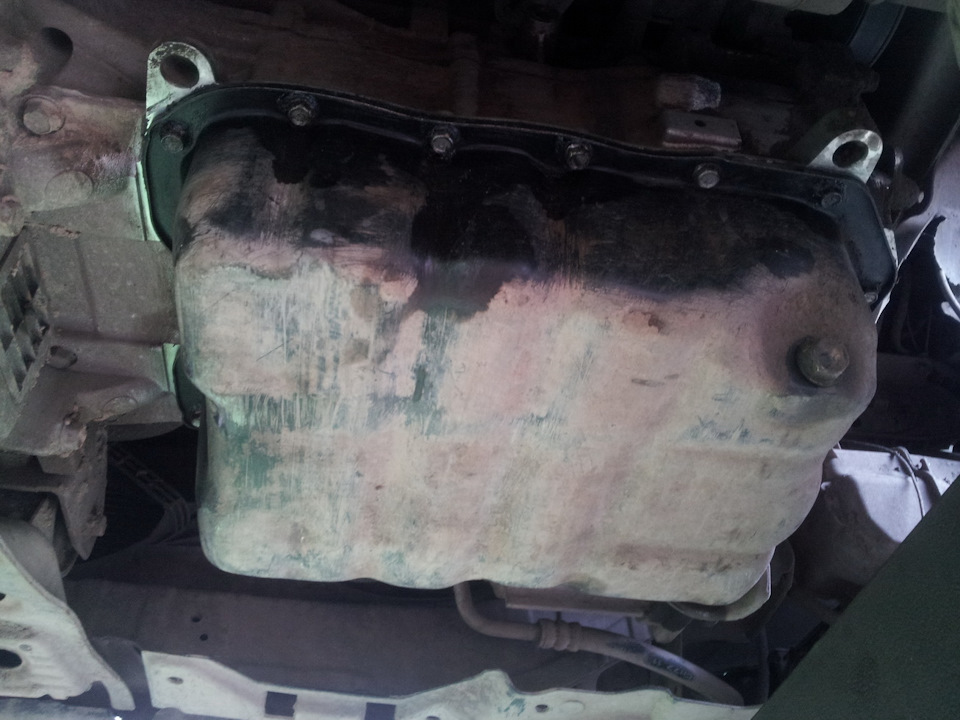
Note:
Tightening torques for 4B12 engine bolts: M6 - 10 ± 2 Nm; M8 - 29 ± 2 Nm.
Bolt tightening torques for 6B31 engine: 10 ± 2 Nm.
After installing the oil pan, wait at least an hour before adding engine oil to the engine.
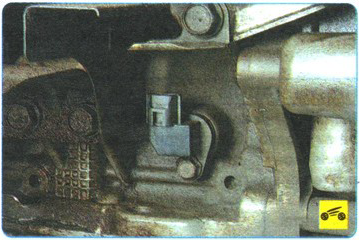
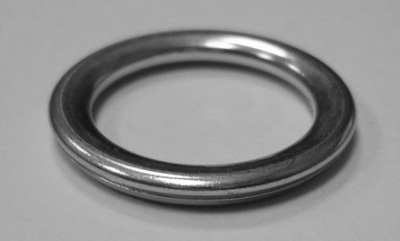
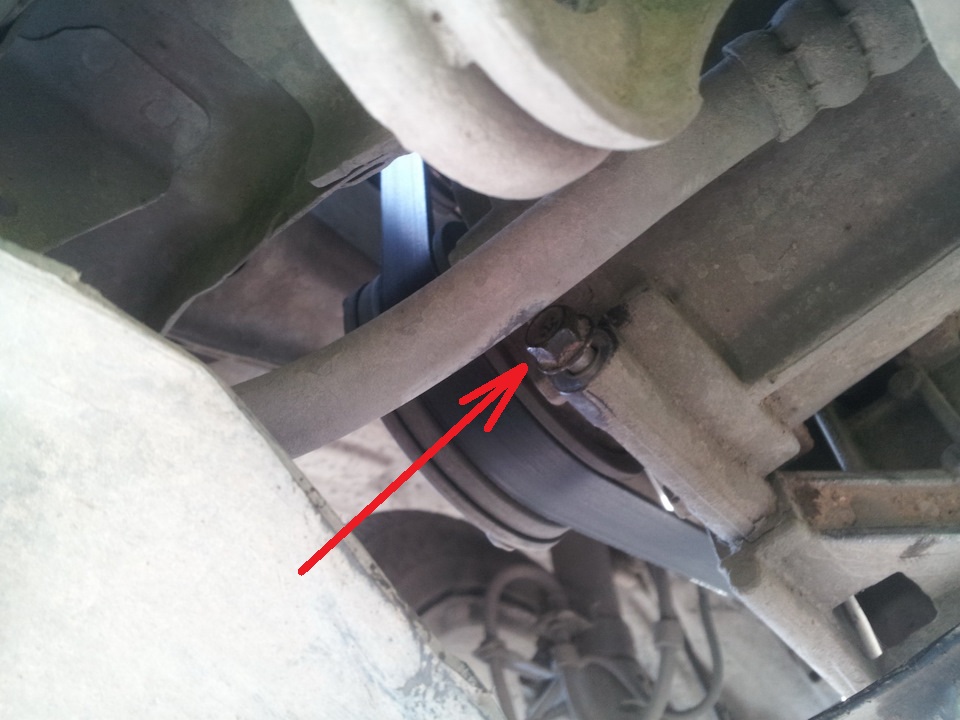
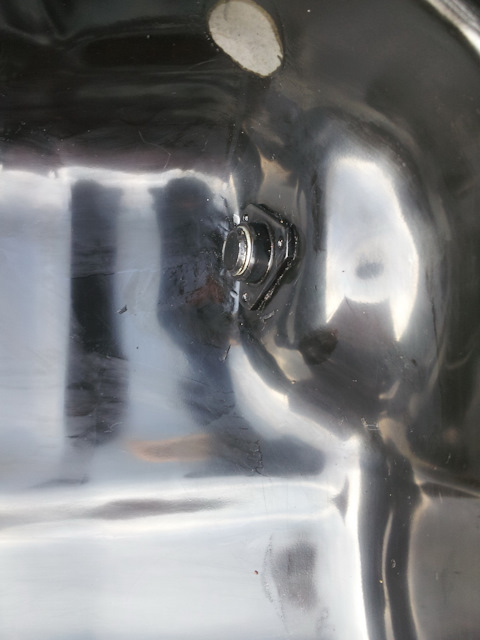
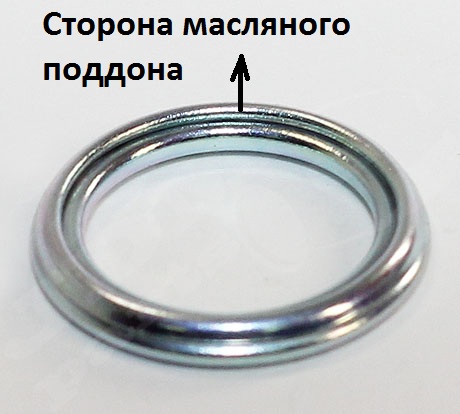
16. Install a new engine tray drain plug O-ring in the direction shown in the figure below and tighten the drain plug to 39 ± 5 Nm.
17. (4B12/4B11 engines) Install the air conditioning compressor and electromagnetic clutch assembly to the engine, tighten the mounting bolts to a nominal torque of 23 ± 6 Nm in the sequence shown in the figure below (shown on the removed engine for clarity).
18. (4B12/4B11 engines) Install the accessory drive belt.

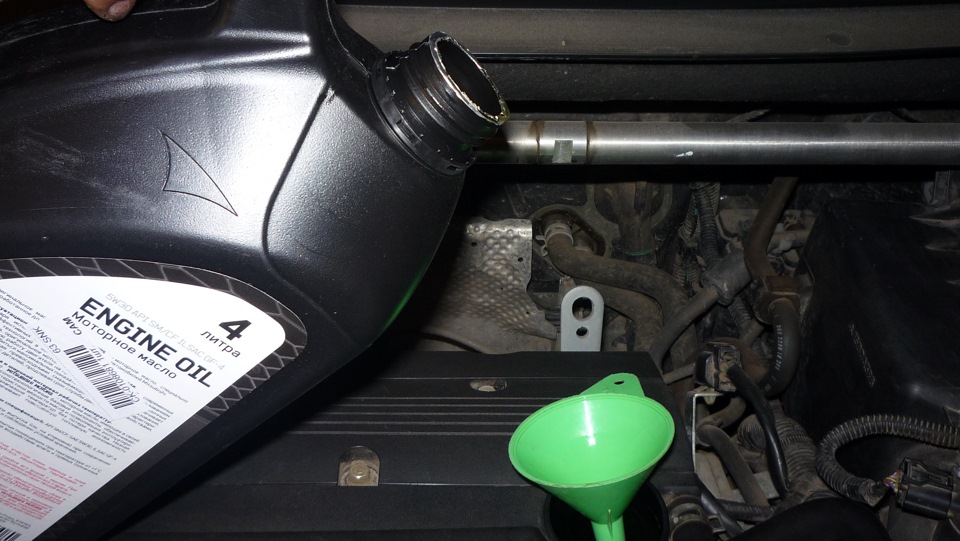
19. Pour oil into the Outlander HL engine by unscrewing the plug in the cylinder head cover.
20. Reinstall the removed engine compartment mudguards.
21. Check for leaks.
The article is missing:
- Tool photo
- Photo of parts and consumables
Source: carpedia.club