![E140/E150 [2006 - 2010]](/uploads/Toyota_Corolla_E140_2006_-_2010_.jpg)
Crankshaft position sensor
You will need: all the tools required to remove the engine mudguards, as well as a 10 key, a tester.
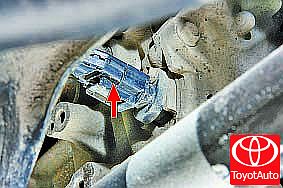
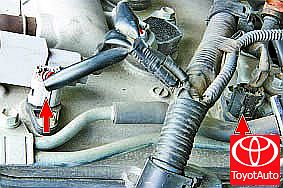
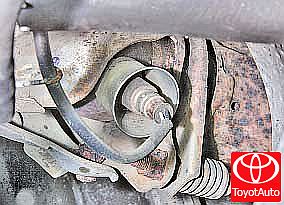
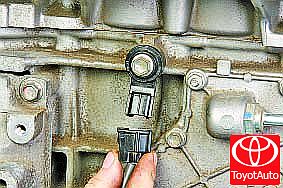
The crankshaft position sensor is located at the front of the engine block.
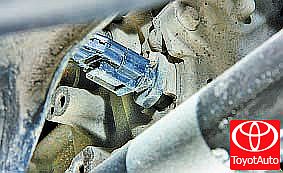
If a malfunction occurs in the crankshaft position sensor circuit, the engine stops working, the controller enters the malfunction code into the memory and turns on the indicator in the instrument cluster. In this case, check the sensor and the drive wheel for missing teeth, runout, or other damage.
Toyota Corolla Crankshaft Position Sensor Replacement
1. Disconnect the wire from the negative terminal of the storage battery.

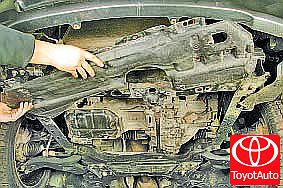
2. Remove the right lower and side engine mudguards (see "Removing and installing engine mudguards").
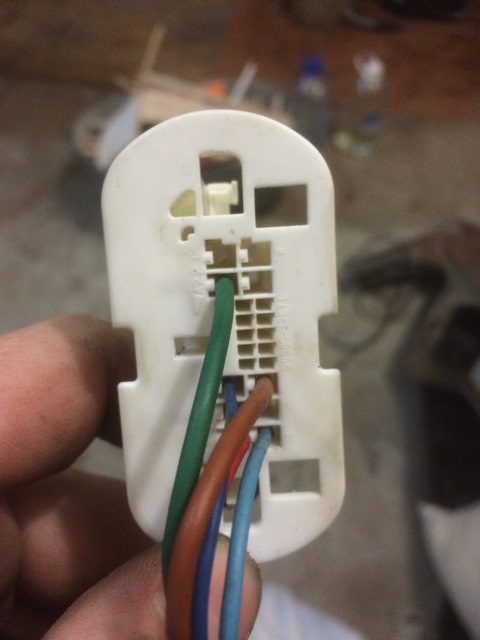
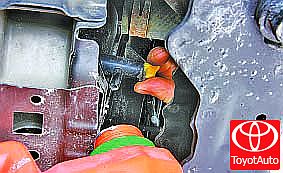
3. Disconnect the CKP sensor harness connector.
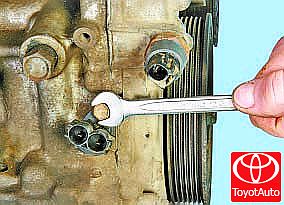
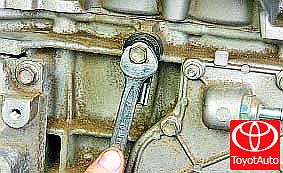
4. Remove the mounting bolt.
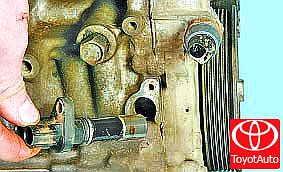
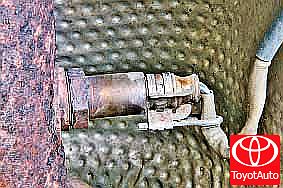
5. Remove the crankshaft position sensor.
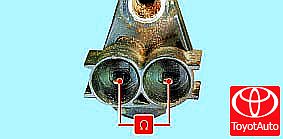
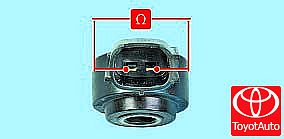
6. To check the serviceability of the crankshaft position sensor, measure the resistance between the contacts of its block. At temperatures from +10 to +50 ° С, the resistance should be 985-1600 ohms.
7. Install the engine crankshaft position sensor in the reverse order of removal.
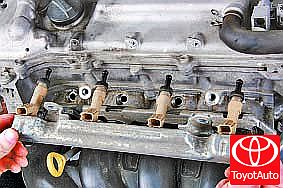
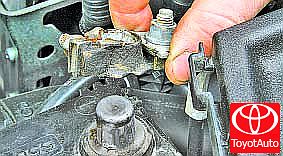
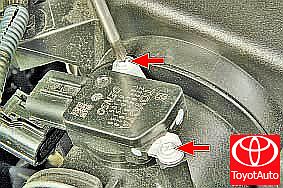
Phase sensors
You need a 10 key.
The phase sensors are installed in the upper left part of the cylinder head. In the event of a malfunction in the sensor circuit, the controller stores a malfunction code in the memory and uses the bypass engine control program (without changing the valve timing).
NOTE:
Shown is the replacement of the phase sensor on the intake camshaft. The phase sensor on the exhaust shaft is replaced in the same way.
Toyota Corolla Phase Sensor Replacement
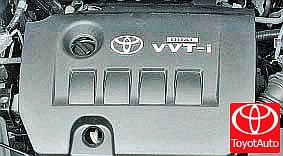
1. Remove the decorative engine cover (see "Removing and installing the decorative engine cover").

2. Disconnect the wire from the negative terminal of the storage battery.
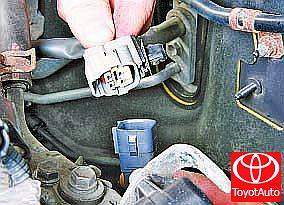
3. Disconnect the harness connector from the phase sensor.

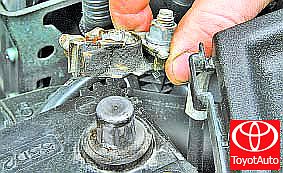
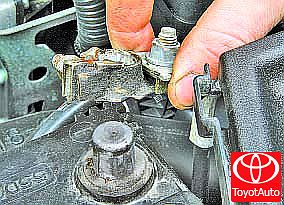
4. Remove the mounting bolt.
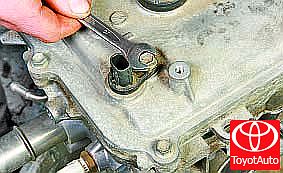
5. Remove the sensor from the hole in the cylinder head.
6. To check if the sensor is working properly, measure the resistance between its contacts. At temperatures from +10 to +50 ° C, the resistance should be 835-1400 ohms.
7. Install the phase sensor in the reverse order of removal.
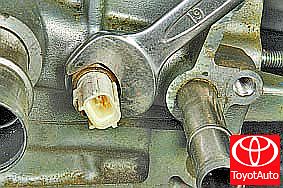
Coolant temperature sensor
You will need: key "19", tester, thermometer.
The coolant temperature sensor is screwed into the threaded hole in the cylinder head. In the event of a sensor failure, the controller stores a DTC in memory and uses the engine bypass program (calculates the approximate value of the coolant temperature from the engine running time and MAF).
Toyota Corolla Coolant Temperature Sensor Replacement
1. Remove the decorative engine cover (see "Removing and installing the decorative engine cover").

2. Disconnect the wire from the negative terminal of the storage battery.
3. Drain the liquid from the engine cooling system (see "Replacing the coolant").
USEFUL ADVICE:
When replacing the sensor, the coolant does not need to be drained: after removing the sensor, plug the hole with your finger or a plug - the loss of coolant will be minimal.
4. Disconnect the harness connector from the coolant temperature sensor by squeezing the retainer.
5. Unscrew the sensor from the hole in the cylinder head.
6. Immerse the sensor in hot water and use a tester to check the change in resistance between the sensor leads as the water cools down, monitoring the water temperature with a thermometer. The resistance values of a working sensor are shown in the table:
Data for checking the coolant temperature sensor
Temperature, ° С
Sensor resistance, kOhm
-twenty
11.0-25.0
0
5.0-10.0
+20
2.4-4.0
+40
1.0-1.9
+60
0.5-0.9
+80
0.25-0.6
7. If the resistance is abnormal, replace the sensor.
8. Screw in the coolant temperature sensor and tighten it to 20 N? M. Install the rest of the parts in the reverse order of removal.
9. Fill with coolant.
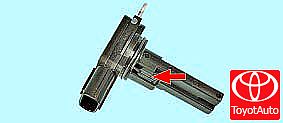
Mass flow and intake air temperature sensor
You will need a Phillips screwdriver.
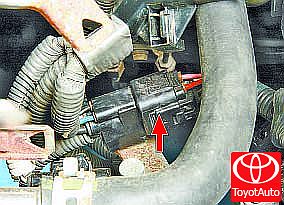
A combined mass flow and intake air temperature sensor is installed in the air sleeve between the air filter and the throttle assembly.
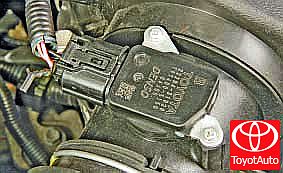
In the event of a sensor failure, the controller stores a DTC in memory and uses the engine bypass program (calculates the approximate mass air flow from the crankshaft speed and throttle position).
Checking the mass flow sensor and incoming air temperature must be performed at a service station using a scanner connected to the diagnostic connector.
Toyota Corolla Mass Flow Rate and Temperature Sensor Replacement
1. Disconnect the wire from the negative terminal of the storage battery.
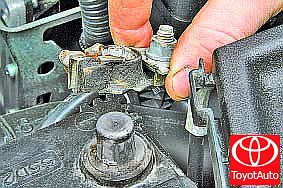
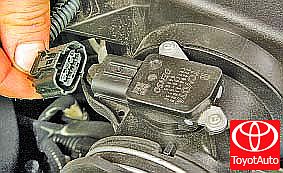
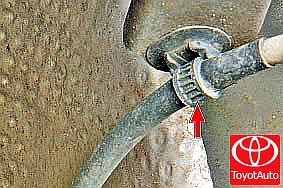
2. Squeeze the sensor retainer.
3. Disconnect the harness connector from the sensor.
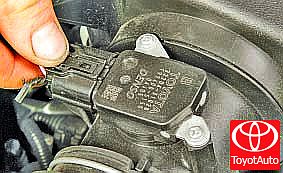
4. Remove the 2 mounting screws and remove the MAF sensor.
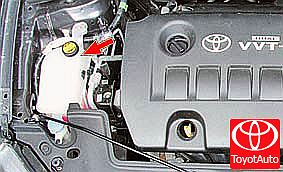
5. Inspect the platinum element of the MAF sensor (shown with an arrow in the photo) and make sure there is no breakage or debris on it. Replace the sensor if the platinum element is broken.
6. Check with a tester the change in resistance between terminals A and B of the sensor as the temperature changes. The resistance values of a working sensor are shown in the table.
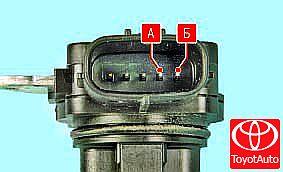
Data for checking the mass flow sensor and intake air temperature
Temperature, ° С
Sensor resistance, kOhm
-twenty
13.6-18.4
+20
2.21-2.69
+60
0.49-0.67
7. If the resistance is abnormal, replace the sensor.
8. Install the combination sensor in the reverse order of removal.
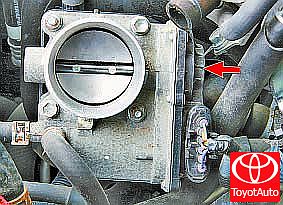
A Hall effect throttle position sensor is connected to the throttle shaft. Rotation of the damper axis causes a change in the voltage of the sensor signal, according to which the controller determines the degree of opening of the throttle valve. The sensor is built into the throttle assembly cover, therefore, if the sensor fails, replace the throttle assembly assembly (see "Removing and installing the throttle assembly").
Oxygen concentration sensors
You will need: key "for 22", tester.
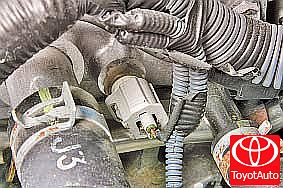
Oxygen concentration sensors are installed on the collector and the front pipe of the exhaust system. The sensor on the exhaust pipe is diagnostic. The sensor on the exhaust manifold is the control one.
Both sensors are similar in design but differ in performance. If at least one of the oxygen concentration sensors is defective, the toxicity of the exhaust gases can rise sharply and fuel consumption will increase.
Toyota Corolla Oxygen Concentration Control Sensor Replacement
1. Disconnect the wire from the negative terminal of the storage battery.
2. Remove the decorative engine cover (see "Removing and installing the decorative engine cover").
3. Squeeze the clips and disconnect the sensor harness connector.
4. Unscrew the control sensor from the hole in the collector.
5. To check the operability of the control oxygen concentration sensor, measure the resistance between contacts "1" and "2" of its block. At a temperature of +20 ° C, the resistance should be 1.8-3.4 ohms.
6. Install the control oxygen concentration sensor in the reverse order of removal.

Toyota Corolla diagnostic oxygen concentration sensor replacement
1. Disconnect the wire from the negative terminal of the accumulator battery.

2. Remove the harness holder from the base of the body.
3. Squeeze the clips and disconnect the diagnostic oxygen concentration sensor harness connector.
4. Unscrew the sensor from the hole in the front pipe.

5. To check the serviceability of the diagnostic oxygen concentration sensor, measure the resistance between contacts "1" and "2" of its block. At a temperature of +20 ° C, the resistance should be 11-16 ohms.
6. Install the diagnostic oxygen concentration sensor in the reverse order of removal.
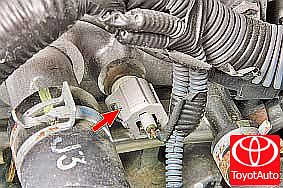
knock sensor
You will need: All tools for removing the engine intake pipe.
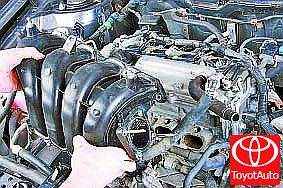
The knock sensor is mounted on a bolt screwed into the wall of the cylinder block at its top.

If the sensor fails, the controller memorizes a malfunction code and uses the engine control bypass program (with a reduced ignition timing to prevent knocking).
Toyota Corolla Knock Sensor Replacement
1. Remove the decorative engine cover (see "Removing and installing the decorative engine cover").

2. Disconnect the wire from the negative terminal of the storage battery.

3. Remove the engine intake pipe (see "Replacing the intake pipe seal").
4. Squeeze the sensor retainer.
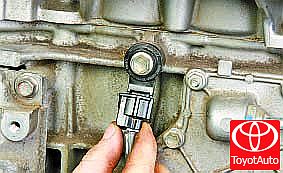
5. Disconnect the harness block from the knock sensor.
6. Remove the bolt and remove the knock sensor from the stud.
7. To check the integrity of the knock sensor, measure the resistance between its contacts. At a temperature of +20 ° C, the resistance should be 120-180 kOhm.
8. Install the knock sensor in the reverse order of removal.
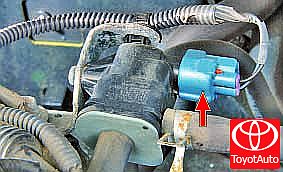
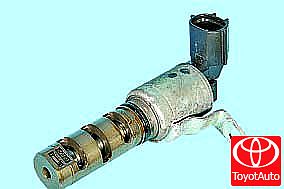
Hydraulic Phase Change Valves
You need a 10 key.
The hydraulic phase change valves are installed on the top right of the cylinder head cover. The valves regulate the pressure of oil supplied to the phase change actuators mounted on the front ends of the camshafts.
Toyota Corolla phase change hydraulic valve replacement
NOTE:
Shown is the replacement of the hydraulic timing valve on the intake camshaft. The hydraulic valve for changing the phases on the exhaust camshaft is replaced in the same way.
1. Disconnect the wire from the negative terminal of the storage battery.

2. Remove the decorative engine cover (see "Removing and installing the decorative engine cover").

3. Press on the shoe latch.
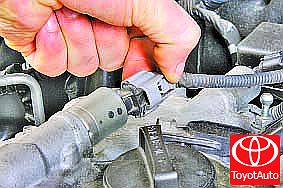
4. Disconnect the engine management system harness connector from the hydraulic phase change valve.
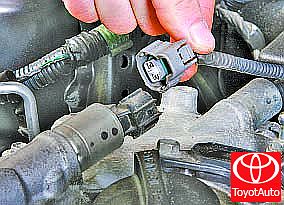
5. Remove the bolt securing the hydraulic phase change valve.
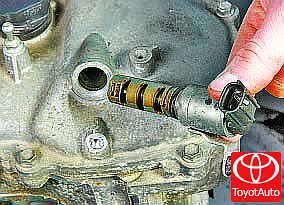
6. Remove the valve from the cylinder head.
NOTES:

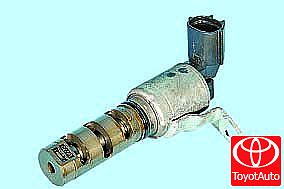
Refer to the hydraulic phase change valve labeling to purchase a similar new valve.
Always replace the O-rings when removing the hydraulic phase change valve.
7. To check the integrity of the knock sensor, measure the resistance between its contacts. At a temperature of +20 ° C, the resistance should be 6.9-7.9 ohms.
8. Install the phase change hydraulic valve in the reverse order of removal.
Source: http://toyotauto.net/corolla/proverka-i-zamena-datchikov-sistemy-upravleniya-dvigatelem.html