Tools:
- Collar for end cap 3/4"
- Crank attachment E-14
- Crank attachment E-18
- Nozzle for crank 8 mm
- Nozzle on the crank 10 mm
- Nozzle on the crank 13 mm
- Nozzle on the crank 14 mm
- Nozzle on the crank 15 mm
- Nozzle for crank 17 mm
- Allen key 6 mm
- Nozzle on the knob twelve-sided 19 mm
- Wrench with Torx tip (asterisk) T50 (if necessary)
- torque wrench
- Screwdriver flat medium / spudger
- Drill (5.5 mm)
- screw jack
- Emphasis (shoe) recoil
- Pulley fixing tool (if necessary)
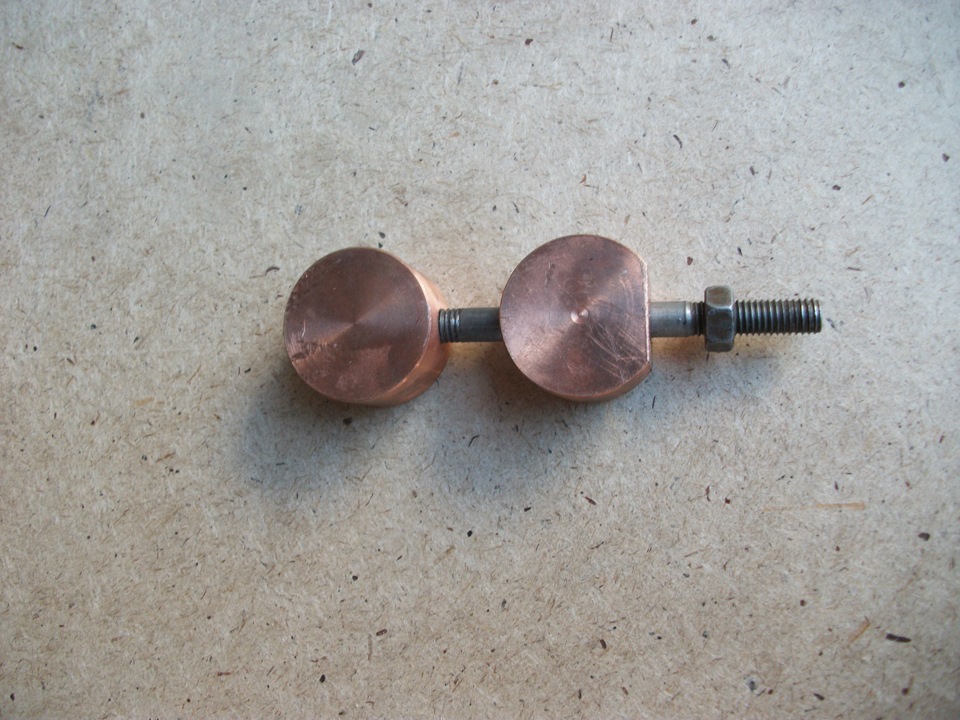
Parts and consumables:
- Bar
- Timing belt (number of teeth 146, width 24 mm.) (24422964)
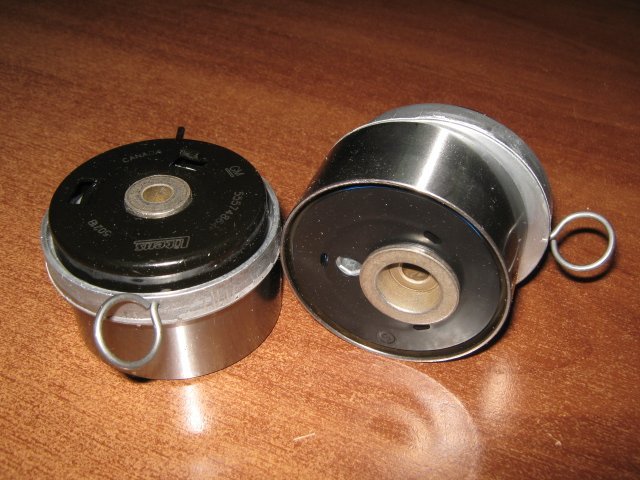
- Timing belt tensioner (if necessary) (55574864)
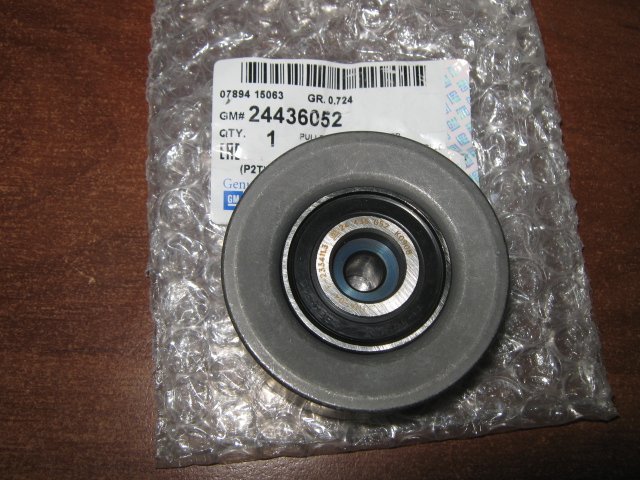
- Timing belt idler (if required) (24436052)
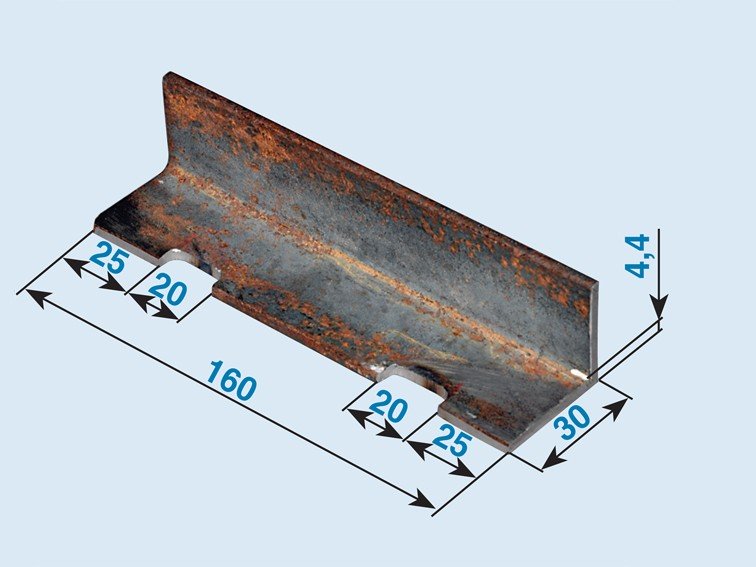
- Metal plate (corner)
Note:
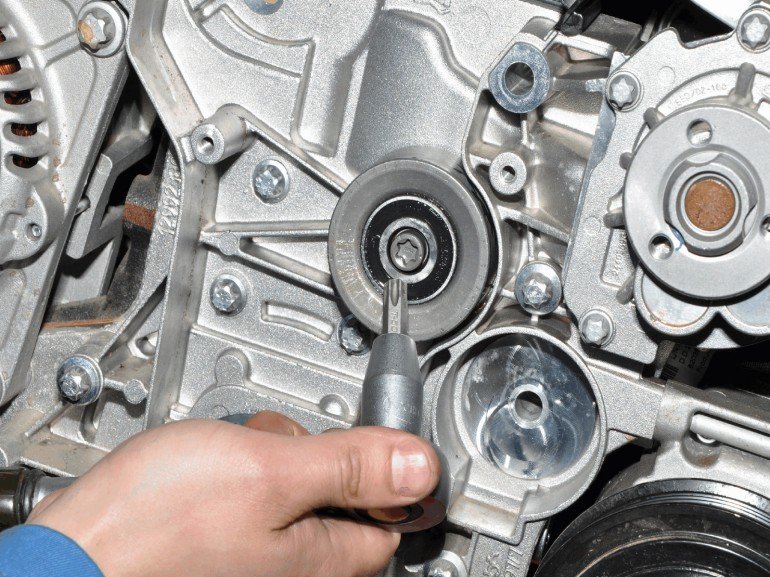
This article shows the timing belt replacement for a Chevrolet Cruze 1.6 and 1.8.
According to the maintenance schedule, checking the condition of the timing belt (timing) should be carried out every 15 thousand km. It should be borne in mind that failure of the timing belt (breakage or shearing of teeth) can lead to sticking of valves into pistons due to a mismatch in the angles of rotation of the crankshaft and camshafts and, as a result, to expensive engine repairs.
Upon reaching the 150 th path. Km belt drive timing Chevrolet Cruze must be replaced regardless of its state.
Checking the condition of the timing belt Chevrolet Cruze
1. Unscrew the 4 crankcase protection bolts (the bolts are shown with a red arrow).
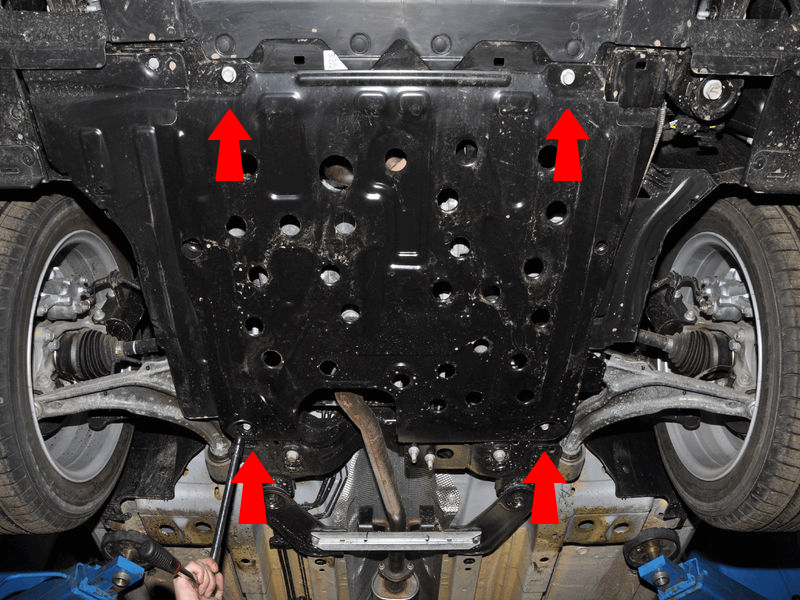
2. Remove protection.
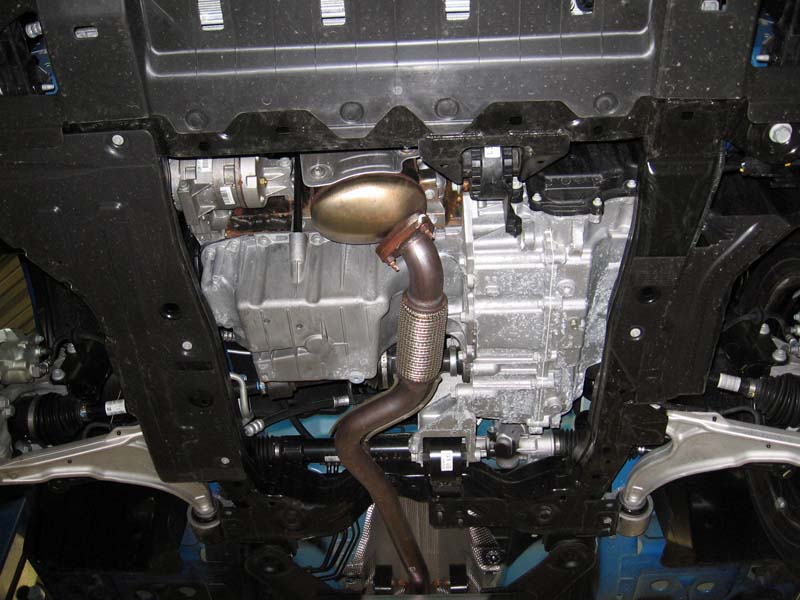
3. Remove 2 pistons and unscrew 3 bolts securing the right mudguard of the engine compartment.
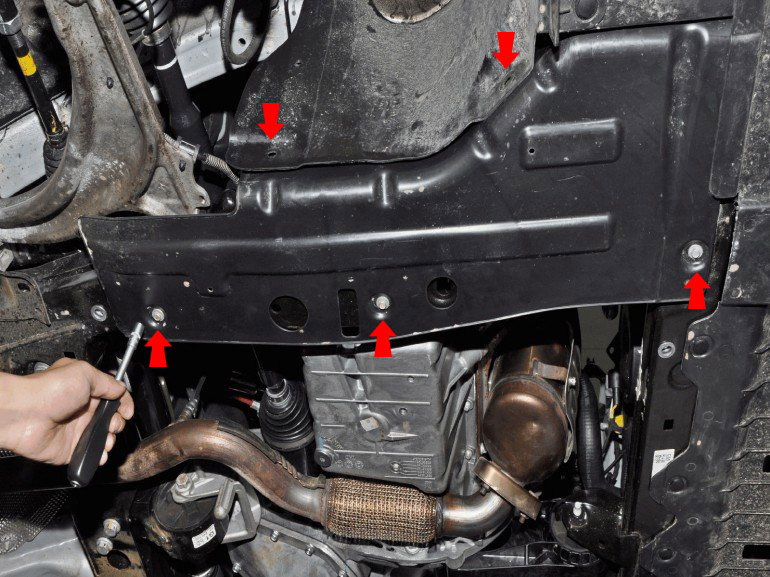
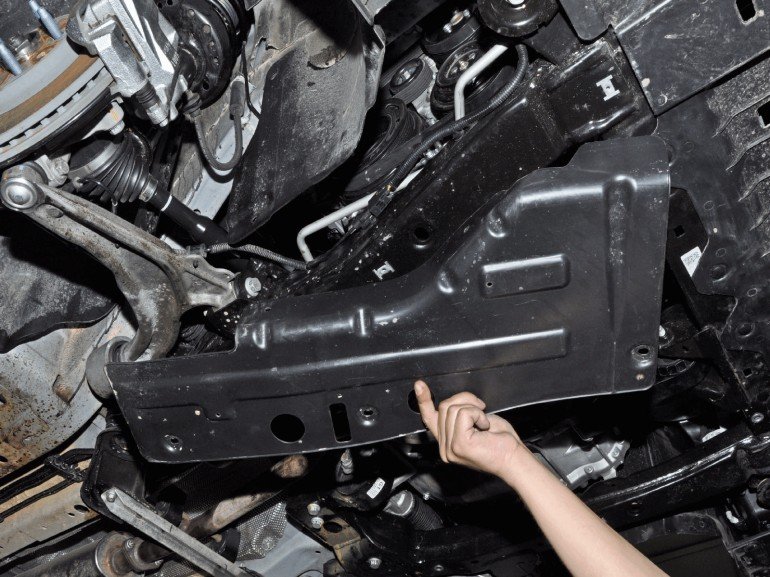
4. Slide the right shield down and remove it.
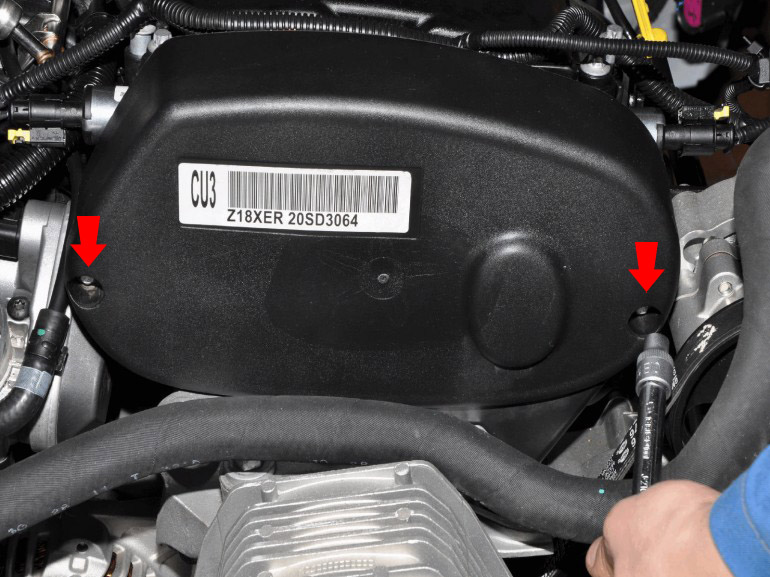
5. Unscrew the top cover of the timing belt with the E-10 head.
6. Remove the cover.
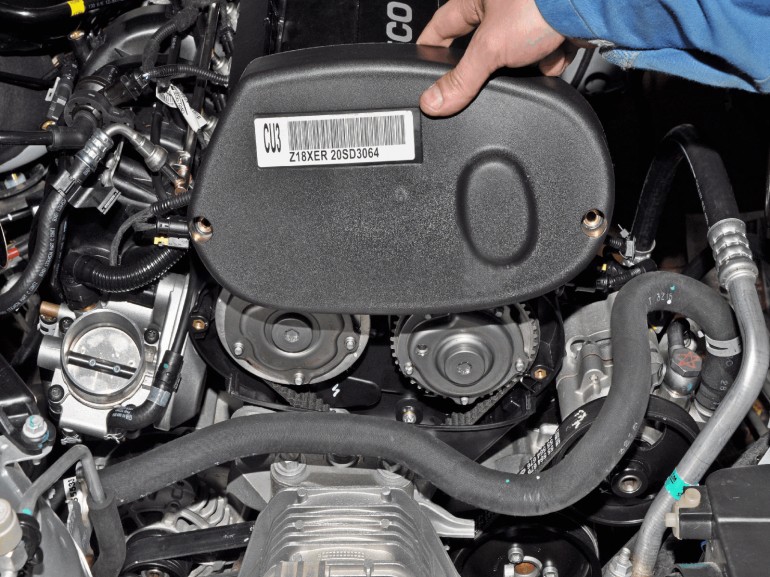
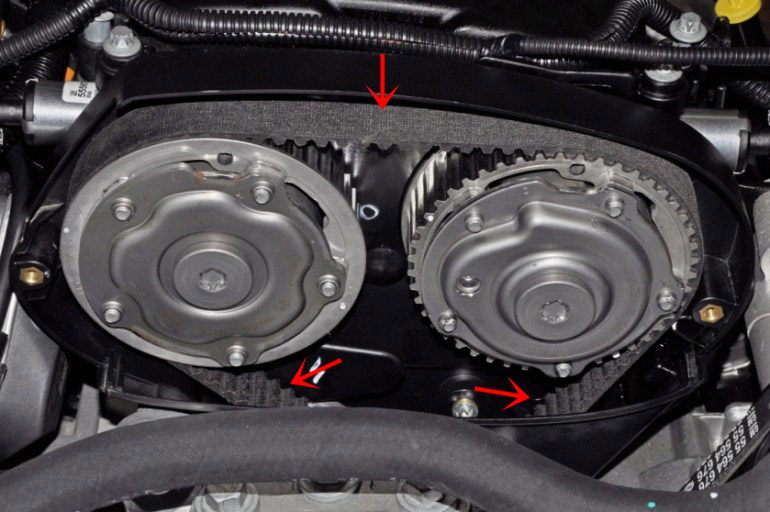
7. Visually assess the condition of the Chevrolet Cruze timing belt.
Note:
The surface of the toothed part of the belt should not have cracks, undercut teeth and delamination of the fabric from the rubber, and the reverse side of the belt should not have wear, exposing the cord threads, and signs of burning. On the end surfaces of the belt there should be no delaminations and fraying. If there is damage, the belt must be replaced. The belt must also be replaced if traces of oil are found on it (before replacing the belt, the cause of its oiling should be eliminated) or when replacing a failed belt tensioner or guide roller.
Timing Belt Replacement Chevrolet Cruze
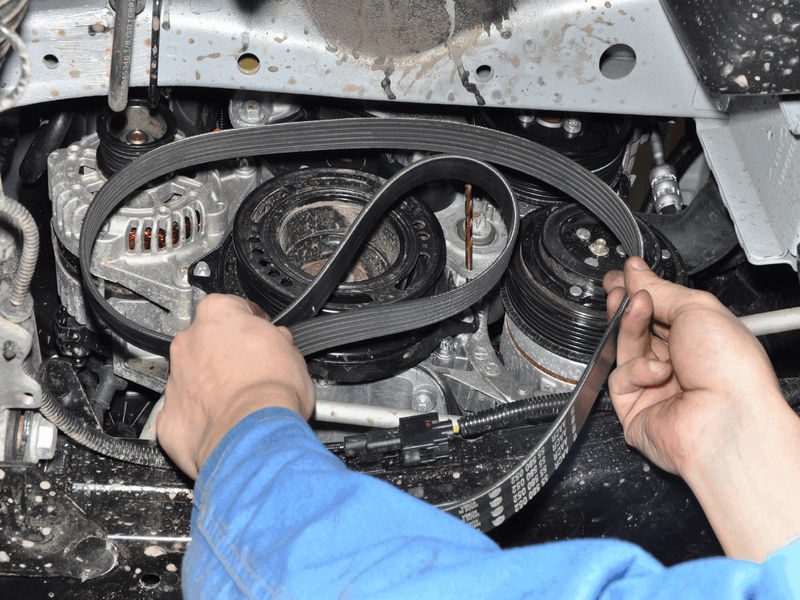
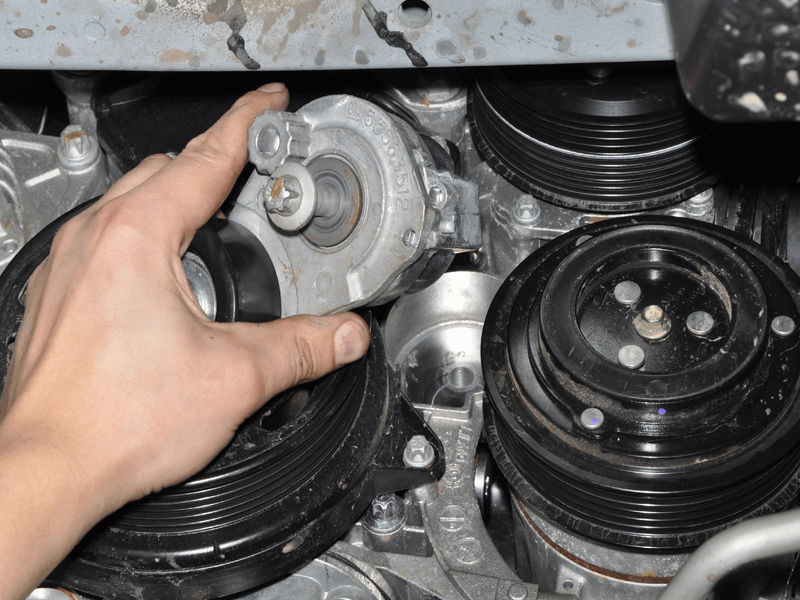
1. To replace the timing belt, you need to remove the accessory drive belt and its tensioner, as described in this article .
Tensioner pulley Chevrolet Cruze
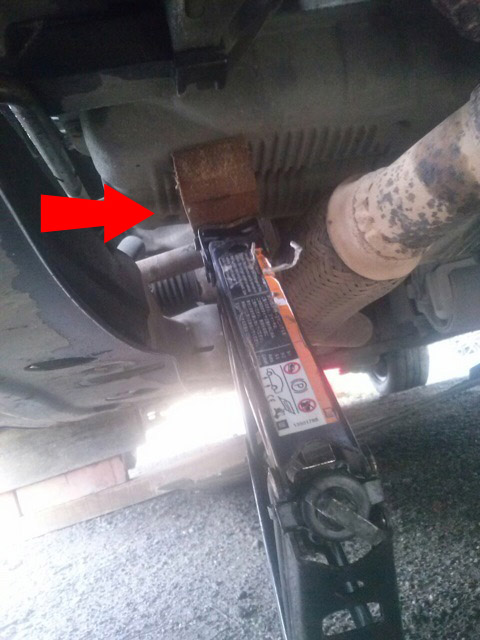
2. Support the engine with a bar.
3. With a 14 head, unscrew the 6 fasteners of the right engine mount.
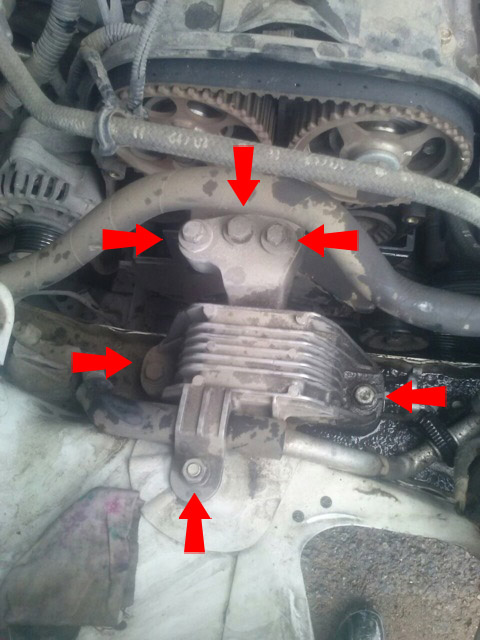
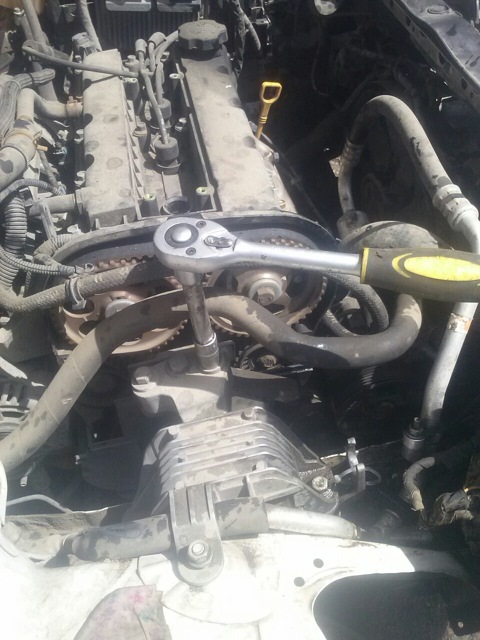
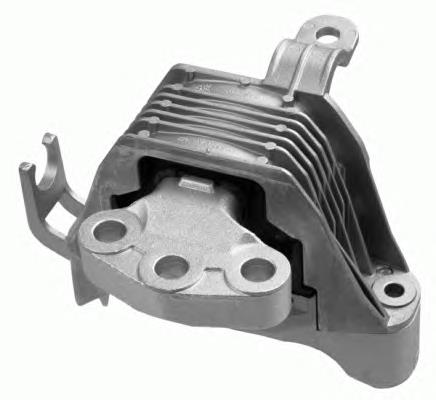
4. Remove the support.
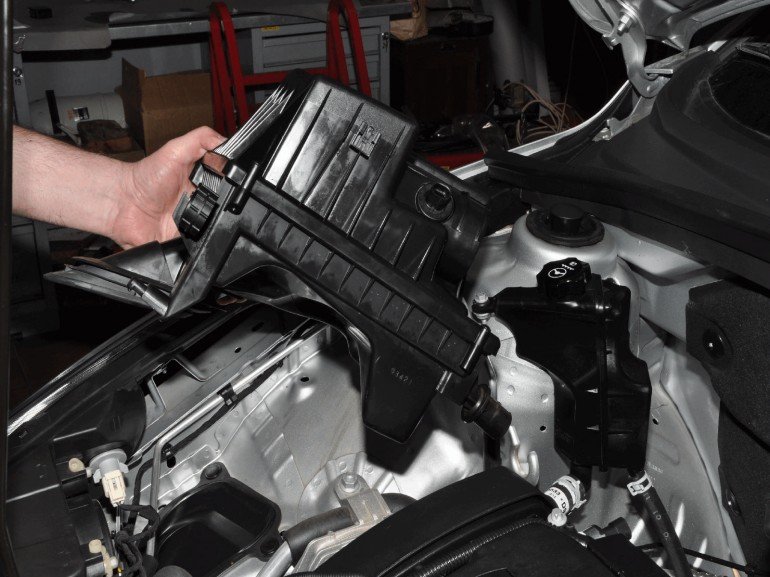
5. Remove the air filter housing.
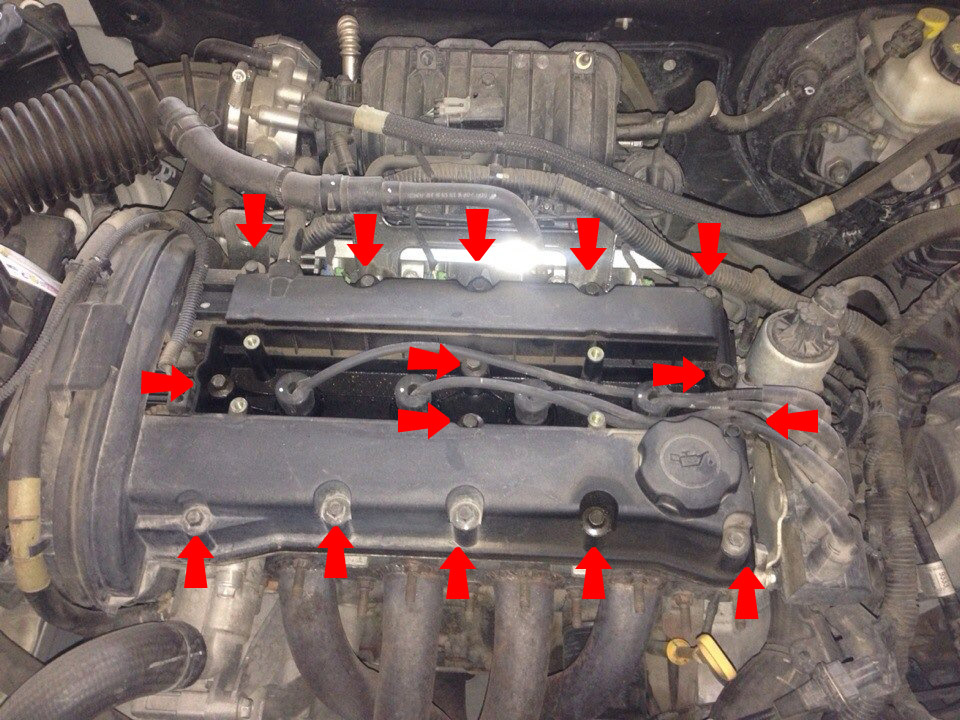
6. With a 10 mm head, unscrew the 15 bolts securing the cylinder block cover and remove the cover.
Note:
Before removing the belt, set the crankshaft and camshafts to the TDC (top dead center) position of the compression stroke of the first cylinder.
7. Turn the crankshaft pulley bolt until the marks on the crankshaft and on the camshafts match.
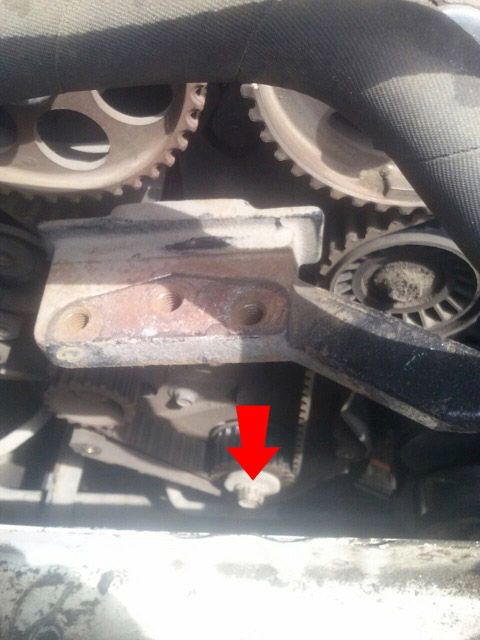
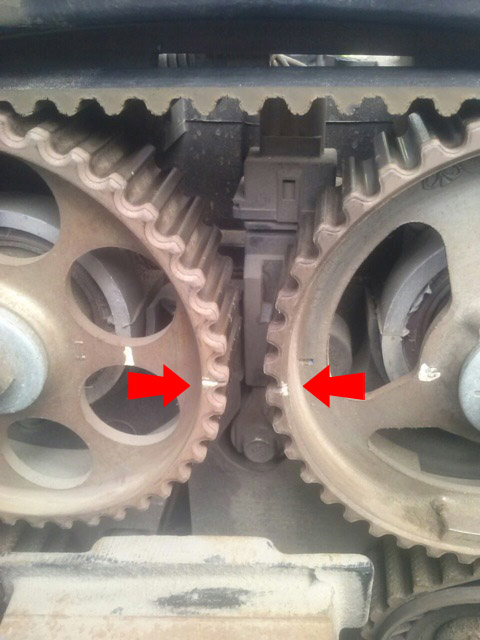
marks on camshafts
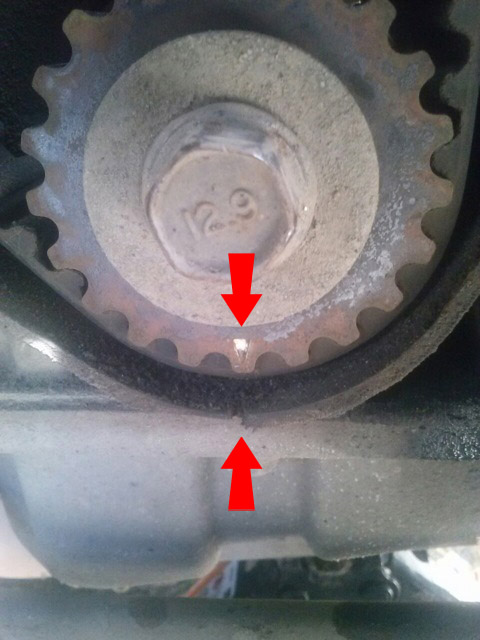
Marks on the crankshaft
Note:
If the Chevrolet camshaft marks do not match, turn the crankshaft one more turn (360º) clockwise and recheck the correct installation of the crankshaft and camshafts.
8. Place wheel chocks under the vehicle wheels.
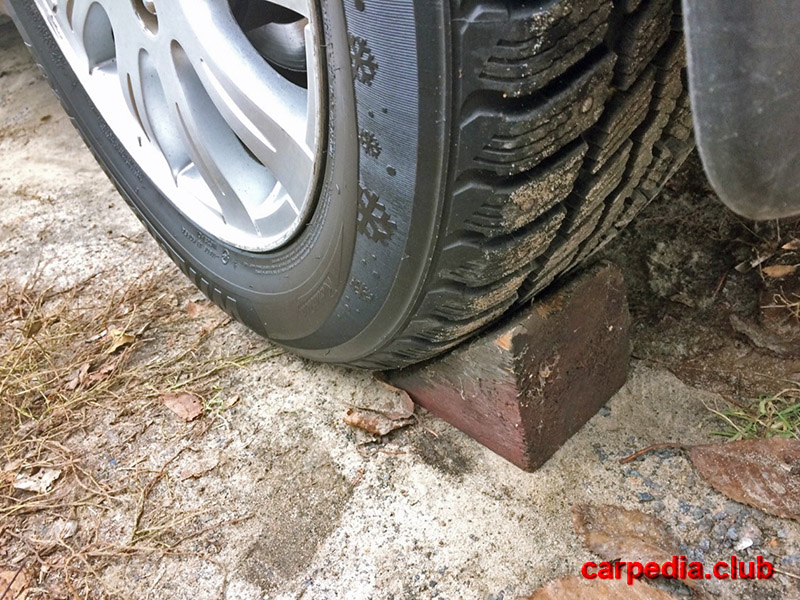
9. Engage fifth gear in the gearbox and ask an assistant to strongly depress and hold the brake pedal to unscrew the accessory pulley.
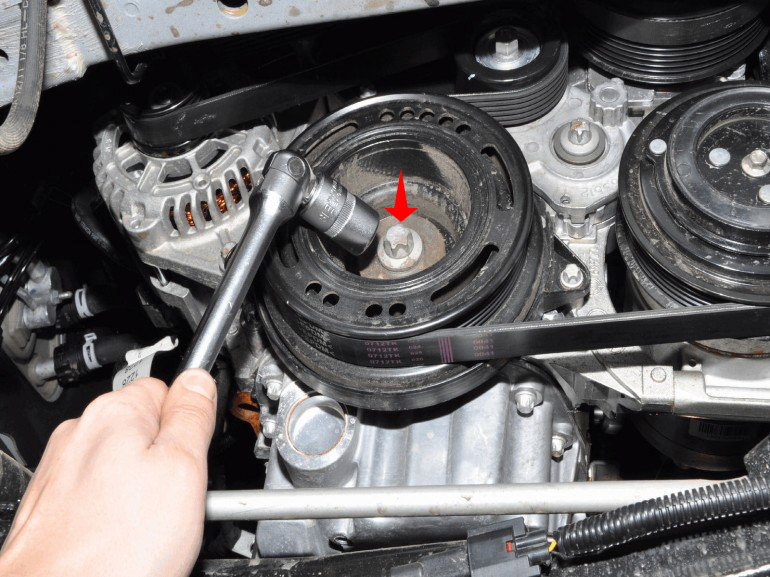
10. Using the E-18 head, unscrew the screw securing the accessory drive pulley.
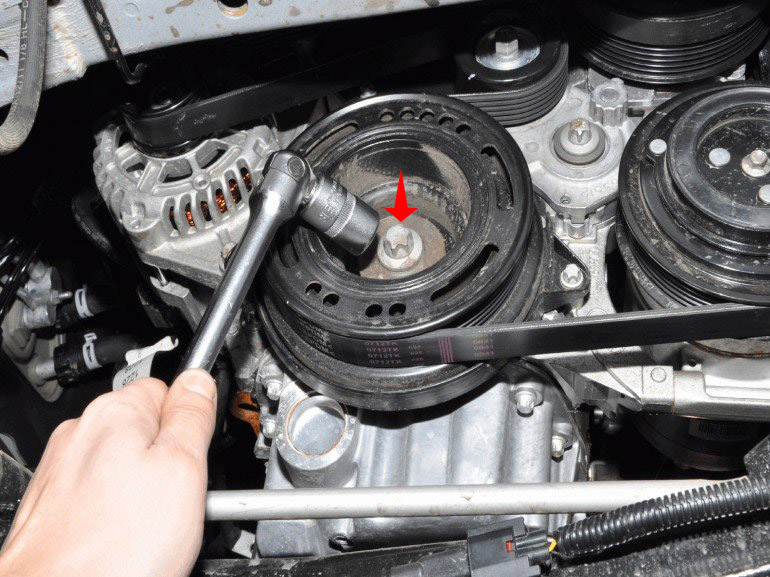
Note:
If it was not possible to unscrew the pulley fastening screw in this way, then, having unscrewed the two bolts with the “15” head, we dismantle the dirt-proof plate that closes the gap at the junction of the gearbox housing and the engine oil pan - next to the housing of the right wheel drive inner hinge. Through the gap we insert a slotted screwdriver between the teeth of the flywheel and rest it on the differential bearing cover, thereby blocking the crankshaft from turning.
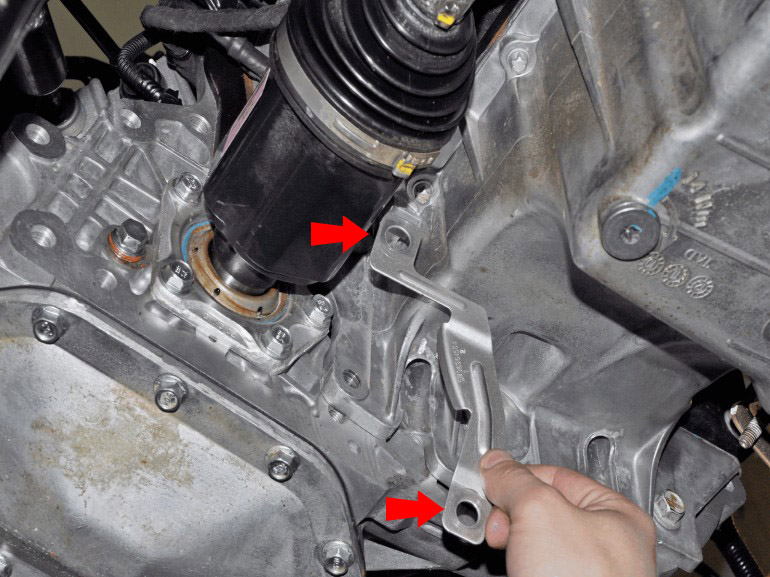
Dirt plate attachment
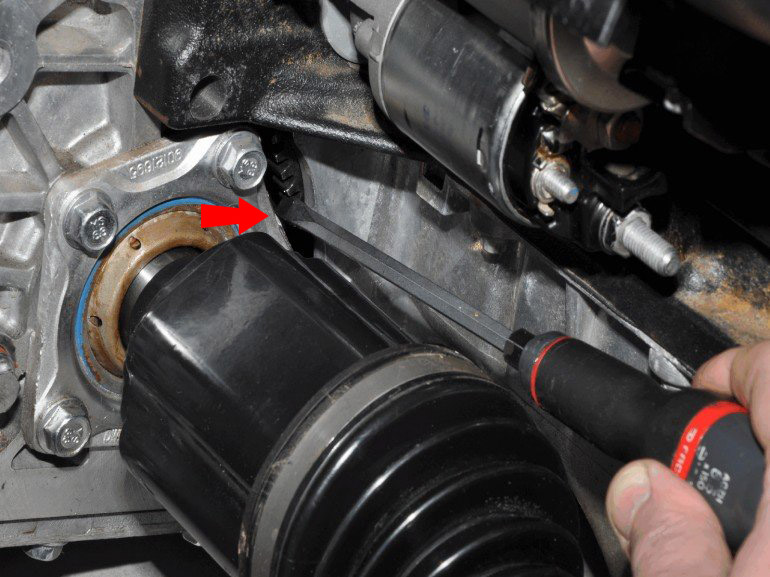
crankshaft lock
11. Loosen and remove the accessory drive pulley screw.
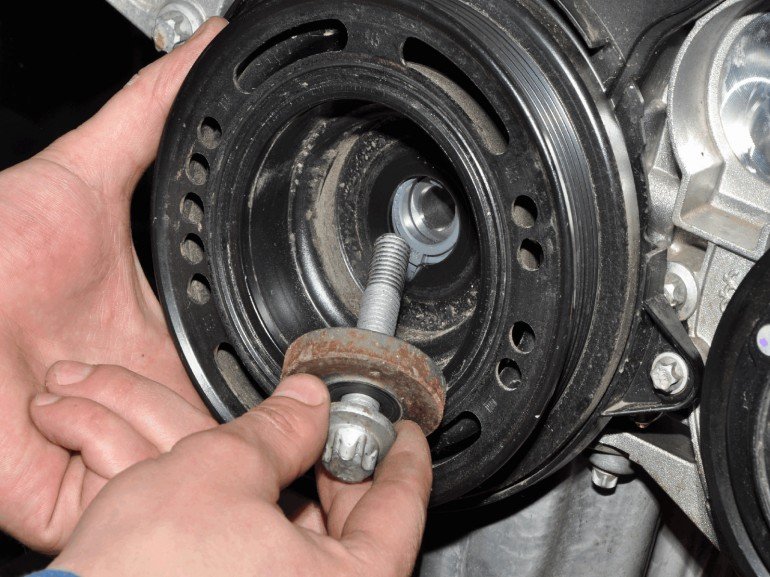
12. Remove the accessory pulley.
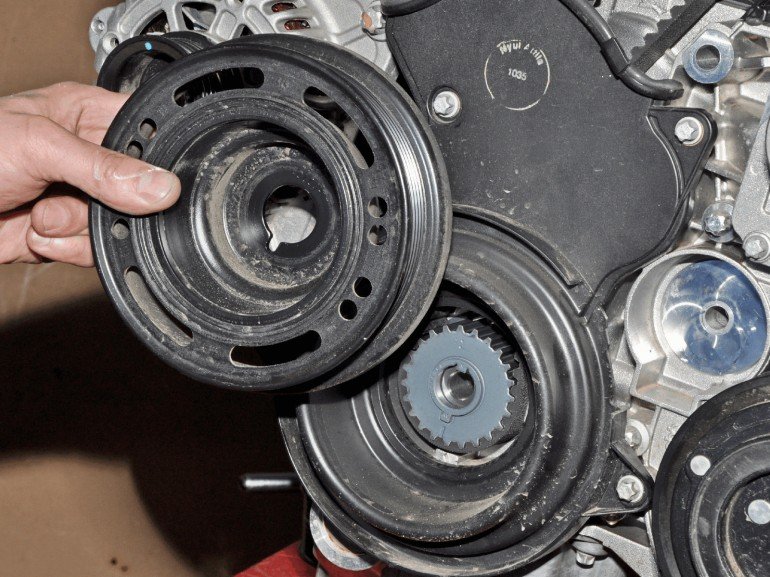
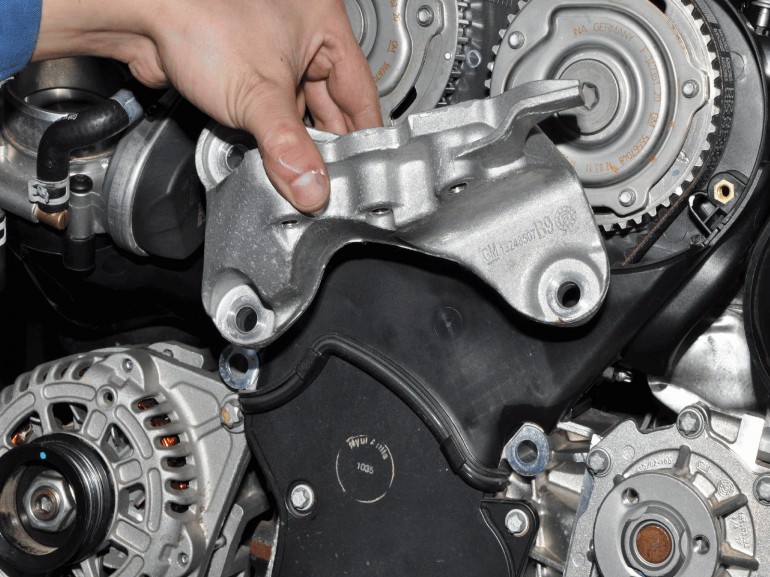
13. With a head of 15, unscrew the 3 bolts securing the bracket of the right support of the power unit (the coolant pump pulley has been removed for clarity).
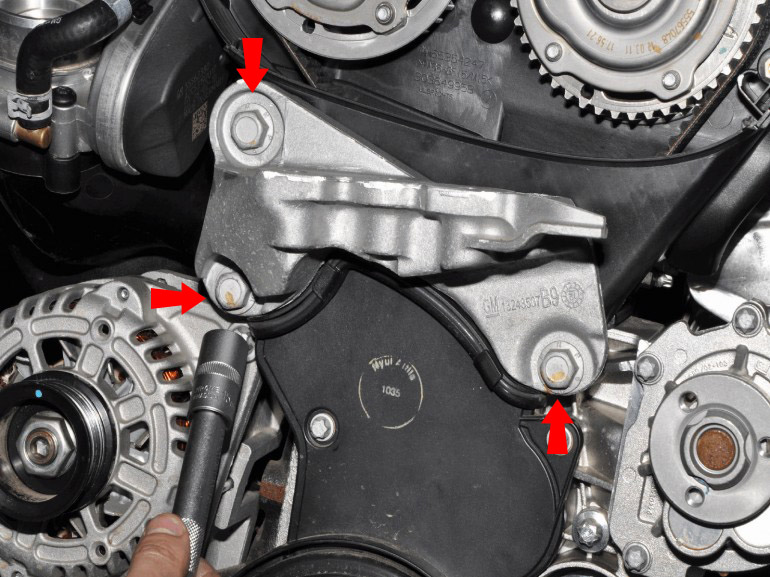
14. Remove the bracket.
15. Disconnect the 2 clips of the middle timing cover.
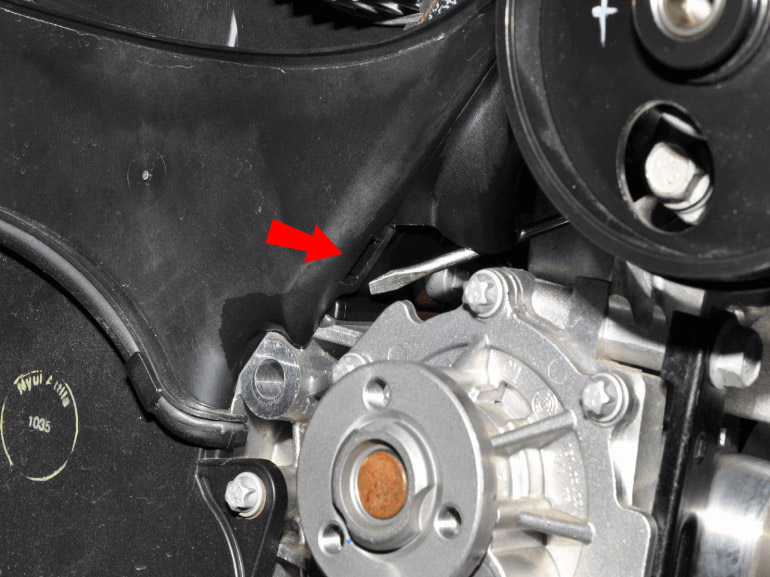
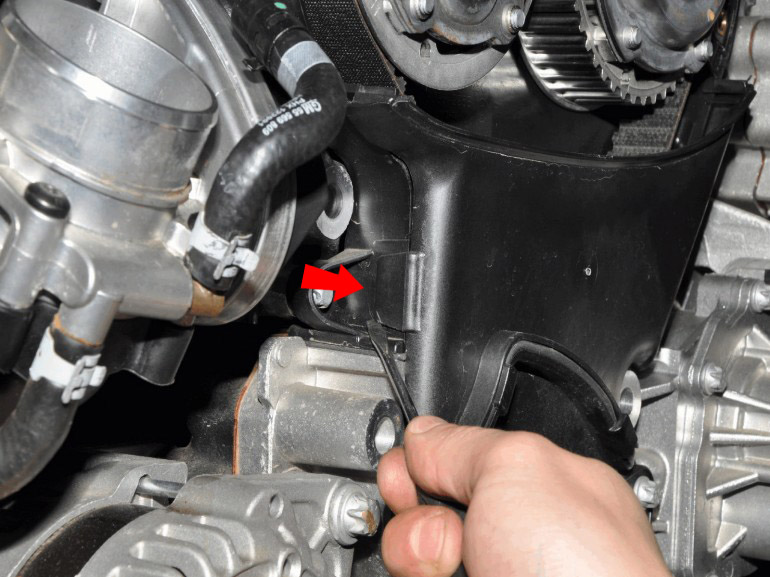
16. Remove cover.
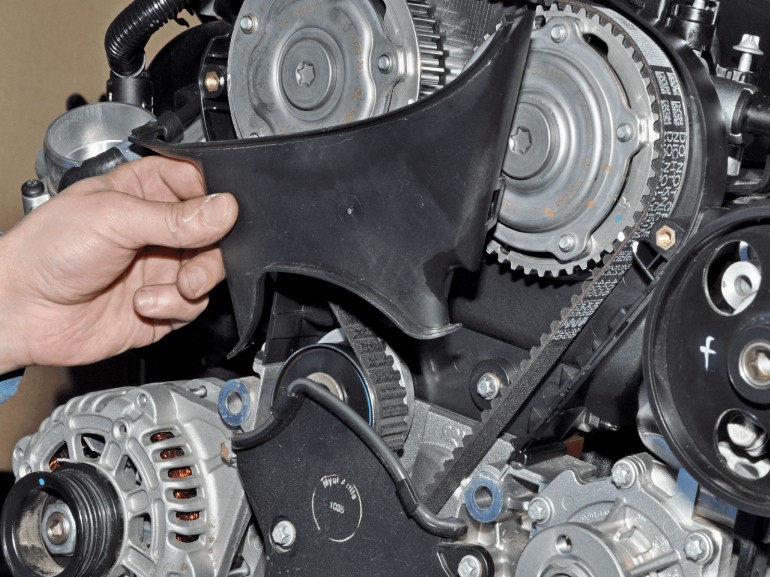
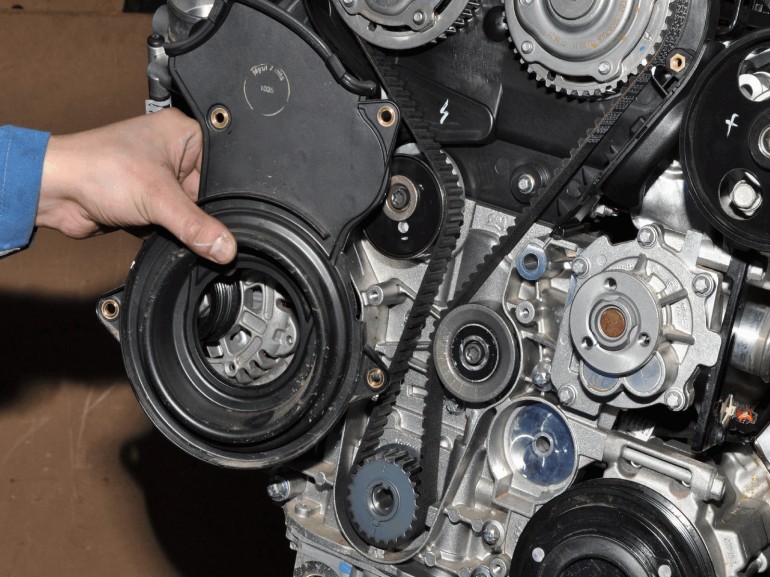
17. Using the E-10 head, unscrew the 4 bolts securing the lower timing cover.
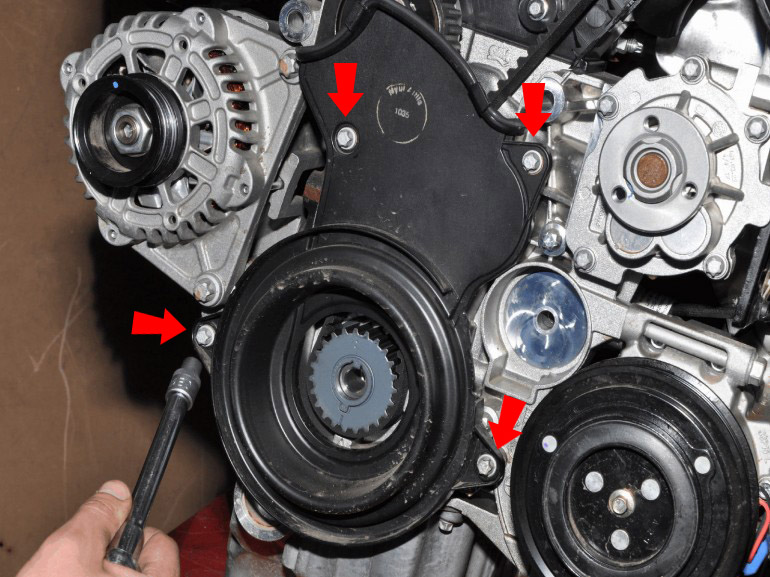
18. Remove the cover.
Note:
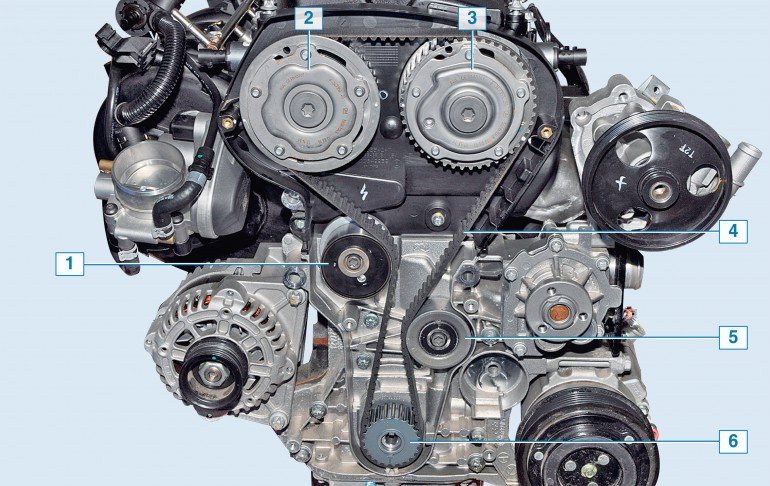
Scheme of the drive of the gas distribution mechanism of the engine:
- 1 – a tension roller of a belt;
- 2 - the actuator of the intake camshaft phase control system;
- 3 - the actuator of the exhaust camshaft phase control system;
- 4 - toothed timing belt;
- 5 - belt guide roller;
- 6 - a gear pulley of a cranked shaft.
19. Again check up correctness of installation of phases of gas distribution of the engine.
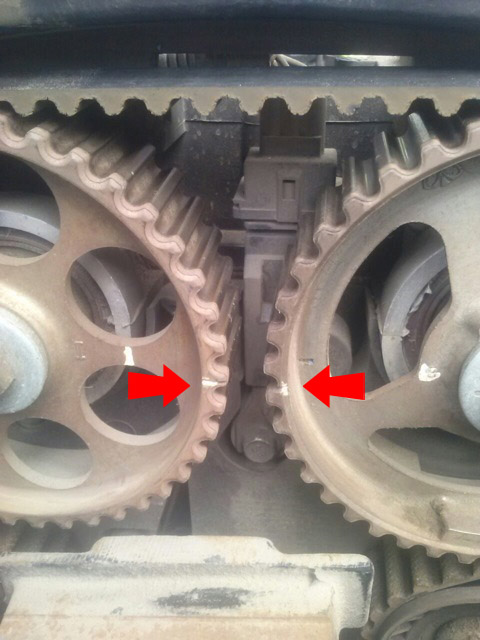
Camshaft marks
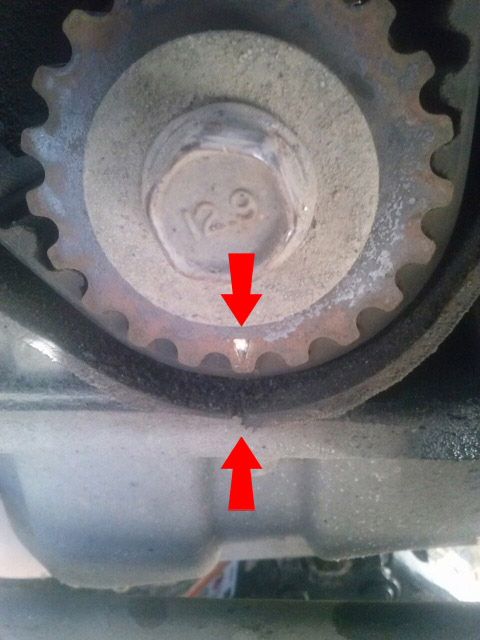
Marks on the crankshaft
Note:
If necessary, turn the crankshaft to the desired position by using the accessory pulley screw (as described in step 13) screwed into place through a suitable thrust bushing.
Useful advice:
In order to fix the camshafts from turning when replacing the Chevrolet Cruze timing belt, it is necessary to make a fixture from a metal plate or corner, and you can also insert a special fixture and fix the pulleys without removing the cylinder head cover.
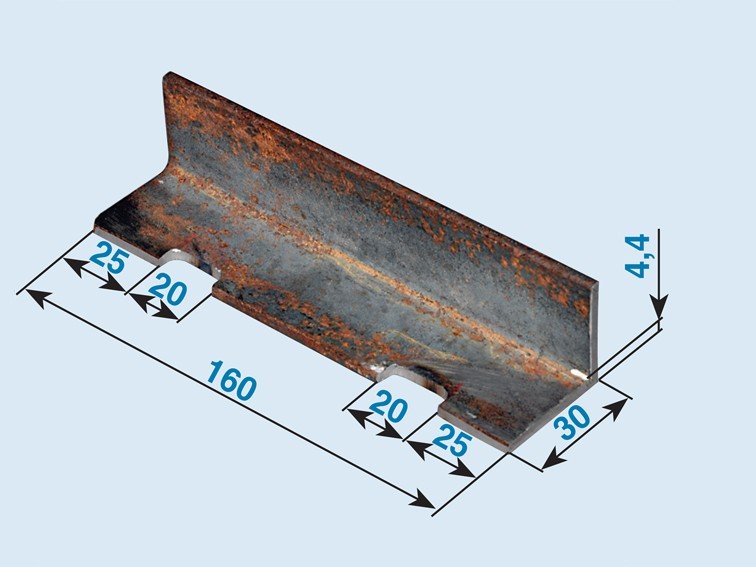
Camshaft Locking Tool
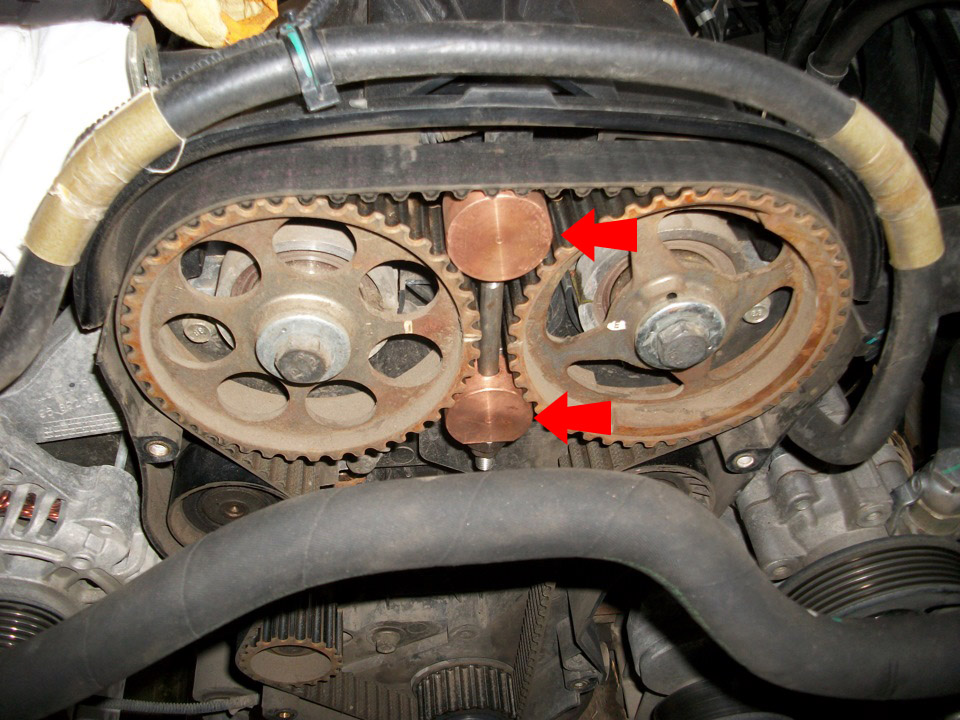
Special tool for fixing camshafts
20. Insert the tool into the grooves on the camshaft stubs.
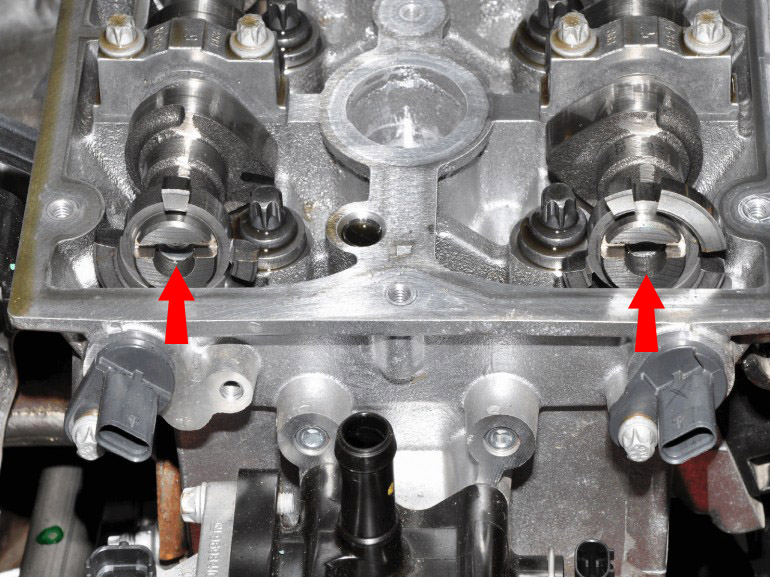
21. Fix camshafts.
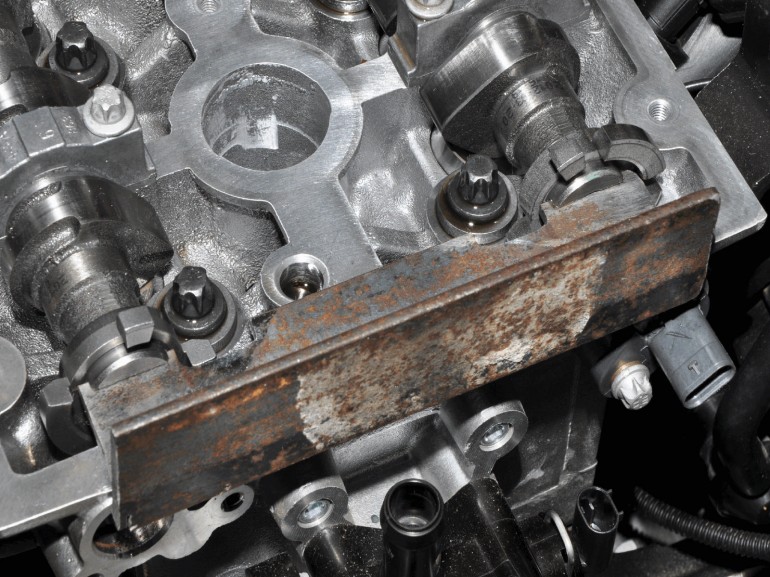
Note:
The plate will fix the shafts relative to each other.
WARNING:
To avoid damage to the camshaft position sensor drive discs, install the plate so that it does not touch the discs. For this, two recesses are made in the plate.
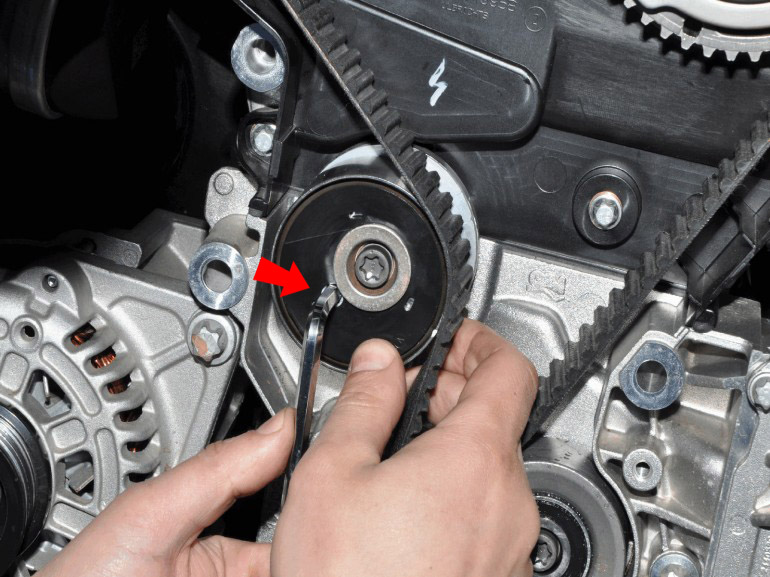
22. Insert a 6 mm hex into the belt tensioner, and turn the hex clockwise. Pull the belt off the roller.
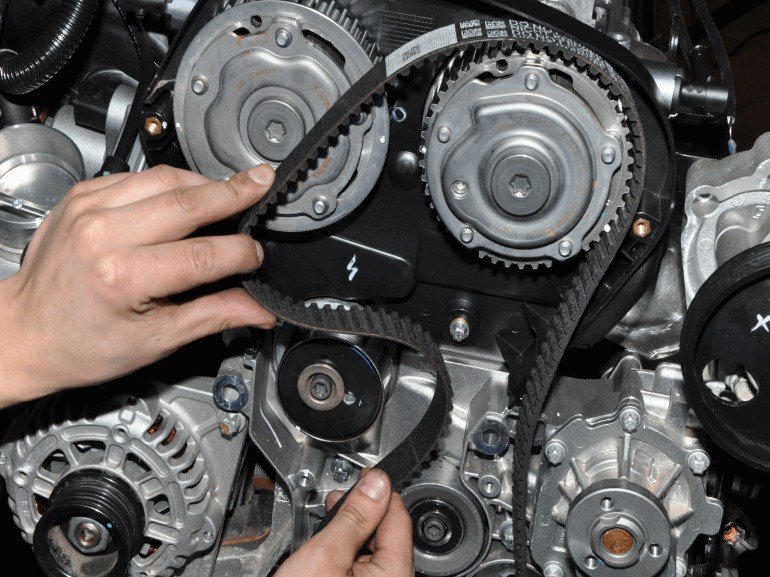
23. Remove the Chevrolet Cruze 1.8 timing belt from the camshafts and crankshaft.
WARNING:
After removing the belt, the crankshaft must not be rotated to avoid sticking the valves into the pistons.
24. If it is necessary to replace the timing tensioner pulley on a Chevrolet Cruze, use the Torx T-50 key to unscrew its mount.
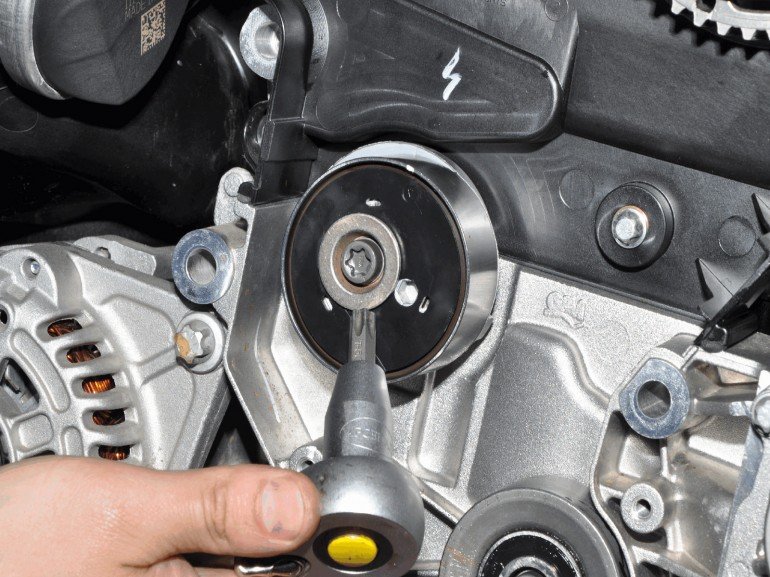
25. Remove the roller and replace it with a new one.
26. To replace the belt guide roller, use a Torx T-50 wrench to unscrew the roller mounts.
Bypass roller timing Chevrolet
27. Install all removed parts in the reverse order of removal.
Note:
Before mounting the belt, check that the alignment marks (see point 13) match the correct installation of the crankshaft and the housings of the actuators of the camshafts of the phase control system. If necessary, rotate the crankshaft and camshaft pulleys to the desired position. Put the belt on the crankshaft and camshaft pulleys and slide the belt behind the idler roller. By turning the tension roller clockwise, wind the belt behind it and release the roller. This will automatically tension the belt.
Remove the locking device from the grooves of the camshaft shanks. Rotate the crankshaft two turns clockwise on the accessory drive pulley screw.
Recheck the valve timing. If the alignment marks do not match, repeat the Chevrolet Cruze timing belt installation procedure.
Tighten the accessory drive pulley screw first to 95 Nm. Then tighten 30° and then another 15°.
The article is missing:
- Tool photo
- Photo of parts and consumables
Source: http://carpedia.club/
Related article here




![J300 [2009 - 2012]](/uploads/Chevrolet_Cruze_2009-2012_.jpg)

