![1 generation [restyling] [2000 - 2010]](/uploads/Skoda_Octavia_2000_-_2010_.jpg)
![2 generation [2004 - 2008]](/uploads/Skoda_Octavia_2004_-_2012_.jpg)
![3 generation [2013 - 2017]](/uploads/Skoda_Octavia_2013_-_2015_.jpg)

Tool:
- balloon wrench
- Emphasis (shoe) recoil
- Support legs (if needed)
- screw jack
- Ratchet wrench
- Head 13 mm
- Head 16 mm
- Head 18 mm
- Head 21 mm
- Socket head 12-sided 30 mm
- Straight spanner wrench 21 mm
- Bit head hexagonal 5 mm
- Hex bit head 7 mm
- Screwdriver flat medium
- Spring tensioner
- Mounting blade / screw jack
- Hammer big
Parts and consumables:
- Syringe with hose / rubber bulb
- rags
- Funnel (if needed)
- Upper shock absorber support (if necessary) (1J0 412 331 C)
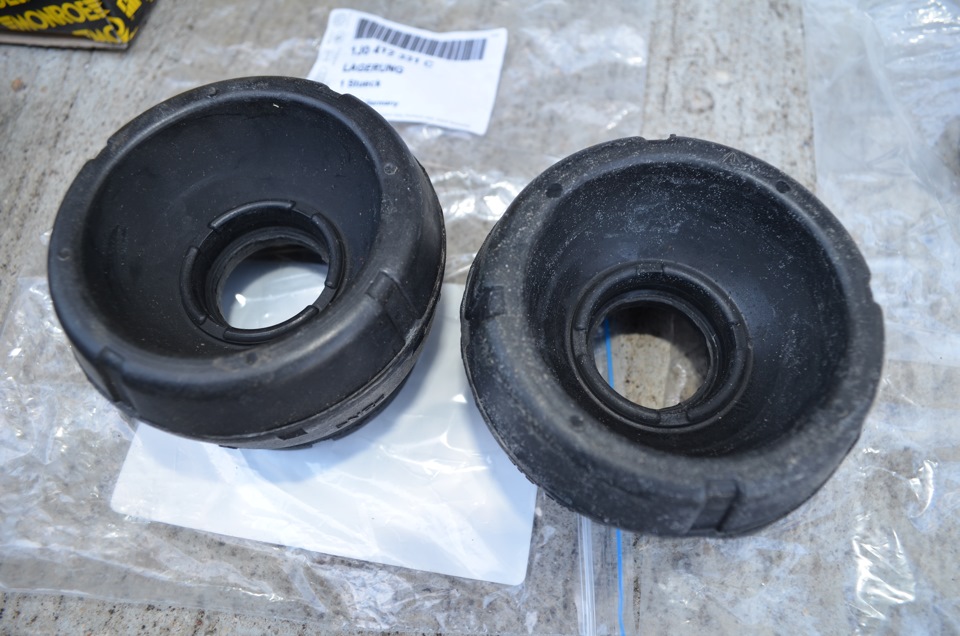
- Thrust bearing (if required) (1J0 412 249)

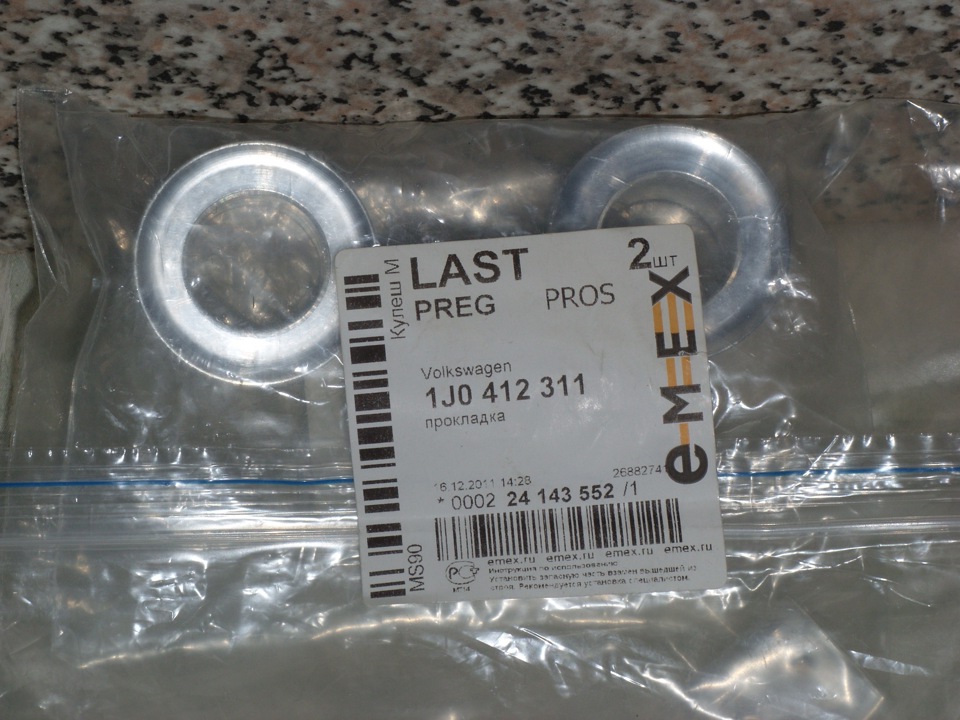
- Sleeve (spacer) shock absorber (if necessary) (1J0 412 311)
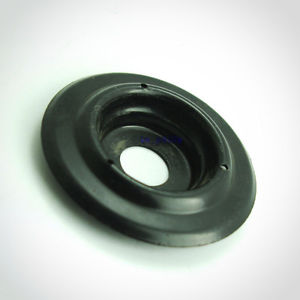
- Upper spring seat (if required) (1J0 412 341)
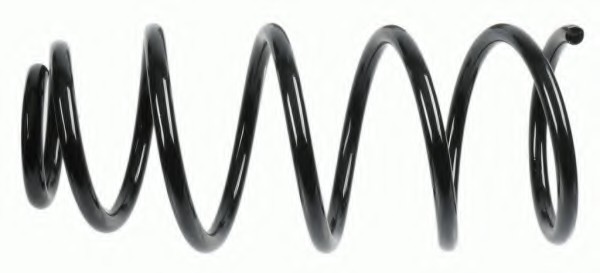
- Springs (if necessary) (1J0 411 105 BG)
- Shock absorber rod guard (if required) (357 413 175 A)
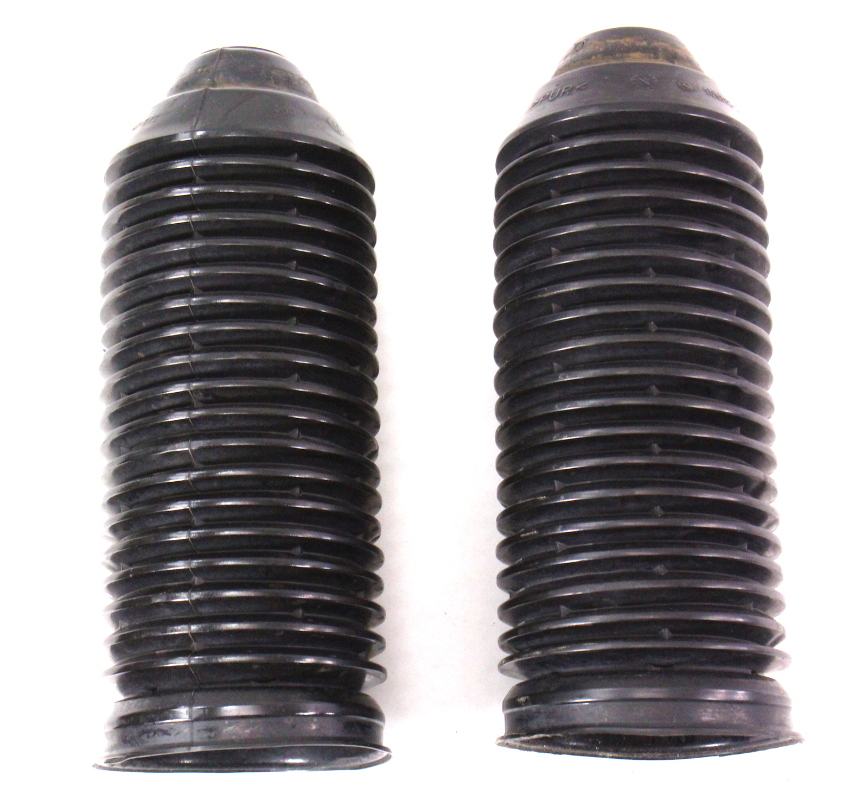
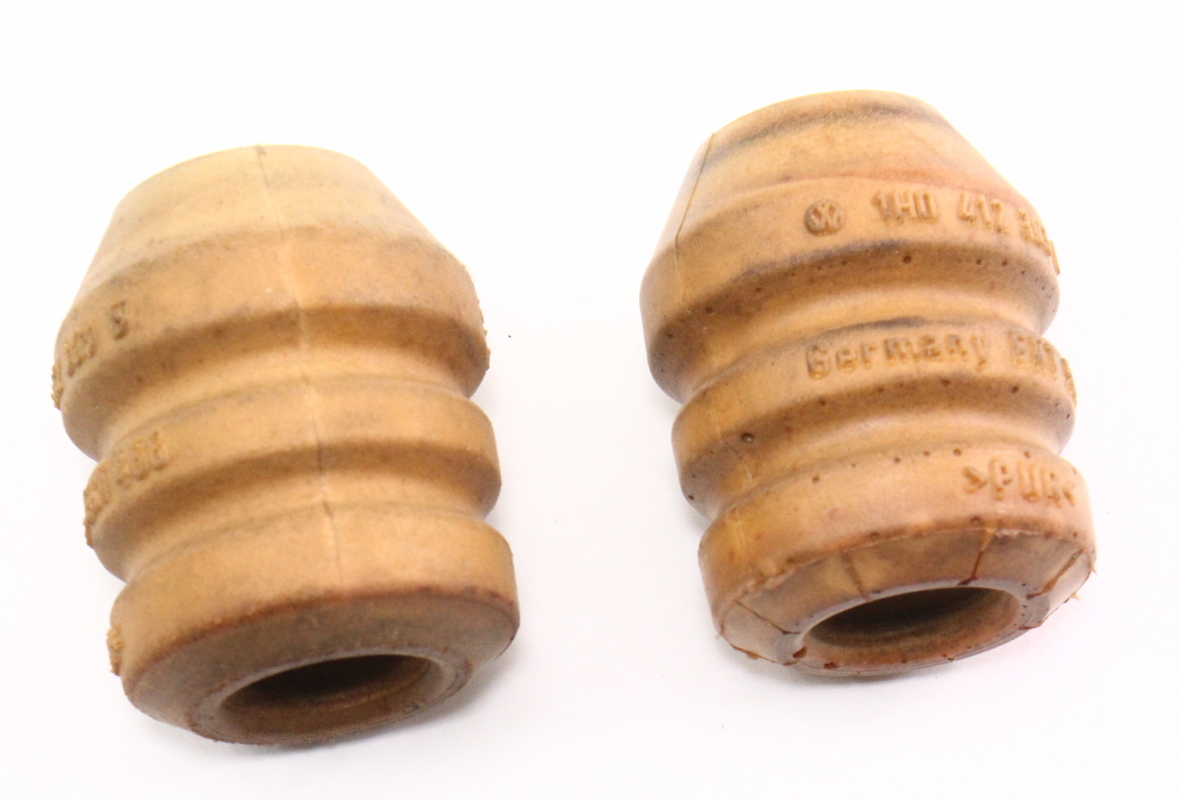
- Compression stroke buffer (if required) (1H0 412 303 B)
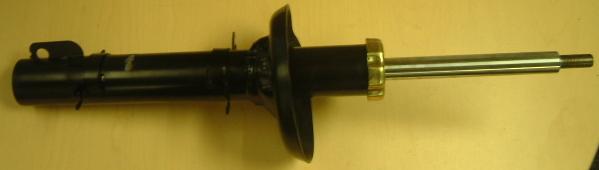
- Front shock absorber (if required) (1J0 413 031 AM)
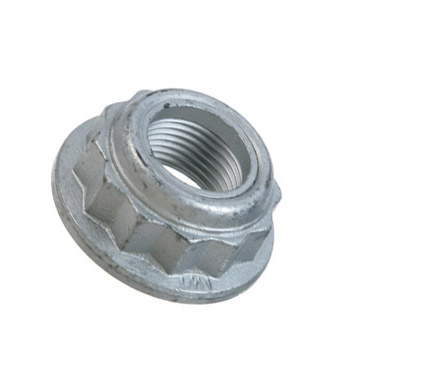
- Hub nut (N 905 876 02)
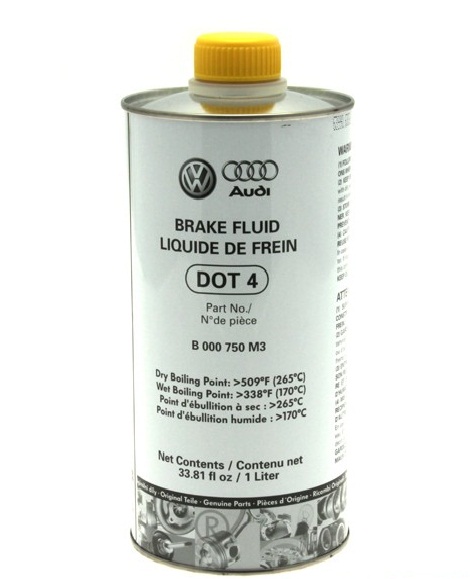
- Brake fluid DOT4 BRAKE FLUID (if required) (B000750M3)
Notes:
This article describes how to remove the front shock absorbers of the Skoda Octavia Tour.
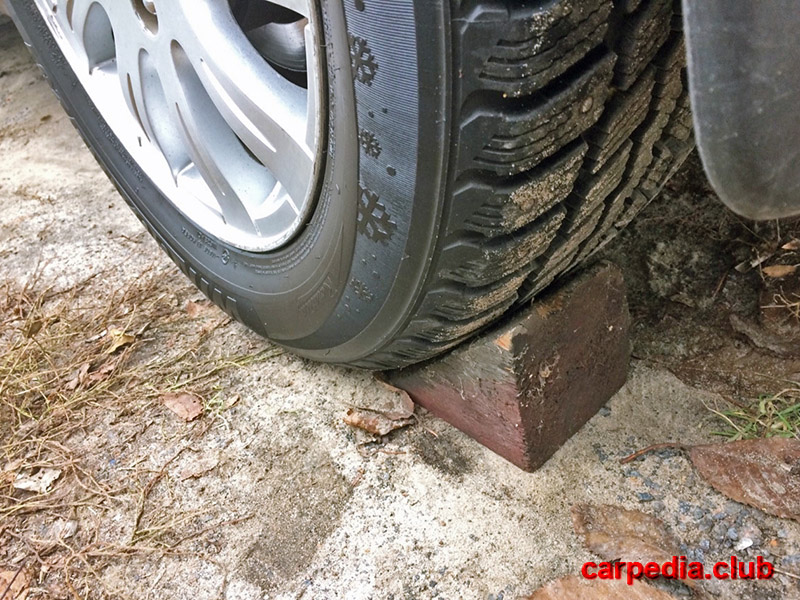
1. Engage I gear (translate the automatic transmission selector to the “P” position) and install the chocks “boots” under the rear wheels.
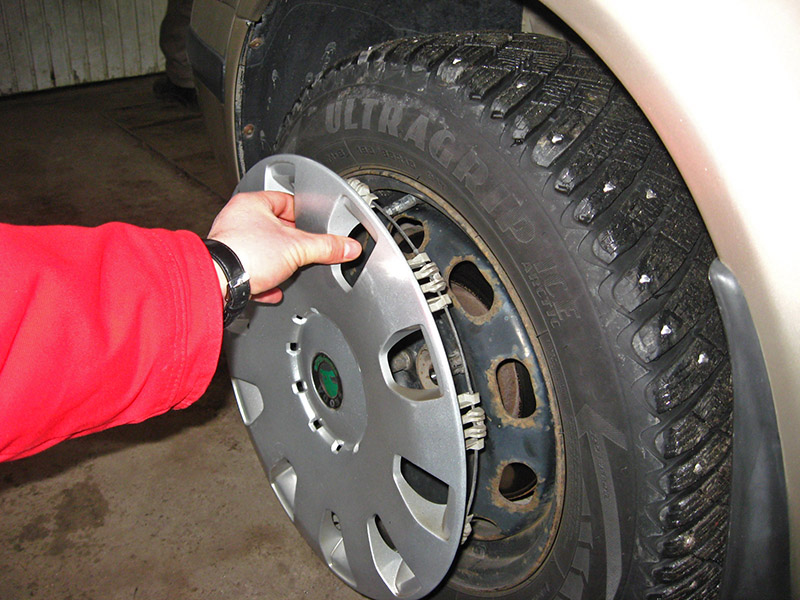
2. Pry off the cap with a flathead screwdriver or by hand and remove the cap.
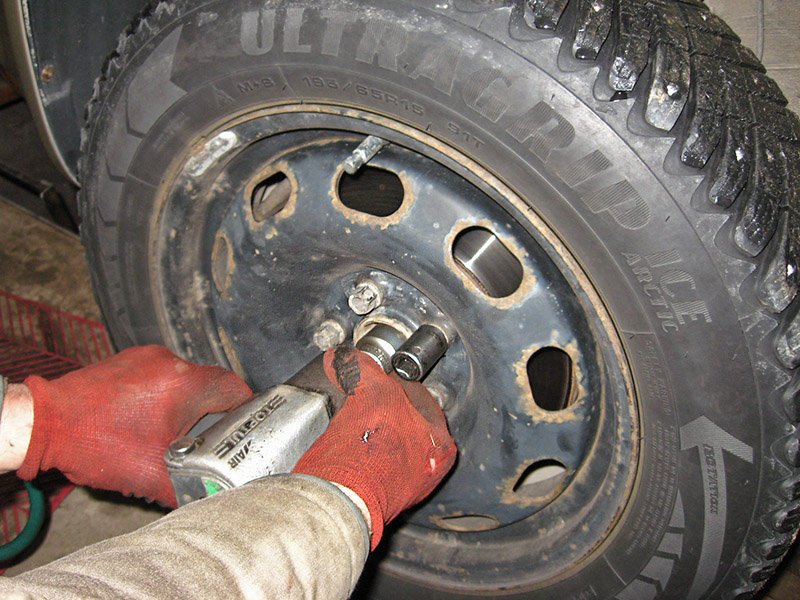
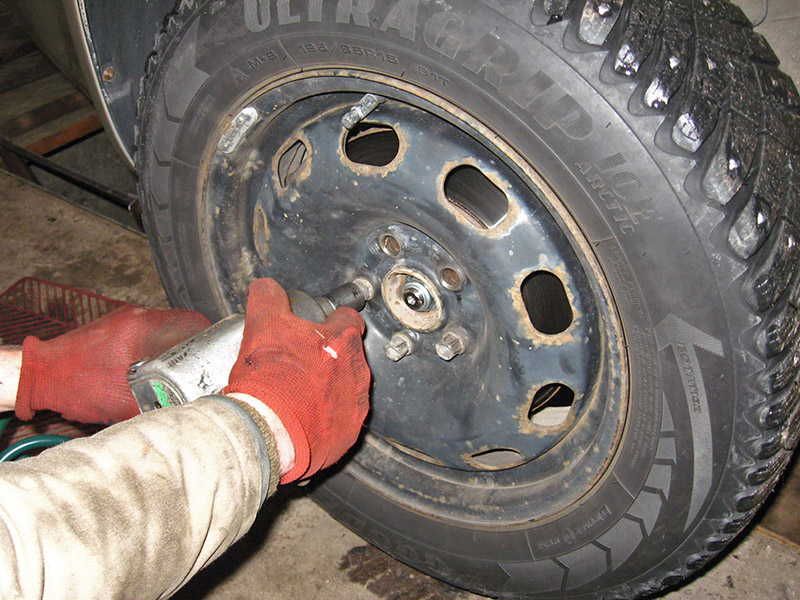
3. Loosen the hub nut and wheel nuts.
Note:
If you do not have an air wrench, it is more convenient to loosen the hub nut with a wrench with a long handle.
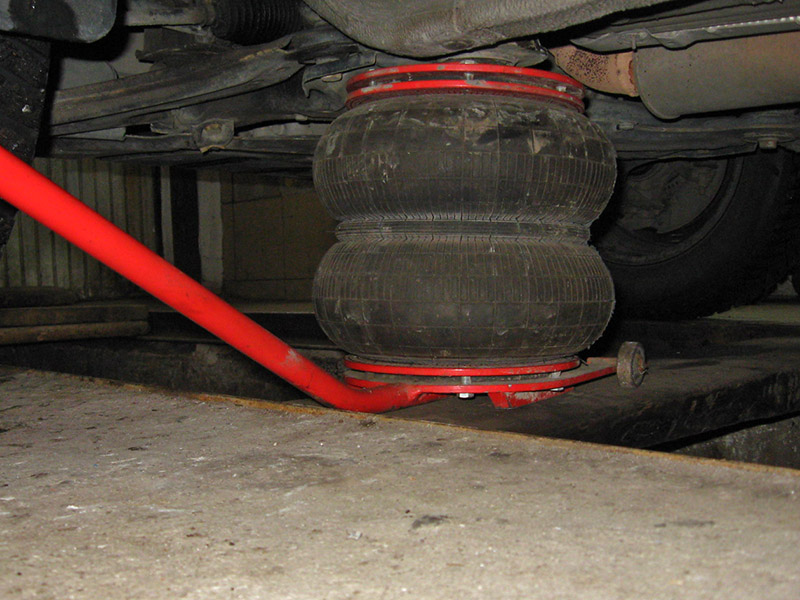
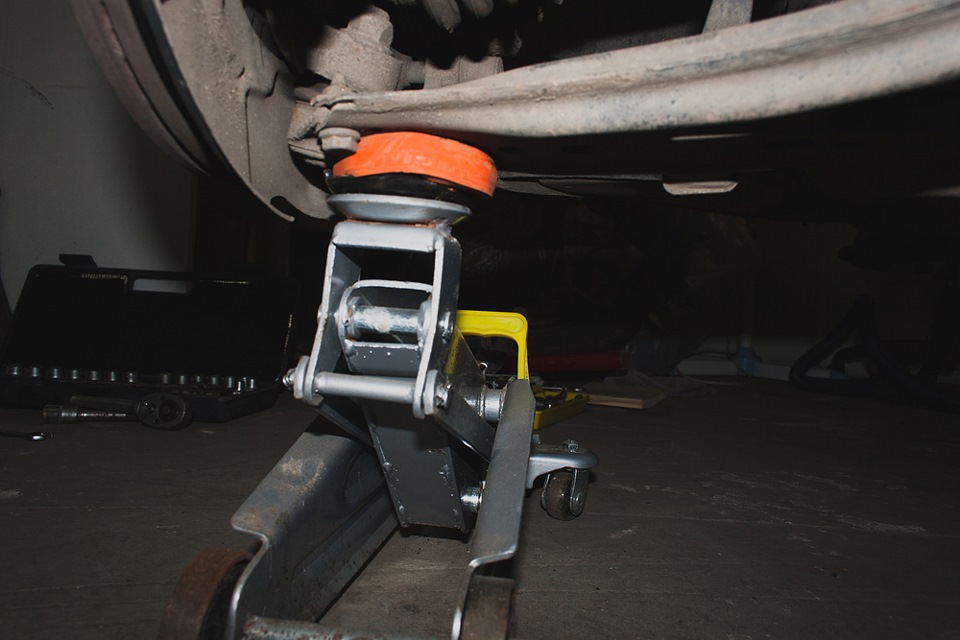
4. Raise the front of the vehicle with a jack.
Note:
We use an air jack, but you can use any other jack.
5. Place the car on secure supports, finally unscrew the wheel nuts and remove the wheel.
Note:
If you don't have car jack stands, use the removed wheel as a stand.
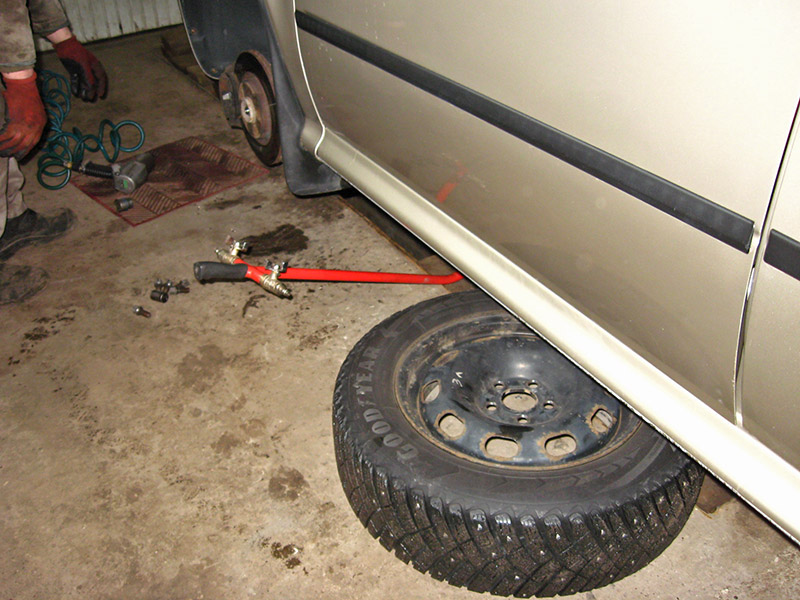
wheel as support.
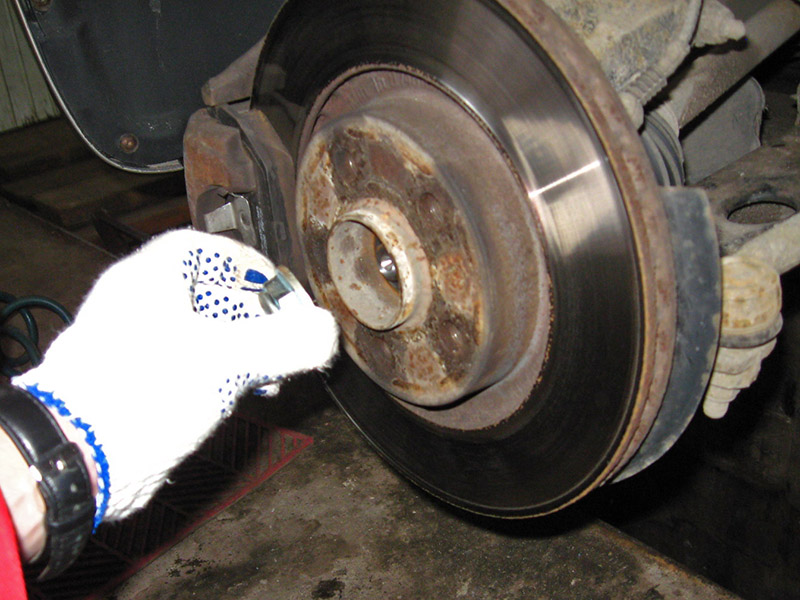
6. Unscrew the hub nut (when installing, you need to replace and install a new nut).
7. Pry with a screwdriver and disconnect the ABS hose from the shock absorber strut.
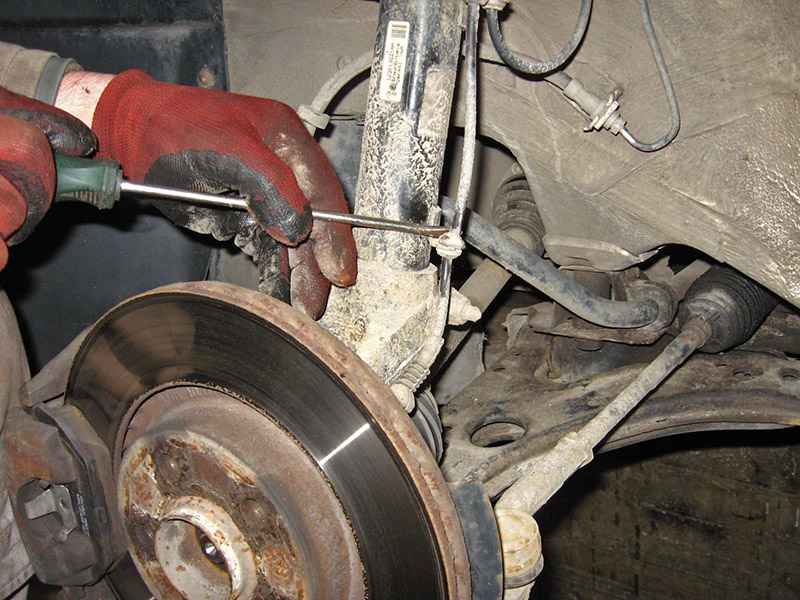
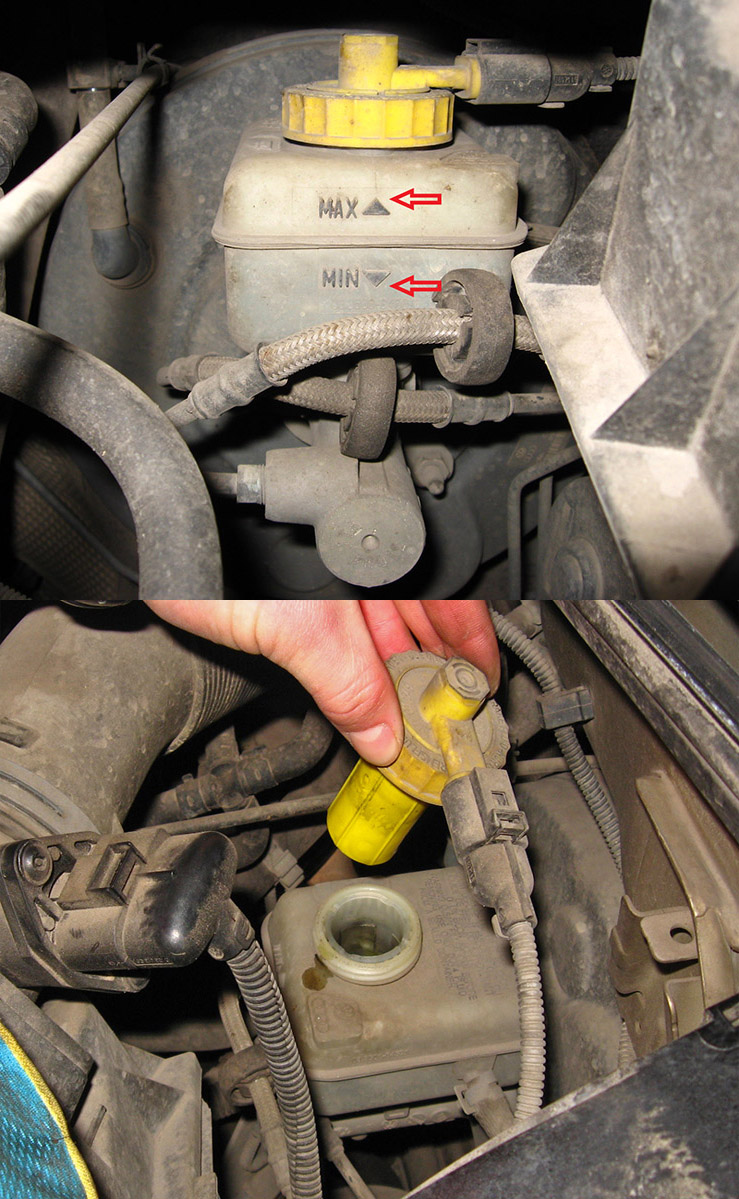
8. If the fluid level in the reservoir of the hydraulic brake drive is at the MAX mark , then pump out some of the fluid from the reservoir with a syringe or rubber bulb. Read more about checking and topping up brake fluid in this article .
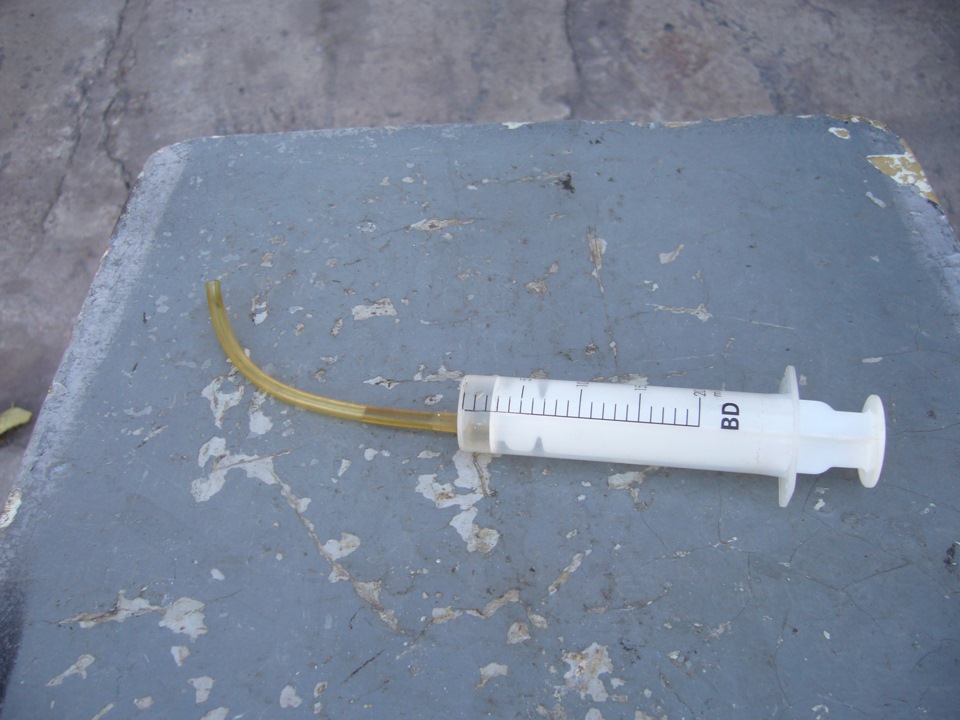
Liquid pumping tool.
Note:
The liquid must be pumped out so that when the piston is sunk into the working cylinder, it does not leak out from under the reservoir cap.
9. Insert a screwdriver with a wide blade into the caliper window between the brake disc and pad, spread the brake pads and push the piston into the cylinder.
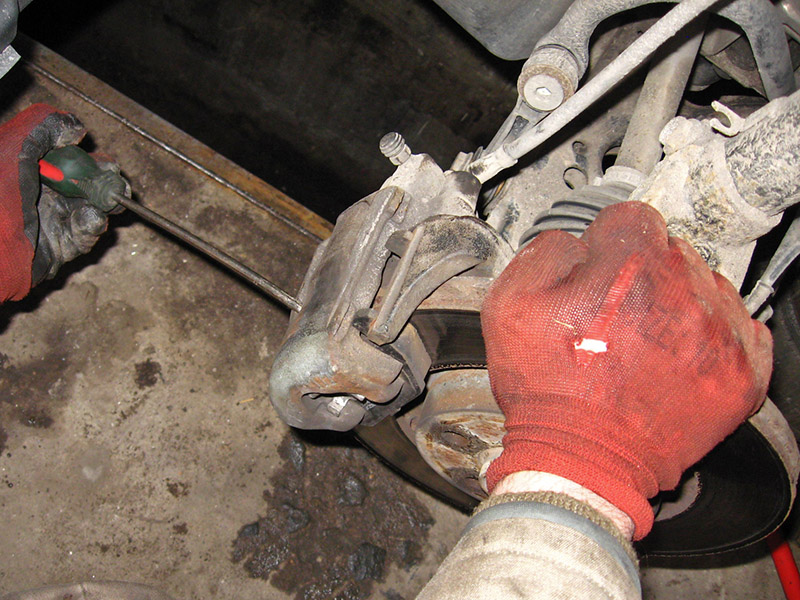
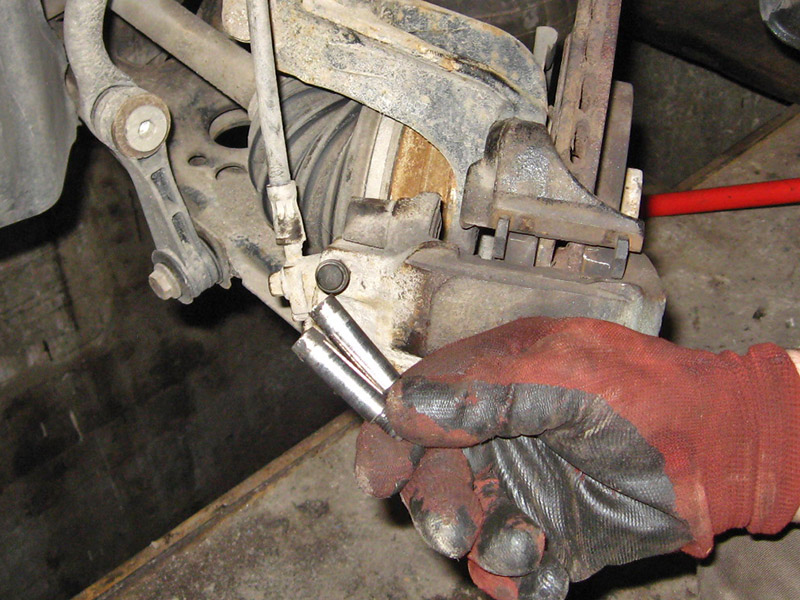
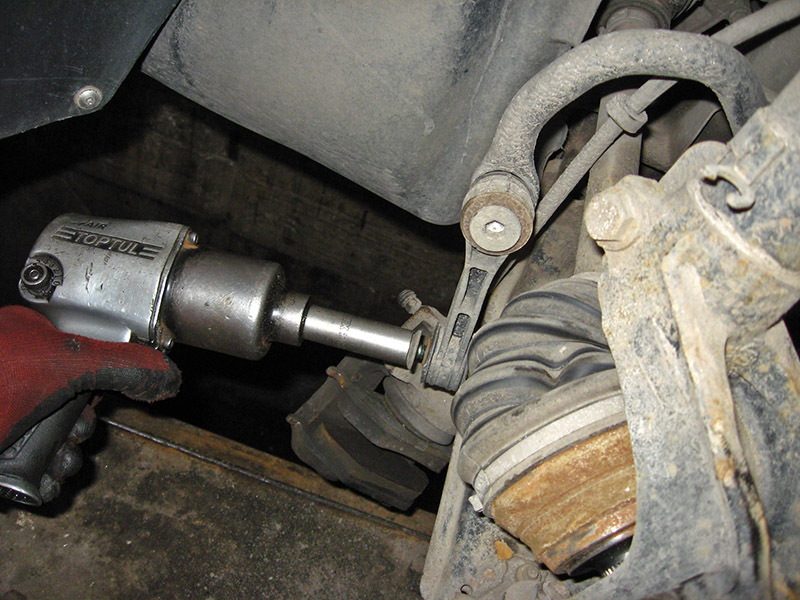
10. Turn off the top and bottom fastening of directing fingers of a support.
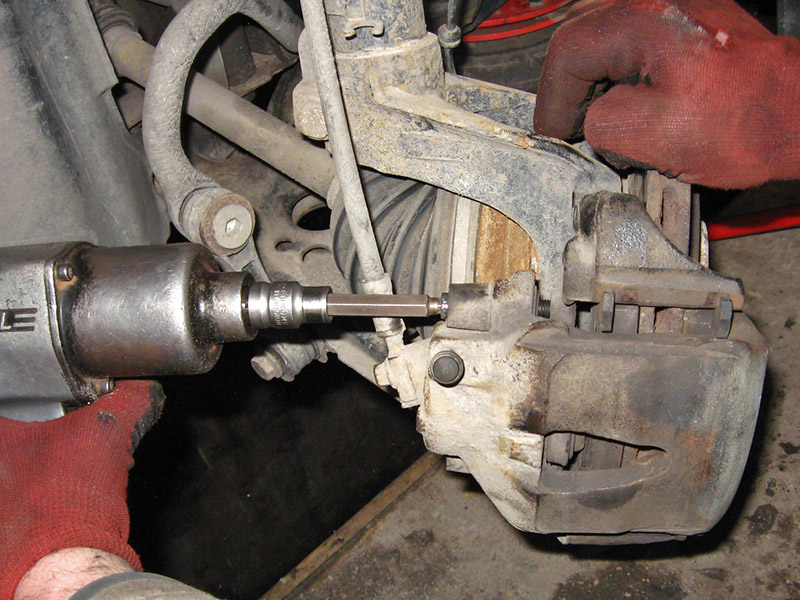
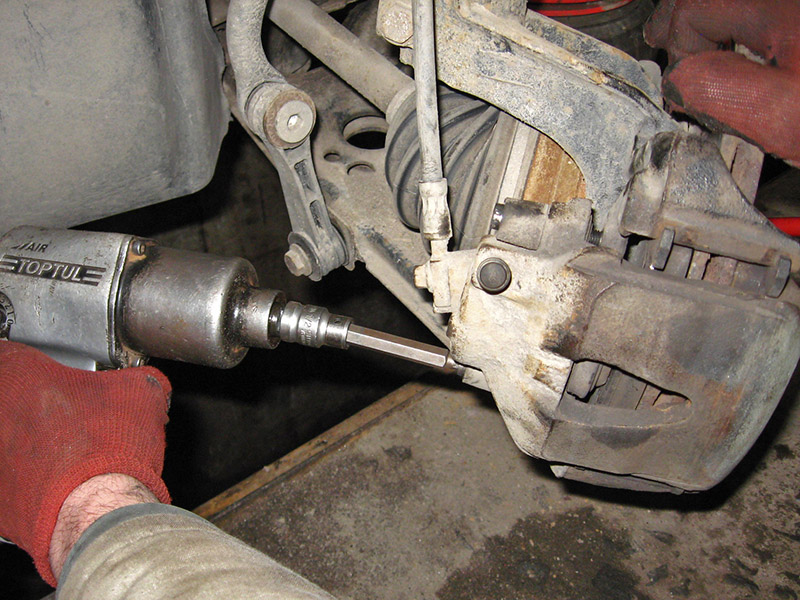
11. Remove the caliper guide pins.
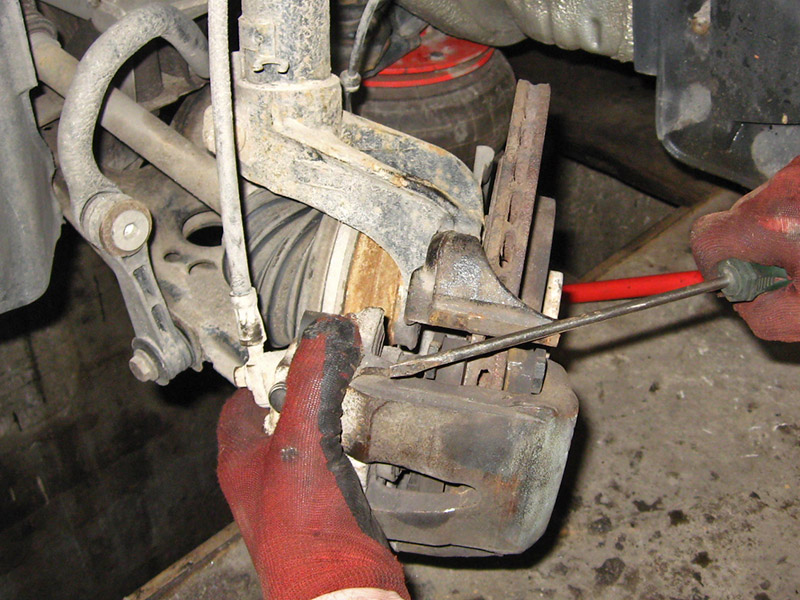
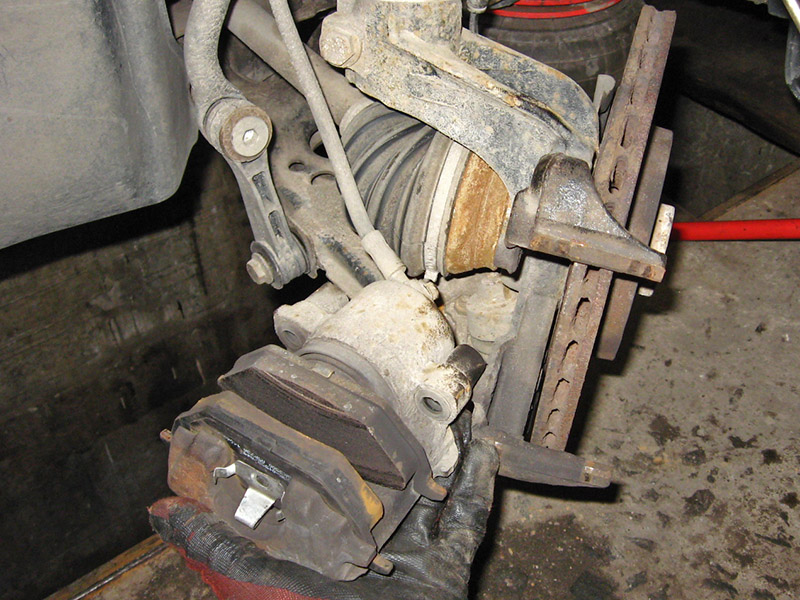
12. Pry with a screwdriver and remove the caliper from the brake disc with pads without disconnecting the brake hose from the caliper.
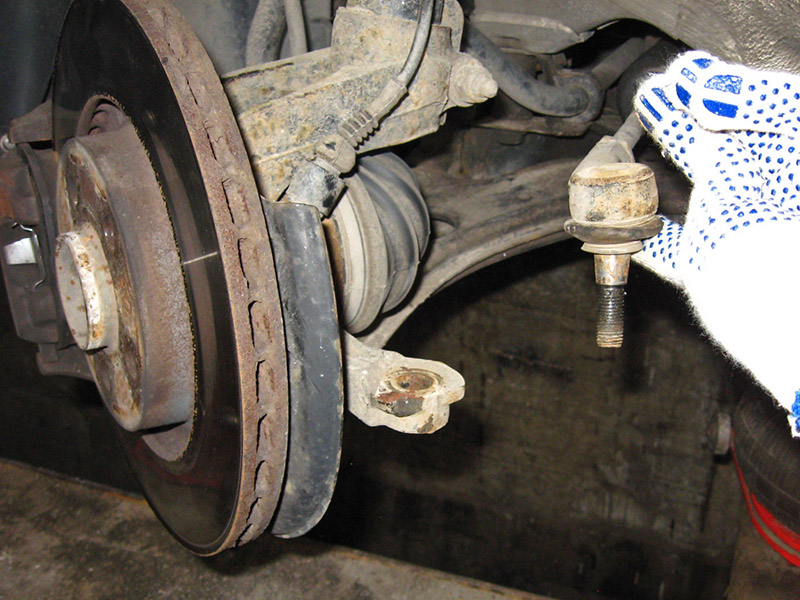
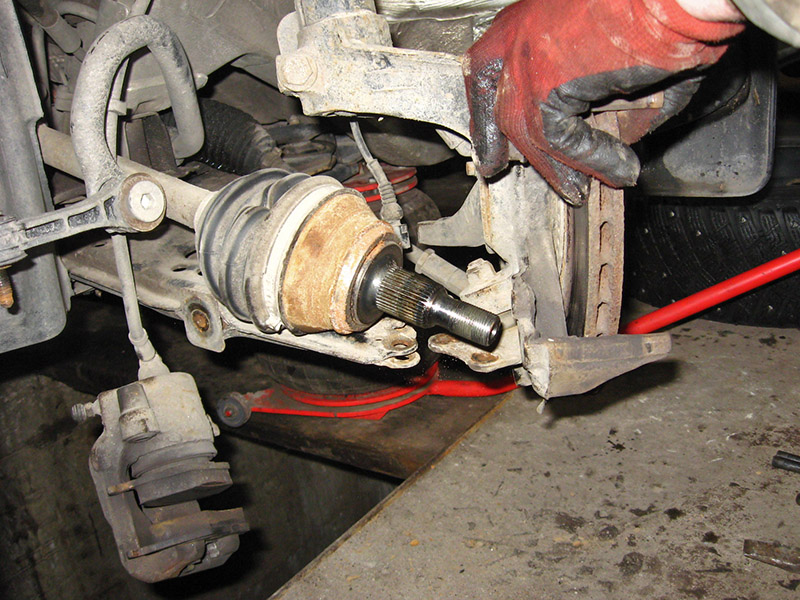
13. Turn off fastening of a tip of steering draft.

14. Gently apply a couple of blows with a hammer to the seat of the tip and remove the tie rod end from the hub.
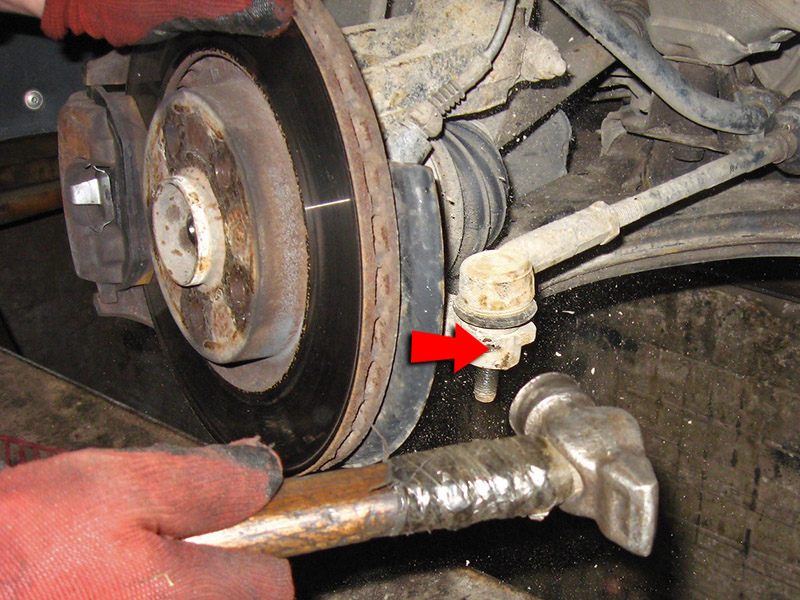
A place to hit with a hammer.
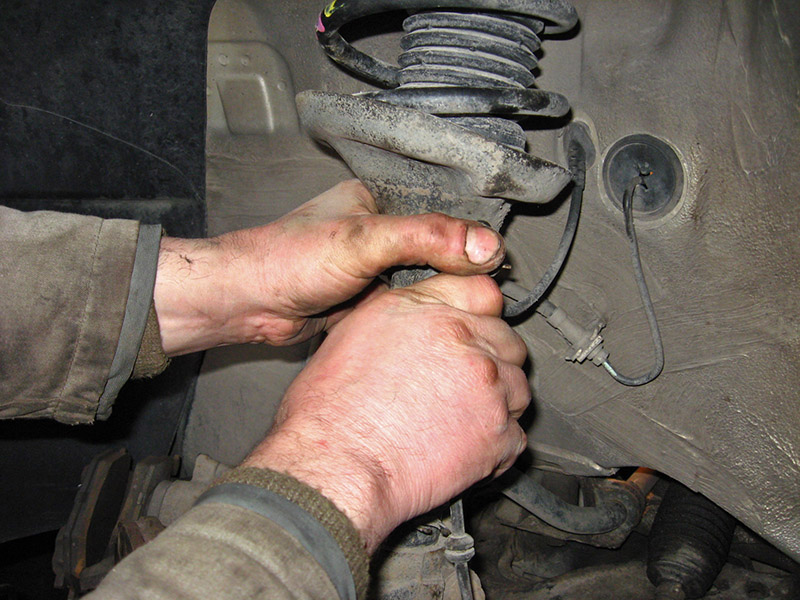
15. Turn off a bolt of fastening of gauge ABS.
16. Pry with a flat screwdriver and disconnect the block of wires from the ABS sensor.
17. Turn off the lower fastening of a stabilizer rack.
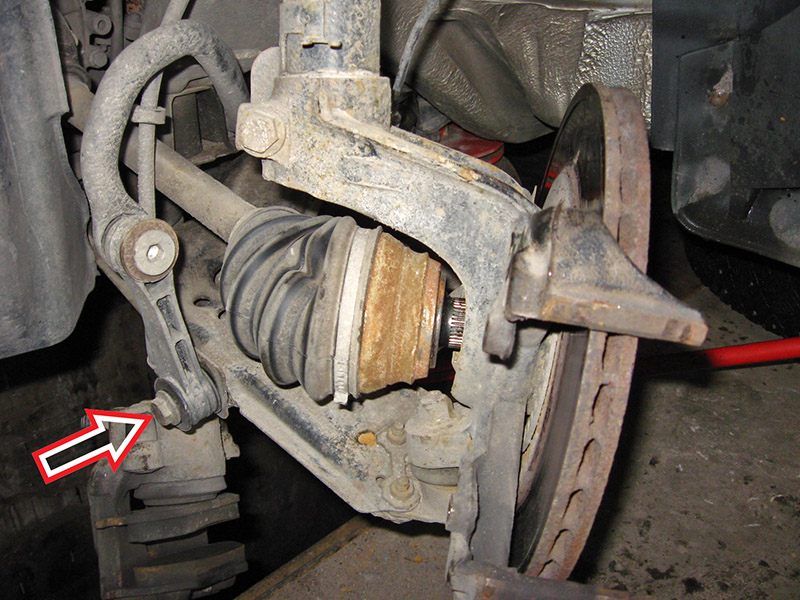
18. Rest the mounting blade and bend the anti-roll bar to remove the stabilizer strut mount from the lower arm.

Note:
You can also jack up the lower arm and disconnect the lower stabilizer link from the lower front suspension arm. Choose the most convenient option for you.
Jack up the lower control arm of the front suspension.
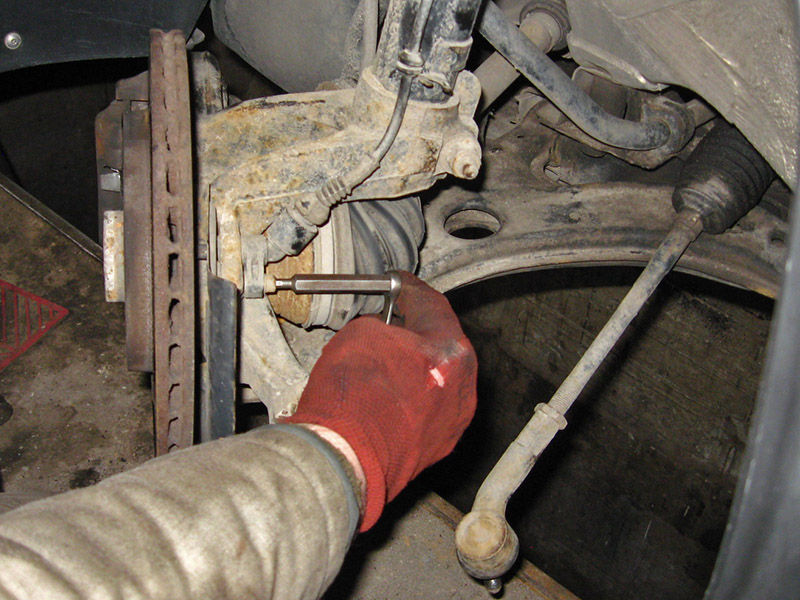
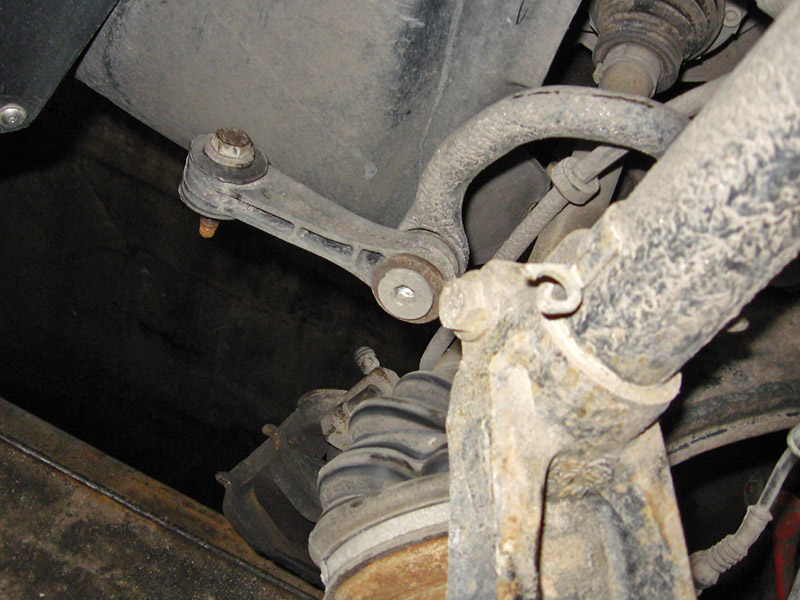
19. Turn off three bolts of fastening of a spherical support to the lower arm of a forward suspension bracket.
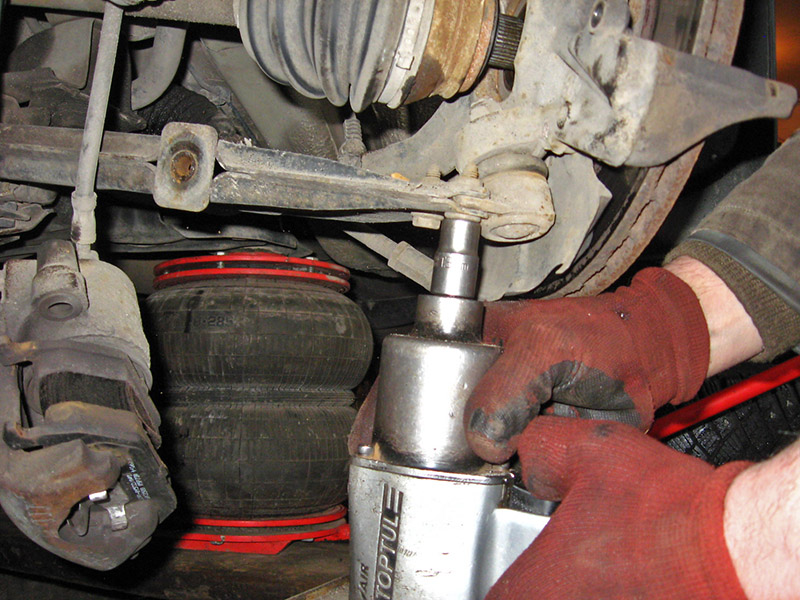
20. Remove the retaining bracket for attaching the ball joint to the lower arm and remove the splined tip of the outer CV joint from the hub.
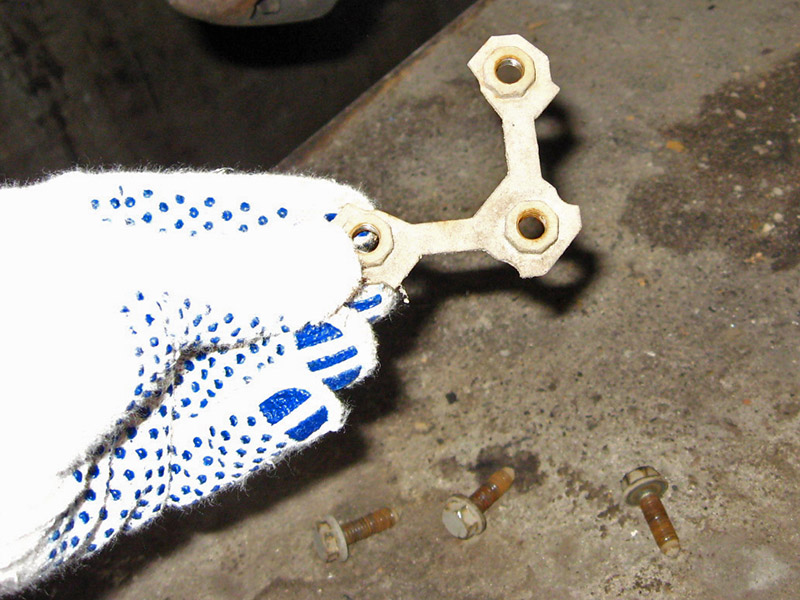
Fixing bracket.
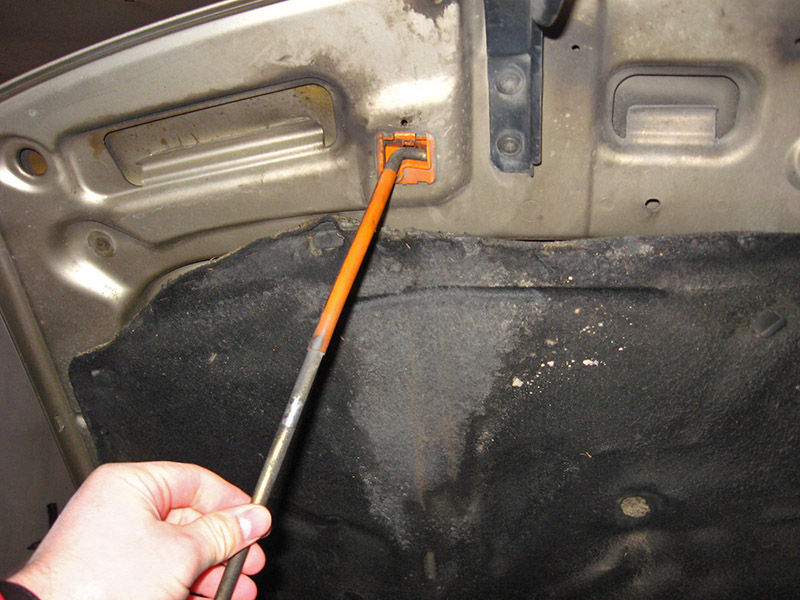
21. Open the hood and place it on the stop as described in this article .
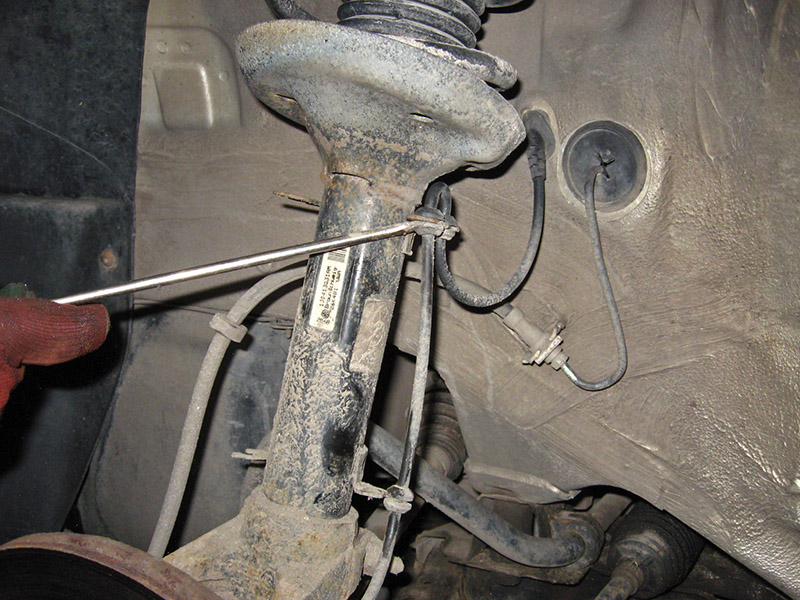
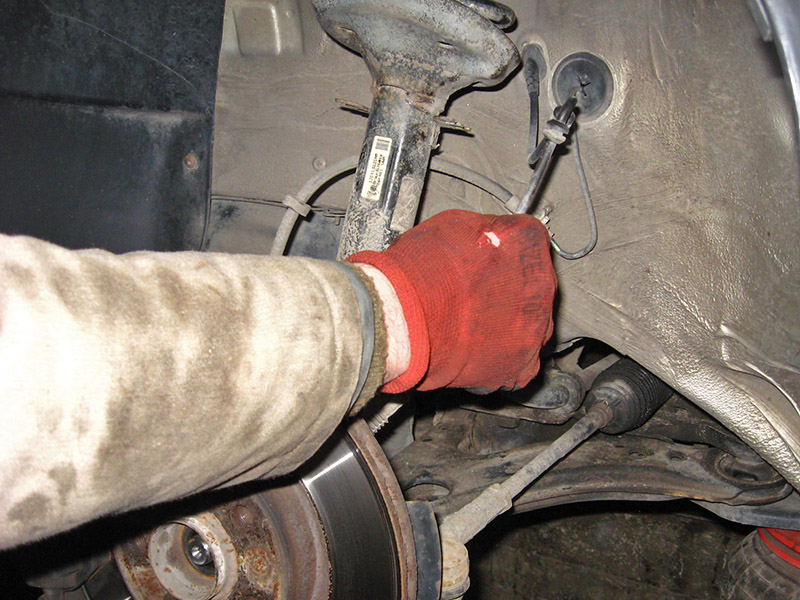
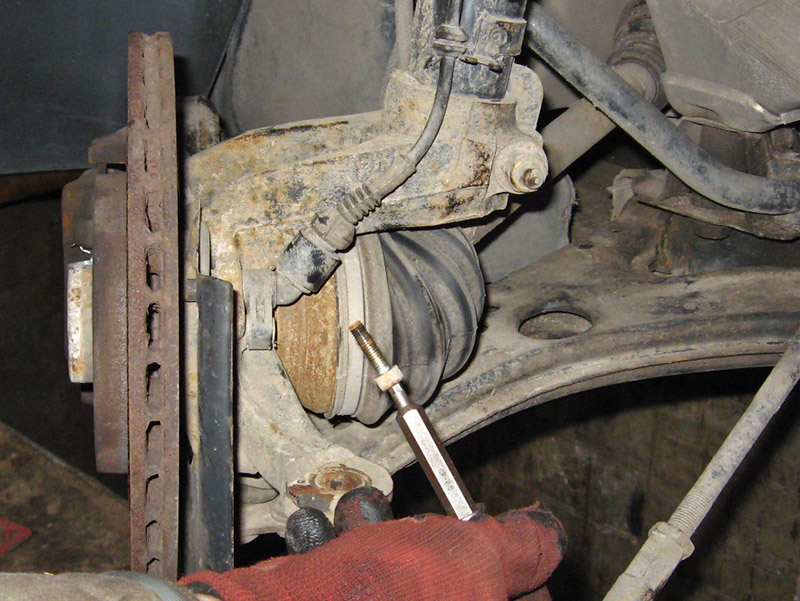
22. Turn off the top fastening of a rack of the shock-absorber.
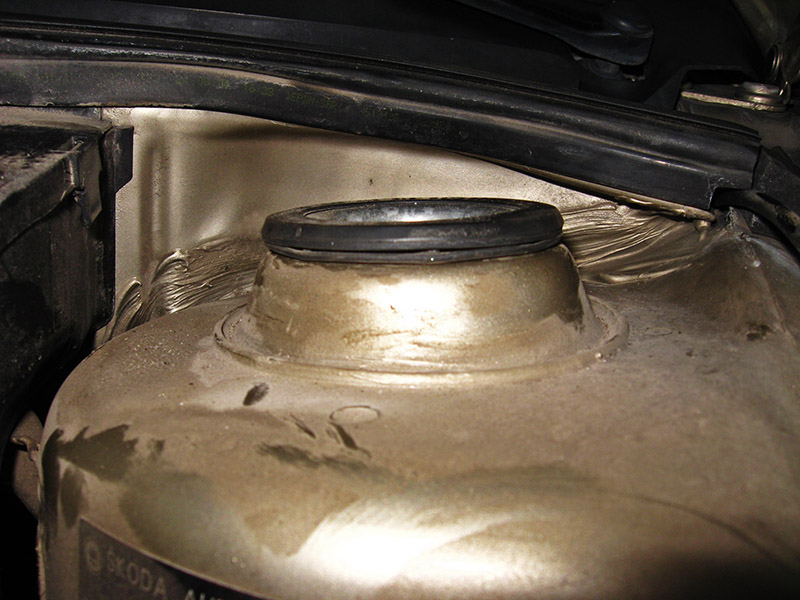
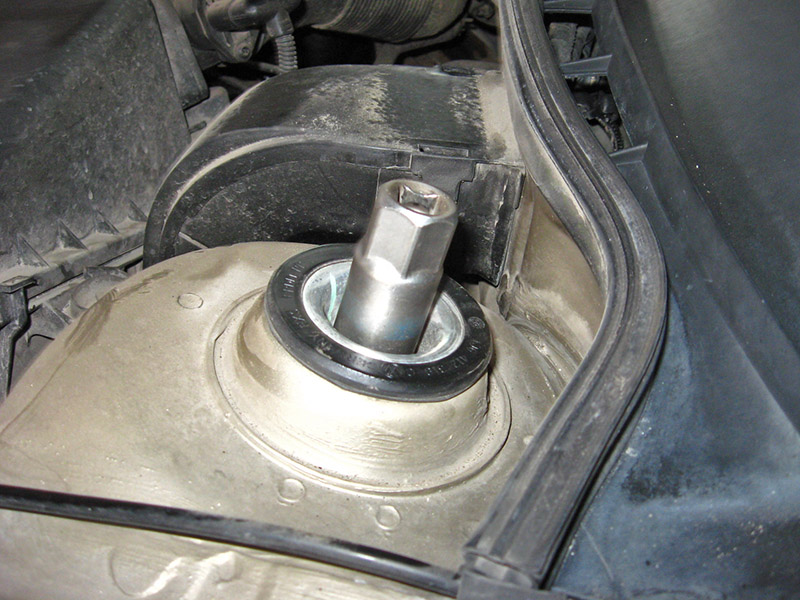
23. Remove a shock-absorber rack from the car.
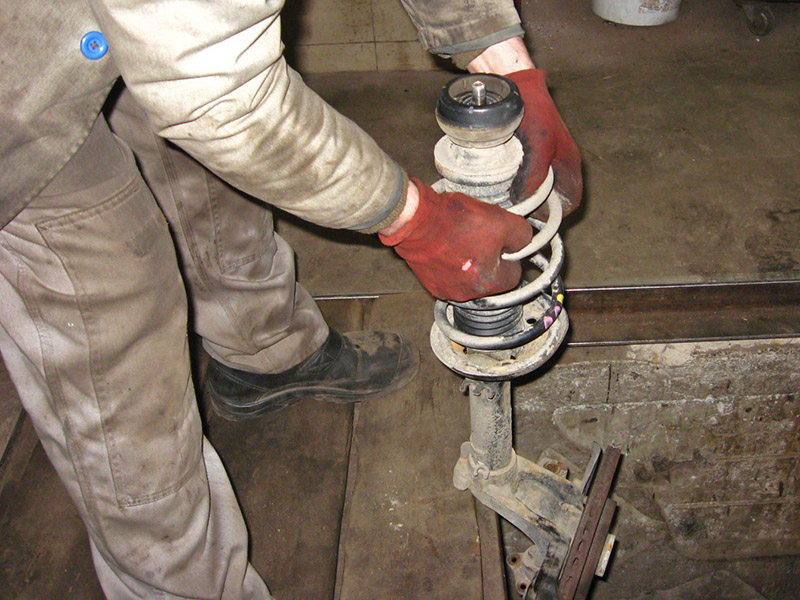
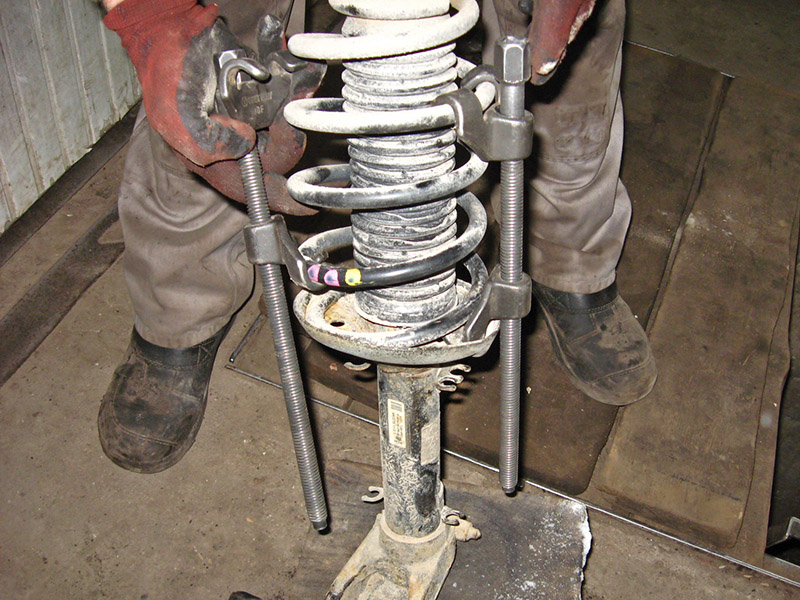
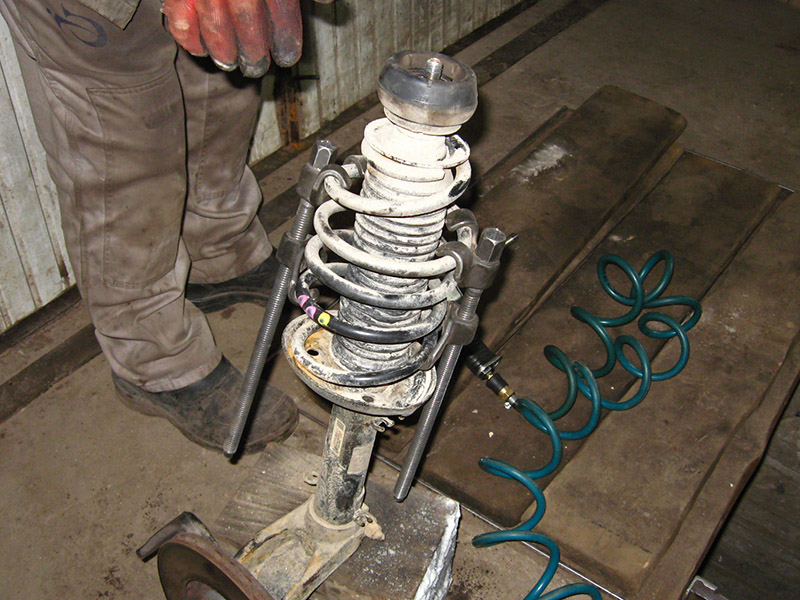
24. Install spring ties on opposite sides and evenly, without distortions, tighten the spring until the load is removed from the upper cup of the spring.
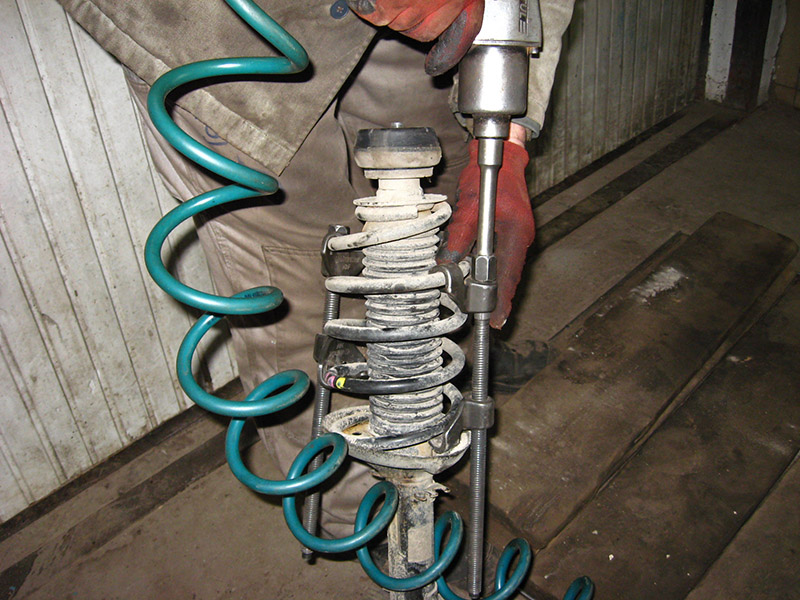
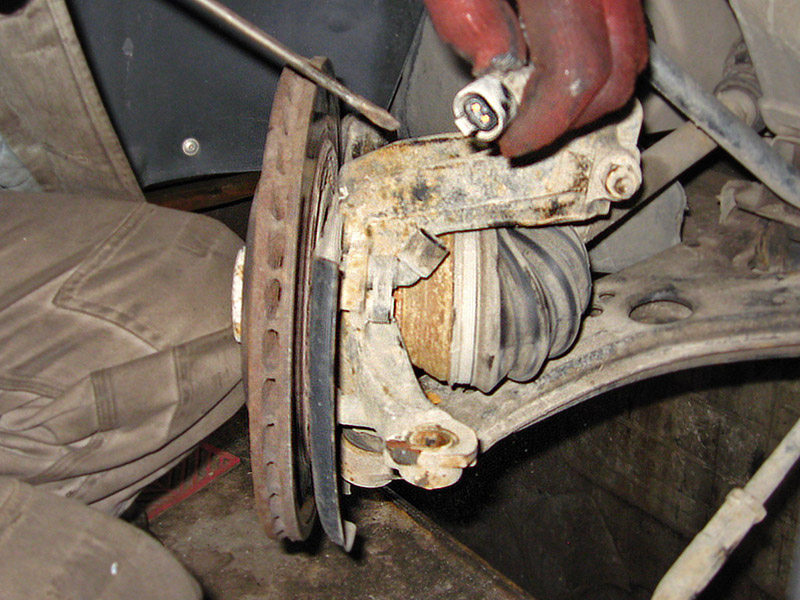
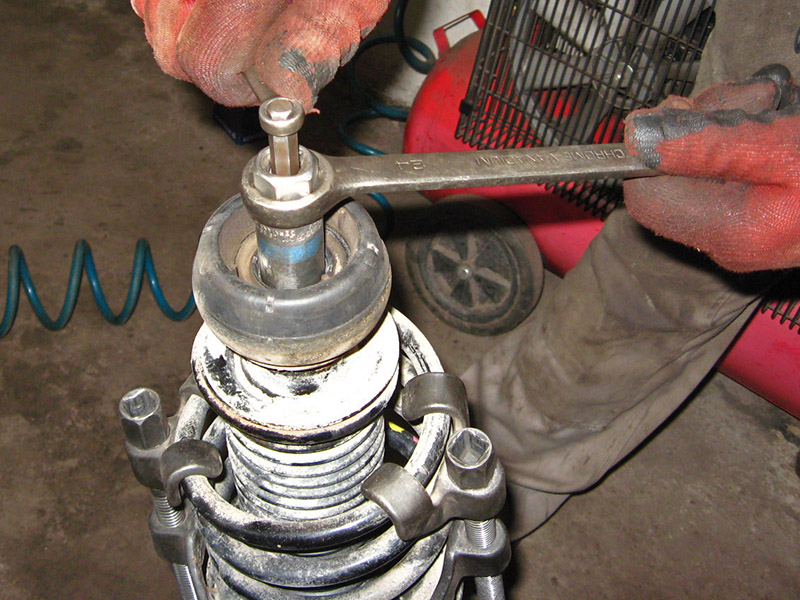
25. Hold the shock absorber rod from turning with a 7 hexagon and a 21 wrench, unscrew the shock absorber rod nut.
26. Remove the upper strut mount, thrust bearing and bushing, upper spring seat, spring (without removing the tie rod), damper rod guard, and compression stroke buffer.
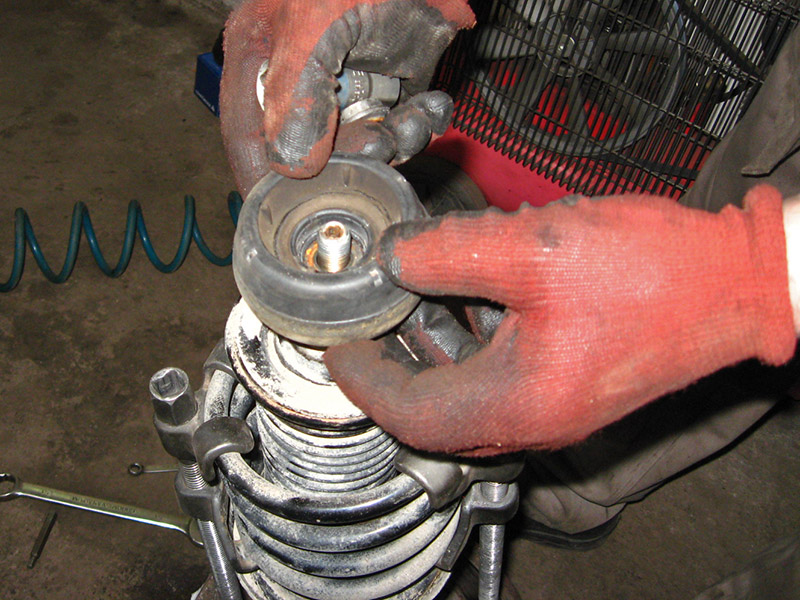
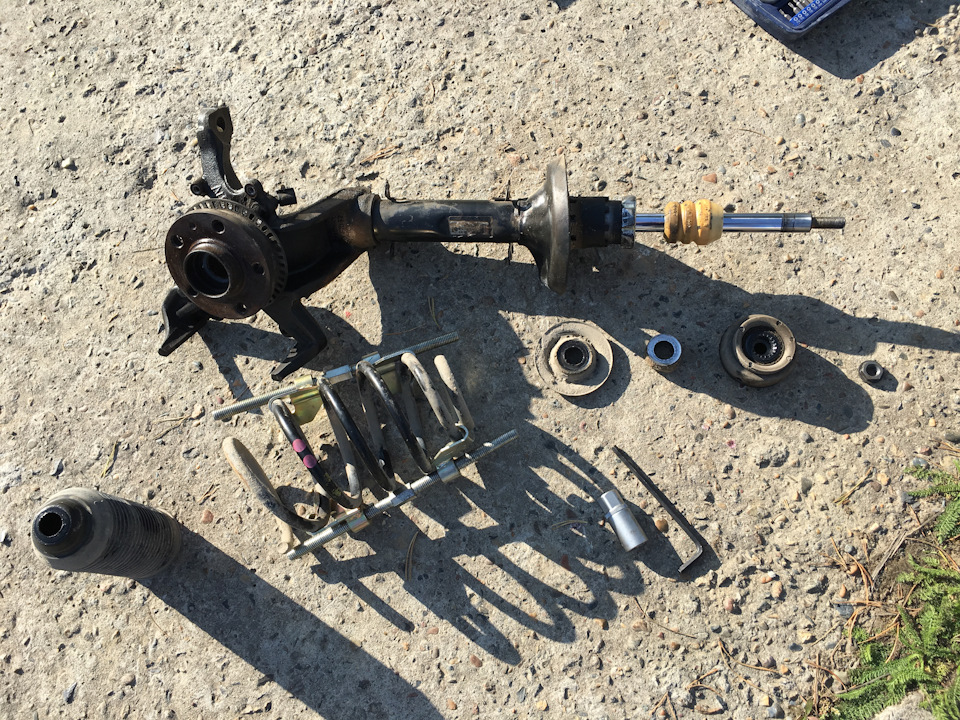
Disassembled shock absorber strut Skoda Octavia Tour.
Note:
Fully extend and sink the shock absorber rod, make sure the shock absorber is in good condition. If dips, jerks or extraneous sounds are heard when moving the rod, it is recommended to replace both shock absorber assemblies.
Check the integrity and serviceability of all installed parts on the rack. A torn protective cover of the shock absorber rod, a damaged compression stroke buffer, we replace it. If mechanical damage to the spring is found, it is recommended to replace both springs.
27. The second shock absorber is removed and disassembled in the same way.
28. Assemble the shock absorber struts of the Skoda Octavia Tour in the reverse order of removal.
29. Install the shock absorbers on the Skoda Octavia Tour and all removed parts in the reverse order of removal.
30. If brake fluid was pumped out, check its level in the tank and, if necessary, bring it to normal, as described in this article .
The article is missing:
- Tool photo
- Photo of parts and consumables
Source: carpedia.club