![CM [2006 - 2010]](/uploads/Hyundai_Santa_Fe_2006-2010_.jpg)
![DM [2012 - 2016]](/uploads/Hyundai_Santa_Fe_2012_-_3.jpg)


Tools:
- Straight ring wrench 10 mm
- Ratchet wrench
- socket head 12 mm
- Socket head 14 mm
- socket head 17 mm
- socket head 24 mm
- Screwdriver flat medium
- pliers
- Mounting blade
Note:
The work of removing and installing the gearbox is very laborious, so be sure to first make sure that its malfunctions cannot be eliminated without removal (insufficient working fluid level, drive defects, loosening of the gearbox, etc.).
The gearbox is quite heavy and has an awkward shape to hold, so we recommend removing it with an assistant.
Removal and installation of automatic transmission Hyundai Santa Fe
1. Place the vehicle on a lift or pit.
2. Remove the air filter housing (see "Removing and installing the air filter housing").
3. Remove the battery and its mounting shelf (see "Removing and installing the battery").
4. Remove the air intake (see "Removing and installing the air intake").
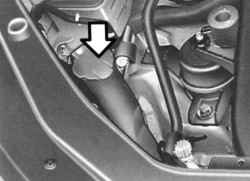
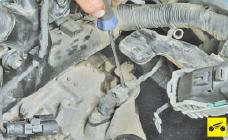
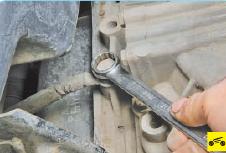
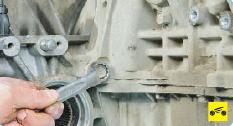
5. Squeeze the antennae of the engine wiring harness holder with pliers and disconnect the harness from the bracket on the gearbox.
6. Wring out a clamp of a block.
7. Disconnect the harness connector from the input shaft speed sensor.

8. Similarly disconnect blocks from the gauge of frequency of rotation of a leading shaft.
9. Disconnect the block from the lever of the gearbox control unit.

10. Disconnect the shoe from the solenoid valve connector.
11. Disconnect the block from the vehicle speed sensor.

12. Disconnect the tip of the transmission control cable from the lever on the gearbox (see "Adjusting and replacing the automatic transmission control cable").
13. Remove the crankcase protection and engine mudguards (see "Removal and installation of crankcase protection and engine mudguards").
14. Drain the working fluid from the gearbox (see "Replacing the working fluid in an automatic transmission").
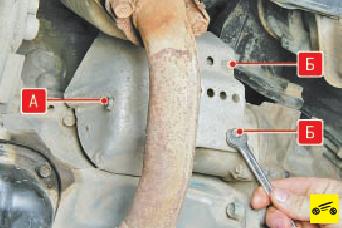
15. Remove a reception pipe (see. "Removal and installation of a reception pipe").

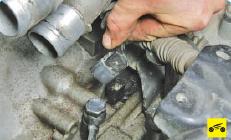
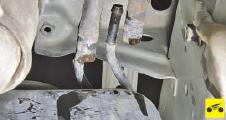
Squeeze the bent lugs of the clamp for fastening the inlet hose of the automatic transmission fluid cooling radiator, slide the clamp along the hose and disconnect the hose from the inlet pipe fitting. Disconnect the hose from the outlet pipe fitting in the same way.
17. Disconnect the front wheel drives from the gearbox and transfer case (see "Removing and installing front wheel drives").

NOTE:
On a vehicle with four-wheel drive, additionally remove the right front wheel drive intermediate shaft assembly with the support and the transfer case (see "Removing and installing the transfer case").
18. Remove the starter (see "Removing and installing the starter").
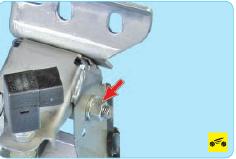
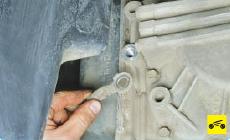
19. Turn out a bolt of fastening of a "mass" wire.
20. Move the wire aside.
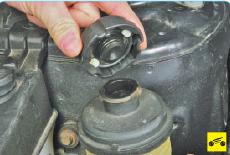
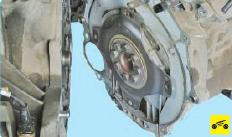
21. Turn out a bolt of fastening of a cover of the hatch in a case of the hydrotransformer.
22. Remove the cover.
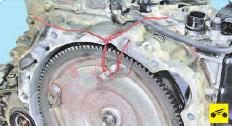
23. Mark the relative position of the torque converter of the automatic transmission and the driven disk.
24. Using a screwdriver or mounting spatula, fix the driven disk from turning.
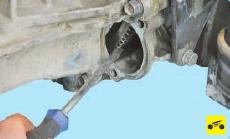
25. Turning the engine crankshaft 90° each time, unscrew the four bolts securing the torque converter to the drive plate in succession.
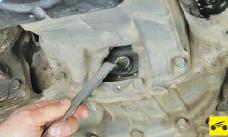
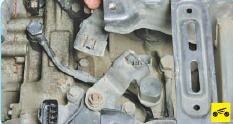
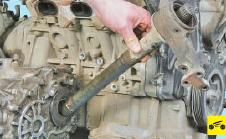
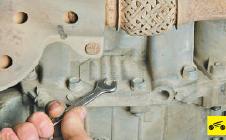
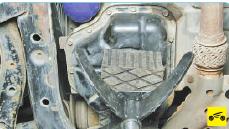
26. Turn out three bolts of fastening of a forward support.
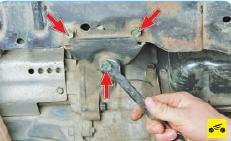
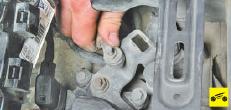
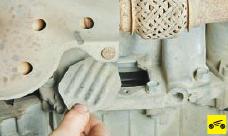
27. Turn out three bolts of a back support of a suspension bracket of the power unit to a subframe of a forward suspension bracket.
28. Remove the front subframe (see "Removing and installing the front suspension subframe").
29. Securely support the engine or hang it out with a hoist.
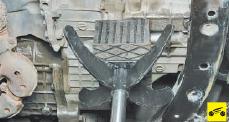
30. Install a similar support under the gearbox.
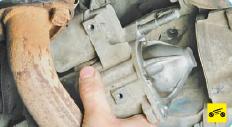
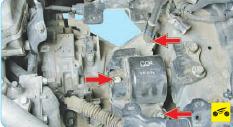
31. Turn out three bolts of fastening of the left support of a suspension bracket of the power unit to an arm on a transmission.
32. Turn out bolts of the top fastening.
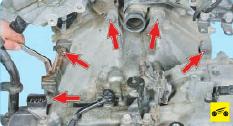
33. Turn out a bolt over an intermediate support of a drive of the right forward wheel.
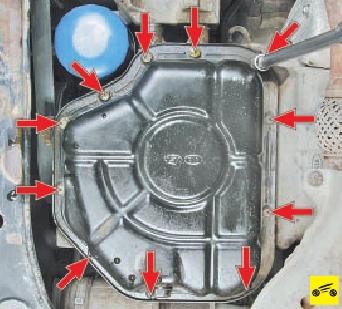
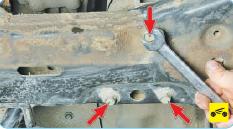
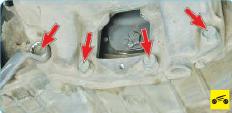
34. Turn out bolts of the bottom fastening of a transmission to the block of cylinders of the engine.
NOTE:
The engine cooling system hoses have been removed for clarity.
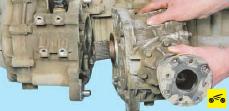
35. Carefully separate the gearbox from the engine, using a screwdriver as a lever, while pressing the torque converter in the direction of the gearbox so that it remains seated on the gearbox drive shaft.
36. After the release of the torque converter support from the hole in the crankshaft, remove the gearbox from the car, removing the support from under it.
37. After removing the gearbox, secure the torque converter with improvised means so that it remains planted on the gearbox drive shaft.
38. Establish a transmission and all removed details and knots in an order, the return to removal.
39. Fill in the working fluid in the gearbox (see "Checking the level and topping up the working fluid in the automatic transmission").
Source: Hyundai Santa Fe Owner's Manual, Third Rome Publishing House