Tools:
- Special tool 09568-34000
- Open-end wrench 14 mm
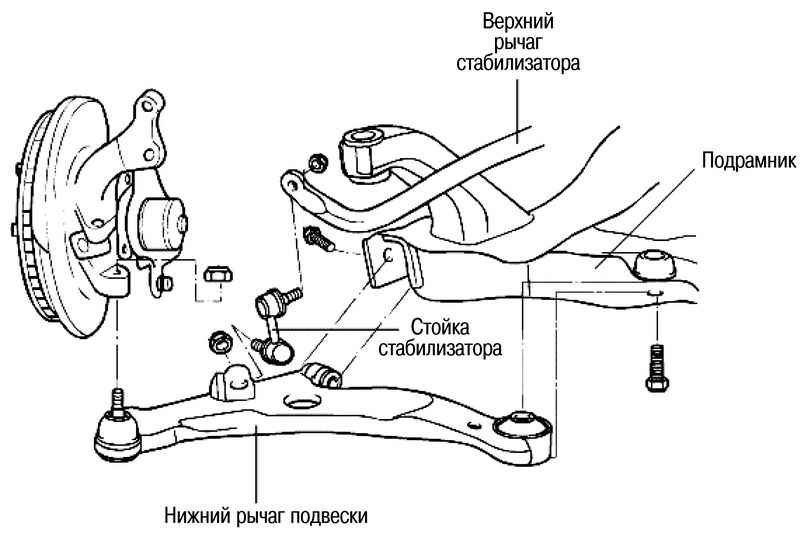
Lower Suspension Arm
Withdrawal
1. Remove the front wheel.
2. Remove the cotter pin, unscrew the wheel drive shaft nut and remove the washer.
3. Loosen the nut securing the ball joint of the lower suspension arm to the steering knuckle, do not unscrew the nut completely.
4. Turn away two bolts of fastening of a forward rack to a rotary fist (lower).
5. Pull the wheel hub out of the vehicle and separate the wheel drive shaft from it.
6. Using the special tool (09568-34000), disconnect the lower arm ball joint from the lower arm.
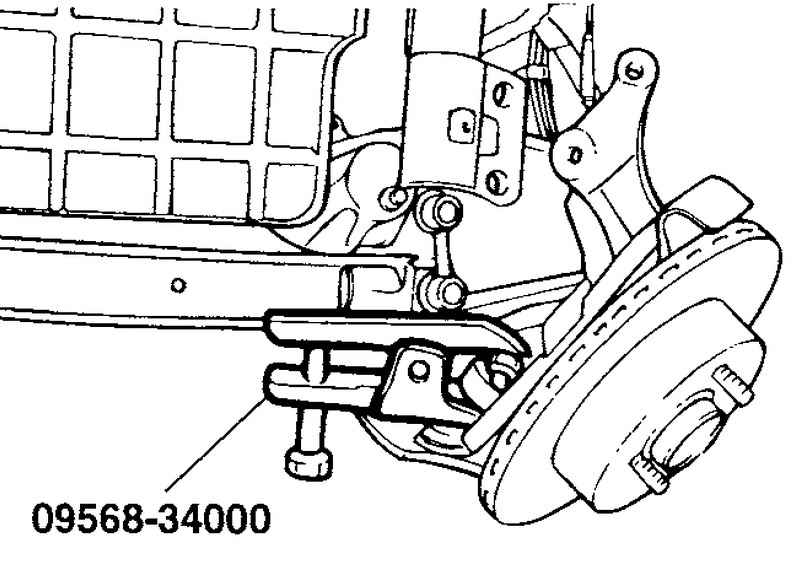
7. Temporarily install the bolts securing the front strut to the steering knuckle (lower).
8. Turn away a nut of fastening of a rack of the stabilizer.
9. Turn away two bolts of fastening of plugs "And" and "G" of the bottom lever.
10. Remove the lower control arm assembly.
Installation
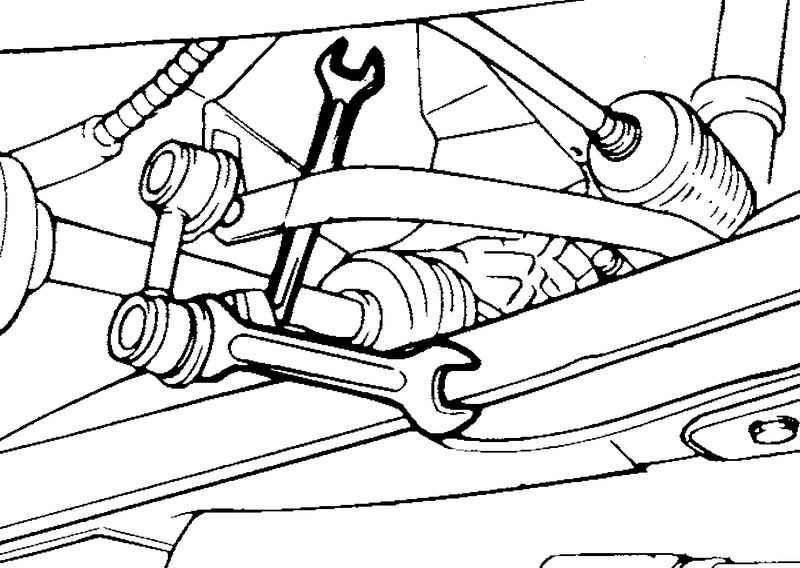
11. When tightening the stabilizer strut mount, hold the ball joint from turning with a wrench (14 mm), tighten the self-locking nut.
The article is missing:
- Tool photo
- High-quality repair photos
Source: http://automn.ru/hyundai-matrix/hyundai-37300-10.m_id-4950.m_id2-4952.html
![1 generation [2001 - 2005]](/uploads/Hyundai_Matrix_2002-2006_.jpg)
