![B6 [2000 - 2005]](/uploads/Audi_A4_2000-2005_B6_.jpg)

Instruments:
- Screwdriver flat medium
- Torx wrench (star) T5
- Torx wrench (star) T8
- Wire
Parts and consumables:
- Self-locking screws (rivets)
Note:
To prevent deployment of head airbags, before carrying out the following work, turn off the ignition and disconnect first the negative (-) and then the positive battery cables.
When disconnecting the airbag system cables, be sure to follow the safety precautions for handling the airbag, refer to the General Information and Safety Precautions section .
C-pillar
1 . Remove the roof end strip (described below).
Warning:
When disconnecting the cables of the airbag system, be sure to follow the safety precautions for handling the airbag.
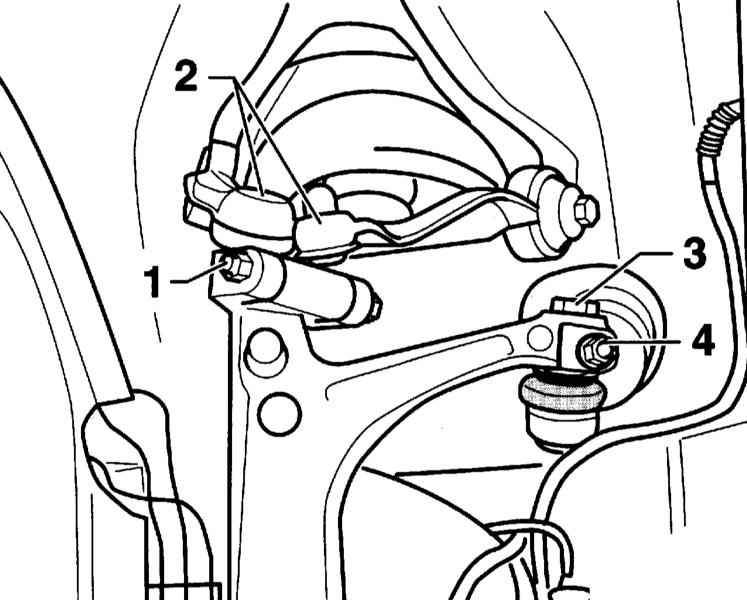
2 . Remove screws ( 2 ).
3 . Remove the rear seat side cushions, refer to Removing and Installing the Rear Seat .
4 . Remove the clip ( 3 ) under the side cushion.
5 . Detach the side shelf and lift it up.
6 . Disconnect the C-pillar trim ( 1 ) at the spring clip ( 4 ) and remove it.
7 . To install the rack, lift the shelf up and insert the C-pillar trim into the grooves on the shelf.
8 . Further installation is carried out in the reverse order of removal. At the same time, replace the self-locking screws ( 2 ) with new ones.
Warning:
When connecting the battery, there should be no people in the passenger compartment.
9 . Remove the tape from the negative battery terminal, connect first the positive (+) and then the negative (-) cable to the battery.
D-pillar
1 . Remove the D-pillar trim.
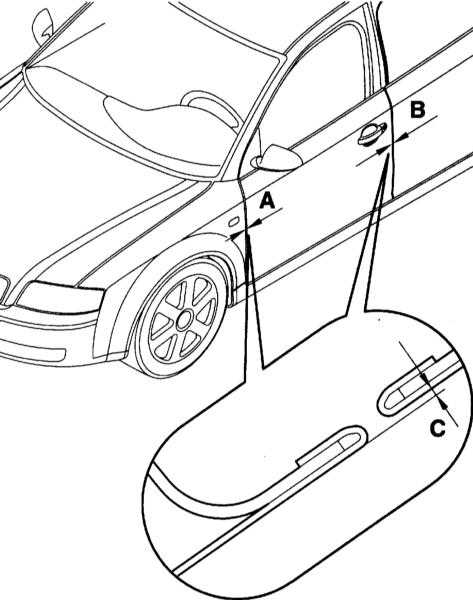
2 . Push down on the handle ( 5 ) and flip down the screw cover ( 4 ). To do this, insert a thin wire into the groove ( 7 ) and open the cover.
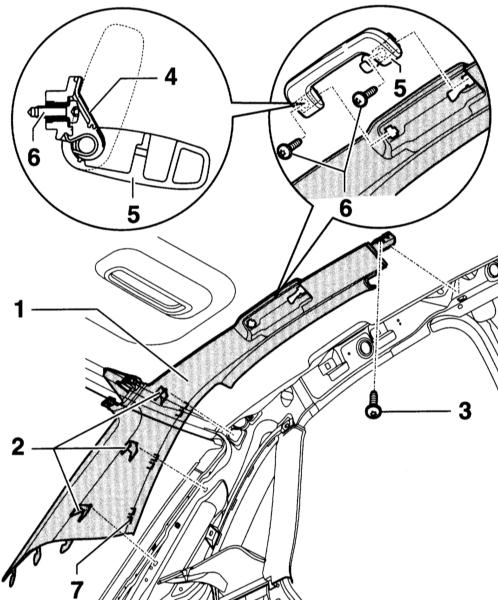
3 . Remove screws ( 6 ).
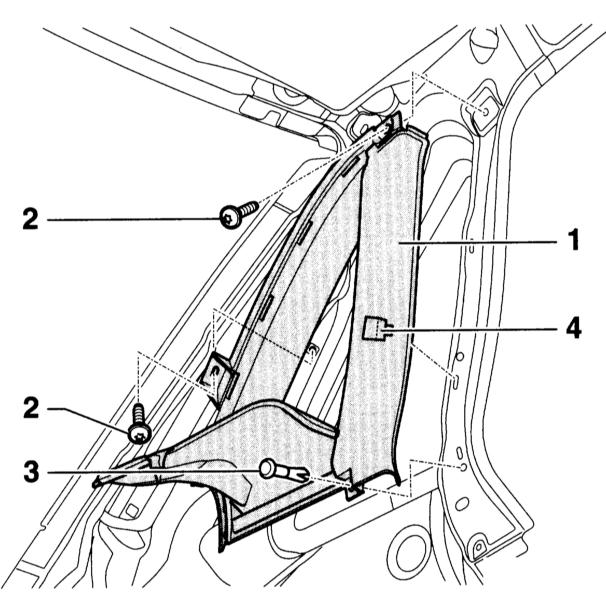
4 . Remove the screw ( 3 ) and detach the A-pillar trim at the rear (above the front door).
5 . Pull out the trim ( 1 ) under the B-pillar trim.
6 . Detach the D-pillar trim ( 1 ) at the spring clips ( 2 ) and pull it out of the shelf.
7 . To install, insert the trim at the rear of the D-pillar into the shelf.
8 . Insert the hook ( 7 ) into the slot at the C-pillar trim.
9 . Attach the D-pillar trim to the spring clips ( 2 ).
10 . Insert the front trim under the B-pillar (side B-pillar) trim.
11 . Check that the clip and hook of the airbag adapter are securely fastened.
12 . Screw in the screw ( 3 ) and fix the trim behind the A-pillar.
13 . Secure the handle with new self-locking screws ( 6 ). Replace the screw cover.
14 . Lay the door seal over the trim.
15 . Install the roof lock bar.
Warning:
When connecting the battery, there should be no people in the passenger compartment.
16 . Remove the tape from the negative battery terminal, connect first the positive (+) and then the negative (-) cable to the battery.
Roof end strip
1 . To remove the roof closing strip, disconnect the roof closing strip ( 1 ) at the spring clips ( 2 ) from the grooves ( 3 ) and remove.
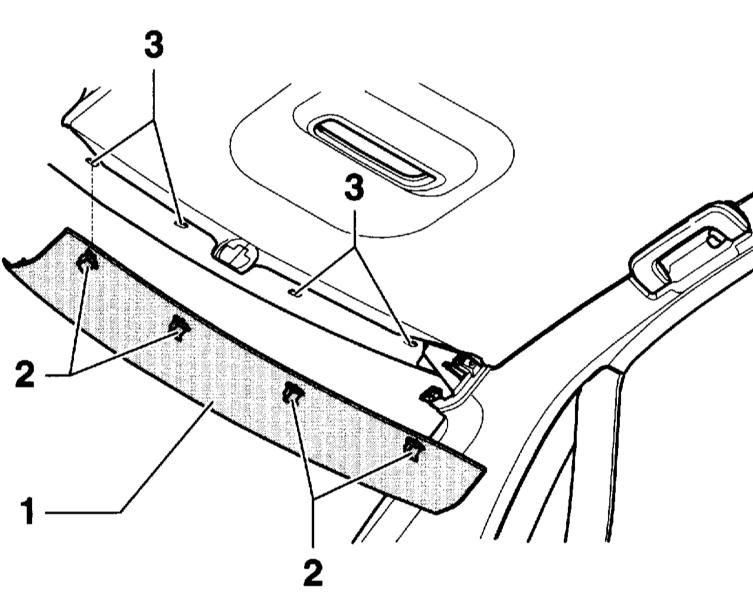
2 . Installation is carried out in the reverse order of removal.
Rear entry bar
1 . To remove the rear entry bar, remove the B-pillar lower trim.
2 . Remove the C-pillar trim.
3 . Remove the rear seat side cushion, refer to Removing and Installing the Rear Seat .
4 . Disconnect the input bar at the three spring clips and remove.
5 . Installation is carried out in the reverse order of removal.
Shelf under the rear window
1 . Depending on the equipment: fold down the rear seatback or remove it, refer to Removing and installing the rear seat .
2 . Disconnect from a shelf facing of a rack With at the left and on the right.
3 . Remove the left and right side rear seat cushions, refer to Removing and Installing the Rear Seat .
4 . Non reclining rear seat: Detach the center seat belt at the bottom.
5 . Remove the loudspeaker grille from the shelf using a plastic wedge ( 3 ).
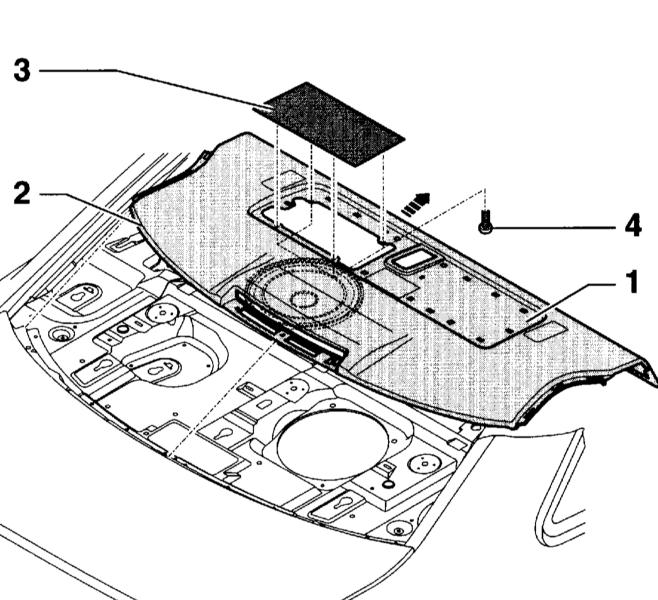
6 . Depending on the equipment, remove 3 or 4 screws ( 4 ).
7 . Remove the 3 screws securing the sun blinds in the trunk from below and pull the sun blind forward.
8 . Pull the shelf ( 1 ) forward ( arrow ), detach it at the edge ( 2 ) and remove it upwards.
9 . Installation is carried out in the reverse order of removal.
The article is missing:
- Tool photo
- Photo of parts and consumables
- High-quality repair photos
Source: http://carmanz.com/audi/a4-b6-2000-2004/6676-a4200011-5-18.html#ixzz3cmzoXi00