![W203/S203/CL203 [2000 - 2004]](/uploads/mercedes-c-klass-w203.jpg)

The steering column switch switches the following devices: dipped beam, high beam, direction indicators and windshield wiper.
Withdrawal
PROCEDURE
1. Set the wheels straight.
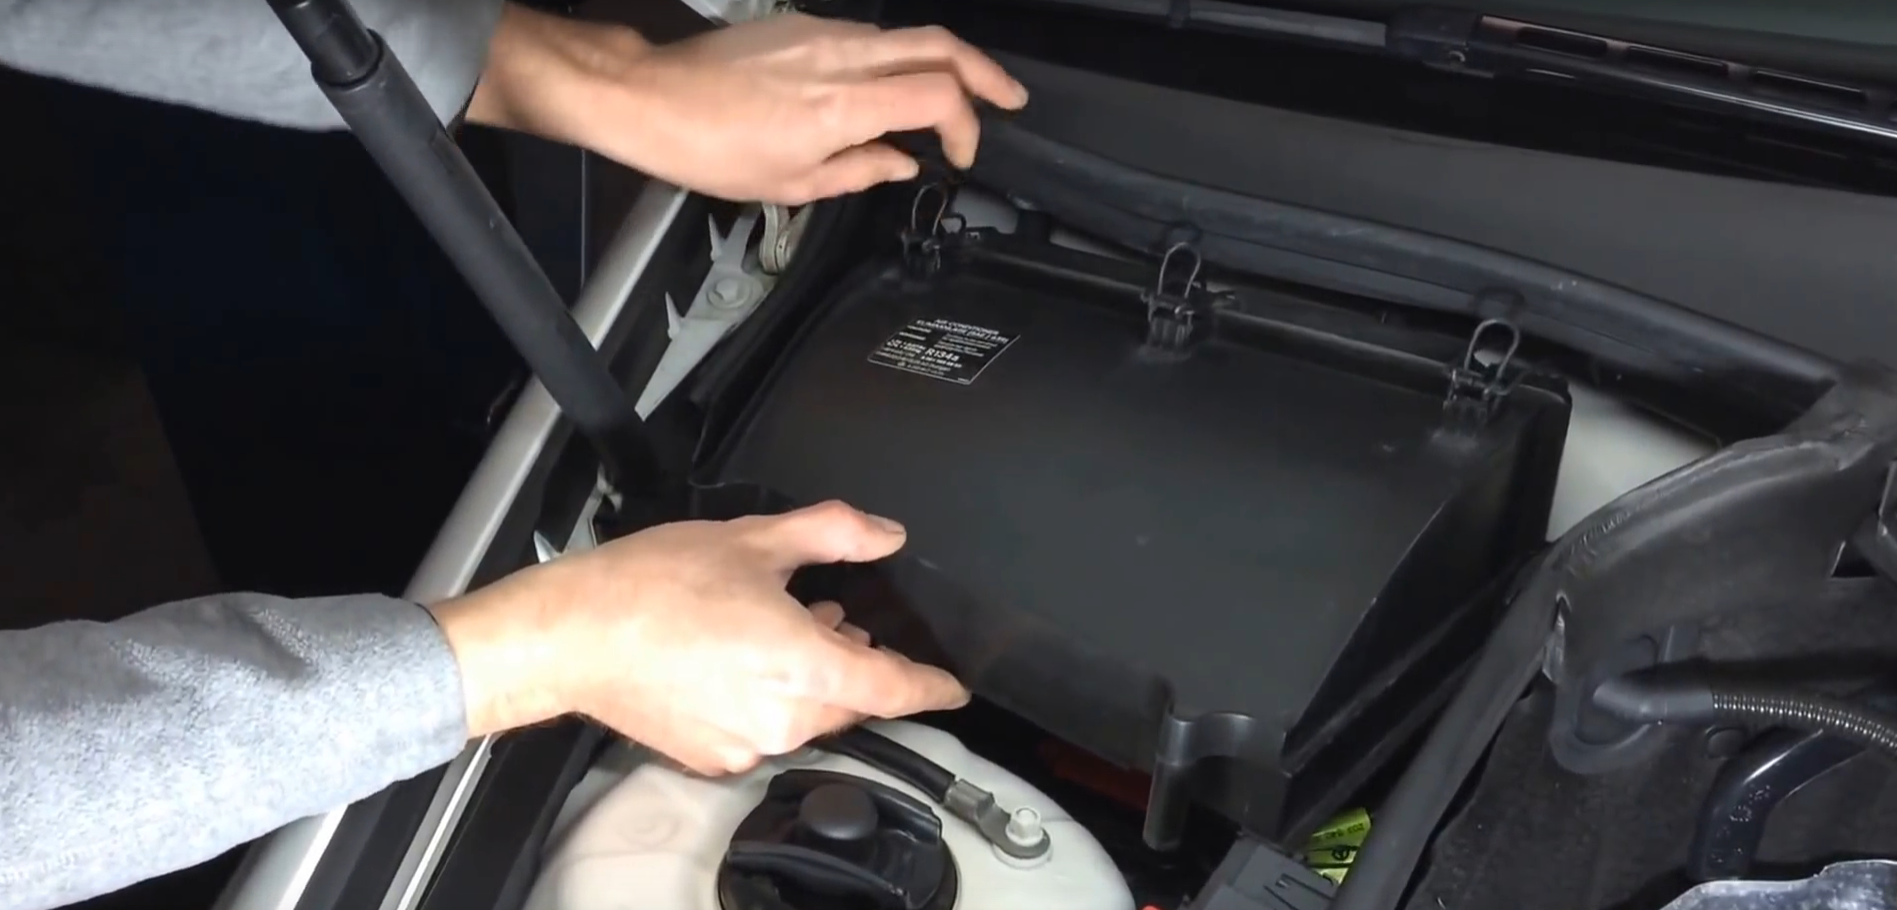
2. Disconnect the negative (-) battery cable with the ignition off. The cabin air filter box must first be removed.
|
Before disconnecting the cable, find out the security code of the radio. |
3. Remove the steering wheel.
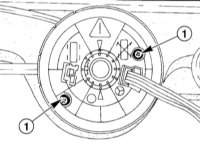 |
4. Unscrew the fastening screws (1) of the contact coil with the front wheels standing straight so that the coil can be removed.
|
5. Carefully remove the contact coil from the steering column switch. The steering column switch connector is automatically undocked.
6. Remove 3 screws.
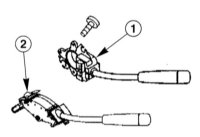 |
7. Open the stalk connectors (1) by squeezing and remove from the stalk. |
Models with tempostat
PROCEDURE
1. Remove the cover under the instrument panel, refer to the relevant section.
2. Disconnect the tempostat switch plug (2) from the ignition switch.
 |
3. Remove the steering column switch with the tempostat switch, if the latter is installed, and disconnect the plug from the steering column switch. |
Installation
PROCEDURE
|
Be sure to follow the safety precautions when handling the airbag. |
1. Make sure the wheels of the car are straight.
2. Dock the steering column switch connector and install the switch in place.
3. Insert 2 connectors into the switch and fix.
4. If there is a tempostat, dock the ignition switch connector and install the cover under the instrument panel, refer to the relevant section.
5. Fix the steering column switch with three screws.
6. Install the contact spiral against the stop on the steering spindle. Lock the connector.
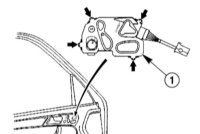
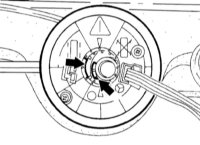 |
7. Fix 2 connectors. At the same time, make sure that both markings coincide (arrows in the illustration). |
8. Reinstall the steering wheel. At the same time, observe the safety precautions when handling the airbag.
9. Attach a cable of weight (-) of the storage battery at the switched off ignition. Install the cabin air filter box. If necessary, enter the radio code and set the time on the clock.
Source: http://www.auto-knigi.com/model/mb_c/14_22/