![CM [2006 - 2010]](/uploads/Hyundai_Santa_Fe_2006-2010_.jpg)
![DM [2012 - 2016]](/uploads/Hyundai_Santa_Fe_2012_-_3.jpg)


You will need: keys "for 10", "for 12", "for 14", "for 17", "for 19", socket wrenches "for 8", "for 10", for "32", hex key " 10", mounting spatula, pliers, puller for ball joints, wrench for wheel nuts, hammer.
Removal and installation of the transfer case Hyundai Santa Fe
1. Remove the engine crankcase protection (see "Removing and installing engine crankcase protection and mudguards").
2. Remove the front pipe (see "Removing and installing the front pipe").

3. Drain the oil from the transfer case (see "Checking the level, topping up and changing the oil in the transfer case").
4. Drain the oil from the manual transmission (see "Checking the level, topping up and changing the oil in a manual transmission") or the working fluid from the automatic transmission (see "Replacing the working fluid in an automatic transmission").
5. Remove the right front wheel drive (see "Removing and installing front wheel drive").
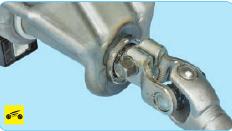
6. Disconnect the front propeller shaft yoke from the output shaft flange and move the shaft to the side (see "Removing and installing the driveline").
7. Turn out two bolts of fastening of a thermoscreen.
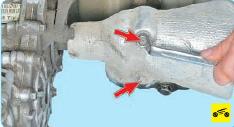
8. Remove the thermal shield.
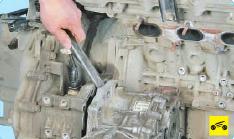
9. Turn out bolts of fastening of an arm of a distributing box to the block of cylinders and the right cover of a crankcase of a distributing box.

10. Remove the transfer case mounting bracket.
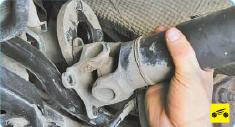
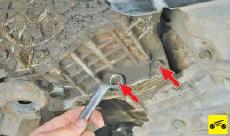
11. Turn out bolts of fastening of a support of an intermediate shaft.
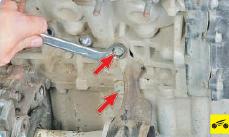
12. Remove an intermediate shaft in gathering with a support.
13. Place a secure support under the transfer case.
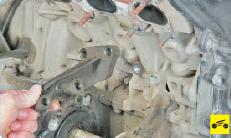
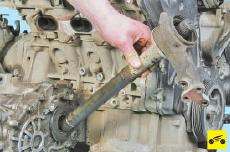
14. Turn out three bolts of the top fastening of a distributing box to a transmission.

15. Turn out two bolts of the bottom fastening of a distributing box.
16. Turn out a bolt of fastening of a transmission to a distributing box.

17. Insert a mounting blade and disconnect the transfer case from the gearbox.
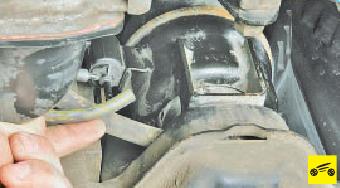
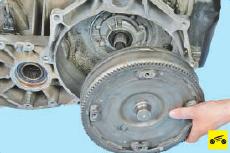
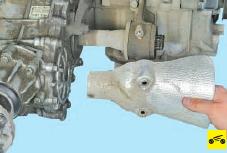
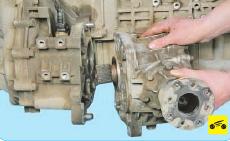
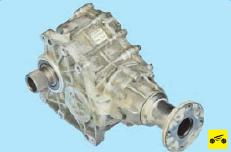
18. Move the transfer case to the right and remove the transfer case (shown on the removed power unit for clarity).
Note:

Before installing the transfer case, make sure that the dowel pins are present and intact.
19. Install the transfer case and all removed parts in the reverse order of removal.
20. Fill oil (working fluid) into the gearbox (see "Checking the level, adding and changing oil in a manual gearbox"; "Checking the level and topping up the working fluid in an automatic transmission")
21. Fill oil (working fluid) into the transfer case (see "Checking the level, topping up and changing oil in the transfer case").
Source: Hyundai Santa Fe Owner's Manual, Third Rome Publishing House