![1 generation [2007 - 2010]](/uploads/Nissan_Qashqai_2007-2010_.jpg)

Tools:
- Open-end wrench 16 mm
- Collar for end nozzle
- Nozzle on the crank 10 mm
- Nozzle for crank 12 mm
- Nozzle on the crank 10 mm
- Torx wrench (star) T20
- Extension
- Screwdriver flat medium
- pliers
Parts and consumables:
- Steering shafts
- Steering column assembly
Notes:
The steering column is one of the most important elements in ensuring road safety, so replace the steering shafts installed in the steering column or the steering column assembly if the following defects are present:
- deformation or damage to the intermediate shaft, play in the cardan joint, damage to its terminal connection with the steering gear shaft;
- deformation or damage to the shaft and parts of the steering column, damage to the splines connecting the shaft to the steering wheel hub;
- damage to the steering column adjustment mechanism.
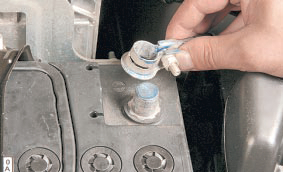
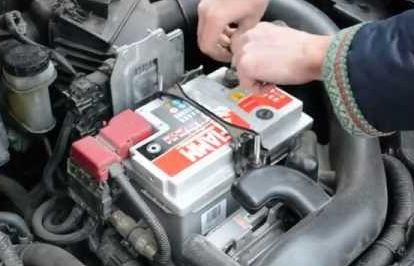
1. Disconnect a wire from the minus plug of the storage battery.
2. Remove the driver's airbag as described here .
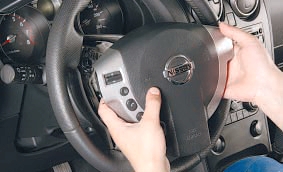
3. Remove the steering wheel as described here .
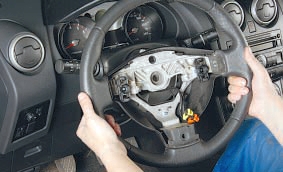
4. Remove the steering column cover as described here .
5. Remove the left stalk as described here .
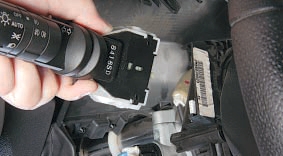
6. Remove the right stalk in the same way.
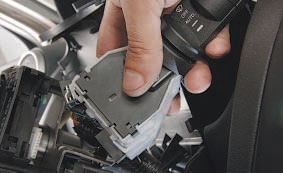
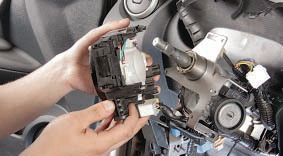
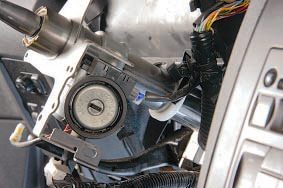
7. Remove the steering column switch module assembly with the driver's airbag slip ring as described here .
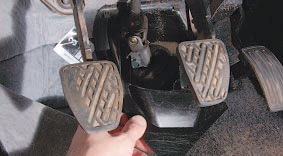
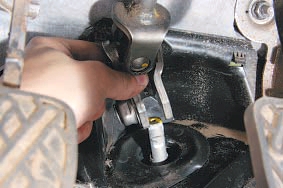
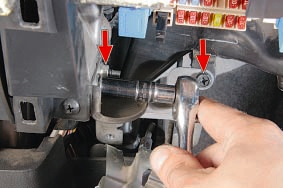
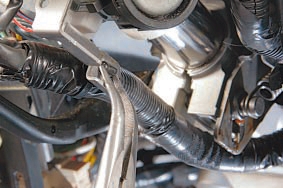
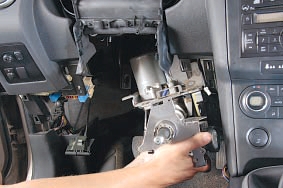
8. In the car, remove the protective cover from the lower cardan joint of the intermediate steering shaft.
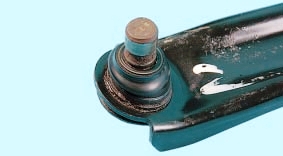
9. Unscrew and remove the coupling bolt of the terminal connection of the cardan joint of the intermediate shaft with the steering gear shaft.
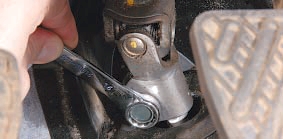
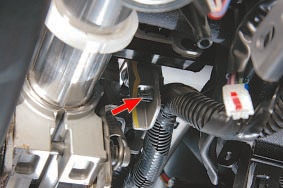
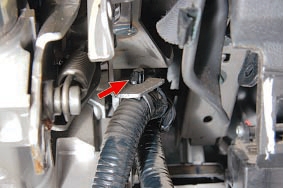
10. Use a screwdriver to pry out the fixing movable nut of the coupling bolt.
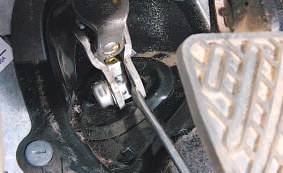
11. Disconnect the intermediate shaft lower universal joint from the steering gear shaft.
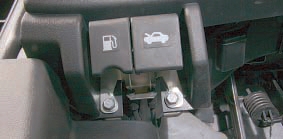
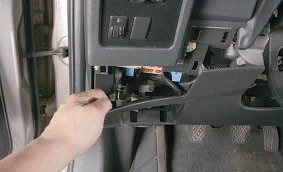
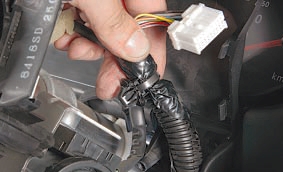
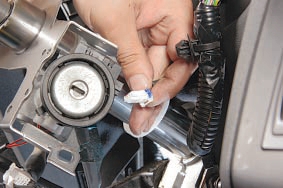
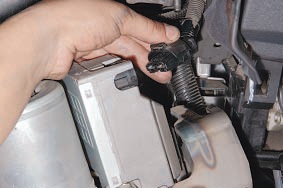
12. Turn out two bolts of fastening of handles of a drive of the lock of a cowl and the lock of the hatch of a fuel-filler mouth to an arm.
13. Overcoming the resistance of the clamps, remove the cover of the mounting block in the car.
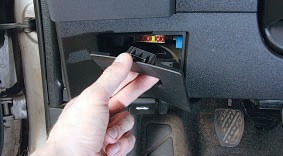
14. Wring out clamps and push a block of a diagnostic socket through a hole in the bottom facing of the panel of devices.
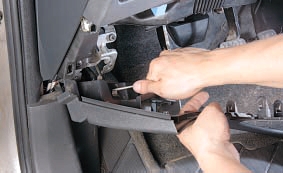
15. Overcoming the resistance of the clamps, take the lower trim of the instrument panel down.
16. Turn out a bolt of fastening of the gauge of air temperature in salon.
17. Disconnect the sensor from facing.
18. Bend the latch of the handles of the drive of the fuel tank hatch and the hood and remove the lower trim of the instrument panel.
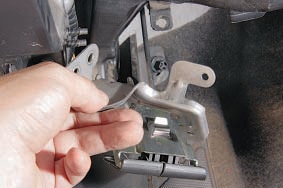
19. Turn away two nuts and turn out one bolt of fastening of an arm of handles of a drive of a hatch of a fuel tank and a cowl.
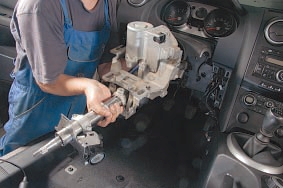
20. Remove the bracket.
21. Pry with a screwdriver and remove the air duct retainer.
22. Remove the air duct.

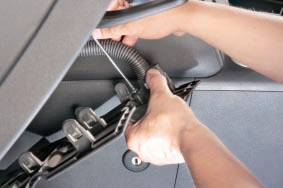
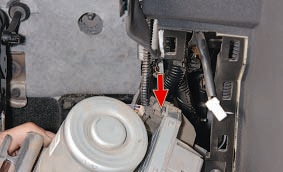
23. Squeeze the clamp of the wire harness clamp with pliers.
24. Disconnect the clamp from the steering column bracket.
25. Squeeze the clamp of the driver's airbag and audio system harness clamp with pliers.
26. Disconnect the clamp from the steering column bracket.

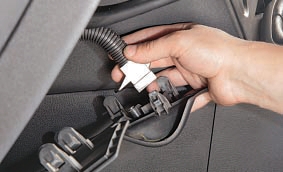
27. Similarly disconnect the forward clamp of a plait of wires from an arm of a steering column.
28. Similarly, disconnect the rear wire harness retainer from the steering column bracket.
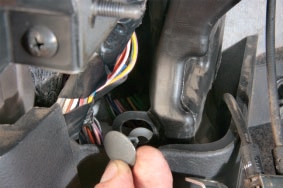
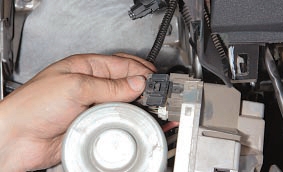
29. Press the latch.
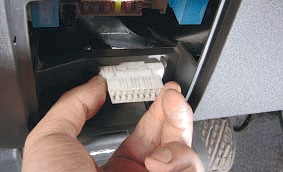
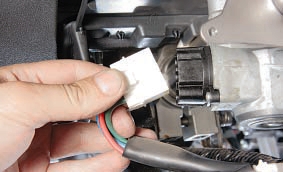
30. By pressing, disconnect the block of the wiring harness from the immobilizer antenna.
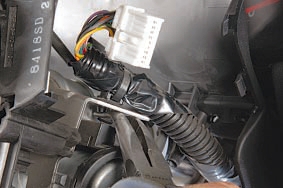
31. Press the latch.

32. By pressing, disconnect the block of the wiring harness from the contact group of the ignition switch.
33. Turn away four nuts of fastening of a steering column to arms of a body (one nut is not visible).
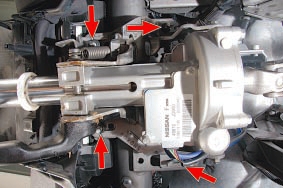
34. Lower the steering column down.
35. Press the latch and disconnect the wiring harness block from the power steering control unit.
36. Press the clamp of the wiring harness block.
37. Disconnect the shoe from the power steering control unit.
38. Remove the steering column assembly with power steering.
39. Establish a steering column and all details in an order, the return to removal.
The article is missing:
- High-quality repair photos
- Tool photo
- Photo of parts and consumables
Source: http://nissan-qashqai.dv13.ru/rulevoe-upravlenie/snyatie-i-ustanovka-rulevoj-kolonki/