![3 generation [2012 - 2017]](/uploads/Skoda_Rapid_2012_-_2016.png)

Tool:
- Spanner wrench
Withdrawal
1. Turn off the ignition and all electrical consumers.
2. To remove the panel of facing of the lever of a gear change.
3. Remove the armrest assembly (if the vehicle is equipped).
4. Remove cover (6).
5. Unscrew the fixing screws (2).
6. Apply the parking brake by raising the parking brake lever as far as possible.
7. Disconnect and remove the handle (3) from the parking brake lever.
8. Press the center console about 30 mm in the direction of arrow A to release it from the holders on the dashboard.
9. Raise and remove the center console from the passenger compartment floor in the direction of arrow B.
10. Disconnect the cigarette lighter wiring harness connector (power outlet).
11. Remove the center floor console from the car

Installation
Installation is carried out in the reverse order of removal.
Removing and installing the center console mounting bracket
Withdrawal
1. Remove floor center console assembly.
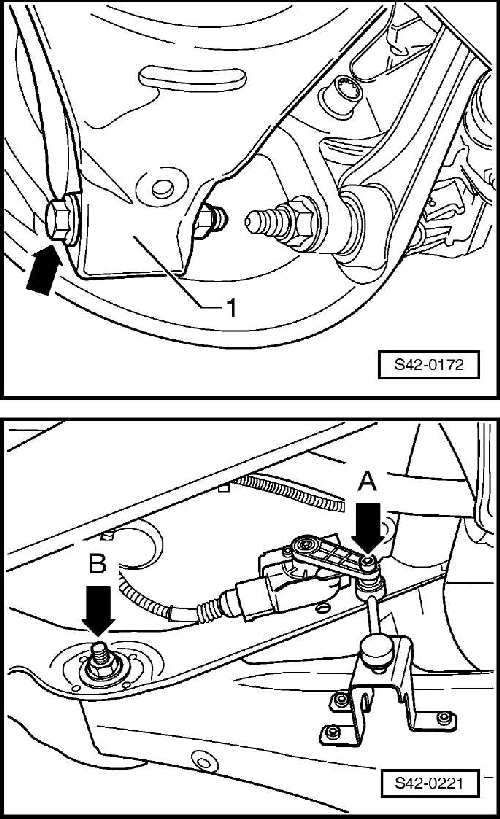
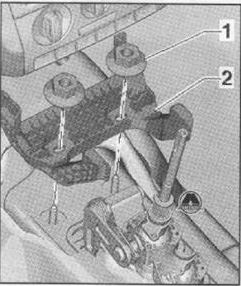
2. Loosen the fastening nuts (1).
3. Remove the mounting bracket (2) from the center floor console assembly.
Installation
Installation is carried out in the reverse order of removal.
The article is missing:
- Tool photo
- Photo of parts and consumables
- High-quality repair photos
Source: Manual for the repair and operation of Skoda Rapid, Monolit publishing house.