![B6 [2000 - 2005]](/uploads/Audi_A4_2000-2005_B6_.jpg)

Tools:
- Compression tool VAG1752/1
- Adapter VAG 1752/9
- Spring holder VAG 1752/16
Parts and consumables:
- New coil spring
Notes:
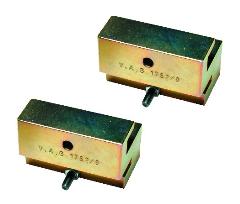
A special tool is required to remove the helical spring. HUNDRED AUDI use for this purpose a compression tool VAG 1752/1, an adapter VAG 1752/9 and a spring holder VAG 1752/16.
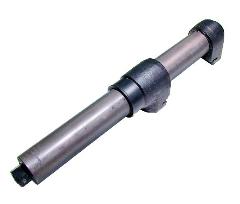
Compression tool VAG1752/1.
Adapter VAG 1752/9.
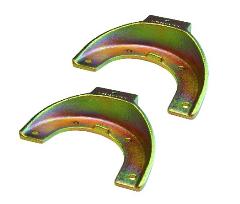
Spring holder VAG 1752/16.
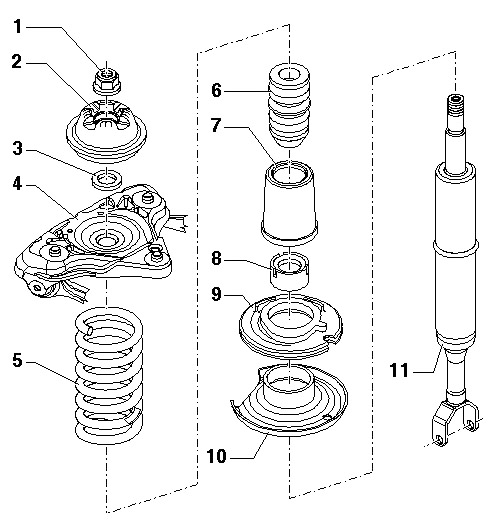
Removal and installation of the coil spring Audi A4 B6
1 . To remove the coil spring, mark the direction of rotation of the wheel with an arrow on the tire.
2. Loosen the wheel bolts.
3. Raise and support a back part of the car and remove a wheel.

4 . Install the spring compressor with adapter and spring holder on the Audi A4 suspension spring. If necessary, first insert the spring holder into the coils and then connect it to the fixture. When doing this, be careful not to damage the trapezoid lever.
Warning:
You need to compress four turns. If this is not possible, compress three coils and then turn the spring so that four coils can be compressed. Watch the correct position of a spring in the holder. Danger of accident!
5 . Squeeze the fixture until it stops and remove the spring.
6 . When installing a new spring, make sure that the conical end of it points down. The colored marks (arrow B in the accompanying illustration) must point downwards.
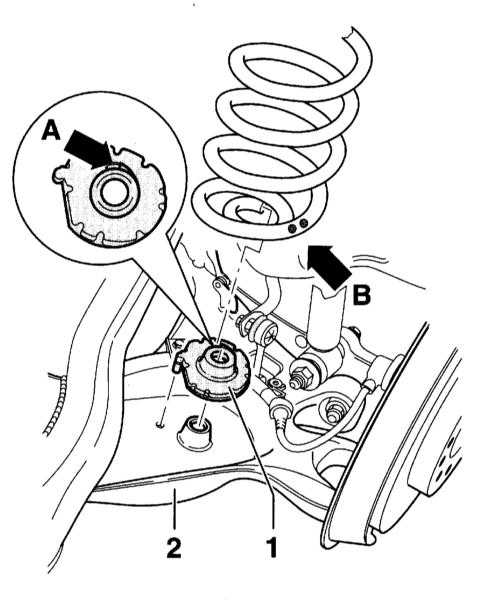
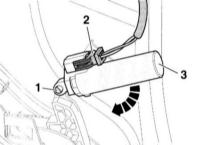
7 . Insert the spring seat pin ( 1 ) into the hole in the trapezoid arm ( 2 ).
8 . Rotate the end of the spring so that it rests on the stop of the spring seat ( arrow A ).
9 . Insert the top spring spacer (not shown) into the top end of the spring.
10 . Carefully loosen the spring. At the same time, align the position of the upper spring spacer.
11 . Observing the direction of rotation of the wheel, secure the rear wheel. Lower the car onto the wheels and only then tighten the wheel bolts crosswise to a torque of 120Nm.
The article is missing:
- Photo of parts and consumables
- High-quality repair photos
Source: http://carmanz.com/audi/a4-b6-2000-2004/6606-a4200010-3-2.html#ixzz3cqslopBR