![B6 [2000 - 2005]](/uploads/Audi_A4_2000-2005_B6_.jpg)

Tools:
- AUDI-3369
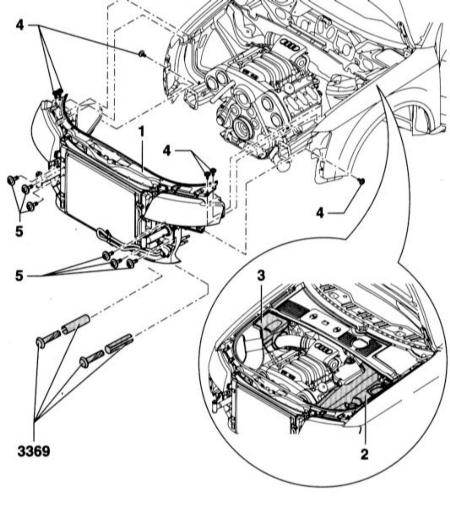
Front panel installation:
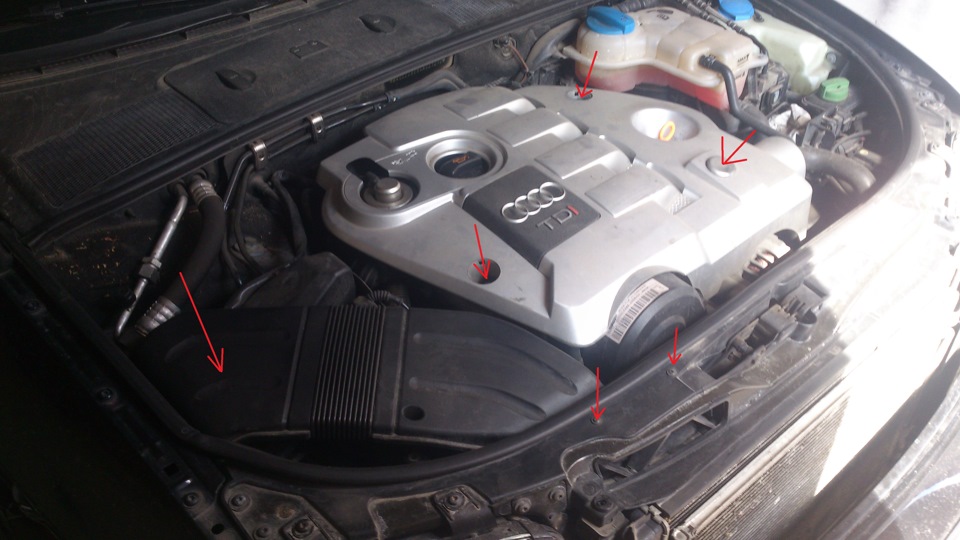
- 1 - front panel;
- 2 — the top cover of the engine, left;
- 3 — the top cover of the engine, right;
- 4 - screw, 10Nm;
- 5 - screw, 50Nm.
Note:
3369 - Service position: screw the AUDI special tool into the holes in the bumper. Note: If the specified special tool is not available, 2 screws M8 x 90 can be used. Washers with a diameter of 24 mm and a thickness of 2 mm should be placed under the bolt head. In addition, 2 bushings with a length of 80 mm and a diameter of 17 mm are required.
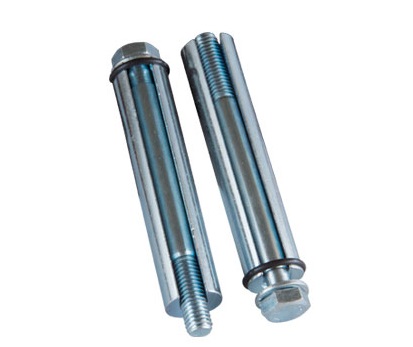
AUDI-3369.
When carrying out some adjustment work, for example, with a V-belt or toothed belt, the front panel must be set to the service position. In this case, the panel moves forward along with the radiator.
1 . Disconnect the air ducts ( 1 ) and ( 2 ) between the front panel and the air filter on the front panel ( arrows ).
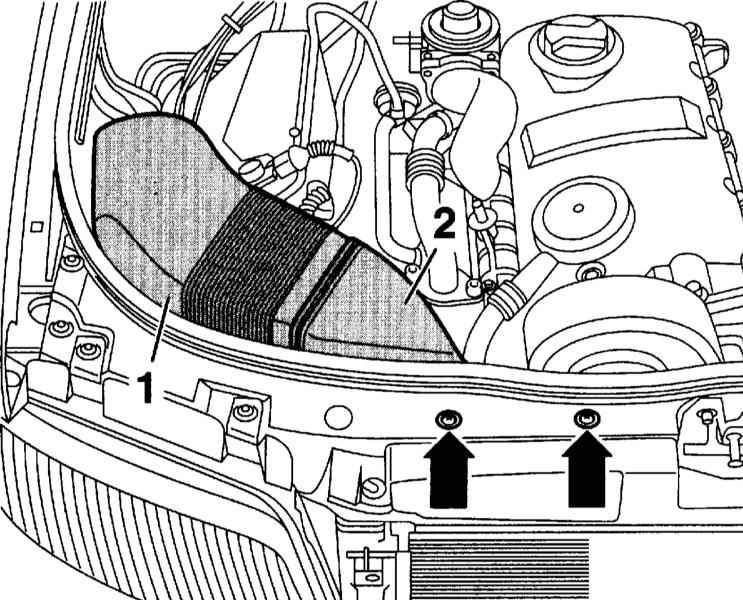
2 . Remove the engine top cover on the left ( 2 ) and right ( 3 ), refer to the illustration at the beginning of the section.
3 . Detach the lower engine cover at the front without removing it. To do this, unscrew only 3 screws.
4 . Remove the front bumper, refer to the relevant section .
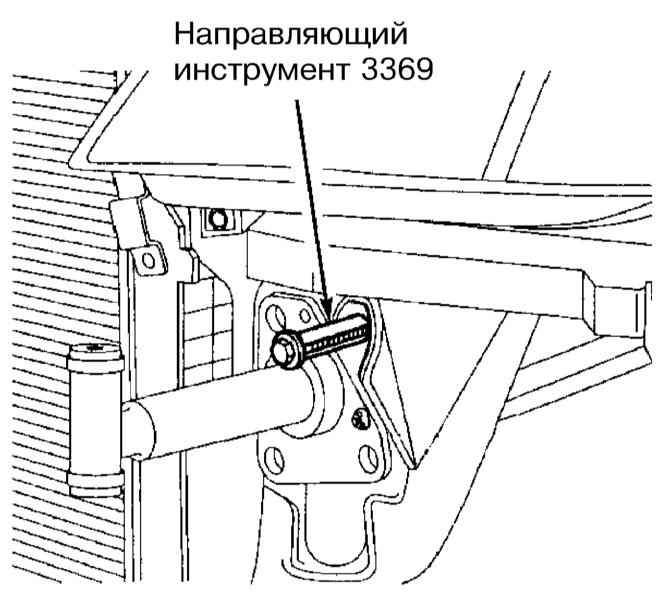
5 . Screw special tool 3369 into the two upper holes on the right and left.
6 . Remove the screws ( 5 ) on the left and right, refer to the illustration at the beginning of the section.
7 . Remove the screws ( 4 ) on the left and right.
8 . Pull the front panel forward so that the rear hole in the panel is covered by the front threaded hole in the fender. In this position, screw the bolt ( arrow ) on the left and right and fix the panel.

The article is missing:
- High-quality repair photos
Source: http://carmanz.com/audi/a4-b6-2000-2004/6619-a4200011-4-1.html#ixzz3csIOIaDX