![CM [2006 - 2010]](/uploads/Hyundai_Santa_Fe_2006-2010_.jpg)
![DM [2012 - 2016]](/uploads/Hyundai_Santa_Fe_2012_-_3.jpg)

- You will need: a “17” key, a “13” socket, engine oil, an oil filter, a cleaning cloth, a container with a capacity of at least 5 liters for drained oil, a special key for the oil filter.
- According to the manufacturer's recommendation, the engine oil should be replaced after 1 year of operation or 15 thousand km. mileage, whichever comes first.
- USEFUL TIPS
- Drain the oil after driving while the engine is still warm. If the engine is cold, start and warm it up to operating temperature.
- Fill with the same brand of oil as the oil that was in the engine. If you still decide to change the brand of oil, flush the lubrication system with flushing oil or oil of the brand that will be used. To do this, after draining the old oil, fill in new oil to the lower mark on the dipstick. Start the engine and let it idle for 10 minutes. Drain the oil and only then change the oil filter. Now you can fill in new oil to the required level (up to the top mark on the dipstick).
- 1. Remove the engine crankcase protection (see "Removing and installing engine crankcase protection and mudguards").
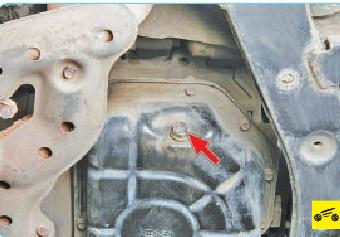
- 2. Clean the drain plug on the oil pan.
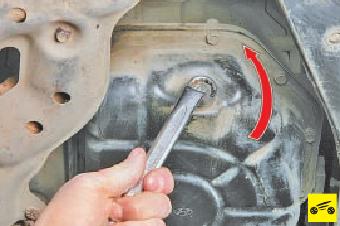
- 3. Unscrew the drain plug, after substituting the container for the drained oil ...
- 4. ... and drain the oil.
- WARNING
- Be careful: the oil is hot.
- 5. Close the cap.
- NOTE
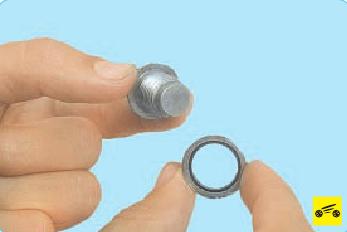
- The plug is sealed with a copper washer. If the washer is heavily compressed, be sure to replace it with a new one.
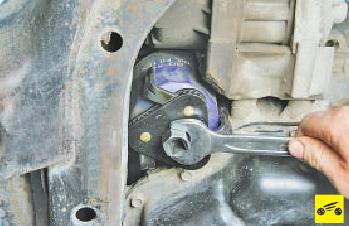
- 6. Remove the oil filter with a special key ...
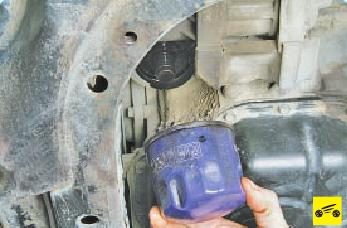
- 7. ... and unscrew it by hand.
- USEFUL ADVICE
- Use a wrench to unscrew the oil filter. If there is no such wrench or similar puller, pierce the filter housing with a screwdriver and, using it as a lever, unscrew the filter. Punch the filter as close to the bottom as possible so as not to damage the fitting. You can also use a strip of coarse sandpaper folded in half, wrapping it around the filter and moving it out of place with your hands.
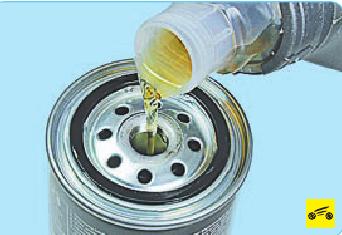
- 8. Fill the new filter approximately 1/3 full with clean engine oil.
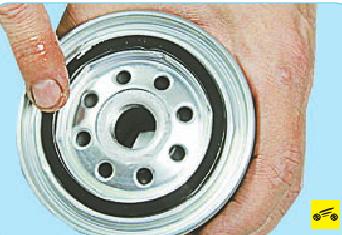
- 9. Lubricate the sealing ring of the new filter with clean engine oil, screw the filter into place (by hand without using a tool) and tighten 3/4 turn from the moment the ring and the flange of the cylinder block come into contact.
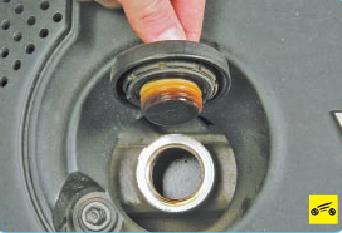
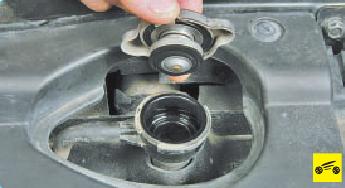
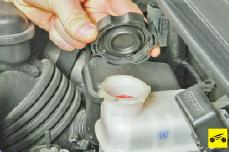
- 10. Remove the oil filler cap
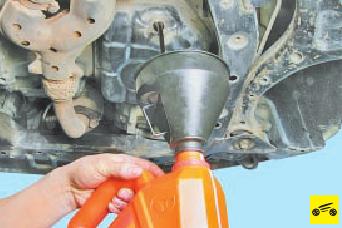
- 11. Fill in clean oil (see "Checking the level and adding oil to the lubrication system"). Reinstall the oil filler cap.
- 12. Start the engine and let it idle for several minutes (the emergency oil pressure drop indicator should go out 2-3 seconds after the engine is started). While the engine is running, check for oil leaks from under the oil filter and drain plug. Stop the engine, check the oil level, add oil if necessary, tighten the plug and filter.
- Source: Hyundai Santa Fe Owner's Manual, Third Rome Publishing House
Removal and installation of the Hyundai Santa Fe adsorber purge solenoid valve
[[ article.getBookmarkIcon() ]]
Instrument
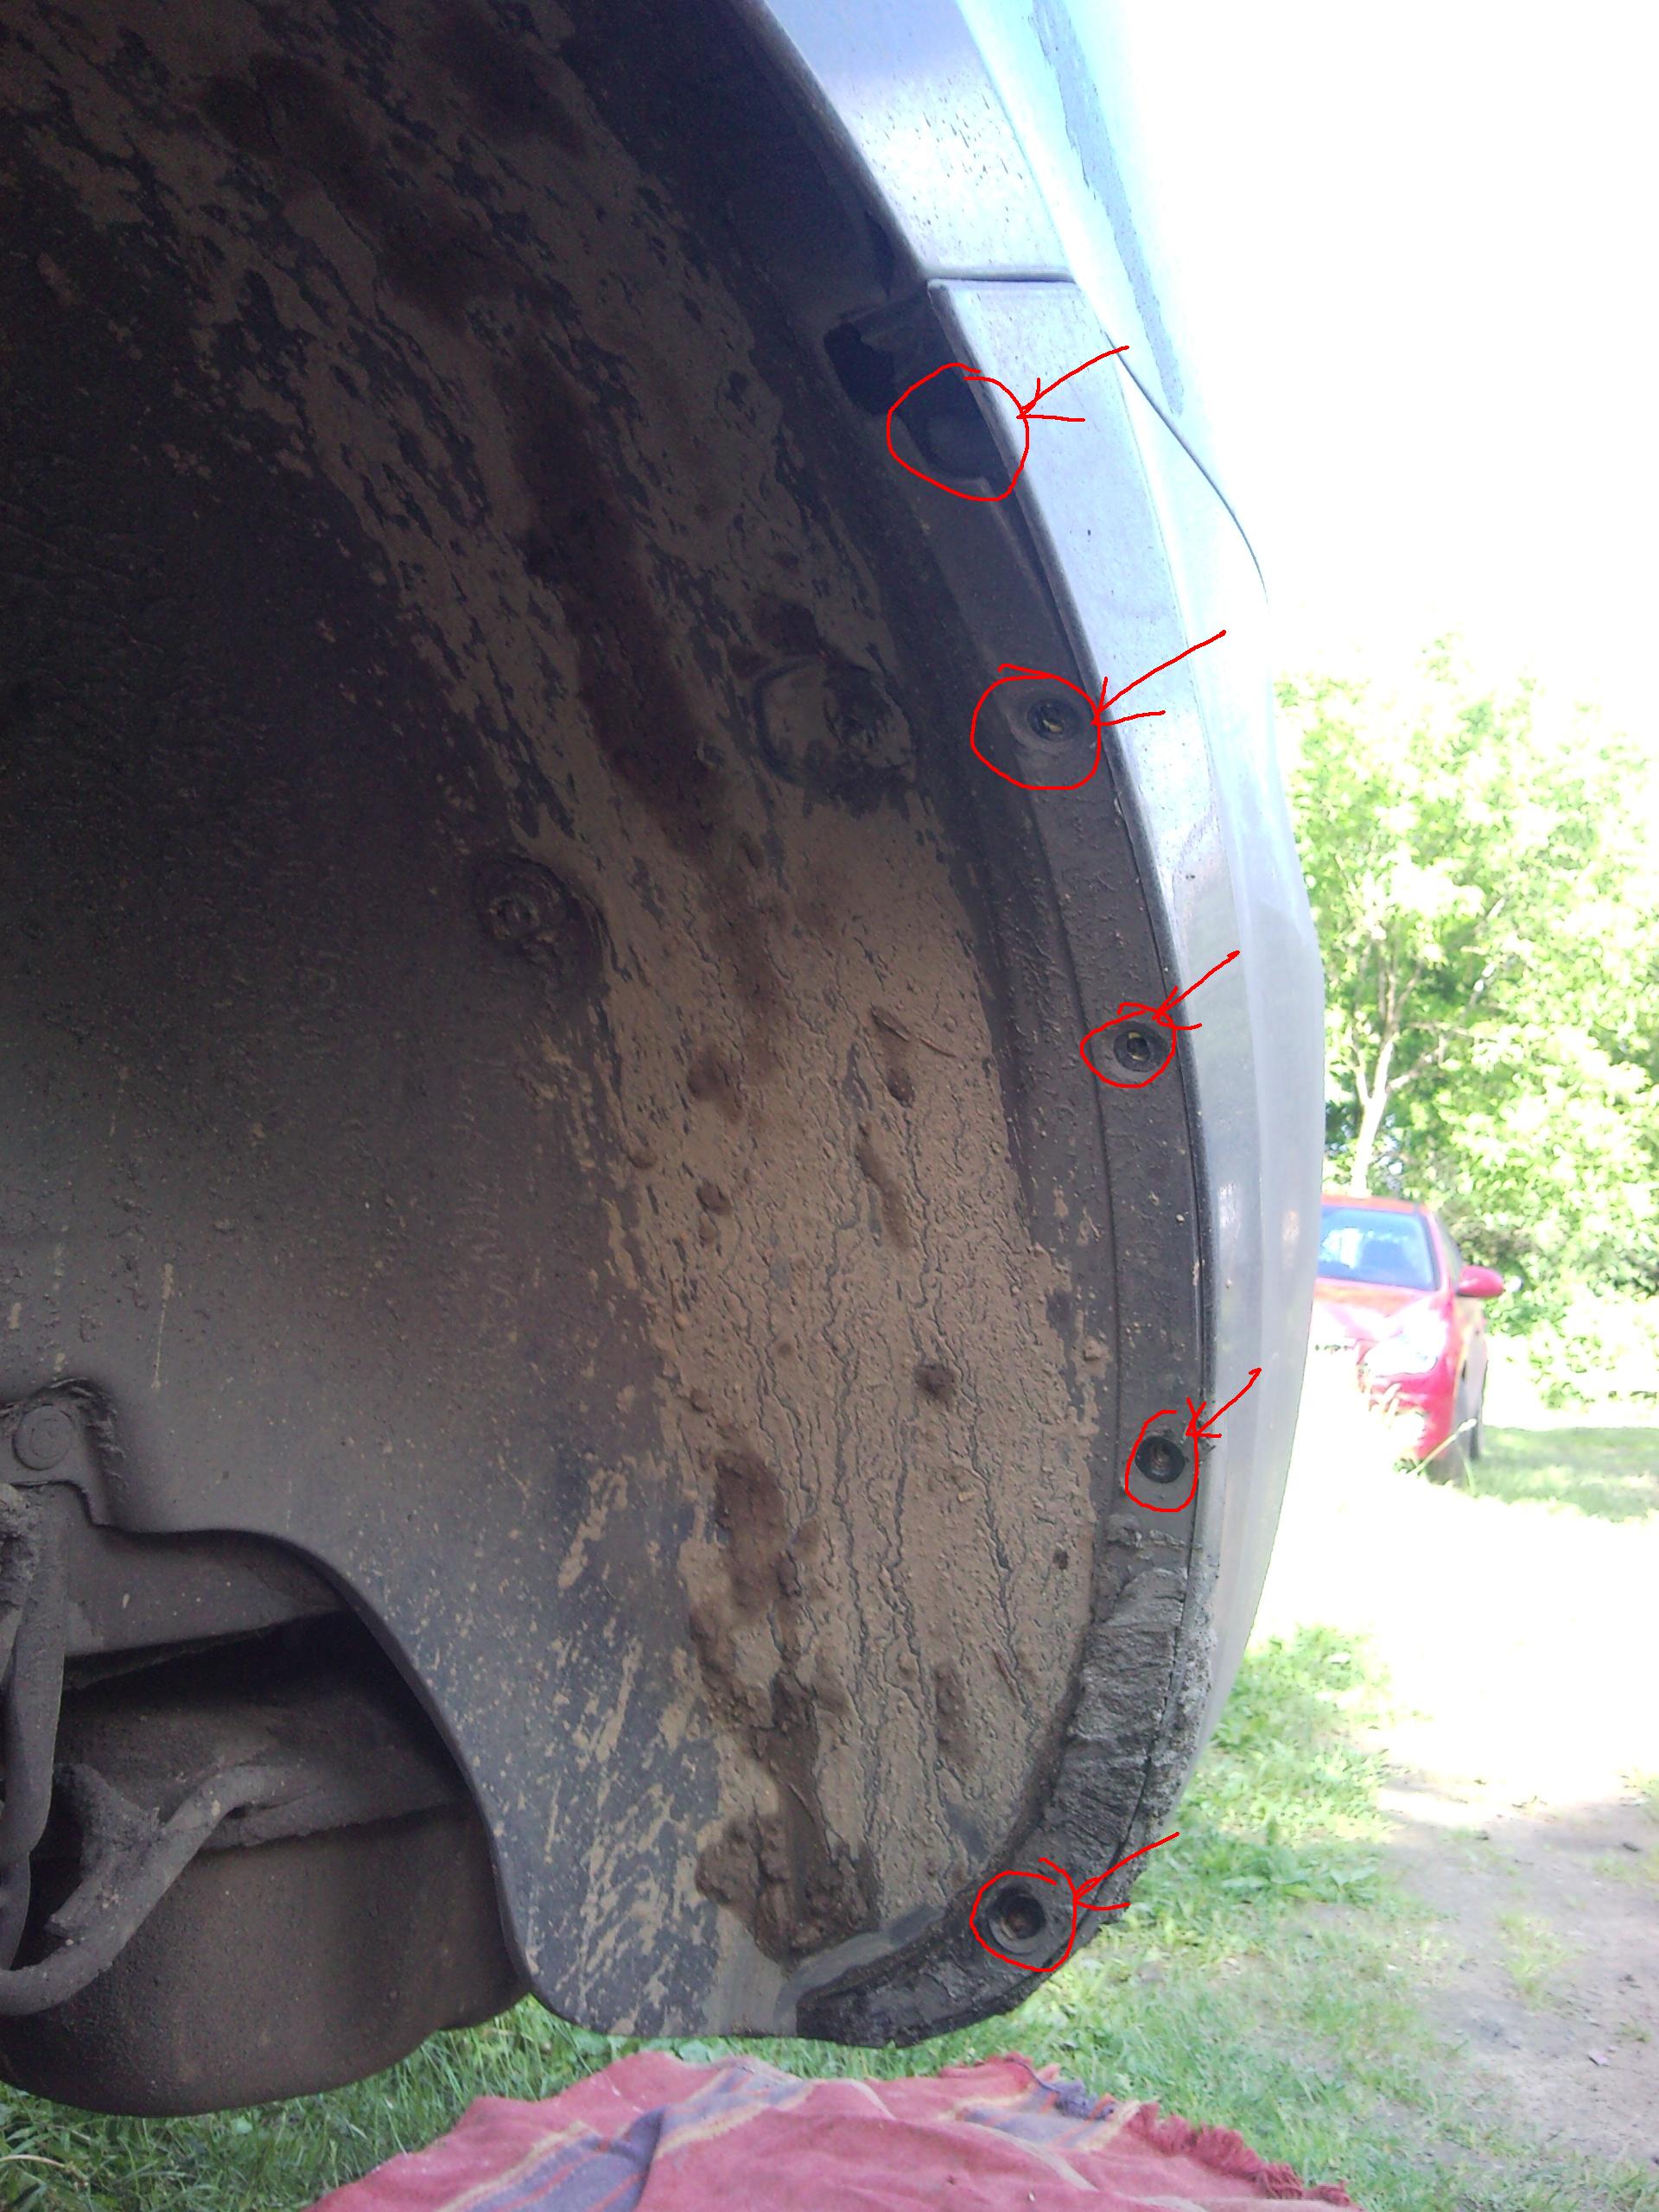
Removing and installing rear bumper Hyundai Santa Fe
1 to 3 hours
[[ article.getBookmarkIcon() ]]
Instrument
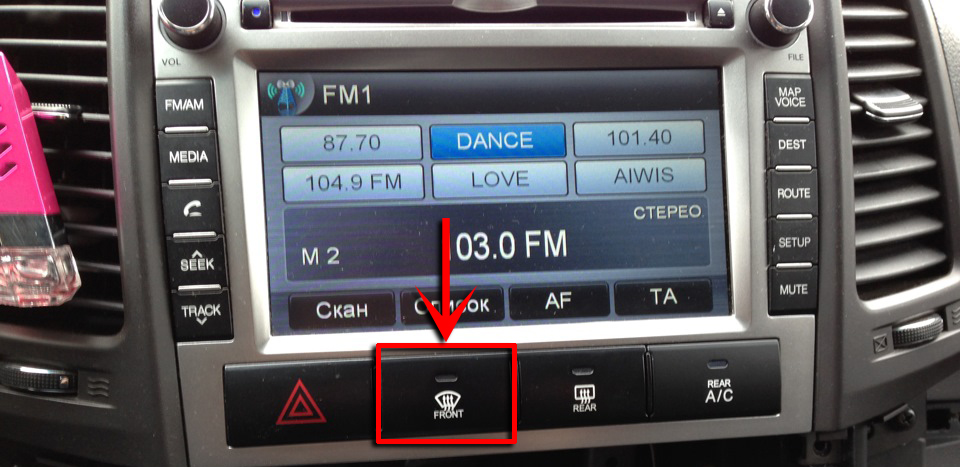
Enabling / disabling the mode of blowing the windshield (windshield) to remove frost and moisture condensation Hyundai Santa Fe CM 2006-2012
5 - 30 minutes
[[ article.getBookmarkIcon() ]]
No tools
Replacement of a brake liquid in a hydrodrive of brakes Hyundai Santa Fe
[[ article.getBookmarkIcon() ]]
Instrument
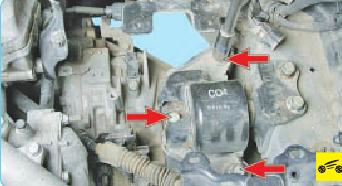
Replacing the left suspension of the Hyundai Santa Fe power unit
[[ article.getBookmarkIcon() ]]
Instrument
Removal and installation of the scenes of the selector control of the automatic transmission Hyundai Santa Fe
[[ article.getBookmarkIcon() ]]
Instrument
Adjusting the parking brake actuator (handbrake) Hyundai Santa Fe CM 2006-2012
[[ article.getBookmarkIcon() ]]
Removing and installing steering knuckle Hyundai Santa Fe
[[ article.getBookmarkIcon() ]]
Instrument