![2 generation [2004 - 2008]](/uploads/Ford_Focus_2_2004_-_2008_.jpg)
![3 generation [2011 - 2017]](/uploads/Ford_Focus_3_2011-2015_.jpg)


Tools:
- Straight spanner wrench for 17
- Straight ring wrench for 10
- socket wrench
- socket for socket wrench 10
- adjustable wrench
- pliers
- Nozzle on the crank 10 mm
- Nozzle on the crank 15 mm
- Collar for end nozzle
- Open-end wrench 10 mm
- Screwdriver flat medium
Parts and consumables:
- Coolant drain container
- Thermostat assembly
- New drive belt
- rags
- Cloth gloves
- sealant
- Funnel
The content of the article:
- Details of the cooling system (view from the left side of the Ford Focus 2 engine)
- Ford Focus 2 engine types used
- The specifics of the design of the cooling system and the location of the thermostat on Ford Focus 2 models
- Types of thermostats
- Signs of a failed thermostat
- Thermostat Malfunction Check
- Replacing a faulty thermostat with belt removal on a 1.6 l (100 hp) engine
- Video of replacing the thermostat Ford Focus 2 1.6 l. (100 HP)
- Replacing a faulty electronic thermostat on a Ti-VCT motor (1.6., 115 hp)
- Tips for saving money when buying a thermostat
- Eliminate error display
- Replacement of a faulty thermal thermostat of power plants for 1.8 and 2.0 liters
- Video of replacing the thermostat Ford Focus 2 1.8 l.
- Features of choosing a thermostat
Notes:
We recommend that all work be carried out on a cold engine.
In this article we will talk about replacing the thermostat on Ford Focus 2 cars with 1.6, 1.8, 2.0 liter engines . We will also show how you can save money by replacing an electronic type thermostat.
The Ford Focus 2 is considered one of the most sought-after models in the compact class. Several body options and a large number of power plants influenced the good demand for cars both in Russia and abroad. All types of engines are of today's classic configuration (4-cylinder, transverse, injection power system and liquid cooling system).
Details of the cooling system (view from the left side of the Ford Focus 2 engine ):
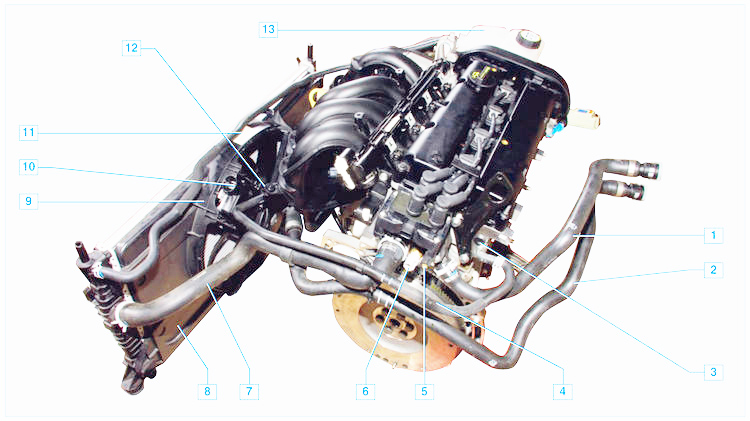
1 - inlet hose of the heater radiator;
2 - outlet hose of the heater radiator;
3 — a branch pipe of a head of the block of cylinders;
4 — a hose of liquid removal from a head of the block of cylinders;
5 - outlet pipe of the cooling system;
6 - coolant temperature sensor;
7 - radiator inlet hose;
8 - radiator;
9 — a casing of the fan of the cooling system;
10 - electronic impeller speed controller;
11 - steam outlet hose of the radiator;
12 - fan of the cooling system with an impeller;
13 - expansion tank.
Ford Focus 2 cooling system - closed type, liquid, two-ring with forced circulation. Includes the following elements:
- expansion tank;
- coolant pump;
- engine cooling jacket;
- thermostat;
- connecting hoses;
- temperature sensor for coolant and radiator with electric fan.
The heater core is connected to the system.
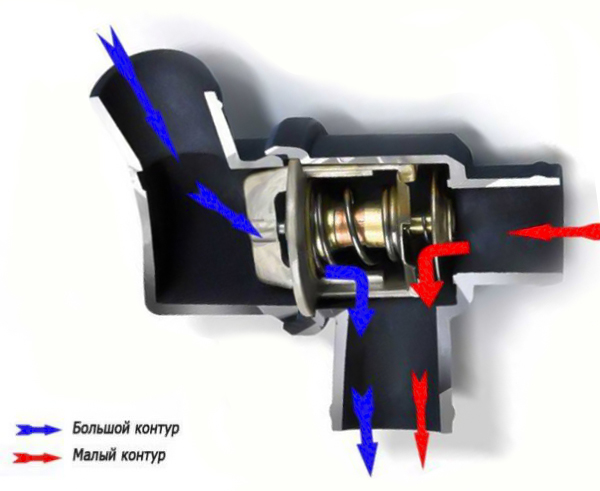
The antifreeze moves in a small circle that excludes the radiator until it reaches the required temperature. Further, the coolant moves already in a large circle, which also connects the radiator.
The thermostat is responsible for separating the movement of antifreeze into small and large circles. It is a key element of the entire cooling system. The thermostat allows the power plant to reach the desired operating temperature as quickly as possible and maintain it in the desired range.
If the thermostat fails, the standard engine temperature will not be observed, and this, as a result, will adversely affect its operation and maintaining a comfortable temperature in the car.
The thermostat itself, as an element, does not belong to the repair, and, if its functions are not fulfilled, it is simply replaced.
Used engine typesFord Focus 2
Previously, this car was equipped with different power plants, but only models with certain engines were on sale.
In Russia, the Ford Focus 2 was available with Duratec gasoline engines. In total there were four options for the working volume:
- 1.4 l. (80 HP);
- 1.6 l;
- 1.8 l. (125 hp);
- 2.0 l. (145 hp).
As for the 1.6-liter engines, there were two modifications:
- Normal (from 100 hp);
- Ti-VCT (115 hp).
A diesel unit was also produced - a 1.8-liter (115 hp). In fact, Ford Focus 2 had more power units, but other versions almost did not enter the Russian market.
The specifics of the design of the cooling system and the location of the thermostat on Ford Focus 2 models
For all Duratec gasoline engines, the thermostat is located in the middle right side of the cylinder block on the radiator side, but it is practically invisible (it closes the installed other equipment).

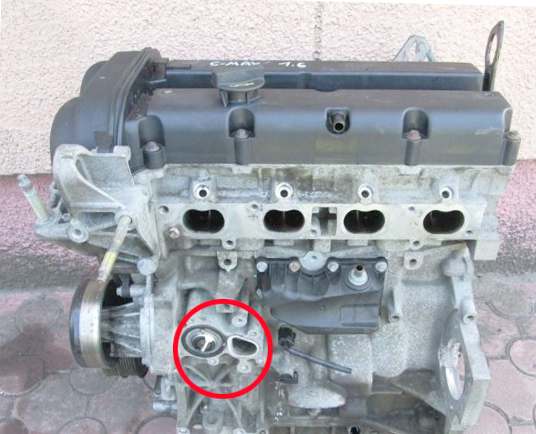
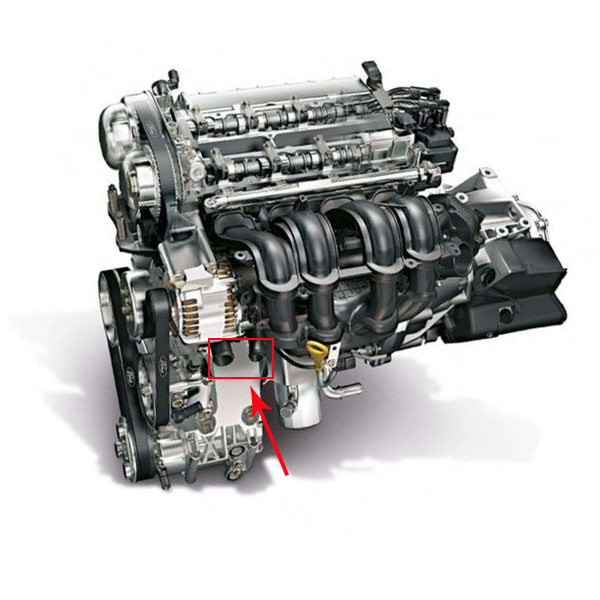
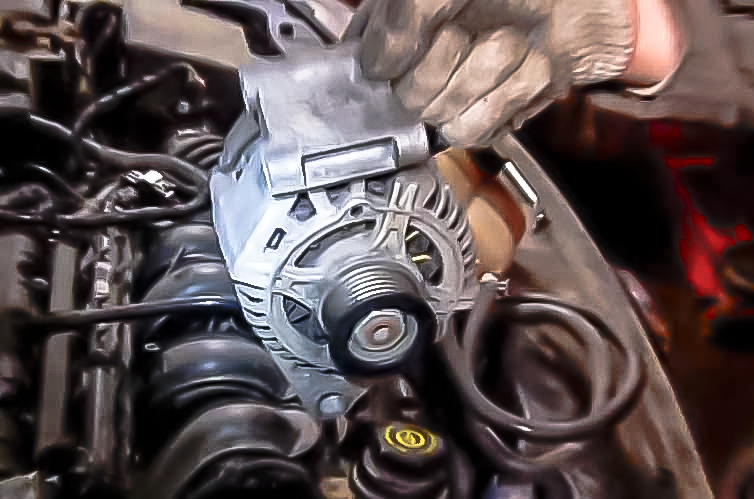
For 1.4 and 1.6-liter engines, the thermostat housing is located under the generator and intake manifold. To see it, you will have to dismantle one of the elements.
In 1.8 and 2.0-liter engines, the generator is located at the bottom of the power unit, and not at the top, and the tension roller hides access to the thermostat housing. To get to the place where the thermostat is located, you will have to dismantle the roller.
Types of thermostats
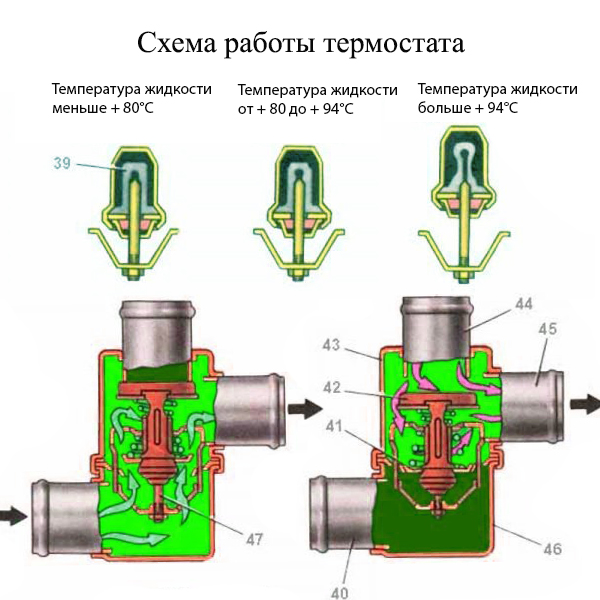
Almost all engines of the Ford Focus 2 car are equipped with ordinary thermal elements with a special filler. When the filler begins to heat up, it expands. In the process, the rod moves and the channel leading to the radiator opens.
Such a thermostat works independently, and only temperature is important for its functioning. The body of the element is usually made of non-ferrous metals. If the rod is oxidized during active interaction with antifreeze, then the thermostat can jam in one position.
In a pre-styling car with a Ti-VCT engine, an electronic type of thermostat was installed. Its control was carried out from the electronic control unit. This design affected the more intense heating of the power plant, since the entire process was controlled by the ECU.
Such a thermostat had a more difficult mechanism, so it often failed. In addition, it costs much more than a conventional element model. But, as practice has shown, it is quite possible to change the electronic thermostat to a regular one, and it will also work fine.
Signs of a malfunctioning thermostat
- Unstable temperature conditions of the engine: overheating or insufficient heating;
- Corrosion inside the radiator;
- Poor quality coolant or its untimely replacement.
Checking the thermostat malfunction
Start a cold engine. With a working element, the main valve is in the closed position, and the spare valve is in the open position. The coolant circulates in a "small" circle, avoiding the radiator of the cooling system. Consequently, the outlet inlet radiator hoses will be cold when touched.
When the antifreeze temperature reaches 60 ° C, the process of active heating of the hose starts, which indicates the beginning of the circulation of the liquid in a large circle. If heating does not occur, replace the thermostat with a new one.
Replacing a faulty thermostat with belt removal on a 1.6 l (100 hp) engine
The alternator belt on this model does not have an automatic tensioner. If you need to replace one belt, then all manipulations will take place at the expense of the generator and its fastening.
Work order:
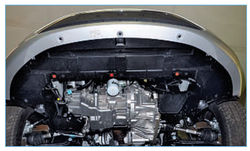
1. If possible, put the car on a viewing hole, and turn off the engine.
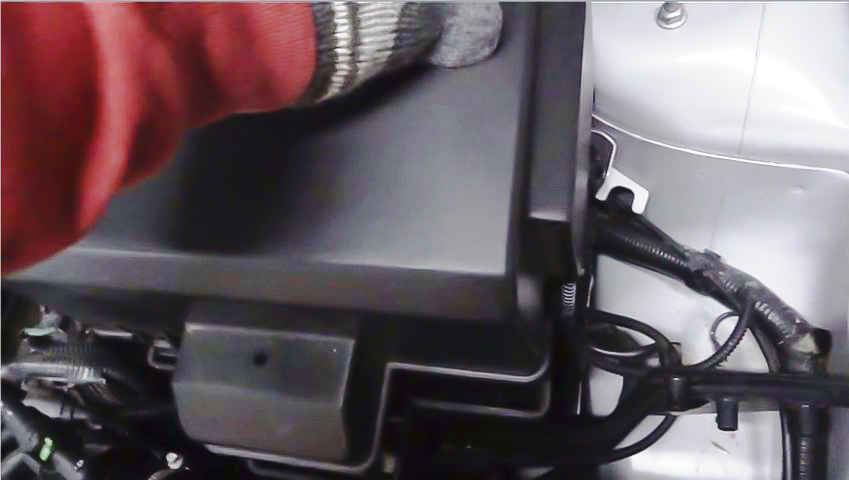
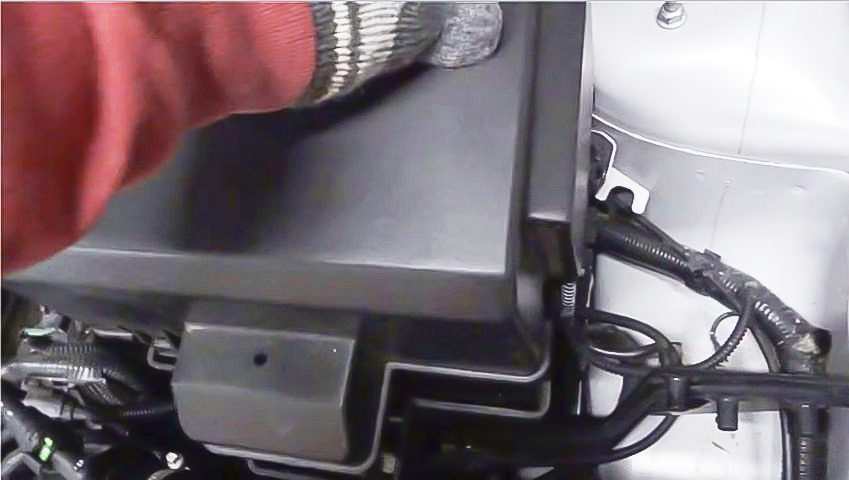
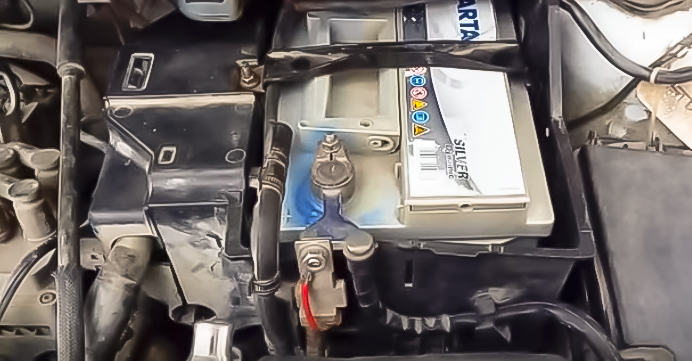
2. Remove the protective cover from the battery.
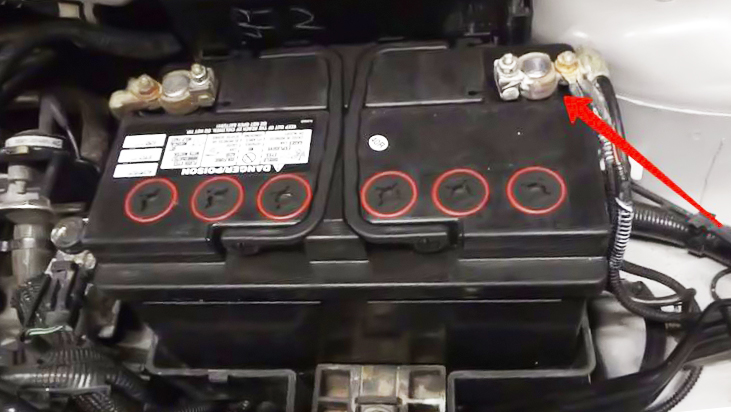
3. Use a 10 spanner to remove the negative terminal from the battery.
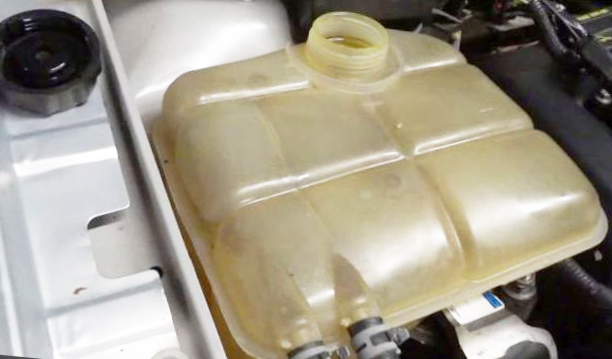
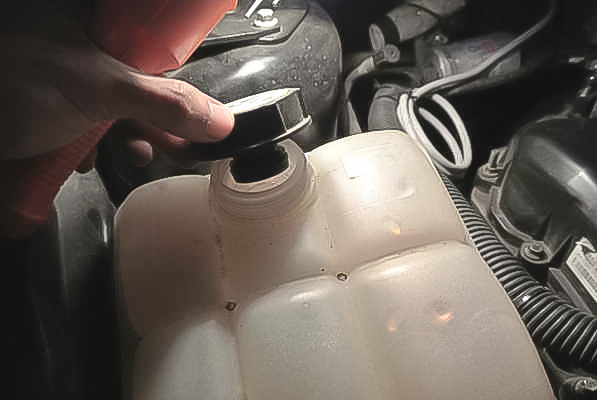
4. Relieve the pressure in the cooling system by unscrewing the plug of the expansion tank.
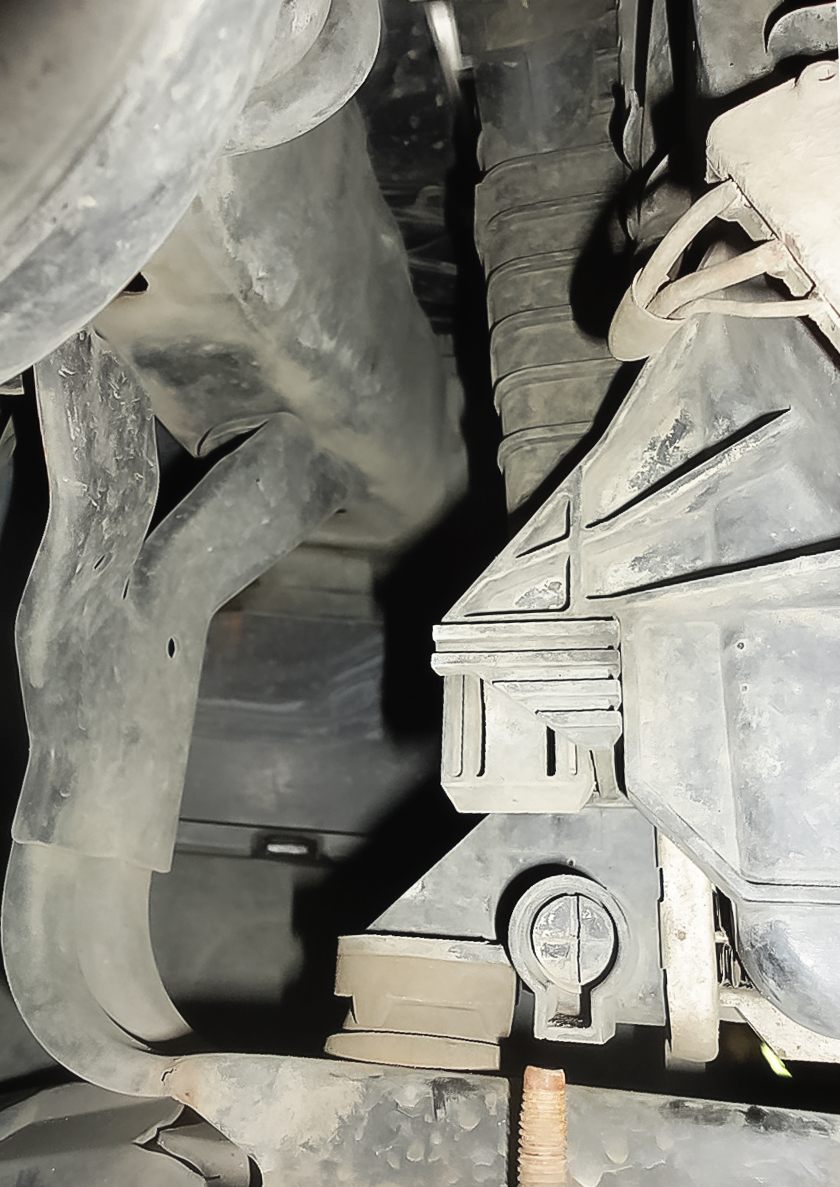
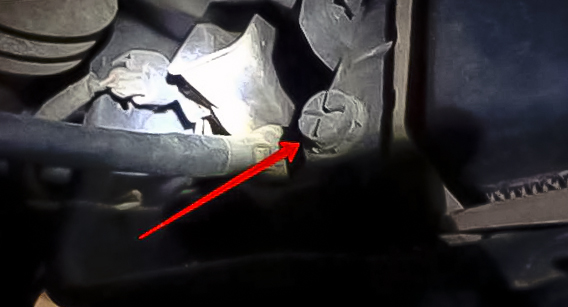
5. Take a screwdriver with a wide slot and unscrew the drain plug at the bottom of the radiator.
6. Place any suitable container under the radiator and wait for the coolant to drain completely.
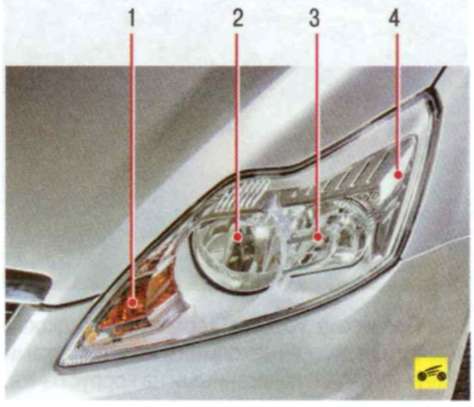
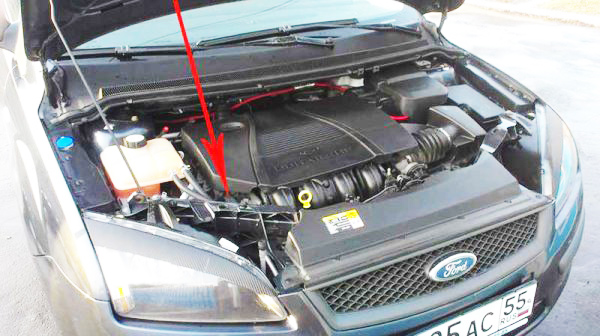
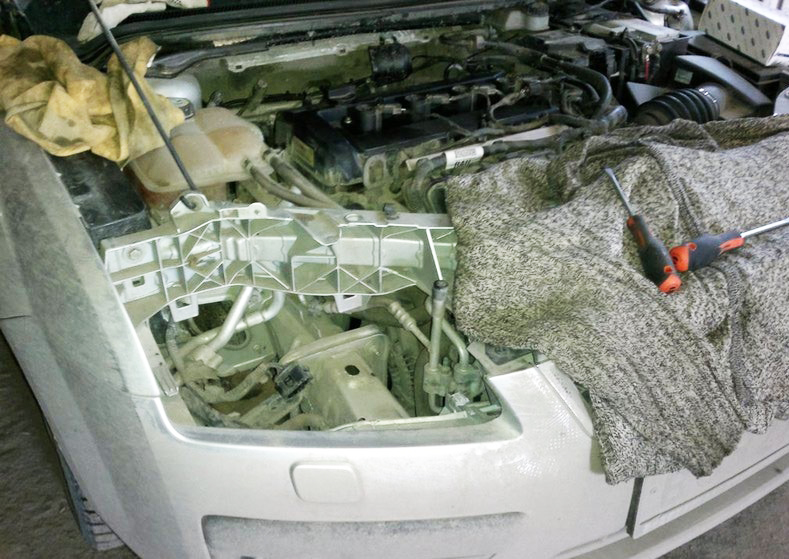
7. Return to the engine compartment. Remove the right headlight.
Unscrew one screw and pull it yourself.
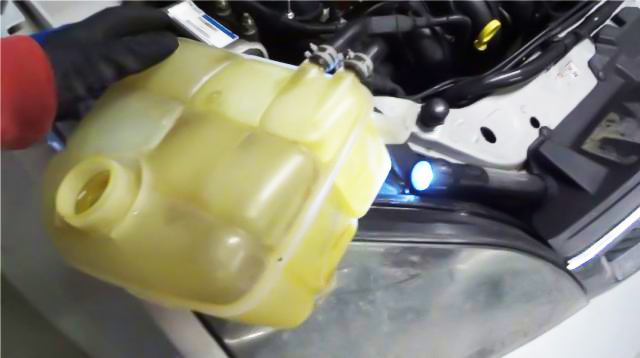
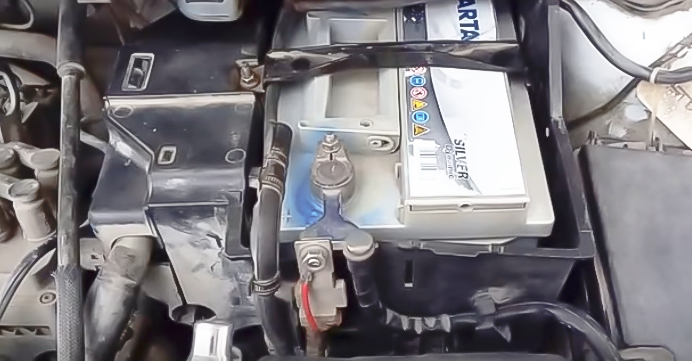
8. Turn off bolts of fastening of a broad tank of system of cooling and move it aside.
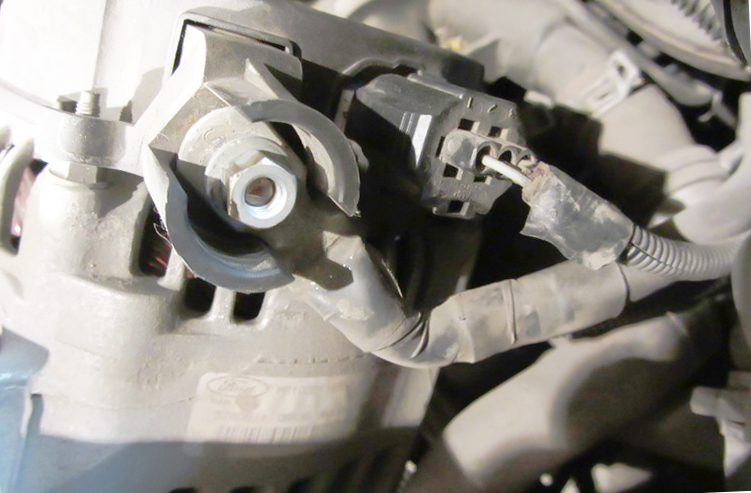
9. Disconnect the terminal and connector from the generator.
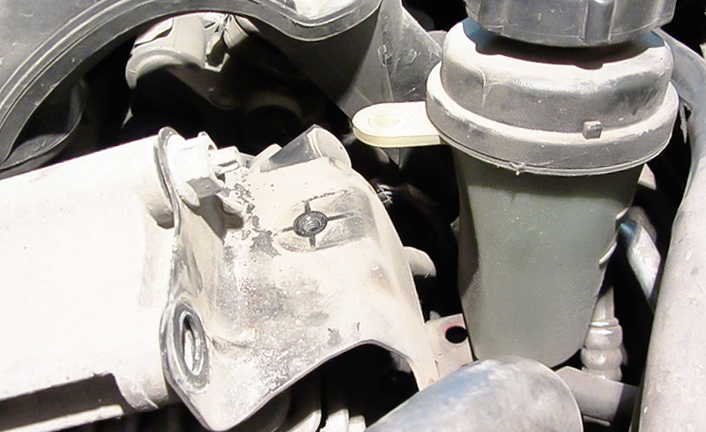
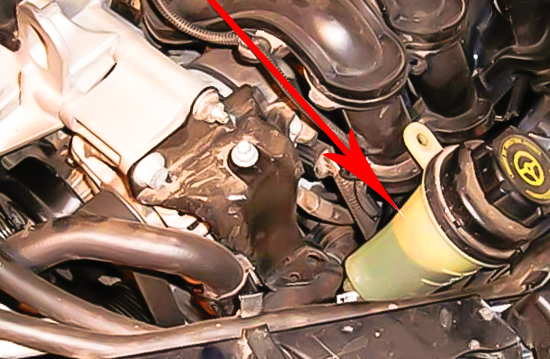
10. With a head of 8, unscrew the bolt securing the expansion tank of the power steering and remove it to the side.
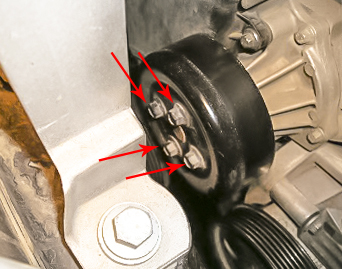
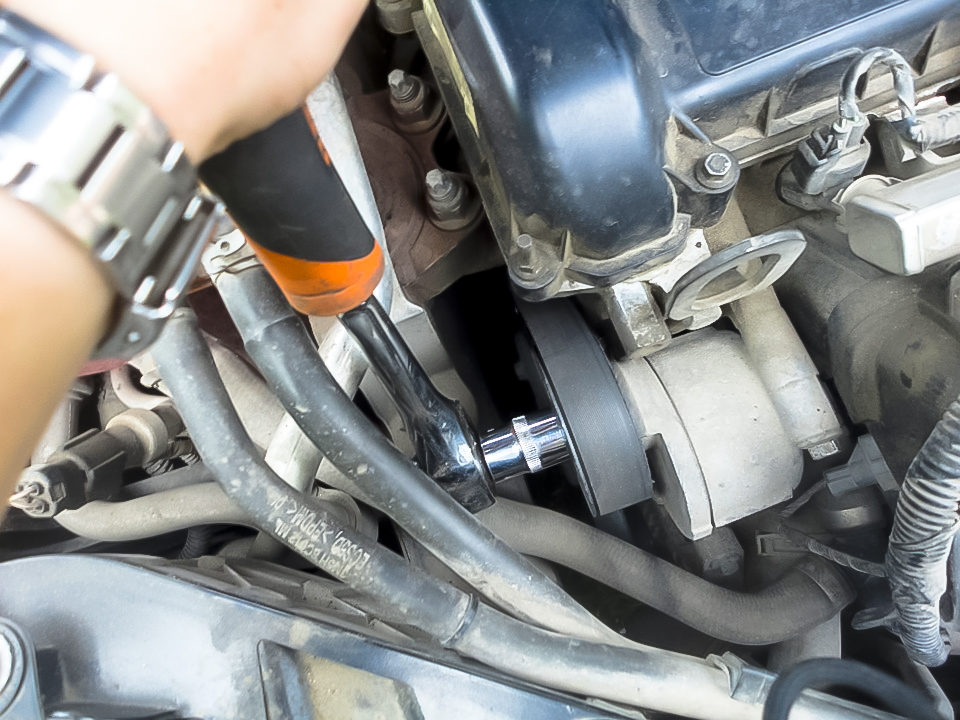
11. Unscrew the 3 bolts securing the pump pulley, and let the 4th one go. The pulley should go to the side and loosen the belt tension.
12. With a head of 15, unscrew the bolt of the lower mounting of the generator.
13. Remove the belt from the generator.
14. With a head of 15, unscrew the bolt and nut of the top fastening of the generator.
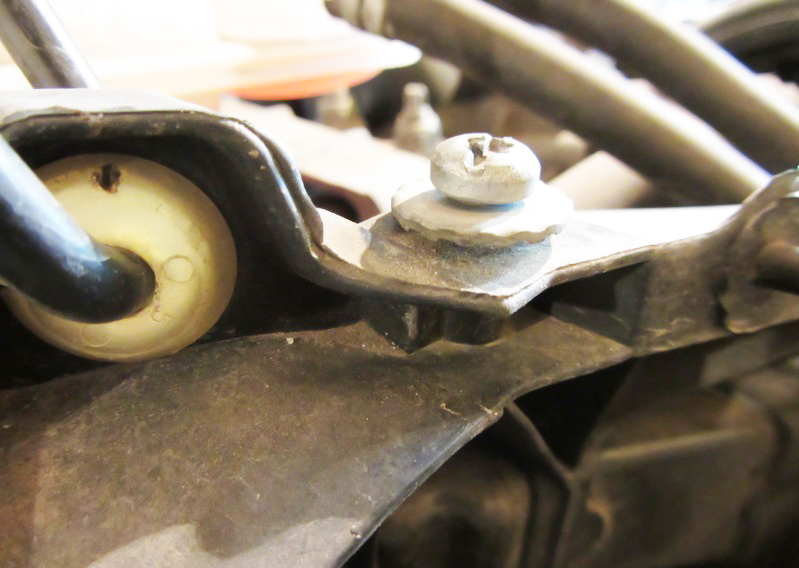
15. Get a bolt, and remove an arm of a reservoir of the hydraulic booster.
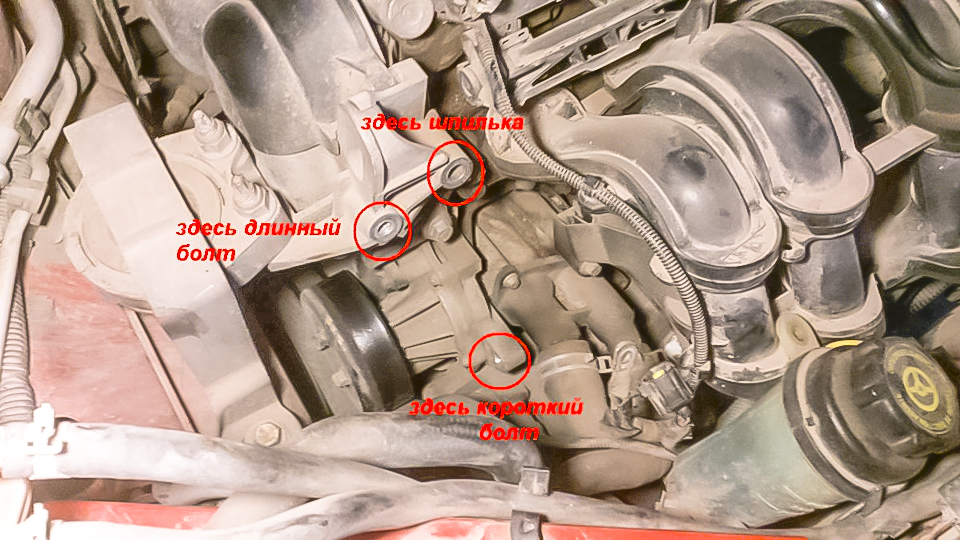
16. Remove the generator from the stud.
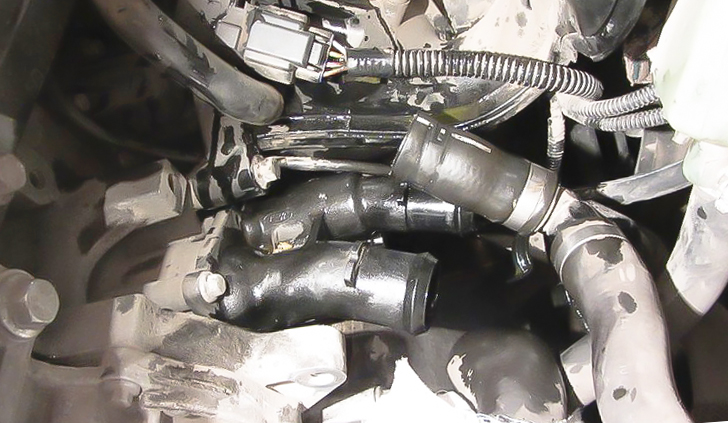
17. Using pliers, disconnect the clamps for fastening the pipes that fit the body. Take them off.
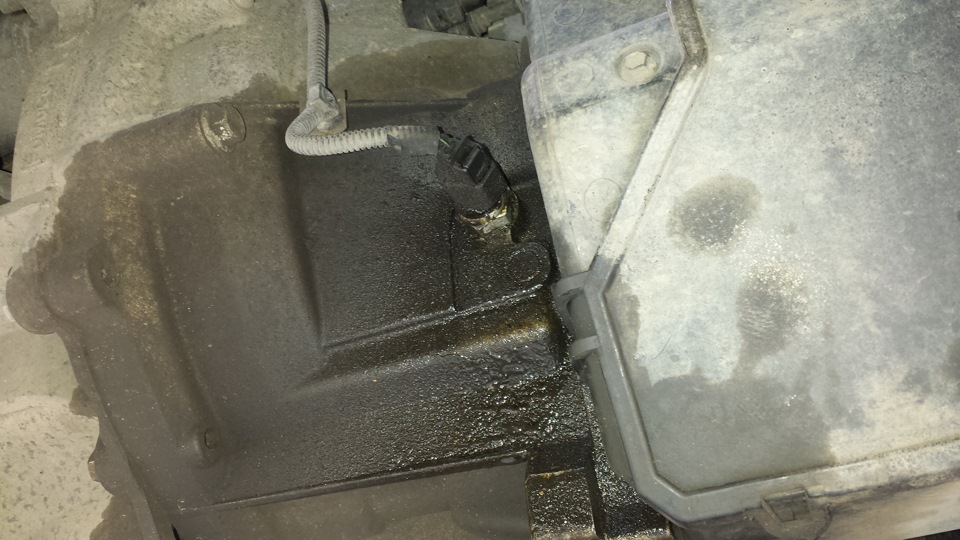
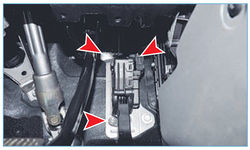
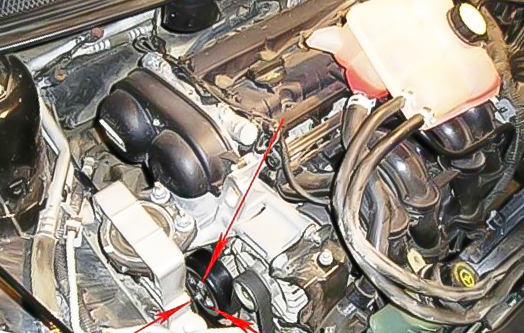
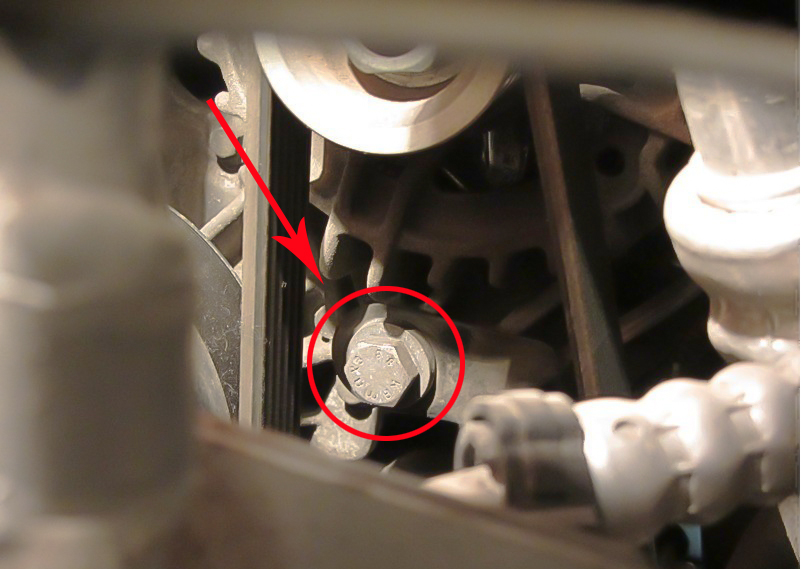
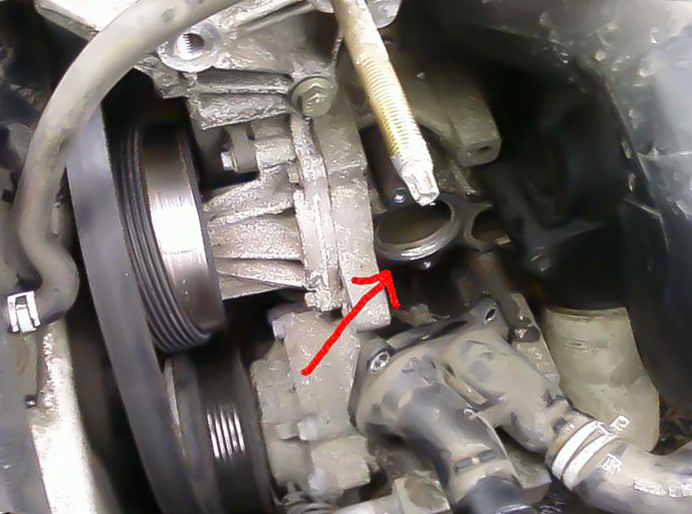
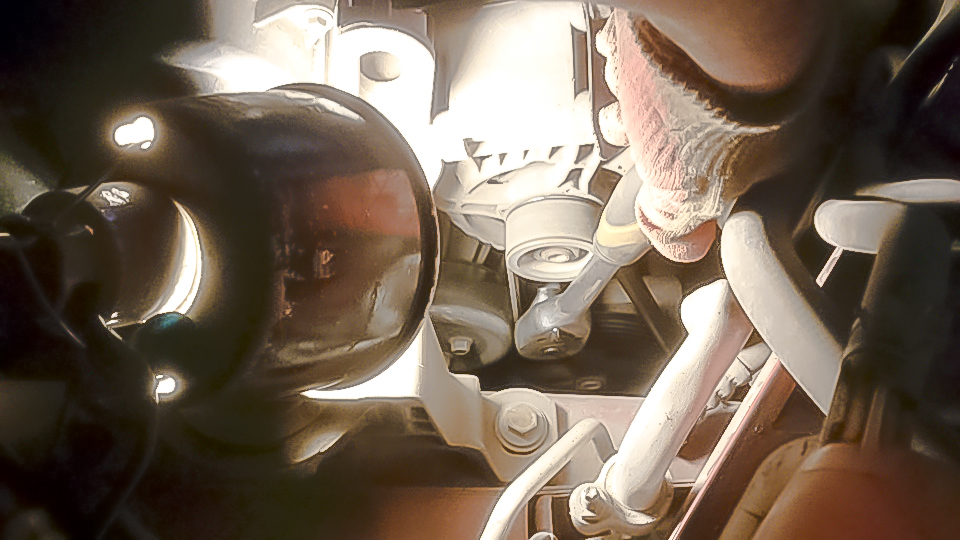
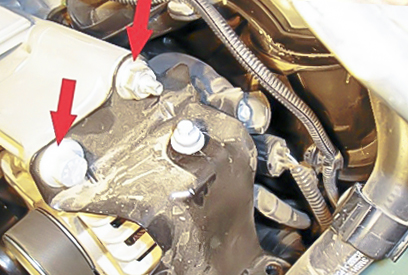
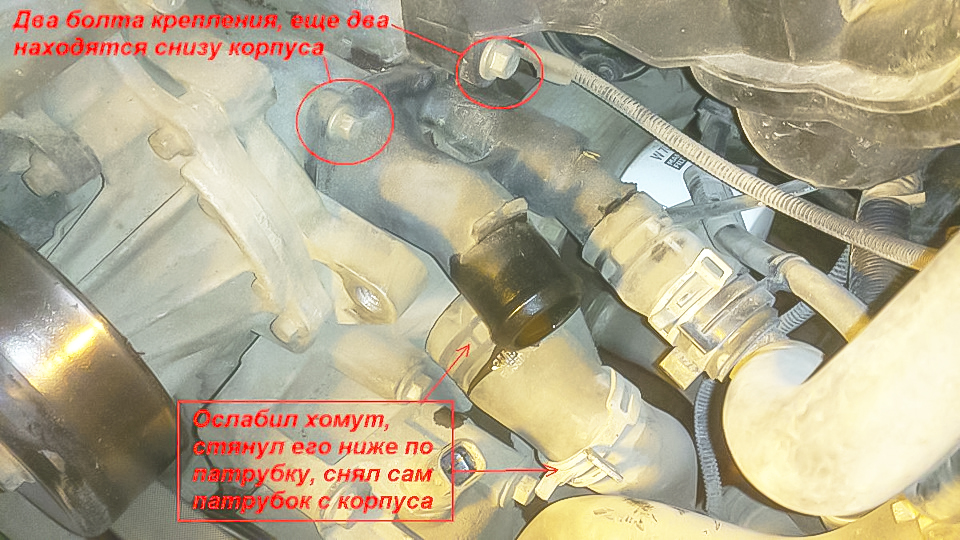
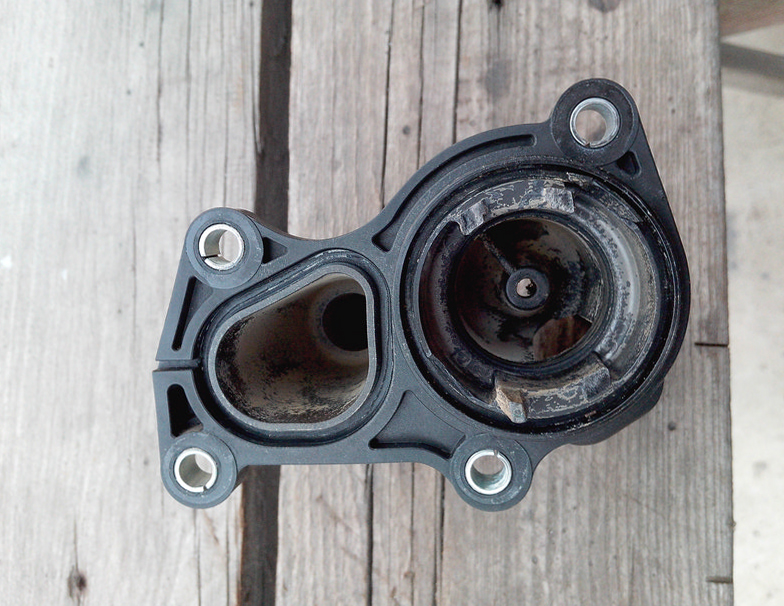
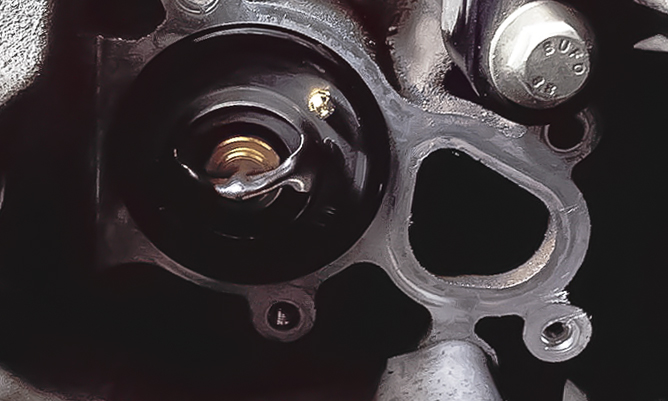
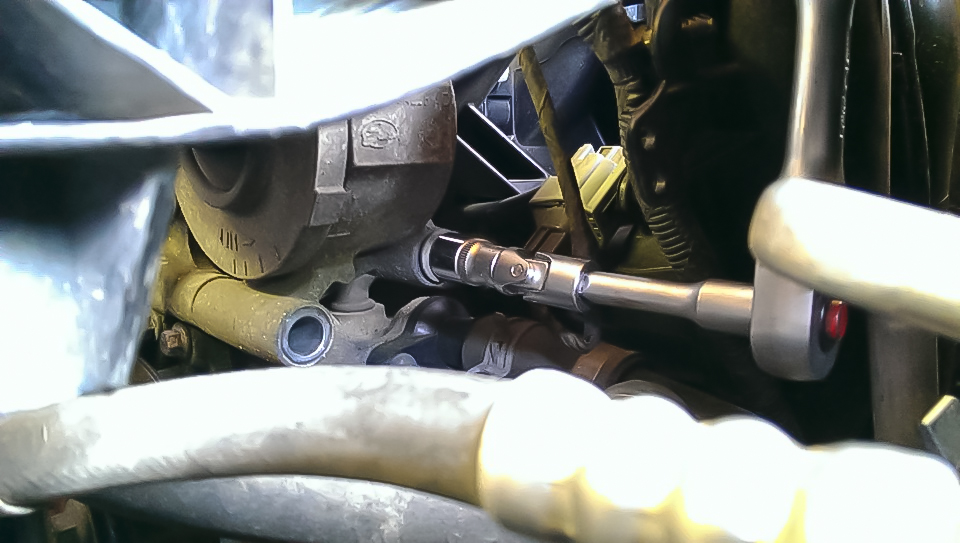
18. The thermostat housing is attached to the engine with four bolts, two of which are located on top (access to them is more open), and two more - from the bottom. With an 8 or 10 head (with a 10 cm extension), unscrew the 4 bolts securing the thermostat housing.

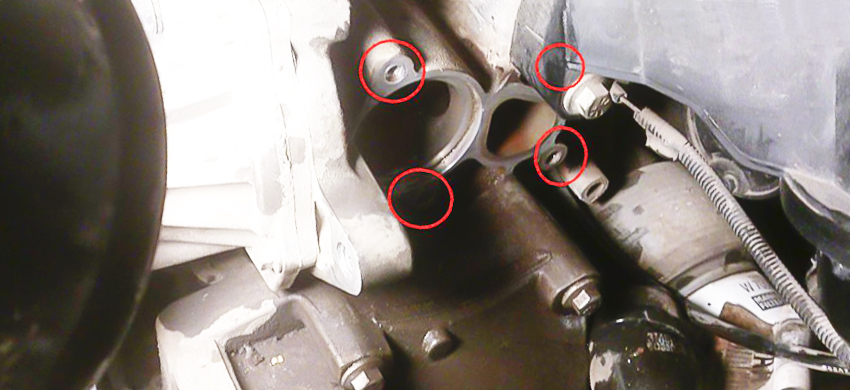
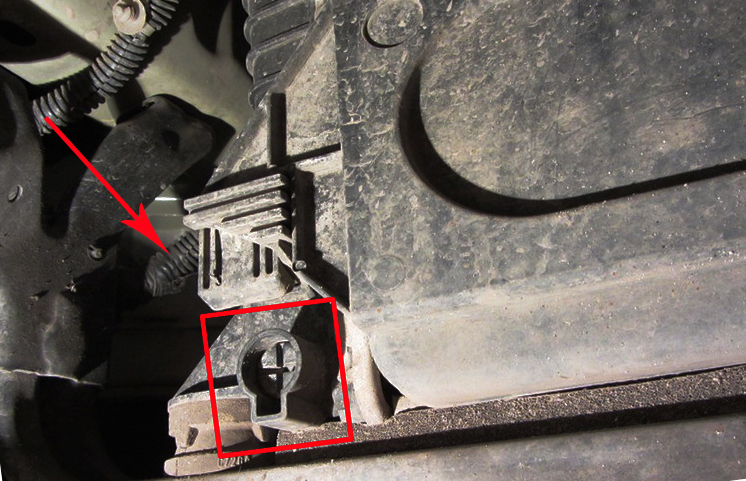
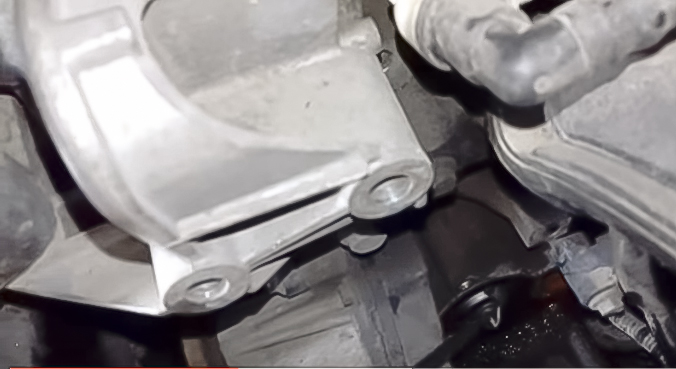
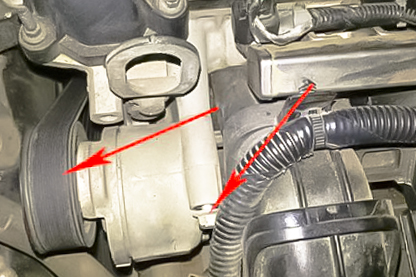
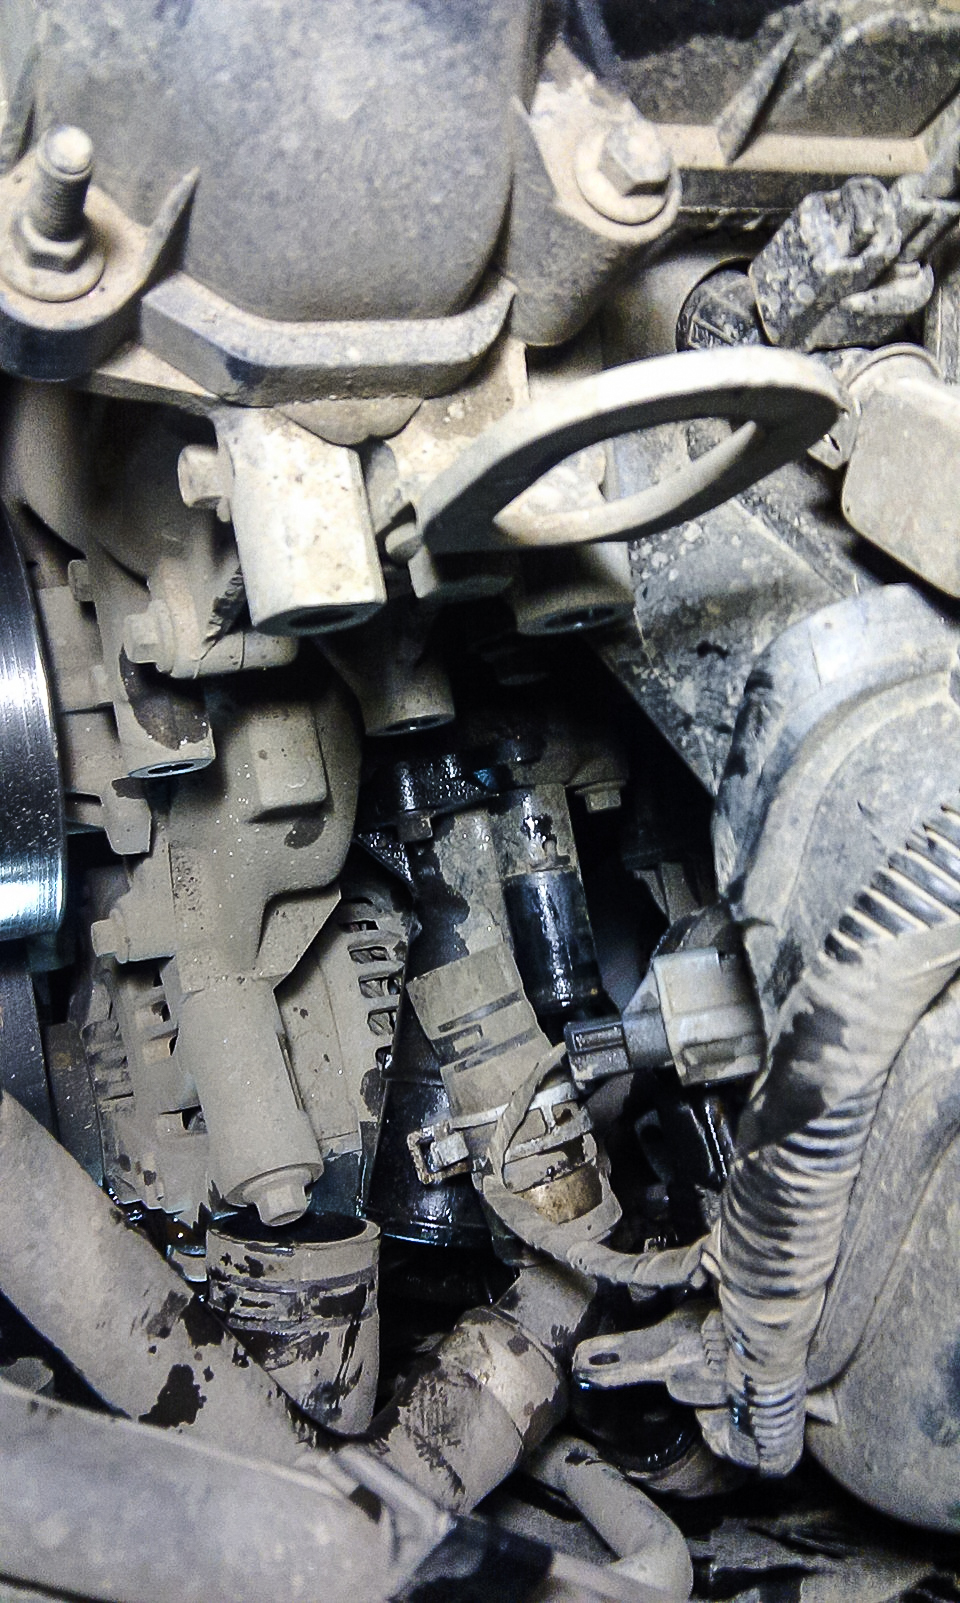
Mounting points of the housing to the engine block
19. Remove the defective thermostat and replace with a new one.
20. Install a new thermostat and reassemble everything in reverse order.
21. Put the belt on the generator, return the pump pulley to its original position. To do this, with a head of 18 and a bolt for fastening the drive of additional units, turn the crankshaft a little. He will pull the belt behind him and sit down in the place where it passes along the pump pulley. This will allow you to start the pulley mounting bolts and tighten them. In this way, it will be possible to replace the thermostat and save the belt intact, which will allow it to continue to do its job.
Video of replacing the thermostat Ford Focus 2 1.6 l. (100 HP)
Replacing a faulty electronic thermostat on the Ti-VCT motor (1.6., 115 hp)
Work order:
1. If possible, put the car on a viewing hole, and turn off the engine.
2. Remove the protective cover from the battery.
3. Use a 10 spanner to remove the negative terminal from the battery.
4. Relieve the pressure in the cooling system by unscrewing the plug of the expansion tank. Examine its usefulness and performance.

5. Next, you need to drain the coolant. Take a screwdriver with a wide slot and unscrew the drain plug at the bottom of the radiator.
6. Place any suitable container under the radiator and wait for the coolant to drain completely.
Useful advice:
To drain the coolant at a slower rate, close the cap on the expansion tank. After the liquid has drained completely, unscrew it again.
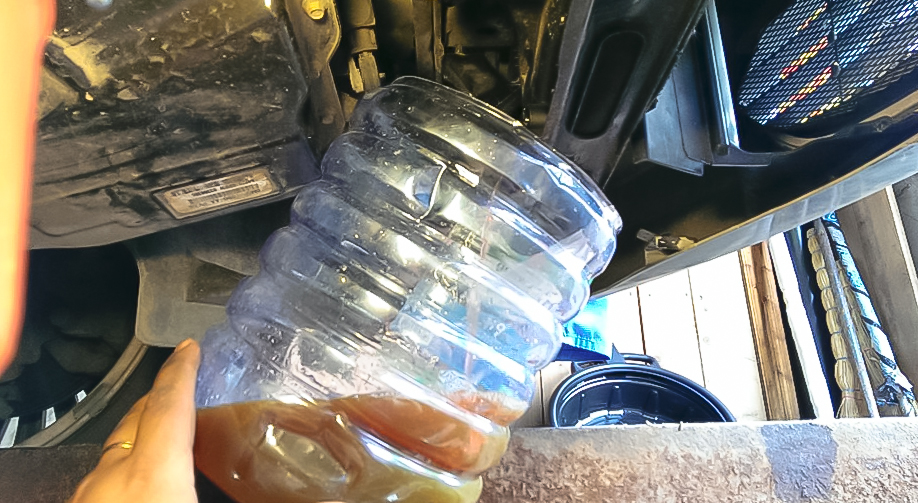
Note:
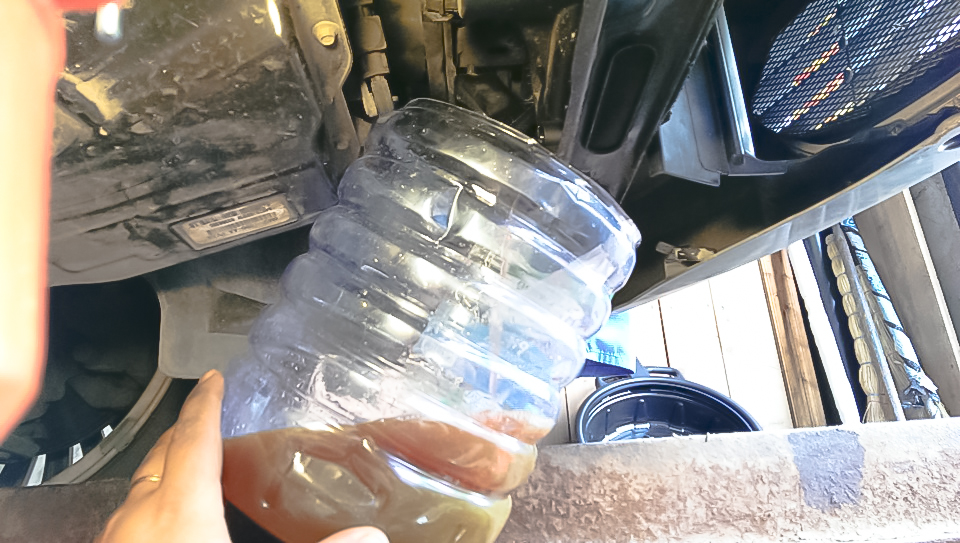
Antifreeze is deadly poisonous to all living things. Therefore, in order not to pollute the environment, drain it from the radiator through a funnel (as an option, you can make it yourself from a plastic soda bottle).
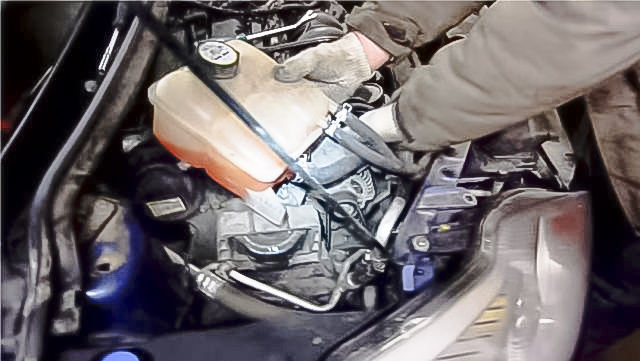
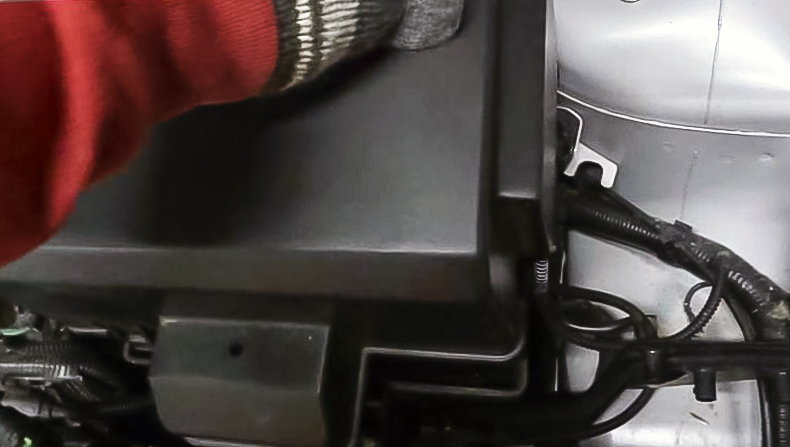
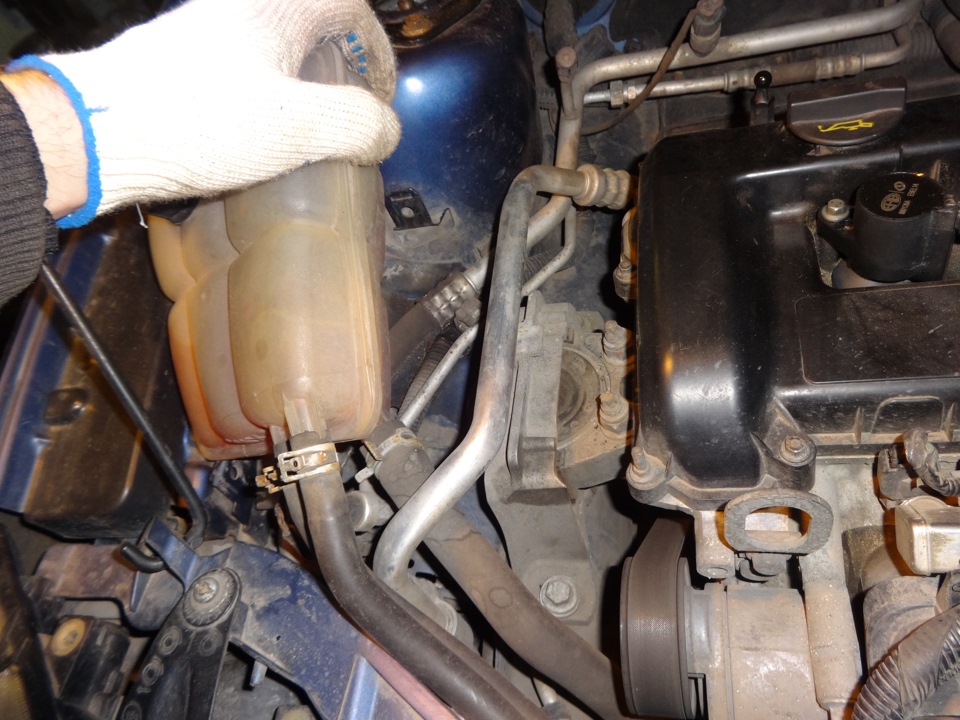
7. Return to the engine compartment and unscrew the bolts securing the expansion tank of the cooling system. Without turning it off, move it to the side.
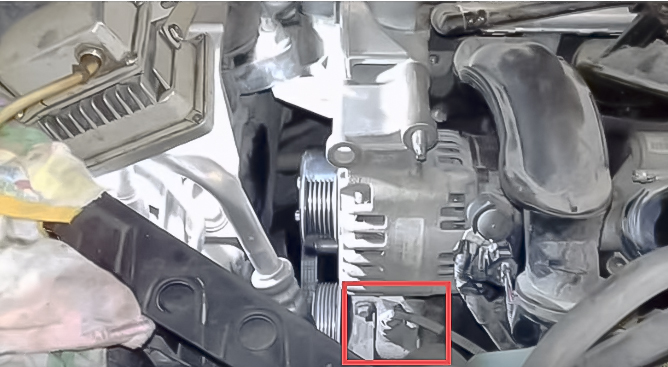
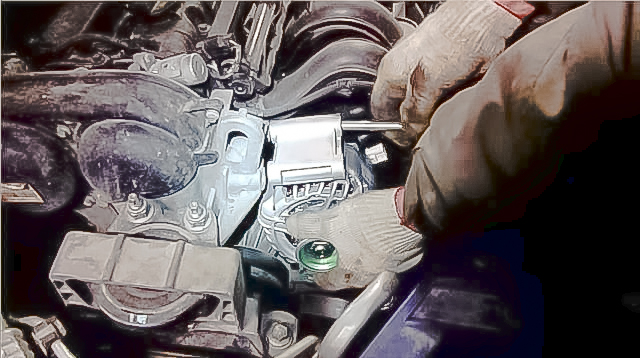
8. To get to the thermostat housing, you first need to remove the alternator. Press the screwdriver on the latch and, pulling towards you, disconnect the block of the wiring harness from the generator connector.
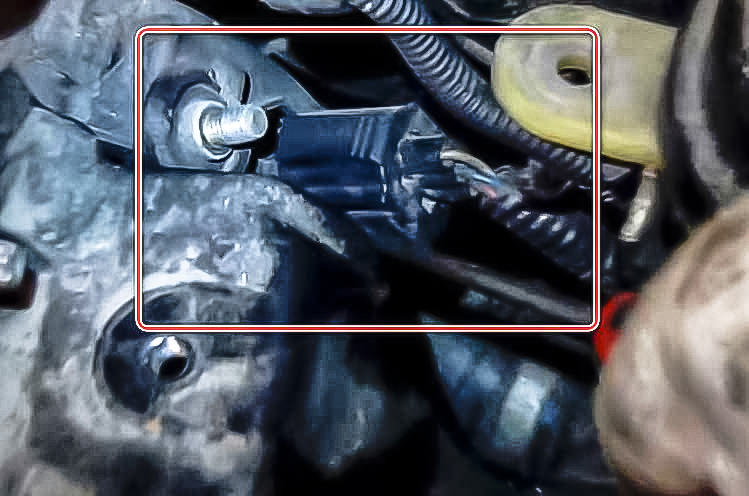
9. There is one more contact under the rubber plug of the generator. Disconnect the terminal and connector from the generator.
10. Turn off a bolt of fastening of a broad tank GUR. Move the tank itself to the side (the pipelines do not need to be disconnected from it).
11. Next, you need to remove the drive belt. Using a 10 spanner, unscrew the 4 bolts securing the pump pulley (water pump). Remove the pulley.
12. With a head of 15, unscrew the lower generator mounting bolt.
13. Remove the drive belt from the generator.
14. With a head of 15, unscrew the upper bolt and nut of the generator.
15. Remove the bolt and remove the power steering reservoir bracket.
16. Remove the generator from the stud.
Note:
When you reinstall the generator, first screw in the stud.
17. Get the generator from a motor compartment. This step will provide access to the thermostat housing.
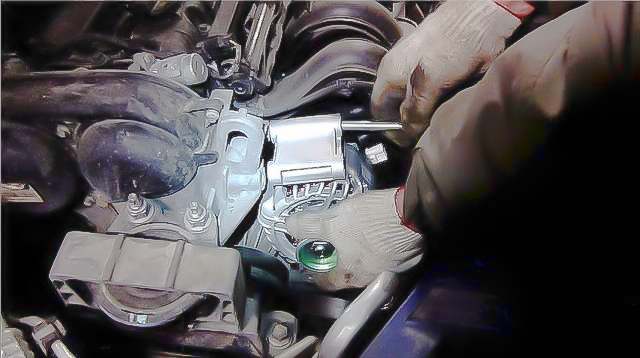
18. The electronic thermostat comes with the housing and is completely replaced. Before removing the thermostat, be sure to disconnect the wiring coming from the electronic control unit from it.
19. Using pliers, disconnect the clamps for fastening the pipes that fit the body. Take them off.
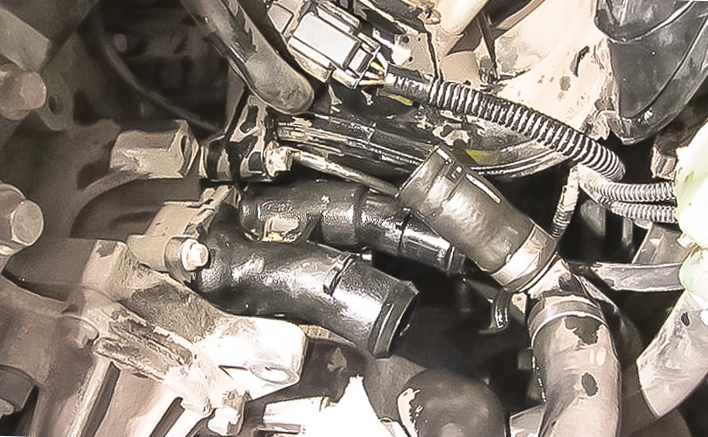
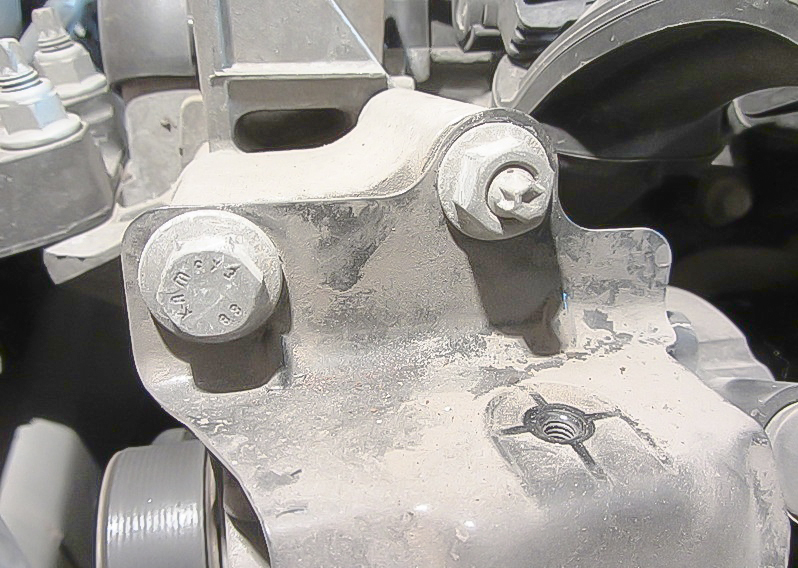
20. The thermostat housing is attached to the engine with four bolts, two of which are located on the top (access to them is more open), and two more - from the bottom. It is not easy to get close to them, because 2 pipes put on the thermostat housing interfere.
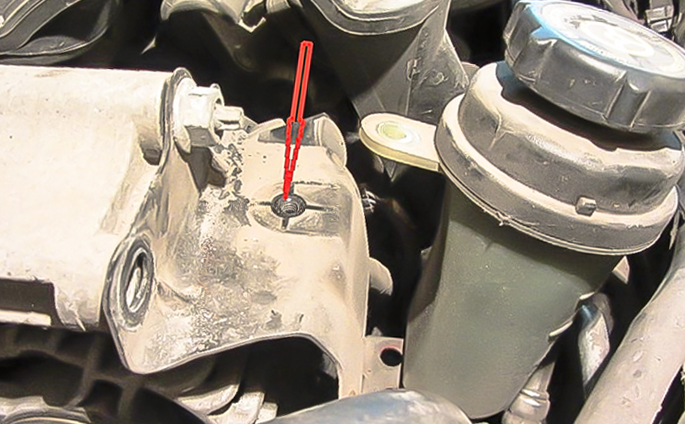
21. With an 8 or 10 head (with a 10 cm extension), unscrew the 4 bolts securing the thermostat housing.
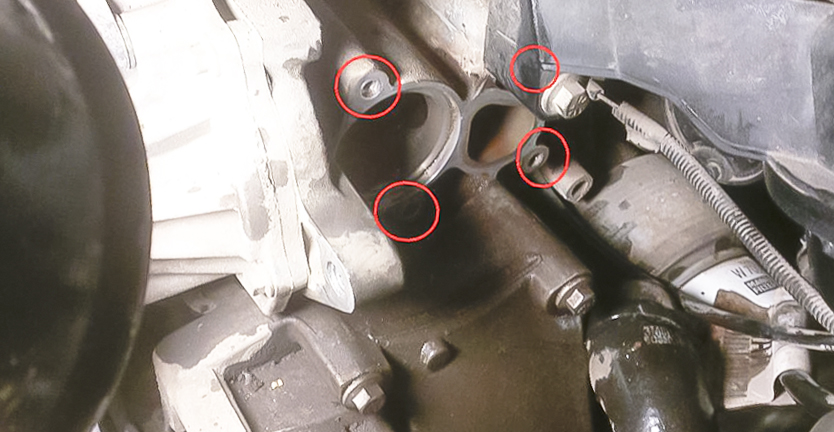
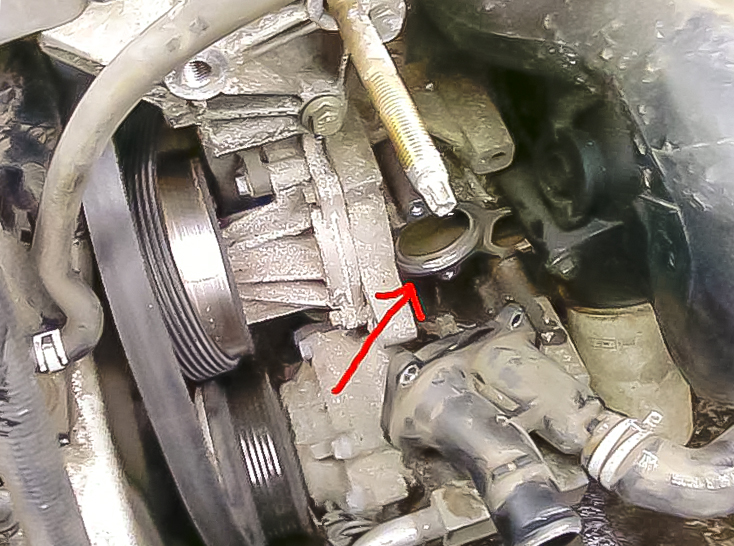
Mounting points of the housing to the engine block
22. Get the damaged thermostat.

If it doesn't fit, pry it gently with a screwdriver. Don't forget to remove the o-ring as well.
Note:
When removing the thermostat, be careful because a small amount of antifreeze remains under it, which can leak onto the engine parts.
23. Install a new thermostat and reassemble everything in reverse order.
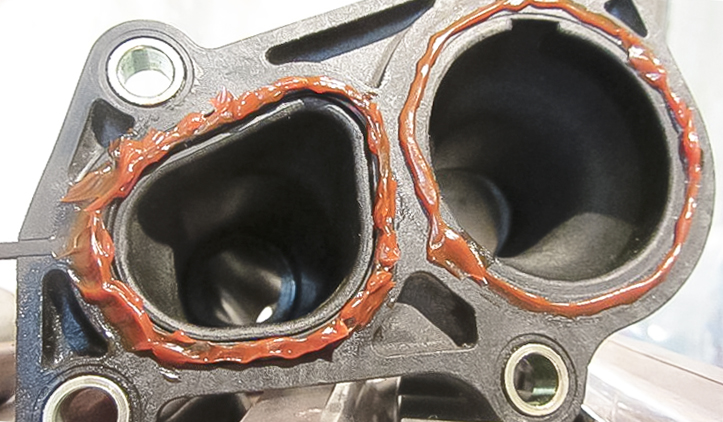
Helpful Hints:
After installing a new thermostat, lubricate the body with a thin layer of sealant, carefully reading the instructions .
- After completing the assembly, fill in the coolant in the expansion tank. If it is old, it is advisable to filter it first.
- During filling, push the nozzles with your hands, thereby preventing the formation of an air lock.
- After warming up the engine, drive the front wheels onto the overpass and add antifreeze to the level with the engine running. If necessary, add antifreeze already on level ground.
Tips for saving money when buying a thermostat
Since the attachment points of the housings of the electronic thermostat and the conventional one are almost the same, they can replace each other. Therefore, instead of an electronic element, you can install a conventional one together with a body from a 1.4 or 1.6-liter version (100 hp).
Another way:
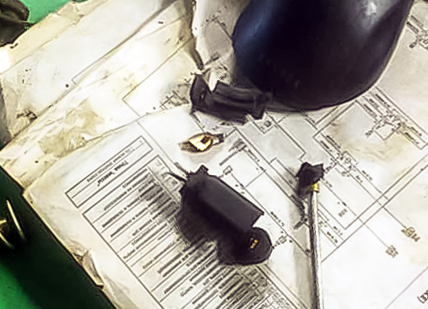
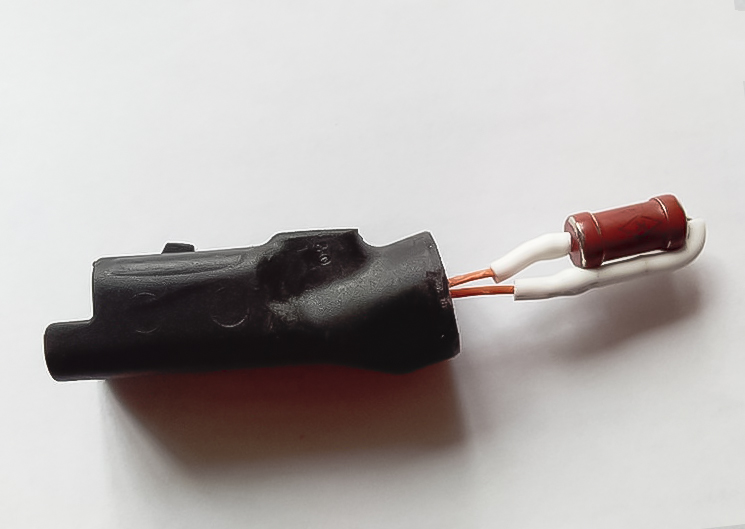
1. Wash the old thermostat removed from the car and disassemble it well. Remove the electrical heater with gaskets from it.
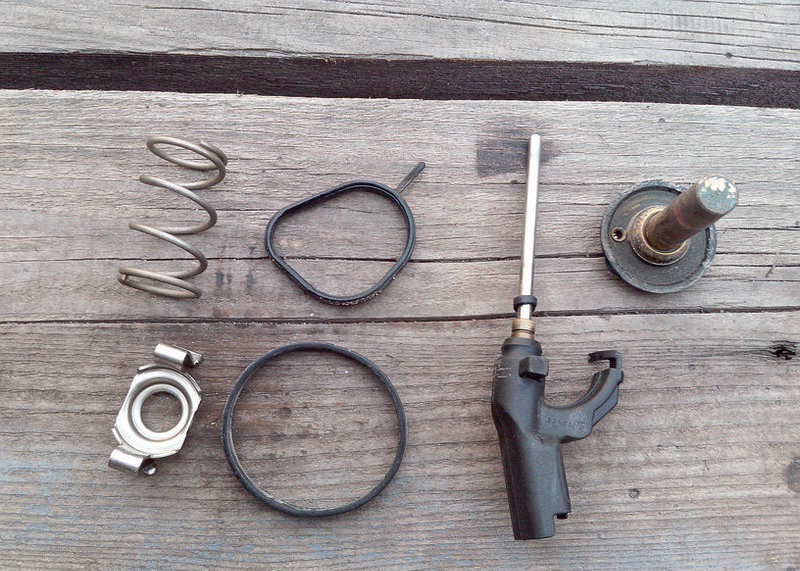
Disassembled thermostat parts
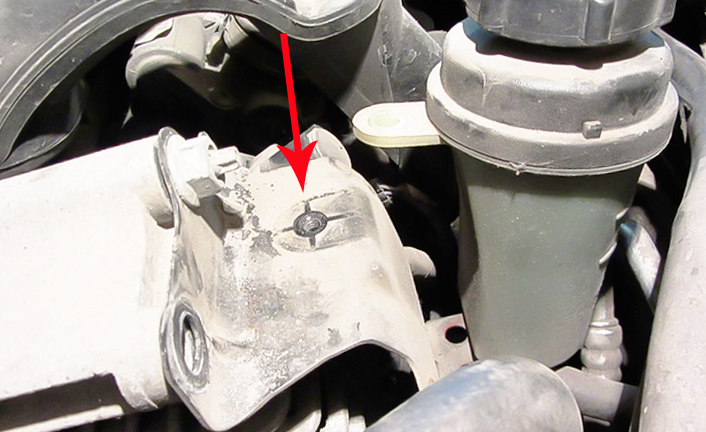
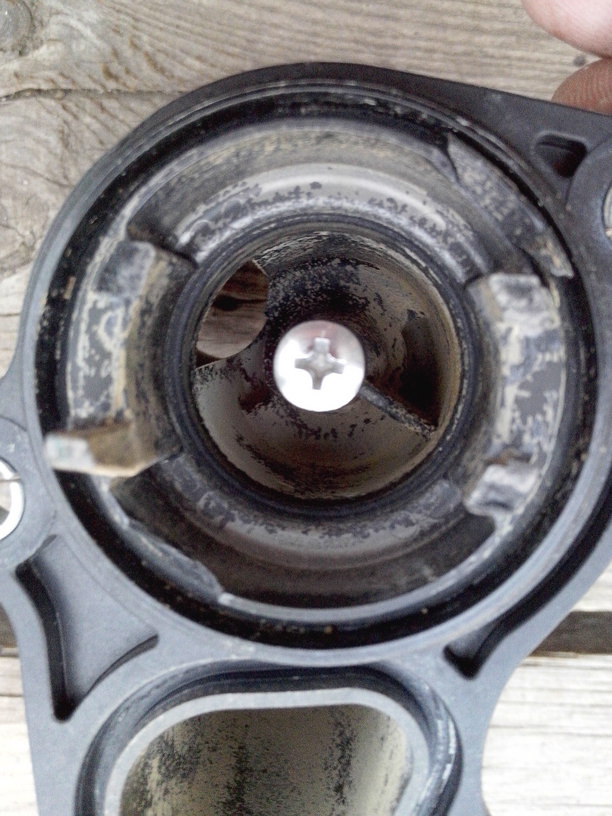
2. In the center of the housing hole (where the heater pin was), cut the M5 thread and take a stainless steel screw. Try on first.
3. In those places where the housing will be adjacent to the cylinder block, carefully grind off the protruding edges. Make the surface as flat as possible.

4. Remove the screw from the outside. Lubricate the threads and screw with sealant, screw the screw back firmly, and remove any remaining sealant.
5. Clean the thermostat seat with a metal brush. Install a conventional thermal thermostat and close it with a modified case.
When switching to using a conventional thermostat, the wiring that comes from the electronic control unit becomes unnecessary. Therefore, the block will show an error. Alternatively, you can leave it as it is, but be sure to insulate it.
Eliminate display error
First way:
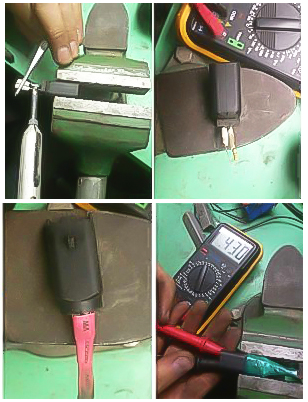
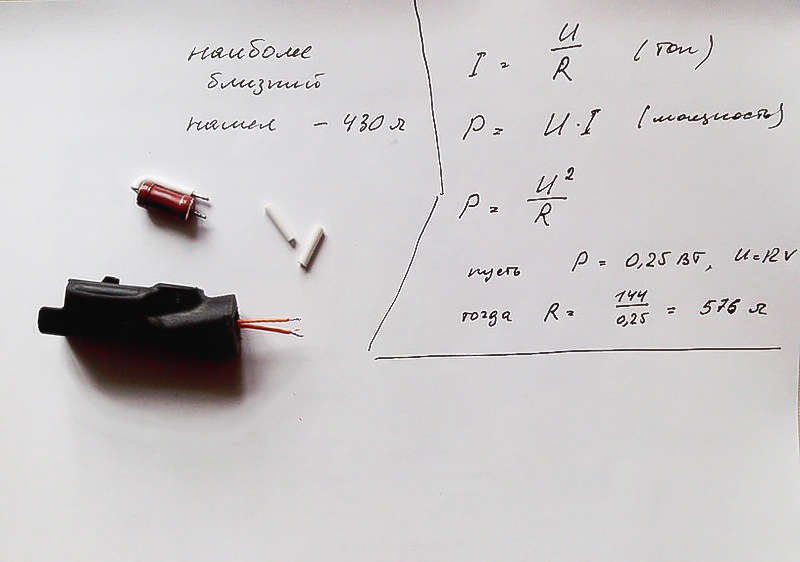
1. Connect a 430 ohm resistor (0.25 W power) to the wires. Disassemble the block itself and get to the wiring.
2. Solder the resistor, isolate and check the operation with a multimeter. Such a refinement will create an identical resistance, as well as the filling of an electronic thermostat. Therefore, the electronic control unit will no longer show an error.
Second way:
1. Disassemble the heater. Cut off a piece of plastic with a grinder. Separate the connector and heater.

2. Familiarize yourself with the diagram. White tubes are silicone, heat-resistant. The power of the resistor and the resistance are selected so that, on the one hand, when the heater is turned on, the structure does not heat up, and on the other hand, the high resistance of the resistor does not receive el. brains like an open heater circuit.
3. Solder the made device and put on the heat shrink tube.
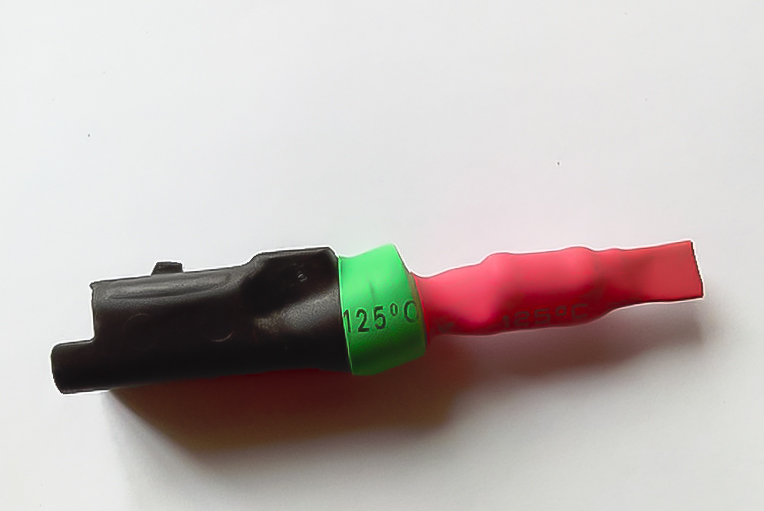
4. Assemble all components, connect the revision to the standard connector, and attach with a tie to the wiring harness.
Replacement of a faulty thermal thermostat for power plants for 1.8 and 2.0 liters
Such power plants have a slightly different design of additional equipment. A tensioner roller is installed at the top, which greatly simplifies the process of replacing the thermostat, and does not require replacing the drive belt.
Work order:
1. If possible, put the car on a viewing hole, and turn off the engine.
2. Remove the protective cover from the battery.
3. Use a 10 spanner to remove the negative terminal from the battery.
4. Turn off a stopper of a broad tank and dump pressure.
5. Use a wide-blade screwdriver to unscrew the drain plug at the bottom of the radiator.
6. Substitute any suitable container under the radiator and drain the coolant.
7. Remove the right headlight.
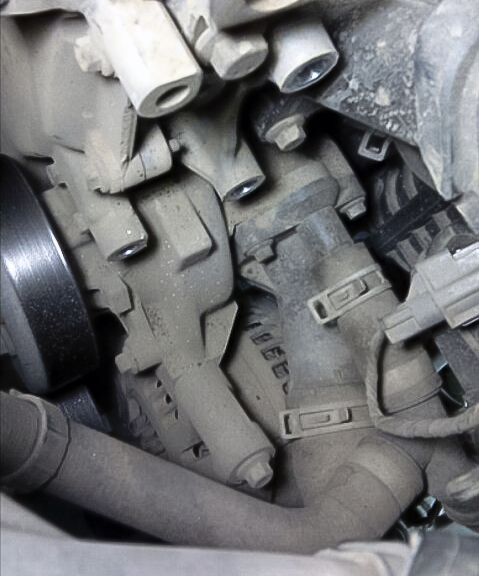
8. Turn off bolts of fastening of a broad tank of system of cooling and move it aside.
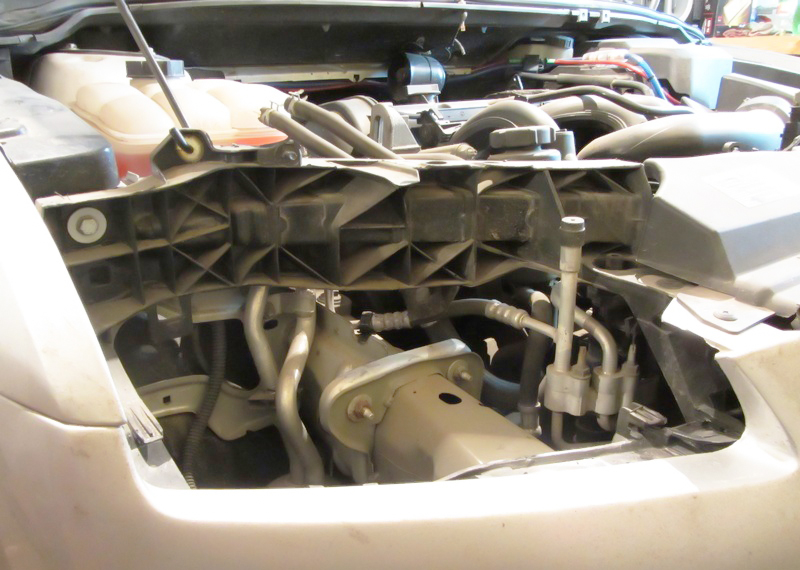
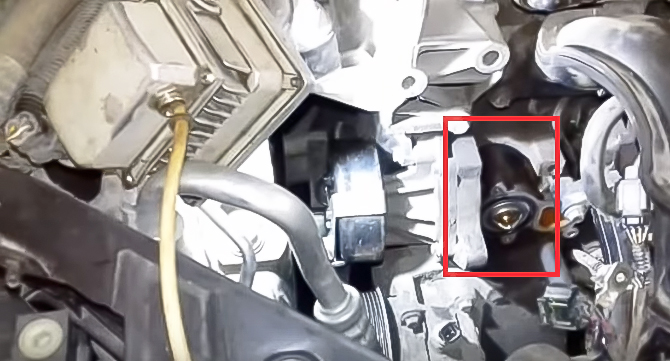
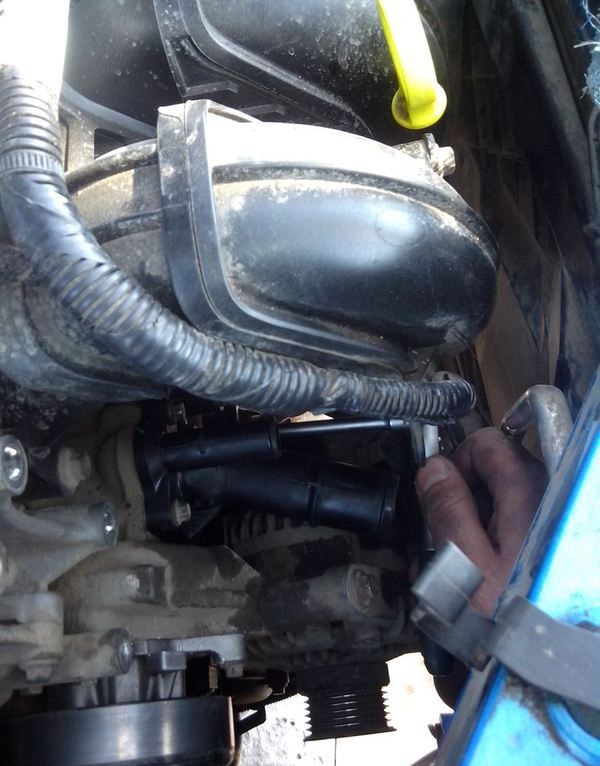
Now the location of the thermostat housing can be seen much better.
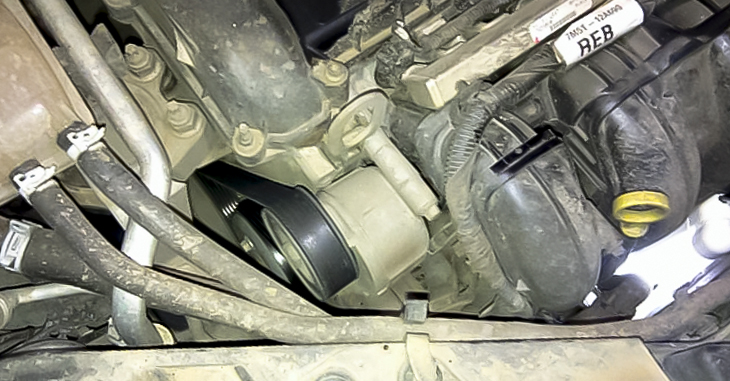
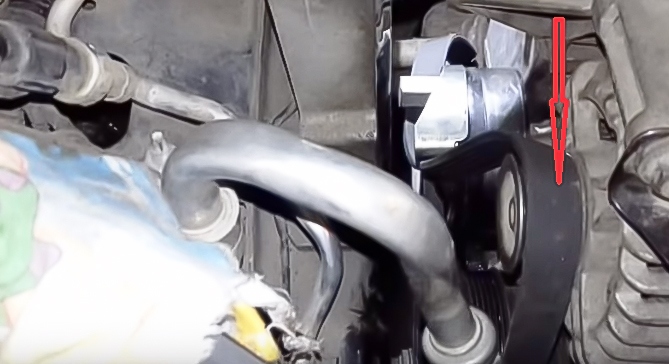
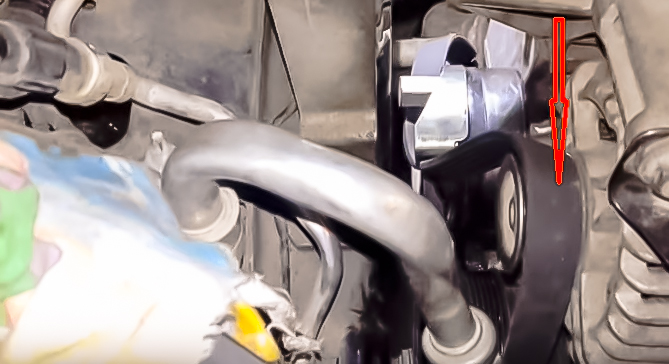
9. With a head of 17, pull the roller away from you towards the windshield and loosen the tension belt.
10. Remove the tension belt (do not remove completely, just fix it).
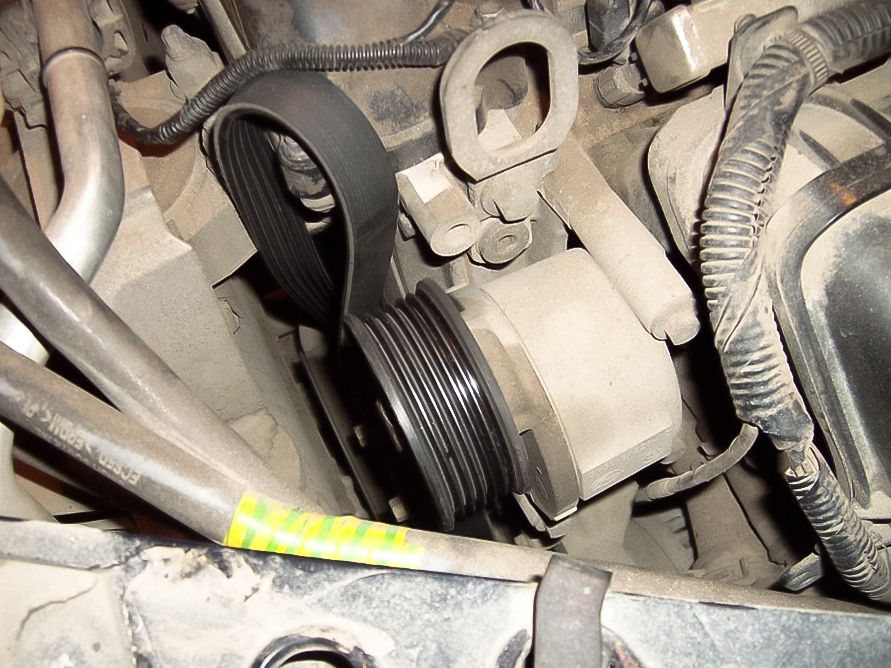
11. Turn off fastening of a drive roller and remove it from the engine. This will open access to the thermostat housing.
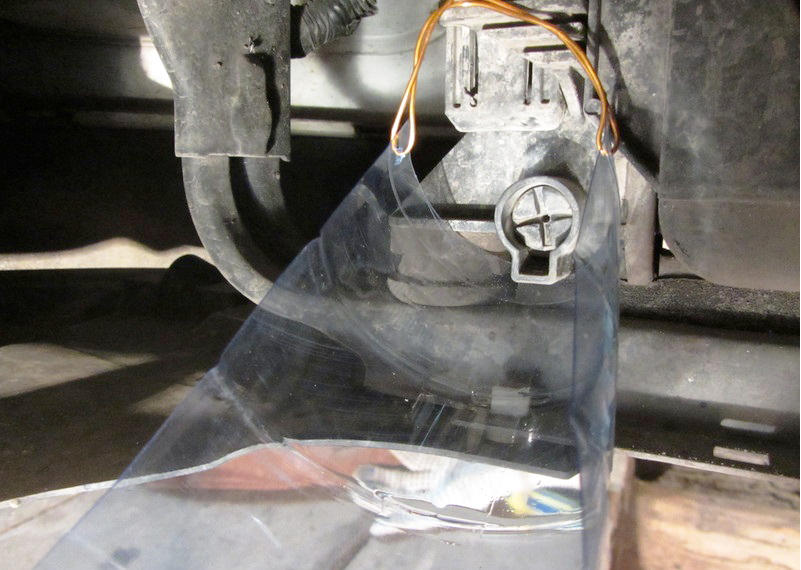
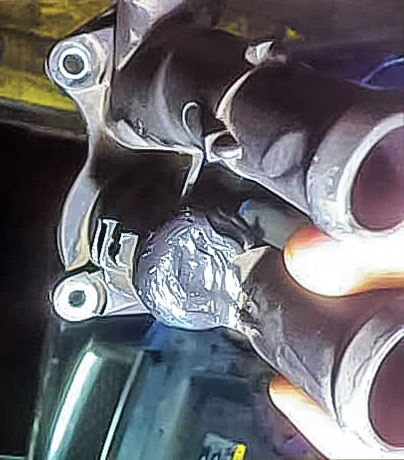
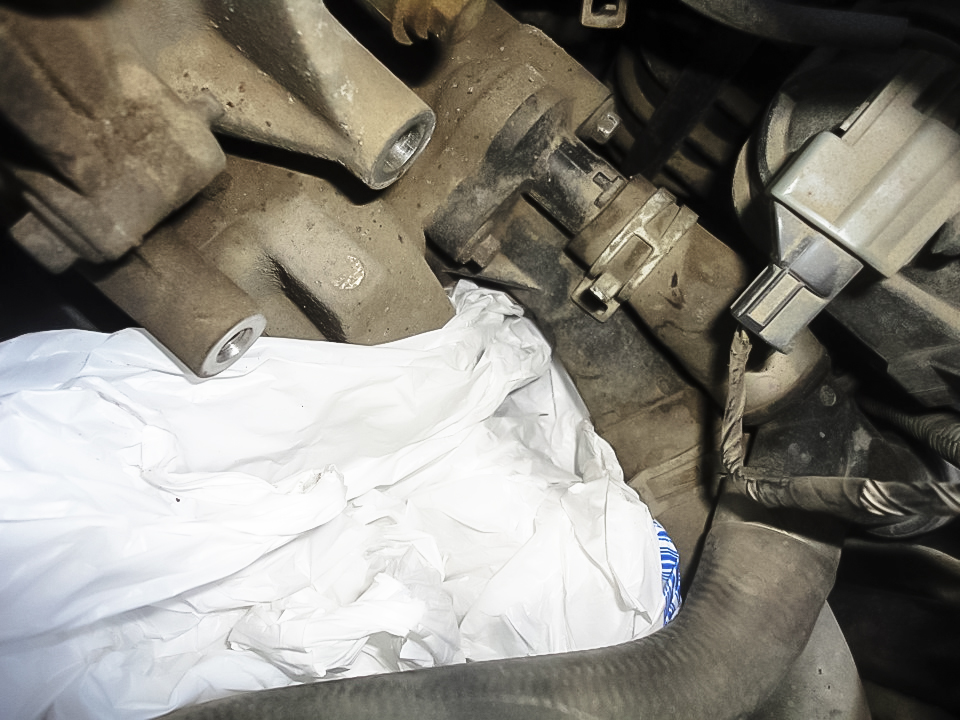
12. Before removing the thermostat, put a bag on the generator. This will protect it from getting inside the coolant.
13. Use a screwdriver to wring out the chip.
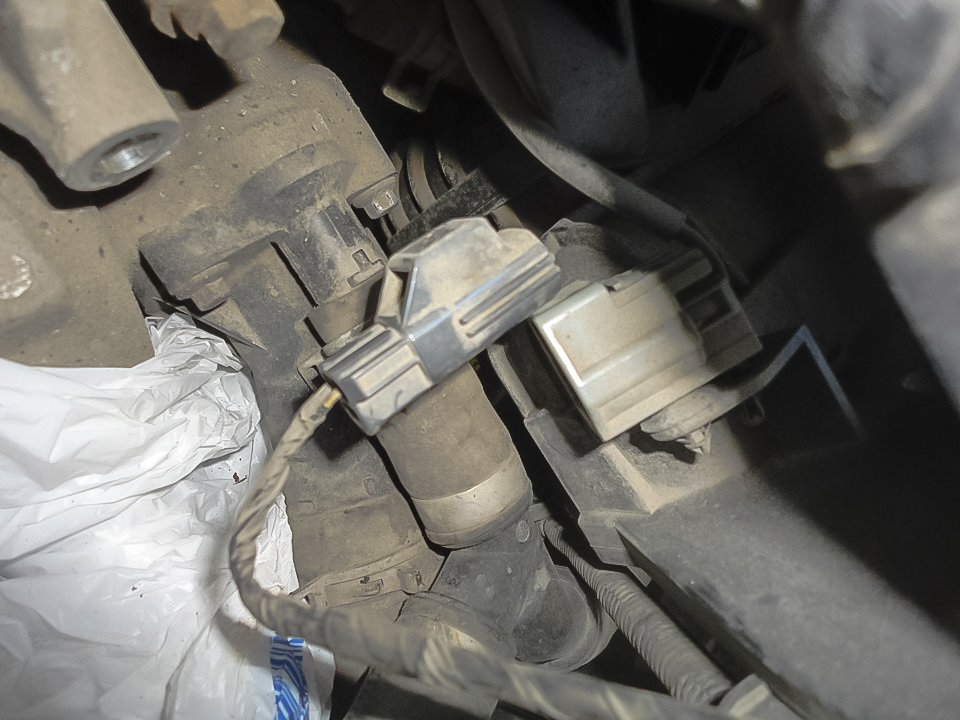
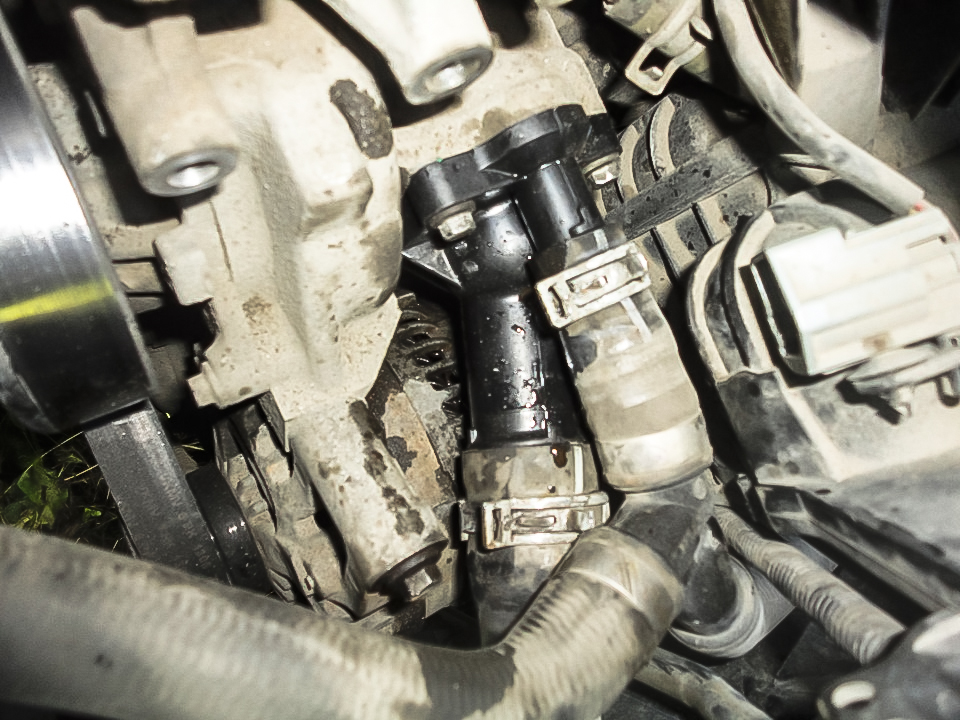
14. Using pliers, disconnect the clamps for fastening the pipes that fit the body. Take them off.
15. The thermostat is fixed with 3 bolts. Loosen the thermostat housing bolts and remove the damaged thermostat.
16. Replace the damaged thermostat with a new one. Assemble all elements in reverse order.
17. After replacing the element, fill the cooling system with liquid. Check whether the plug on the expansion tank and all removable pipes are in place. After that, fill the tank with antifreeze up to the maximum mark. Wait until it stops leaving and top up again to the maximum level. Start the engine. Wait for it to warm up completely (to open the thermostat). As a result, the coolant from the expansion tank will quickly leave. Top up the coolant again to the required level. Check the thermostat, its pipes and plug for leaks.
Video of replacing the thermostat Ford Focus 2 1.8l.
Features of choosing a thermostat
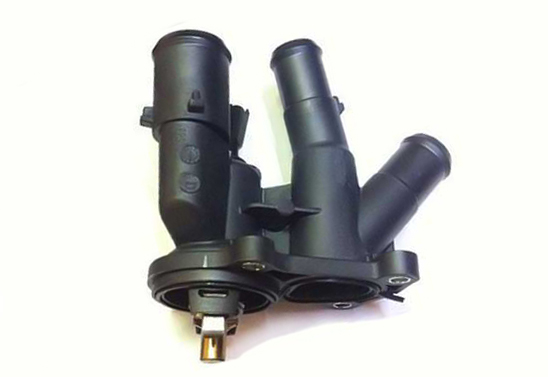
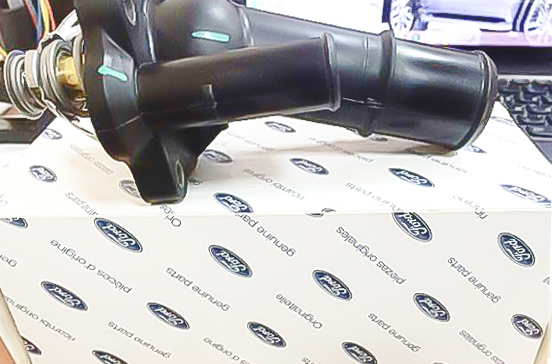
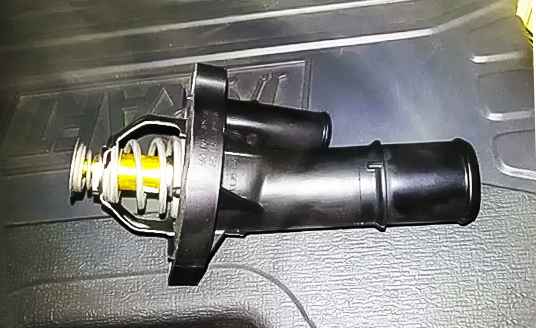
The thermostat can be sold separately from the housing.
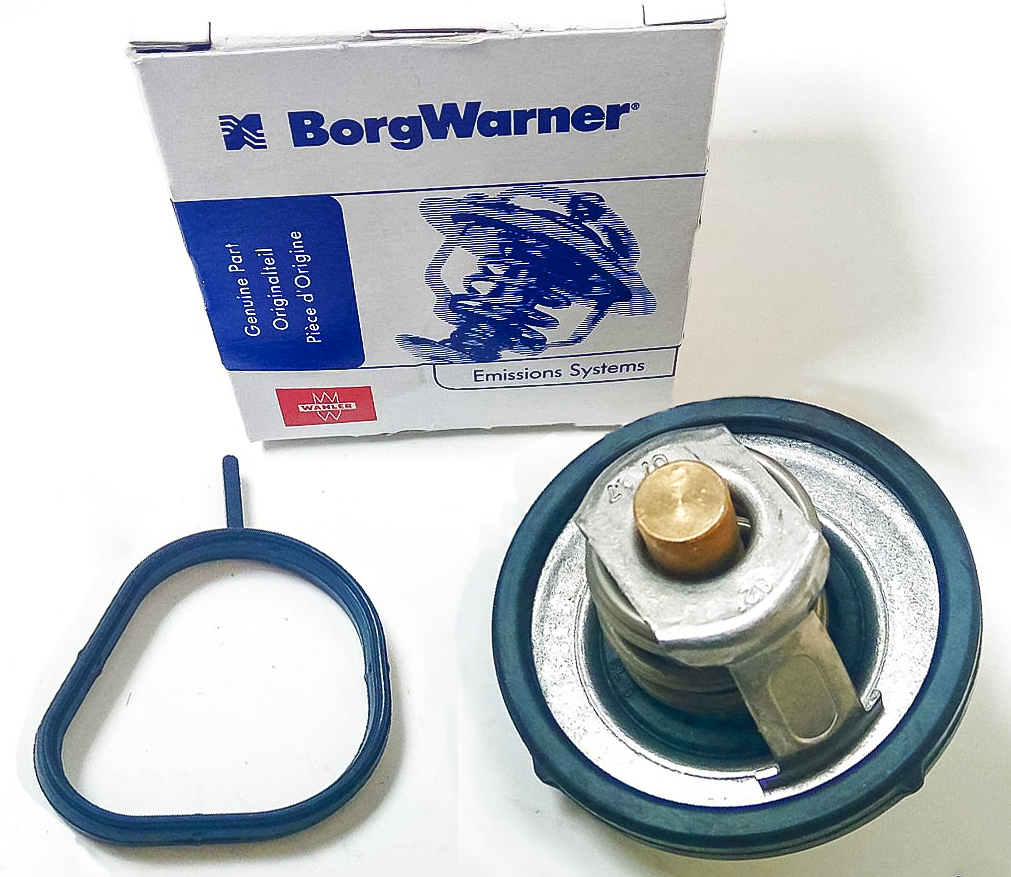
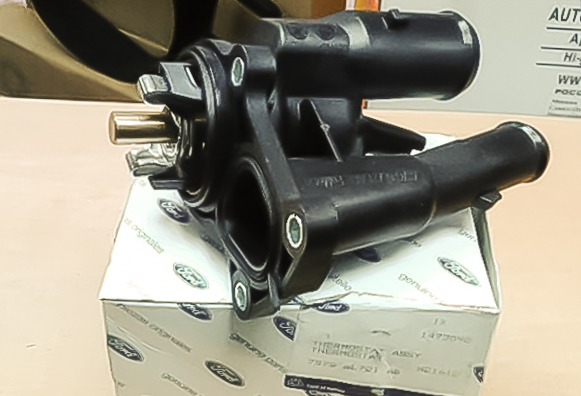
There is also a thermostat option along with the housing.
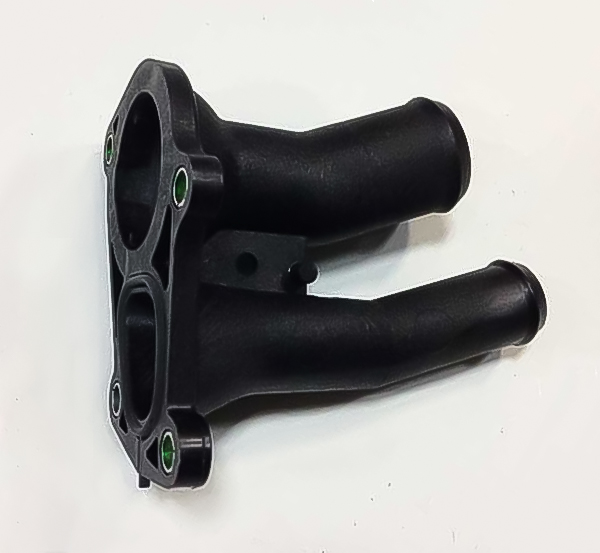
Separately, there is also a housing without a thermostat.
To date, there are “winter” and “summer” elements on sale. They differ from each other in the opening temperature.
The "summer" thermostat allows antifreeze to go to a large circle at 80-85 ° C, and the "winter" thermostat - at 92-95 ° C. The opening temperature of the thermostat will necessarily be indicated both on its packaging and on the element. Visually and in design, they differ from each other only in the length of the stem.
The "summer" thermostat is recommended for use at high temperatures, for example, in the southern regions, as it quickly sets the antifreeze in motion in a large circle, which protects the car from overheating. And the “winter” one is in the northern regions, since such a thermostat conducts antifreeze longer in a small circle, so the engine warms up better and faster.