![1 generation [2011 - 2017]](/uploads/Lada_Granta_2011_-_2015.jpg)

Tools (for 8-valve engines):
- 5mm hex wrench
- 8mm hex wrench
- screw jack
- balloon wrench
- Ratchet wrench
- Torx socket E8
- Head for 8 mm
- Head 10 mm
- Head 13 mm
- 12 mm hex bit head
- Torx socket T30
- Screwdriver flat medium - 2 pcs.
- Collar for end nozzle
- Nozzle on the collar 17 mm
- Open-end wrench 8 mm
- Open end wrench 19 mm
- Straight ring wrench 15 mm
- Straight ring wrench 17 mm
- Ring wrench curved 8 mm
- torque wrench
- Special wrench for turning the tensioner roller (or snap ring remover)
- Key for fixing the camshaft pulley (or extension for the end cap on the crank)
- Bench vices with soft metal jaws
- Calipers
- Micrometer
- metal ruler
- Flat feeler set
- Rubber bulb (or syringe)
- Knife (or scraper)
Tools (for 16-valve engines):
- Open-end wrench 8 mm
- Open end wrench 10 mm
- Open end wrench 13 mm
- Open-end wrench 17 mm
- Open end wrench 19 mm
- Straight ring wrench 15 mm
- Collar sweat butt cap
- Nozzle on the collar 17 mm
- Ratchet wrench
- Torx socket E8
- Head for 8 mm
- Head 10 mm
- Torx socket T30
- screw jack
- balloon wrench
- Phillips screwdriver, medium
- Large flat screwdriver
- Screwdriver flat medium
- 5mm hex wrench
- 8mm hex wrench
- torque wrench
- Special wrench for turning the tensioner roller (or snap ring remover)
- Key for fixing the camshaft pulley
- Bench vices with soft metal jaws
- Calipers
- Micrometer
- metal ruler
- Flat feeler set
- Rubber bulb (or syringe)
- Knife (or scraper)
Parts and consumables:
- Shoe - 2 pcs.
- Technical capacity
- Degreaser type "White spirit"
- Motor oil
- Sealing ring of a tube of an oil receiver
- Oil pump gasket
- Reducing valve spring (if necessary)
- Pressure reducing valve (if necessary)
- Wooden stick (if necessary)
- Sealing ring of a tube of an oil receiver
- Oil pump cover and housing (if required)
- Oil pump gears (if necessary)
- Solvent
- Toothbrush or brush
- sealant
- Petrol
- rags
Notes:
Remove the oil pump for repair or replacement. This describes the process of removing and servicing the old-style oil pump. Newer pumps may require an E8 socket (sprocket) and a Torx T30 socket. In all other respects, the operations are completely similar. Work on dismantling the pump is carried out on an inspection ditch or overpass.
1. Remove the timing belt and alternator drive pulley as described here (for 8-valve engines) or here (for 16-valve engines).
2. Remove the crankshaft sprocket and rear timing belt cover .
3. Remove the oil pan and oil receiver .
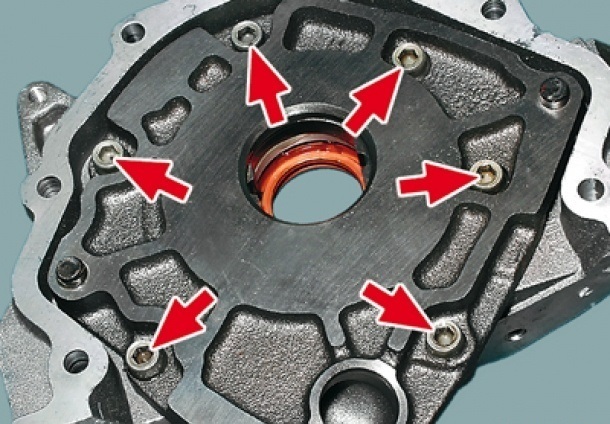
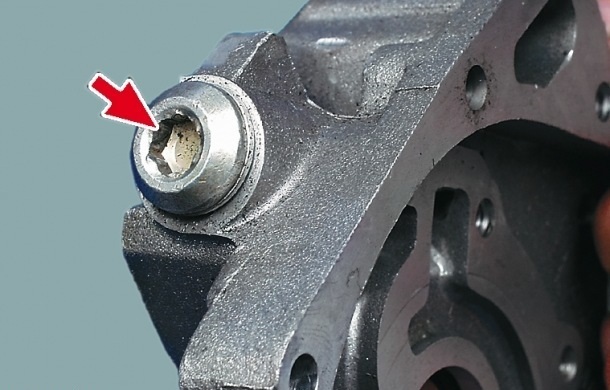
4. Turn away six screws of fastening of a cover of the oil pump to the block of cylinders (a head on 10 mm or E8, depending on pump type).
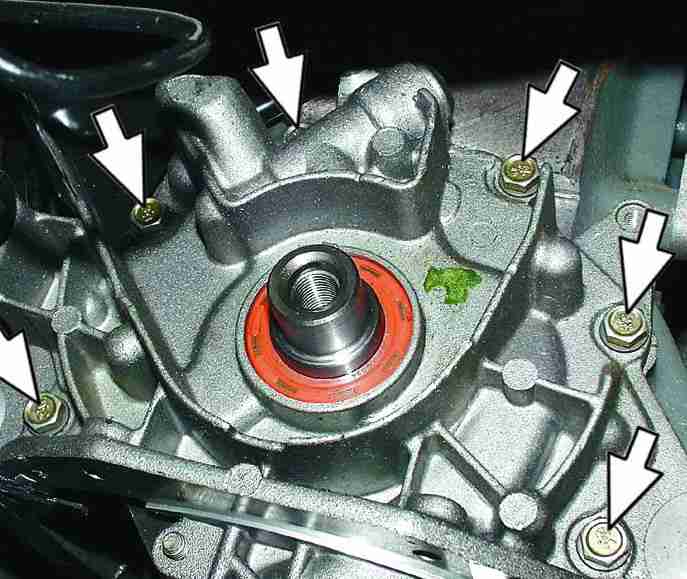

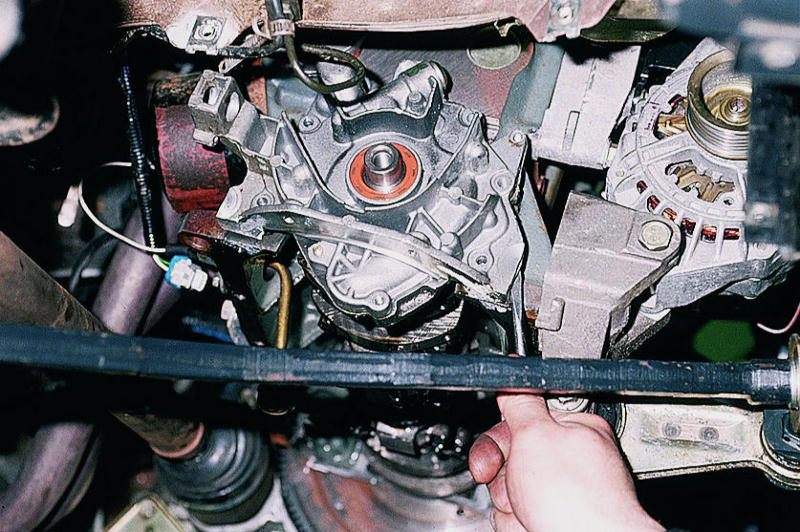
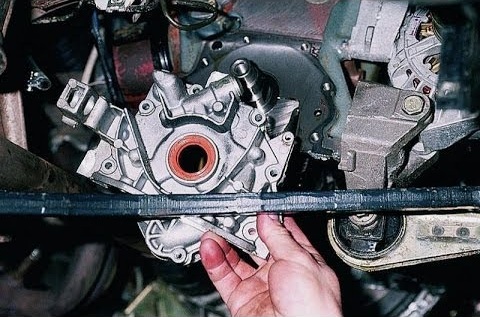
5. Pry off the pump cover by the lugs with a slotted screwdriver and remove the oil pump.
Note:
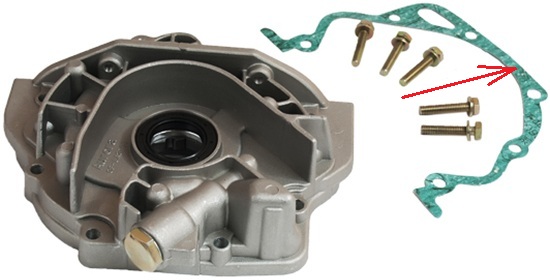
The connection between the oil pump cover and the cylinder block is sealed with a paronite gasket.
6. To assess the technical condition of the pump, disassemble it. Before dismantling, clean the pump of dirt so that dirt does not get inside the pump.
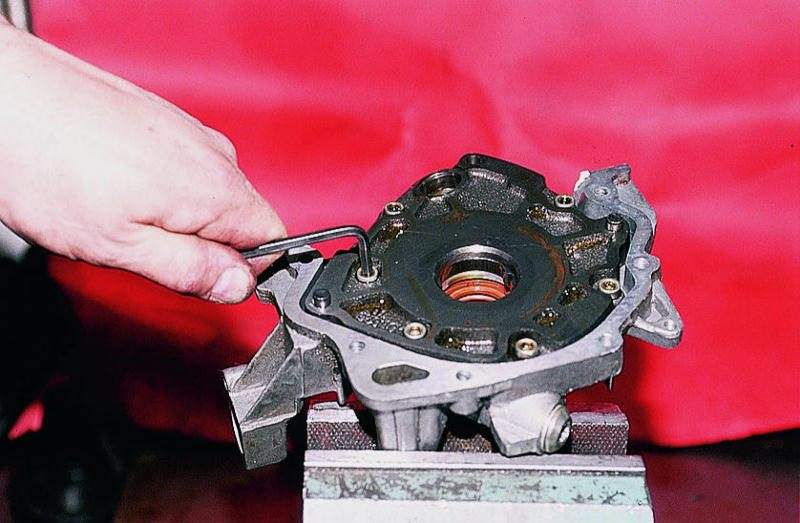
7. Use a T30 socket (or 5mm hex wrench) to unscrew the six screws holding the housing to the pump head while clamping the pump in a soft metal vise.
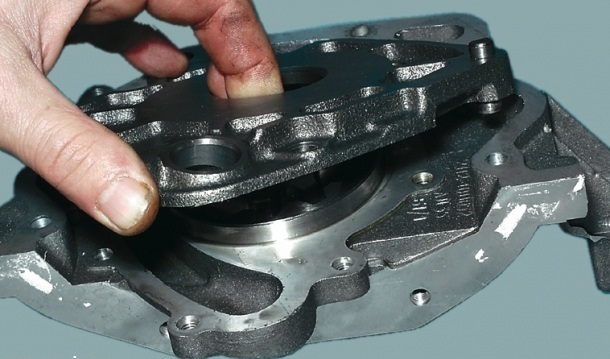
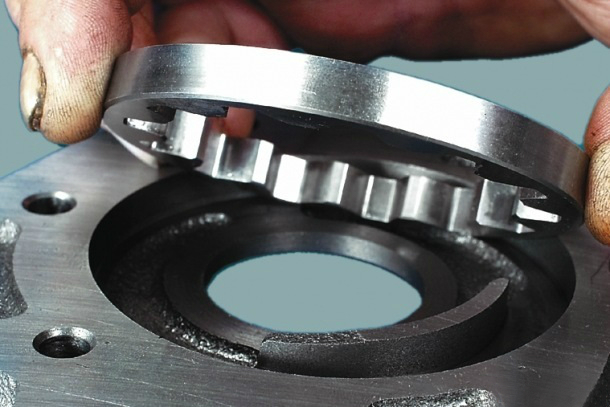
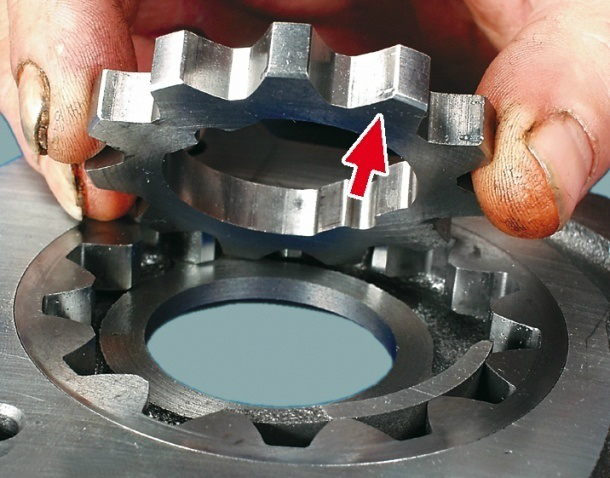
8. Next, slightly lift the oil pump housing with two screwdrivers and make sure that the housing locating pins come out of the holes in the oil pump covers, and as a result, remove the oil pump housing from the cover.
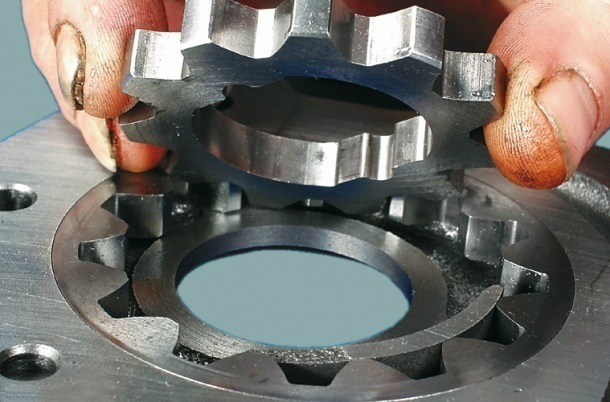
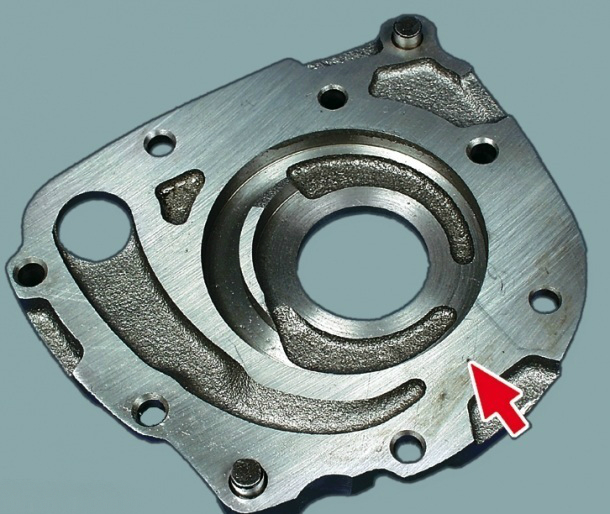
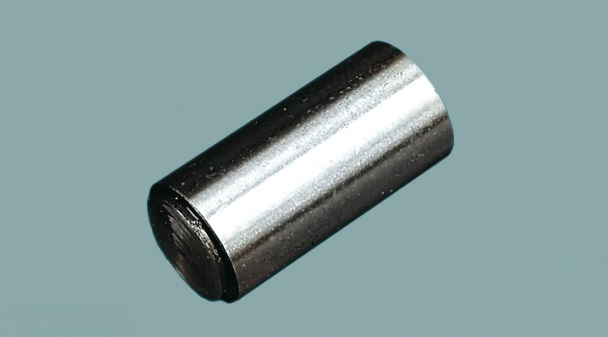
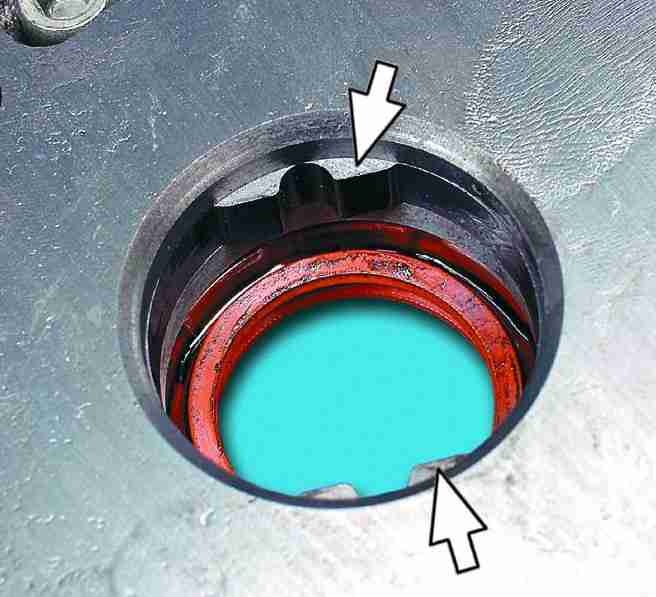
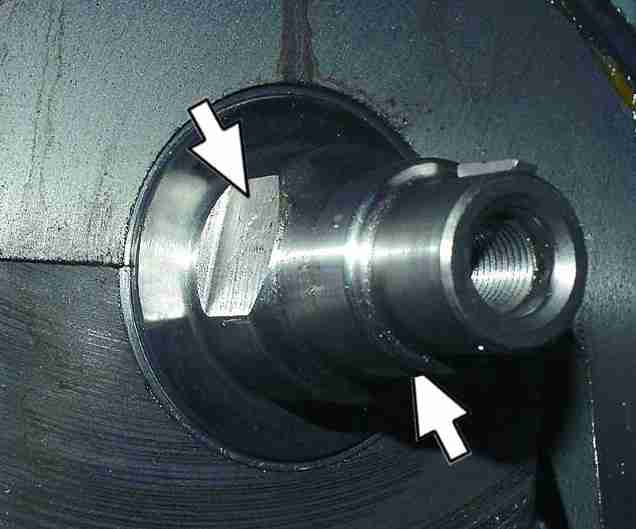
9. Remove the drive (see first photo) and driven (see second photo) gears from the housing socket.
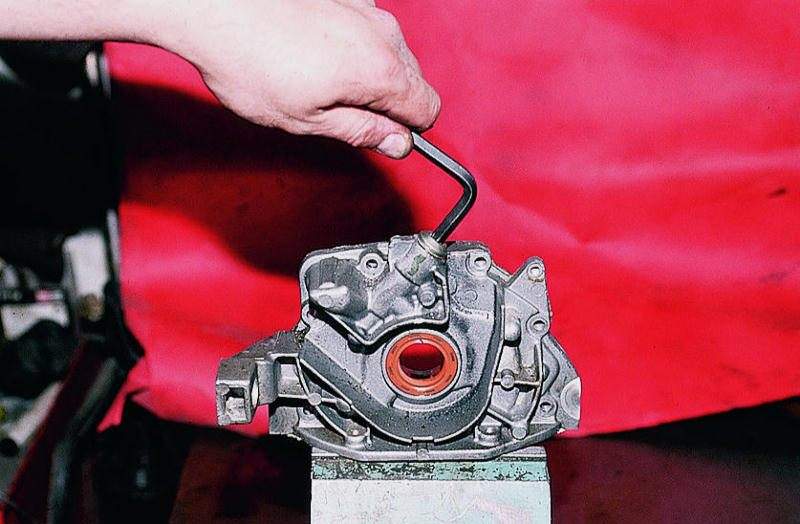
10. Using an 8 mm hexagon wrench, unscrew the plug of the pressure reducing valve (if it is difficult to unscrew the plug, you can slightly clamp the cover in a vice with soft metal jaws).
Note:
The cork is sealed with an aluminum washer.
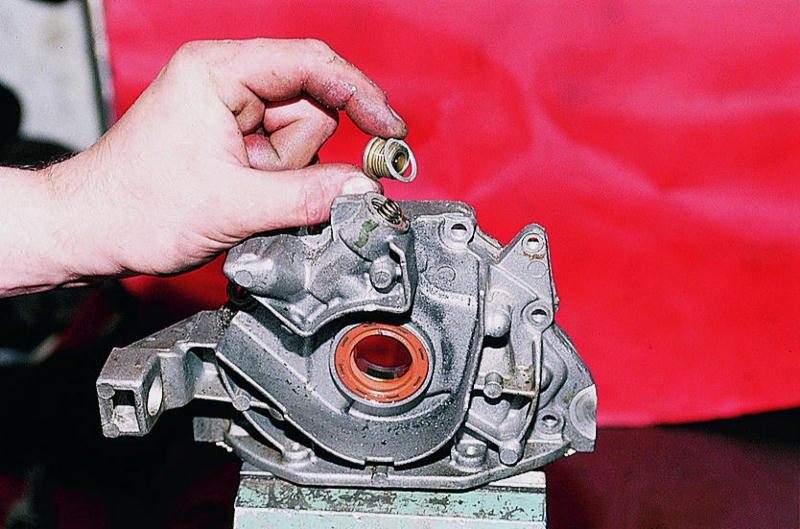
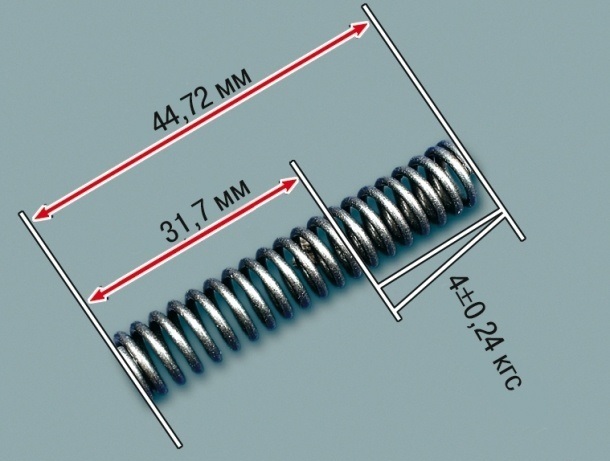
11. Remove pressure reducing valve spring.
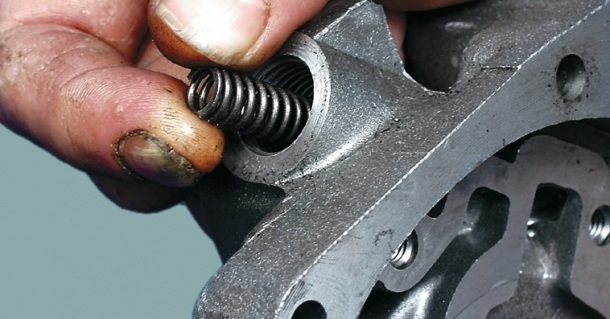
Note:
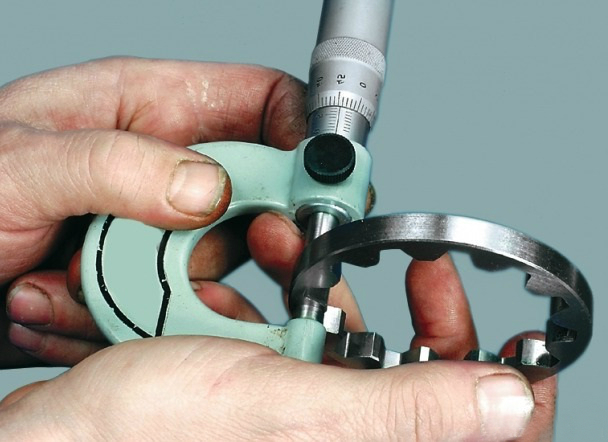
If the removed spring is cracked, broken, or bent, then replace it with a new one. If there is no visible damage, measure its height, which should be 44.72 mm in the free state and 31.7 mm under load. Otherwise, replace the spring.
12. Now gently knock the oil pump cover on a flat surface, as a result of which the pressure reducing valve (piston) will be removed.
Note:
In the event that the pressure reducing valve cannot be removed, then remove it with a pointed wooden stick. To do this, insert a stick into the valve and remove it.
13. Wash out details of the oil pump with gasoline.
14. Next, visually inspect the oil pump cover. If in the area where the gears are adjacent, traces of scuffing, deep scratches and signs of wear are found, then in this case, replace the oil pump cover with a new one.
15. Then pick up the oil pump housing and carefully inspect it. If there are deep scratches, signs of wear and various kinds of scuffs on it, replace the case with a new one.
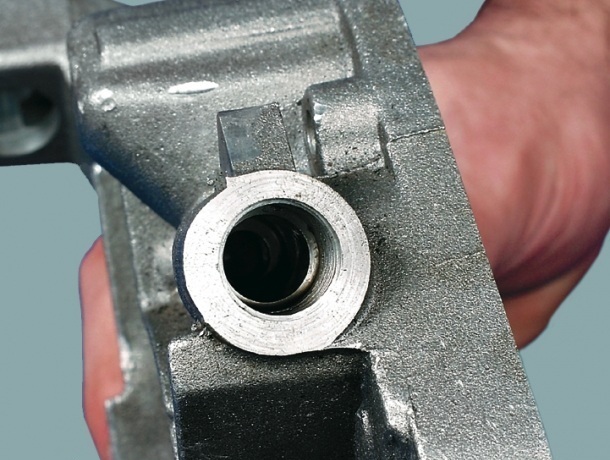
16. Now, using a vernier caliper, measure the diameter of the socket for the driven gear on the oil pump housing.
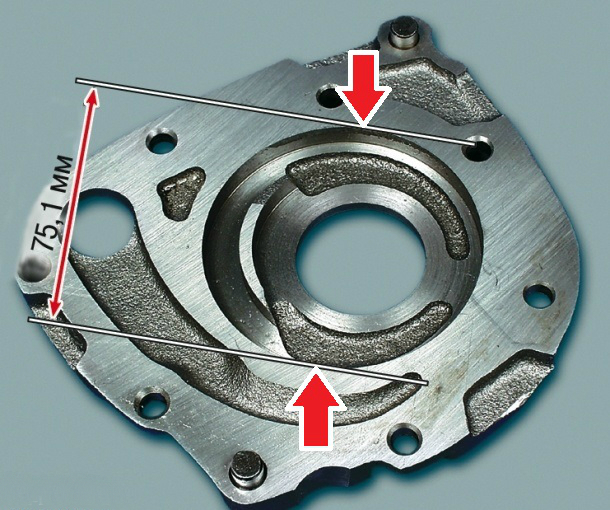
Note:
The socket diameter should be 75.1 mm. If it is larger, then replace the case.
17. Using the same caliper, in the middle of the housing, measure the thickness of the segment separating the drive and driven gears.
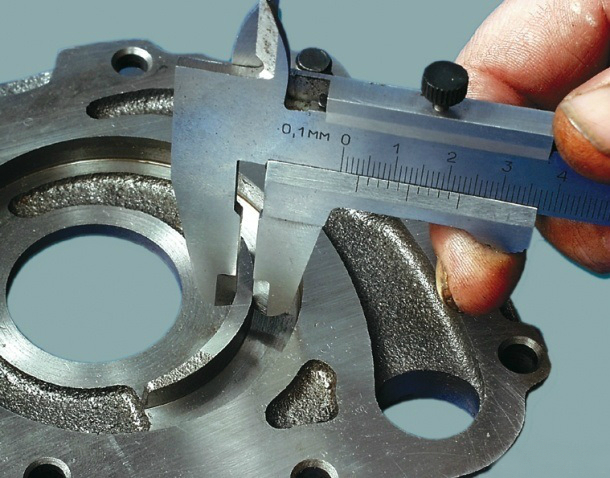
Note:
If the thickness is less than 3.4 mm, then replace the case.
18. After that, take the drive gear in your hands and measure its thickness, which should not be less than 7.42 mm. In the event that the thickness is less, replace the gear.
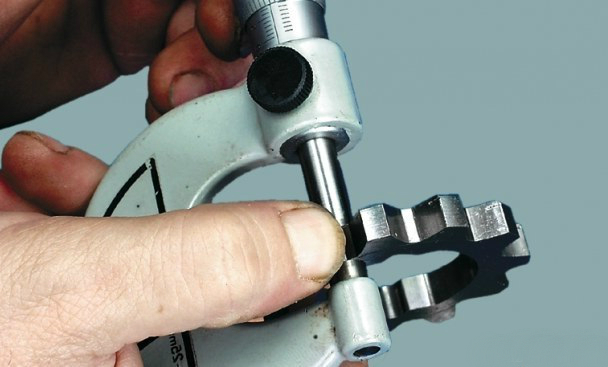
19. Similarly, measure the thickness of the driven gear of the oil pump, and if this parameter is less than 7.35 mm, then in this case, replace the gear with a new one.
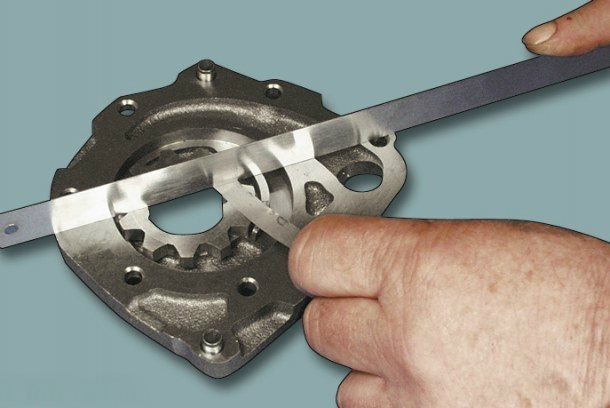
20. To check the axial clearance of the drive gear, first install it in the oil pump housing, and place a metal ruler of a suitable size on top and check the gap between the ruler and the gear with a feeler gauge.
Note:
If the axial clearance is higher than 0.12 mm, then in this case, replace the drive gear with a new one.
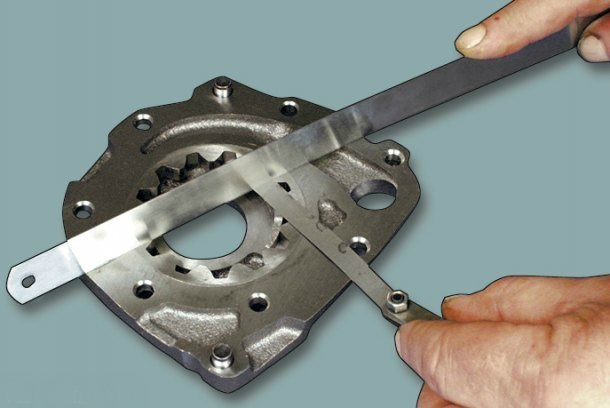
21. Similarly, check the axial clearance of the driven gear.
Note:
If the axial clearance is higher than 0.15 mm, then in this case, replace the drive gear with a new one.
22. Then visually inspect the pressure reducing valve seat and if there are various kinds of burrs and deep scratches on its inner surface, replace the oil pump cover with a new one.
23. Next, take the previously removed pressure reducing valve in your hands and check its surface for burrs and deep scratches. If scuffing and scratches are present, then in this case, replace the pressure reducing valve with a new one.
24. Clean the oil receiver and replace the o-ring on its tube as described here .
25. Assemble the pump in the reverse order, having previously applied engine oil to the gears, the housing in the gear area and the pressure reducing valve piston and installing a new paronite gasket.
Note:
Install the gears with chamfers on the tops of the teeth inside the pump housing.
26. After assembling the pump, using a rubber bulb or syringe, through the hole for the oil receiver, pour engine oil into the oil pump.
Note:
It is recommended to fill in engine oil in the oil pump of the same brand that you have filled in the engine.
27. Rotate the oil pump gears a few turns to lubricate their working surfaces.
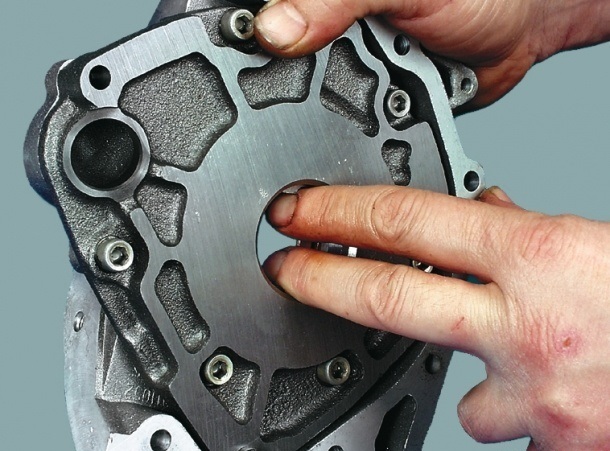
28. Before installation, clean the mating surfaces of the pump housing and cylinder block from the remnants of the old gasket, dirt and oil.
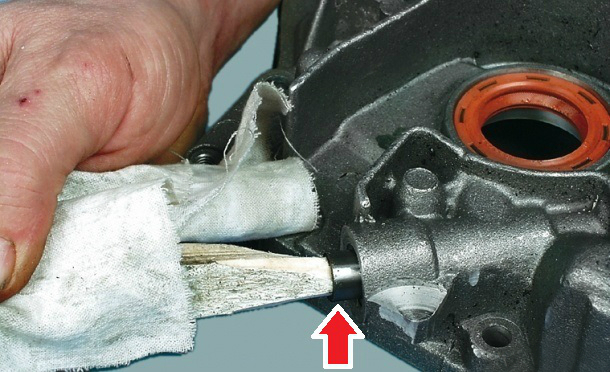
29. When installing the pump, align the lugs in the pump drive gear bore with the flats on the crankshaft.
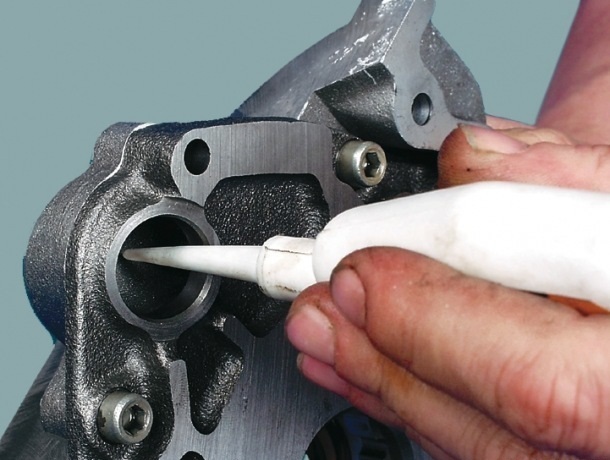
30. Before installing the pump, lubricate the seal lip with engine oil. When installing the pump, carefully fill the sealing lip of the oil seal onto the crankshaft journal with a wooden stick. After that, tighten the pump mounting bolts.
31. Reinstall all removed parts in reverse order.
The article is missing:
- Tool photo
- Photo of parts and consumables
Source: carpedia.club