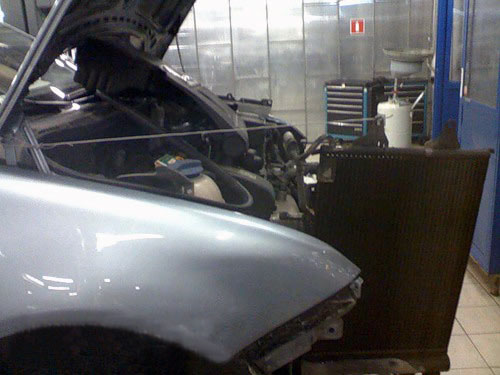
![5J [restyling] [2010 - 2015]](/uploads/Skoda_Fabia_5J_2010_-_2015_.jpg)
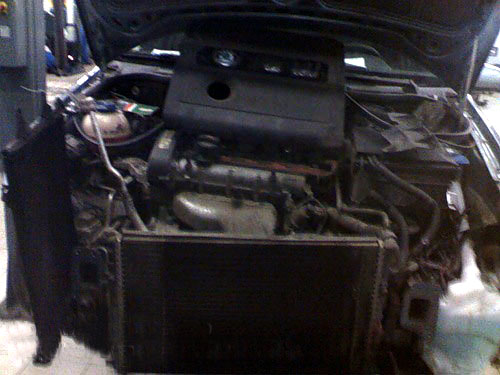
![6Y [restyling] [2002 - 2007]](/uploads/0427389.jpg)

Tools:
- Screwdriver flat medium
- Torx wrench (star) T8
- Torx wrench (star) T25
- Torx wrench (star) T30
Parts and consumables:
- Cooling radiator
- Silicone Grease
- O-rings (if necessary, replace)
- Cooling fluid
Note:
The radiator number for cars with air conditioning is 6Q0 123 253 Q.
Radiator of the cooling system:
1 - radiator;
2 - sealing ring;
3 – a bringing hose of a radiator;
4 – a cover of a broad tank;
5 - connecting block;
6 - hairpin;
7 - fan casing;
8 - screw;
9 - expansion tank;
10 – additional fan;
11 – fan bracket;
12 - wire holder;
13 - fan;
14 - bracket;
15 - outlet hose of the radiator;
16 - sensor for turning on the fan;
17 - lower radiator support;
18 - bolt;
19 - the upper support of the radiator.
Order of execution:
1. Disconnect a wire from the plug "-" of the storage battery .
2. Remove the cover of the expansion tank.
Warning:
Change the coolant on a cold engine.
It is strictly forbidden to pour the coolant onto the ground or into the sewer system, as the ethylene glycol contained in it is a highly toxic poison. Its entry into groundwater will lead to adverse environmental consequences for the environment.
3. Remove the engine splash guard.
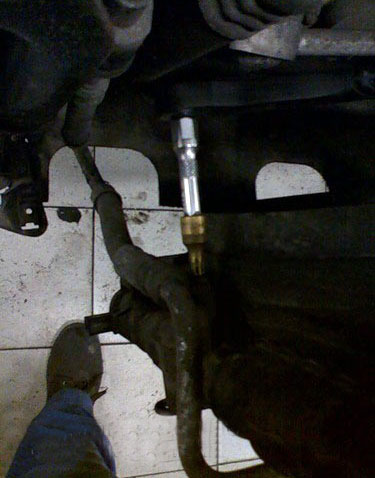
4. Substitute a container for collecting the used liquid under the branch pipe 1 of the drain hole. For convenience, put a hose on the nozzle.
5. Turn away a stopper 2 a drain aperture.
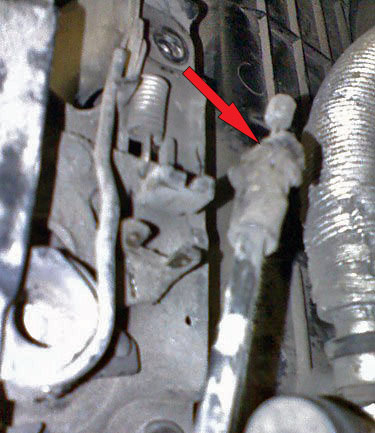
6. On models with diesel engines, loosen the clamp and disconnect the hose 1 from the front fitting of the heat exchanger 2. Wait until all the liquid has drained and connect the hose 1 to the front fitting of the heat exchanger (3 - oil filter).
7. Screw plug 2 (see Fig. Radiator drain plug in item 4) of the drain hole.
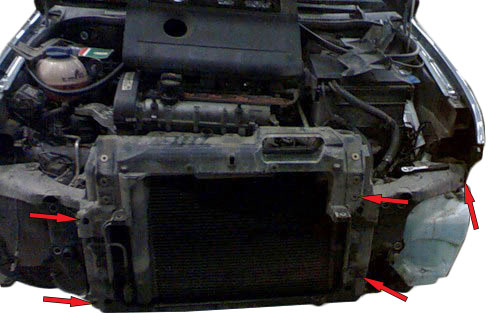
8. To remove the front bumper, unscrew four Torxes from the front wheel well on both sides.
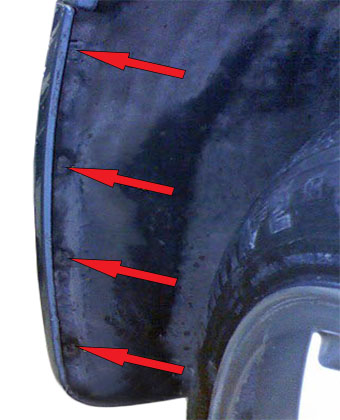
9. Unscrew the two fender liner fasteners on each side of the bottom of the car.

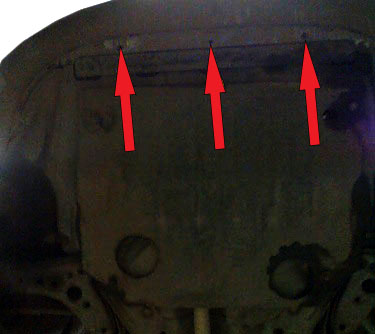
10. Unscrew the three rivets securing to the front bulkhead from below, next to the crankcase protection mount.
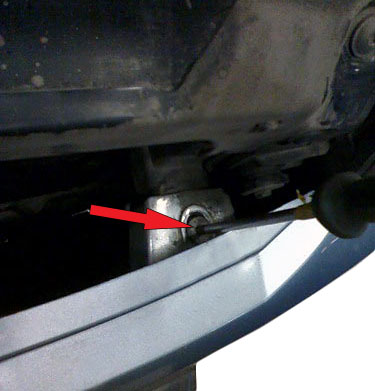
11. Turn off two bolts of fastening of a bumper to a front bulkhead from above near to headlights.
12. Remove the headlights by disconnecting the chips from them, and also disconnect the power wires for the fog lights.
13. Disconnect the hood opening cable from the lock by removing the latch.
14. Remove the top bar covering the radiator.
15. Remove the front amplifier by unscrewing it from the side members and the horn bar.
16. Pressing the tabs of the latches, disconnect the pads 1 and 2 with wires from the fan switch-on sensor and the fan motor. For cars with air conditioning - also from the electric motor of the additional fan.
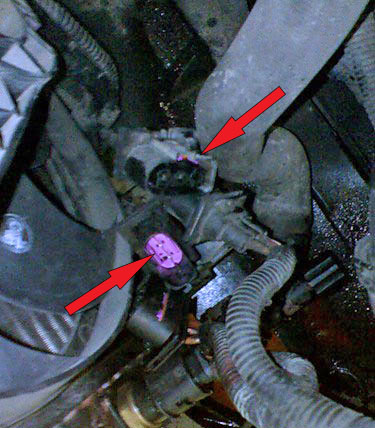
17. Having pressed the spring retainer 4 (see the diagram-figure in the previous paragraph), disconnect the outlet (lower) hose with a tip 3 from the radiator branch pipe. Disconnect the inlet hose from the radiator in the same way.

Warning:
For models with air conditioning - do not open the hydraulic system of the air conditioner, i.e. do not disconnect the hoses from the condenser.
18. Unscrew the frame from the side reinforcements and remove it.
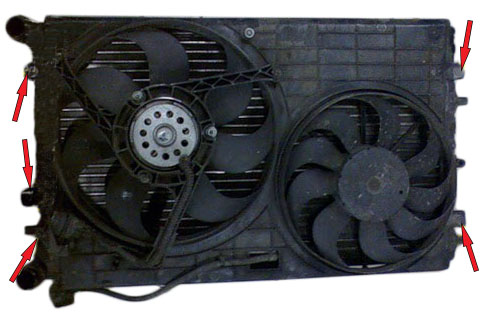
19. Turn off four toreks of fastening of a radiator.
20. For vehicles with air conditioning. Unscrew four bolts 2 fastening the condenser 3 to the radiator 1.
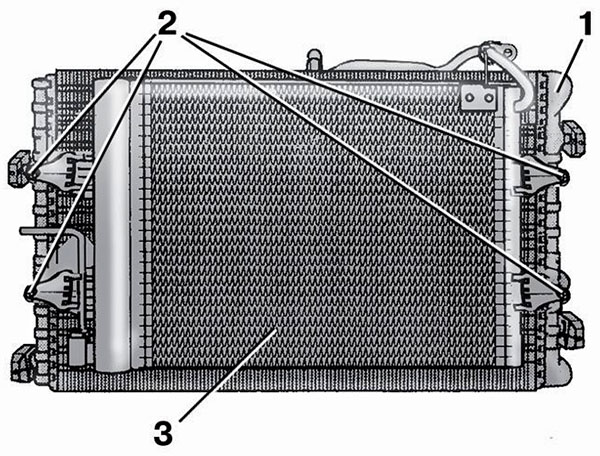
Warning:
Never leave a radiator with a condenser hanging on the hoses.
Move the A/C condenser aside by tying it to the hood hinge.
21. Remove the heatsink and disconnect the fan shroud.
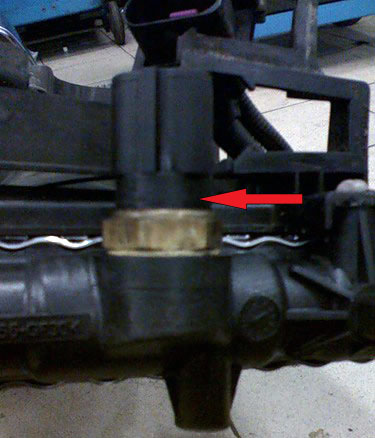
22. If necessary, unscrew the fan switch and replace the O-ring.
23. Attach the fan shroud to the new heatsink and install it in place. Before connecting the pipes, grease them from the inside with silicone grease - this way they are better dressed.
24. Install the radiator in reverse order. At the same time, please note that the upper supports (see Fig. Radiator of the cooling system) 19 of the radiator are white, and the lower 17 are black.
25. Reinstall all other parts.
26. After installation, fill the coolant into the expansion tank up to the “max” mark. The moment of an inhaling of bolts of fastening of a radiator of 5 Н·м.
27. Install the cover on the expansion tank. Start the engine and let it run until the radiator fan turns on.
28. Check the coolant level in the expansion tank and top up if necessary.
29. On a warm engine, the coolant level in the expansion tank should be at the “max” mark or slightly higher. On a cold engine, the fluid level should not fall below the “min” mark.
Warning:
When the engine is warm, the cooling system is under pressure. Therefore, remove the cap of the expansion tank on a cold engine; if it is necessary to open the tank on a hot engine, cover the plug with a rag and remove it with an outstretched hand.
Recommended coolants:
Coolant name - Manufacturer
- Glysantin G 30-72 - BASF AG
- XT 4030 - ELF OIL AG
- Coolant ETX 6280 - TEXACO
- FROSTOX SF-D 12 - HENKEL HAERTOL GmbH
Coolant concentrate dilution rates:
- Freezing point: -25 °C - Concentrate ratio/Distilled water ratio: 40/60%
- Freezing point: -35 °C - Concentrate ratio / Distilled water ratio: 50/50%
The article is missing:
- Tool photo
- Photo of parts and consumables
- High-quality repair photos
Source: http://vwts.ru/forum/71287.html; http://www.navigator.mn/skoda-fabia.html; http://carpedia.club