![W203/S203/CL203 [2000 - 2004]](/uploads/mercedes-c-klass-w203.jpg)

Replacing the head unit on the Mercedes-Benz W203
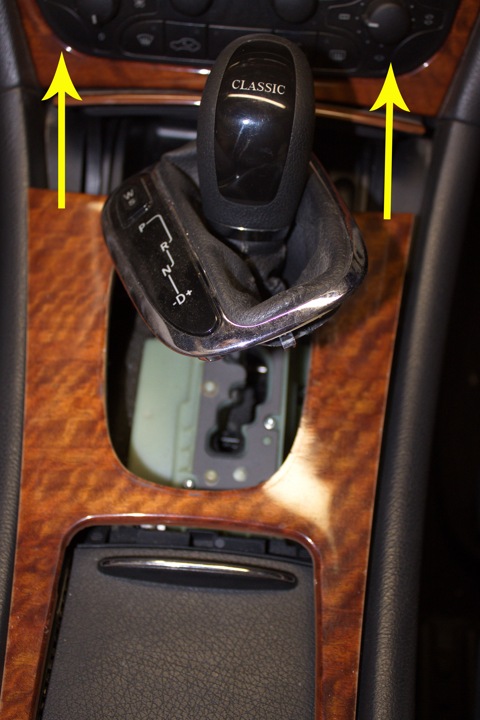
1. We remove the lining of the gear lever on the mechanics, something like that too, I didn’t use a tool for this, I just squeezed the frame slightly in places where the arrows were and pulled it up, it pops up quite easily, just don’t forget that there are backlight wires and it rises centimeters on them at 15.
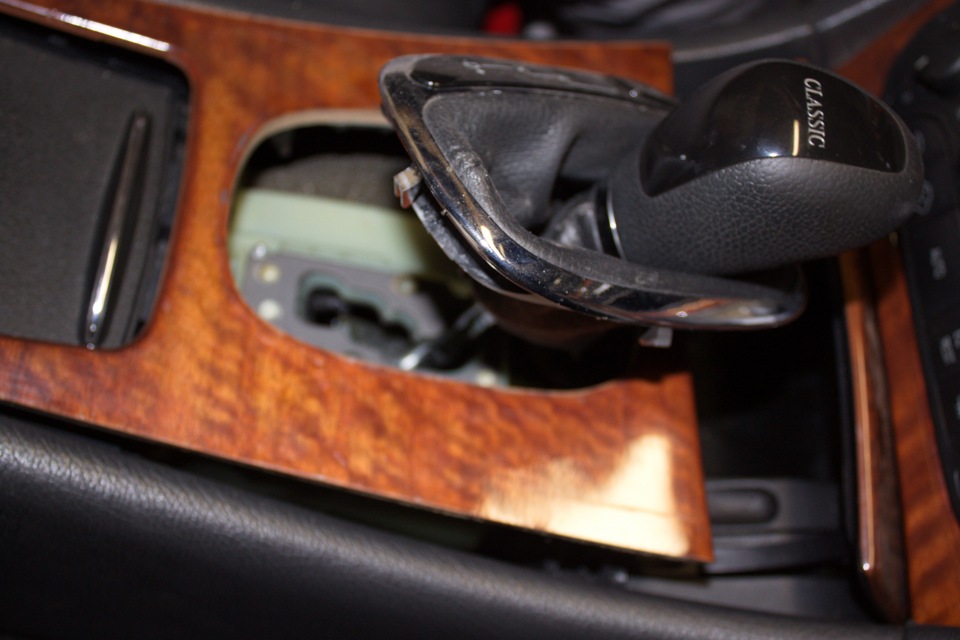
2. Somehow it will look like this. Next, take out the ashtray.
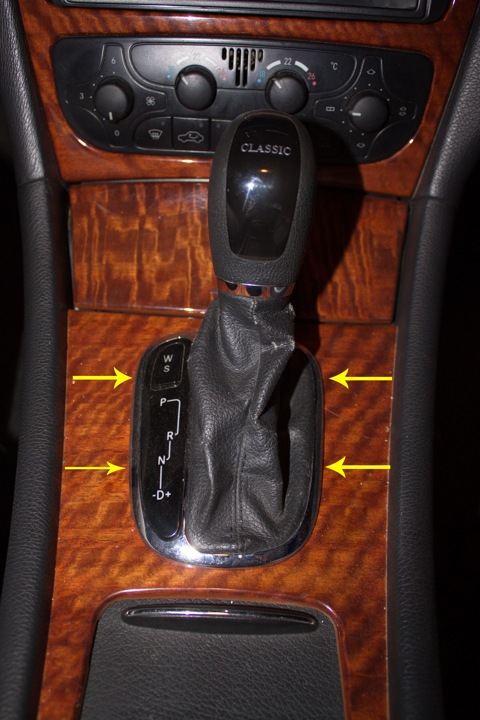
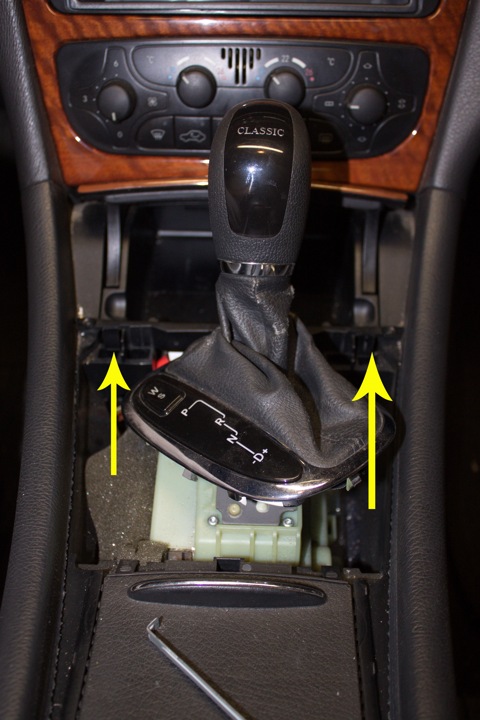
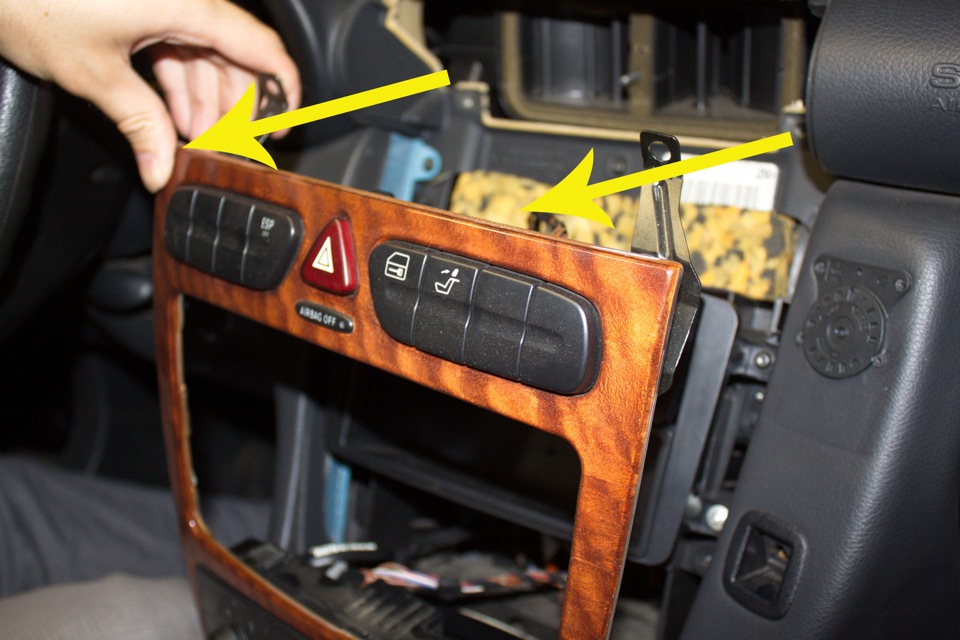
3. Next, remove the wooden lining of the central tunnel, for which we simply pull it out. Places for which to pull are indicated by arrows, pull up. Not necessarily, but just in case, open the large armrest compartment.
4. This is a side view, then just carefully remove the lining and set it aside.
5. We get this view:
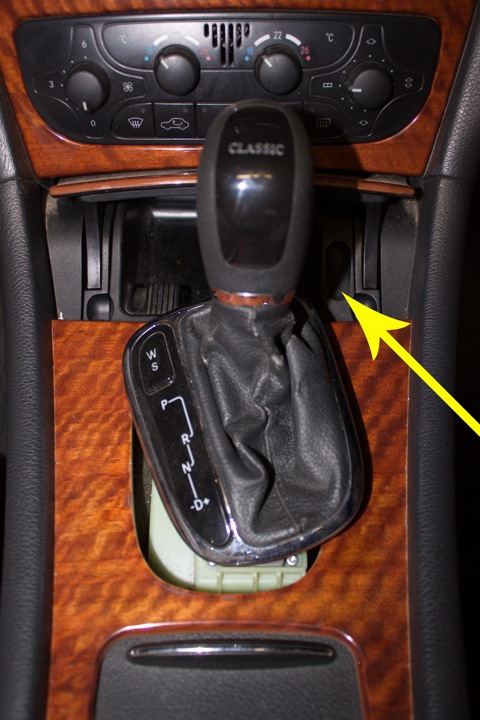
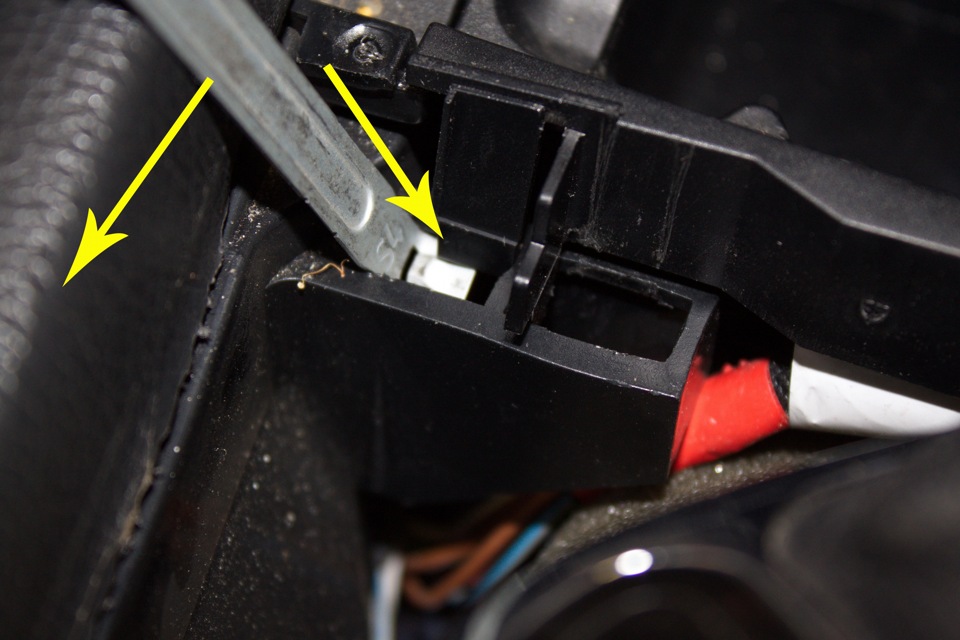
The arrows indicate the attachment points of the ashtray body, with latches they look towards the hood of the car, so removing them is not very convenient and can be broken:
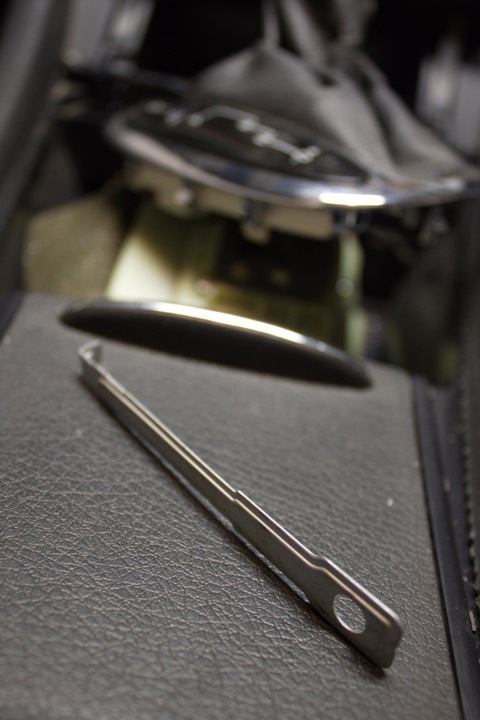
you can handle it with a screwdriver, but it was just at hand, we pick up the latches and take out the frame.
In order to remove it, you need to put the car in neutral speed. Whoever has a machine gun, just for everyone I say, for this you need to insert the ignition key, turn it on, press the brake and put the selector in neutral.
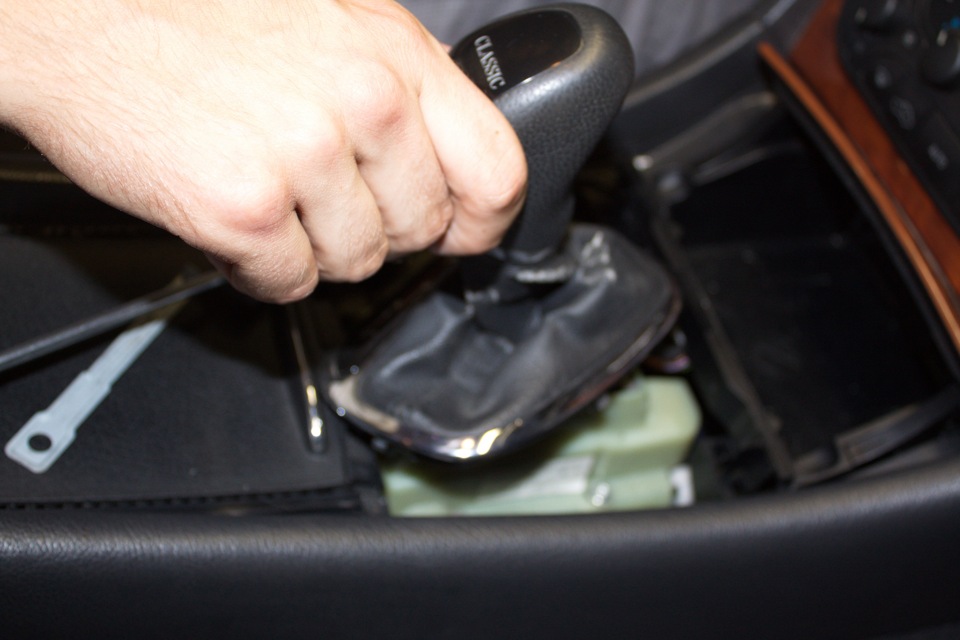
6. When taking out the frame, be careful there, behind the backlight wires, turn them off.

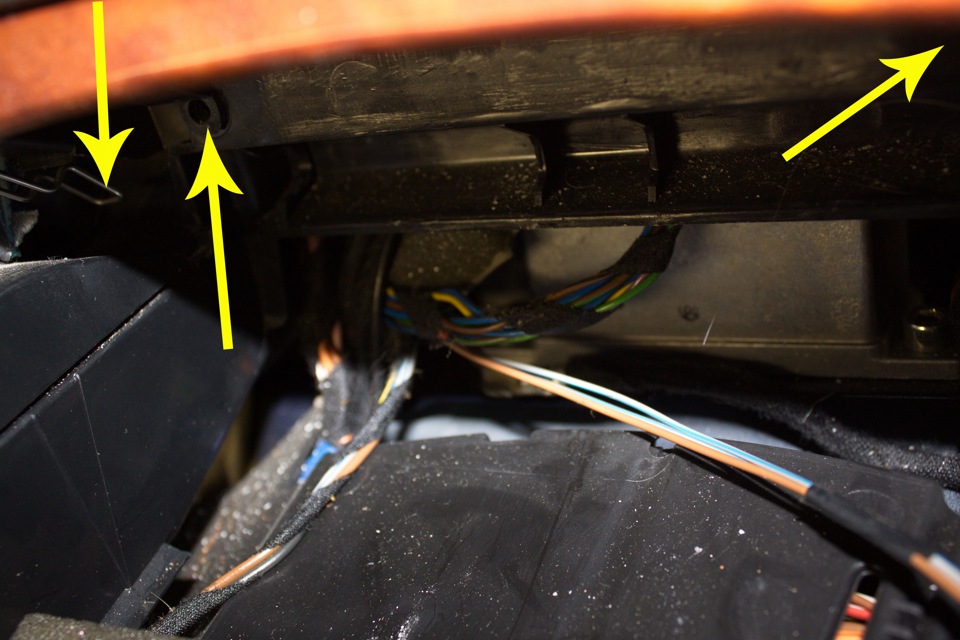
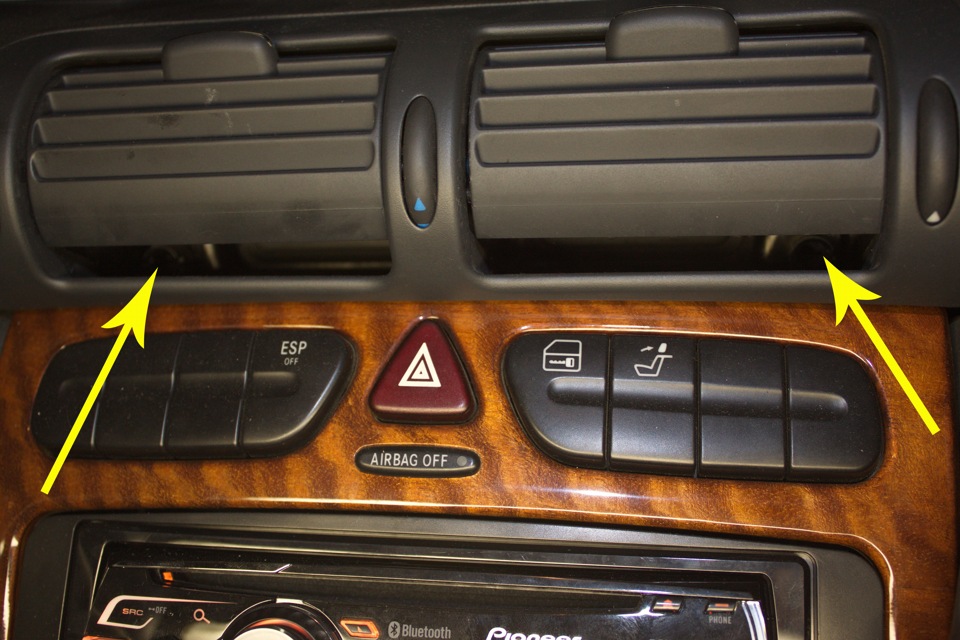
7. Now we have a view of the space under the climate control panel, there are two latches that look like paper clips, we simply pull them towards us and down, and here we need two self-tapping screws with a T-20 Torx asterisk key, like they are called, we unscrew the screws, respectively, everything is indicated by arrows on the picture:
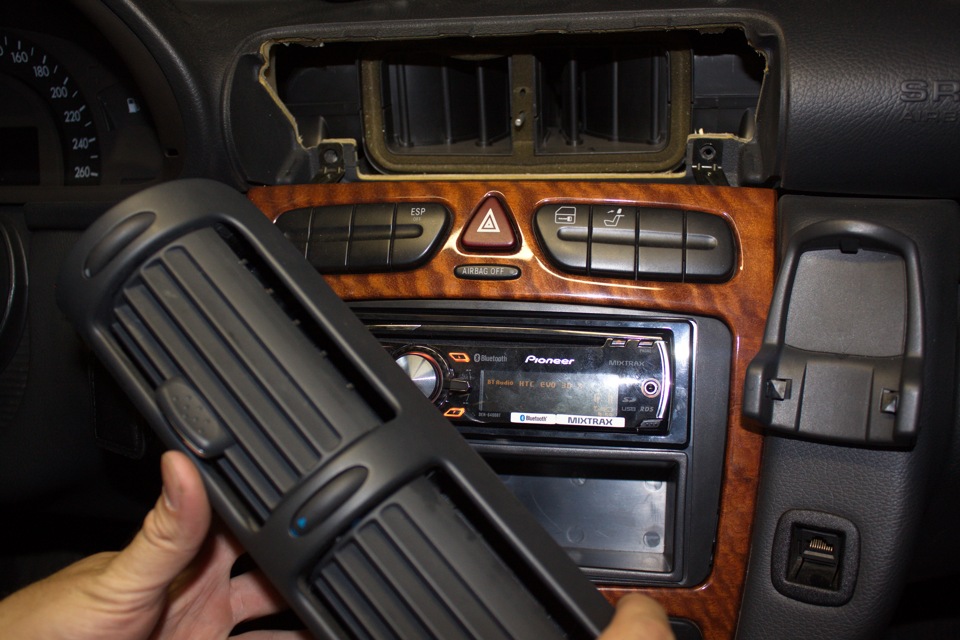
8. Next, we arm ourselves with a flat screwdriver, preferably a wide one, or if anyone has some kind of plastic puller, in general, the task is not to break or scratch it. With a screwdriver, as in the photo, we hook the left edge of the left nozzle and gently press on it, while the handle of the screwdriver should go towards the steering wheel, I tried to somehow depict this with arrows, I hope it’s clear, and pull the nozzle up, the result should be its full rise up and a horizontal regulator rests on the edge of the nozzle,
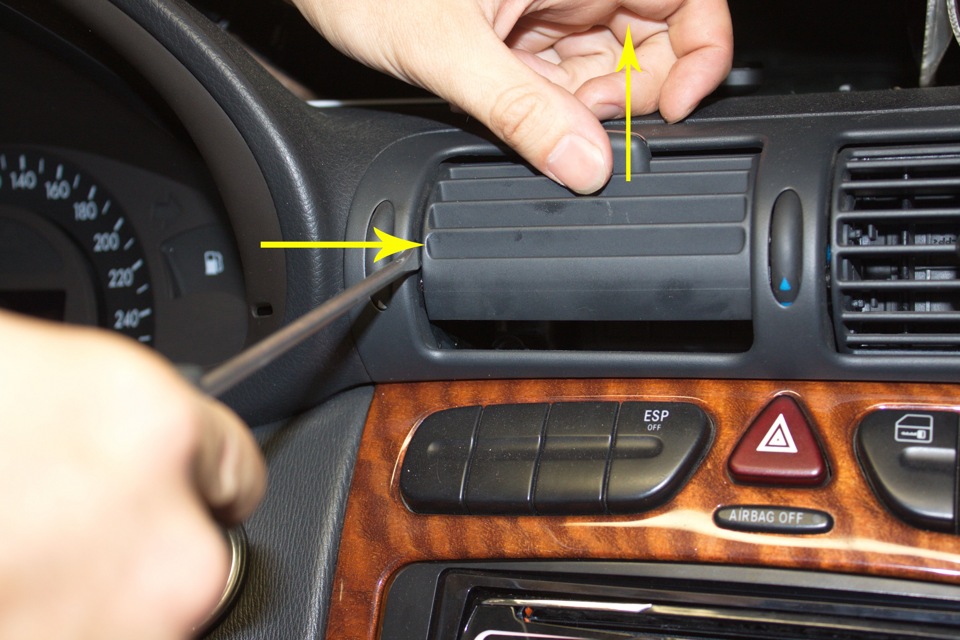
we do the same with the right.
9. We unscrew 2 screws inside the nozzles with the same T-20 key, they are indicated by arrows.
10. Next, we again squeeze the deflectors, but now we translate them vice versa to the lower position:
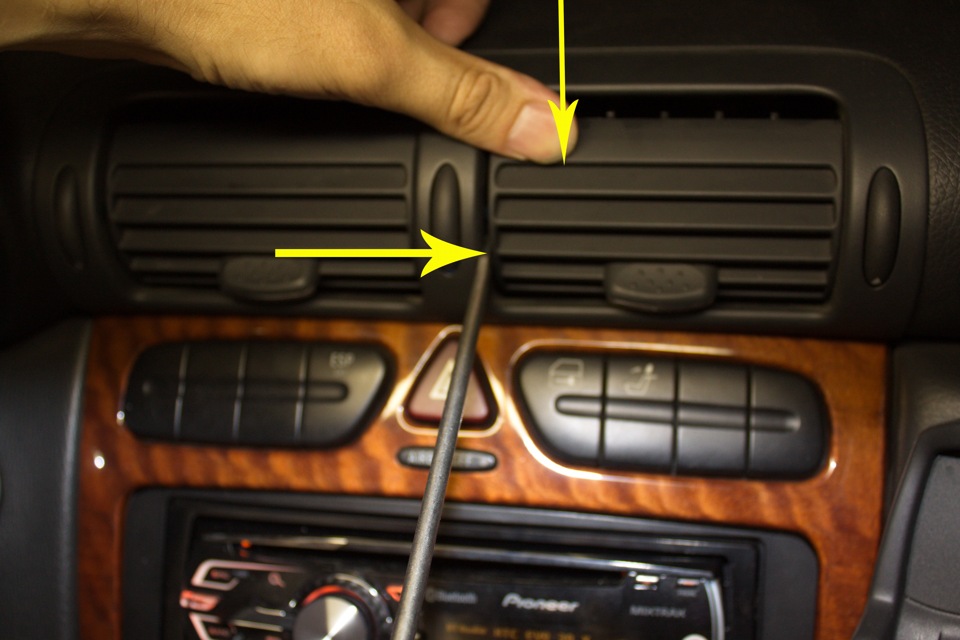
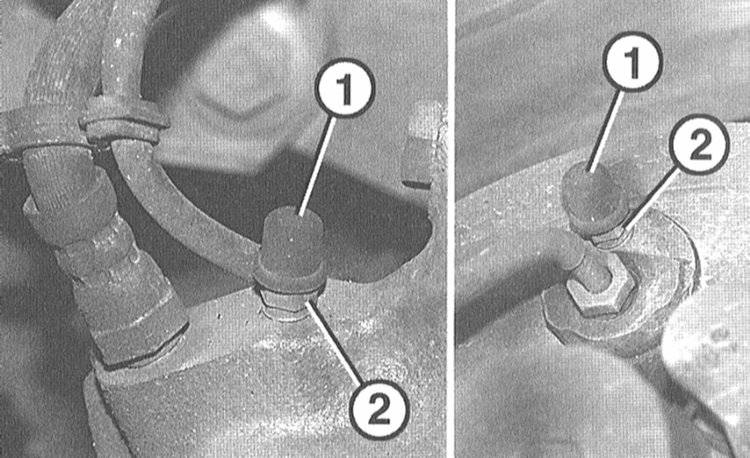
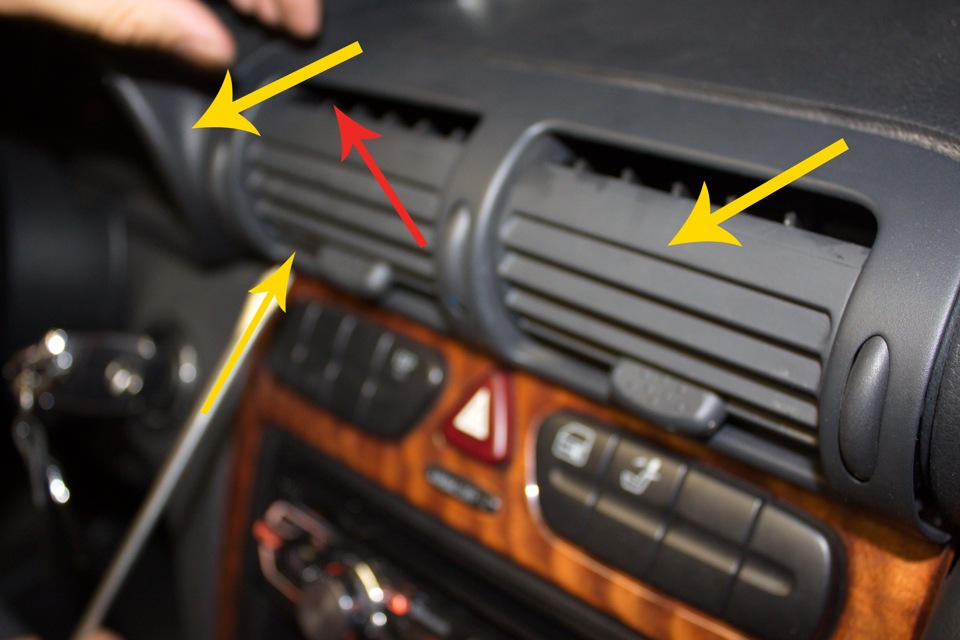
11. Next, we take a long flat screwdriver and as narrow as possible, at an angle of about 50-60 degrees we put it into the deflector as shown in the photo, you need to get into the rectangular hole of the plastic latch, which is located in the upper far part of the blower and snaps into place at the junction between it and panel, we press down at the same time gently pulling the blower towards ourselves but not much, on the other hand there is another latch.
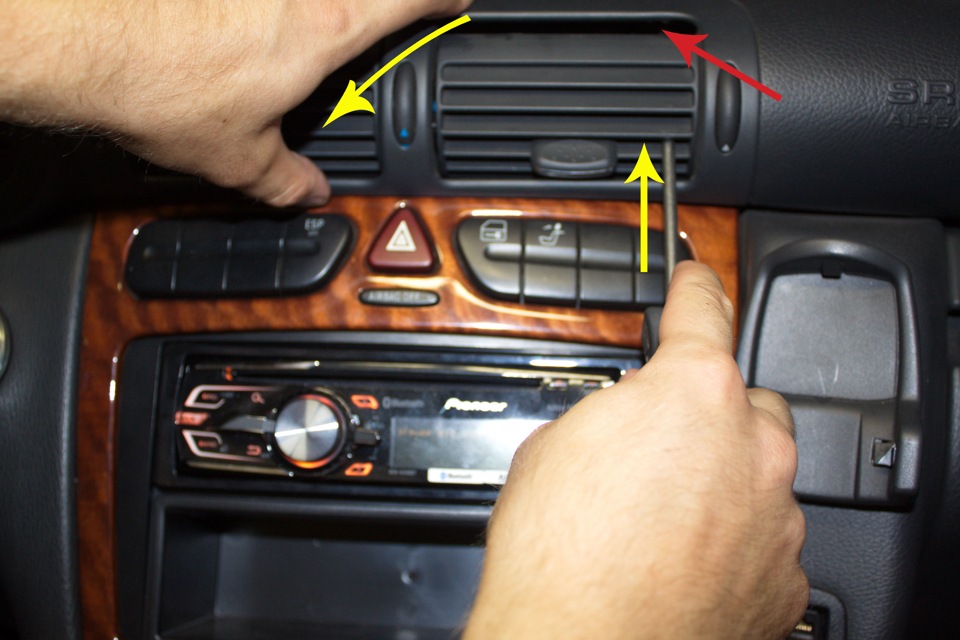
In the photo, the red arrow shows the place where the latch is.
12. We do the same on the other side and finally remove the blower.
Depending on the configuration, there may be a backlight wire, if it is, turn it off. We get this look:
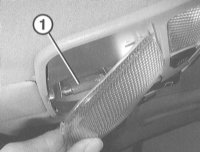
13. We remove the phone mount from whoever has it, for this we hook the plastic plate covering the fastener with a knife.
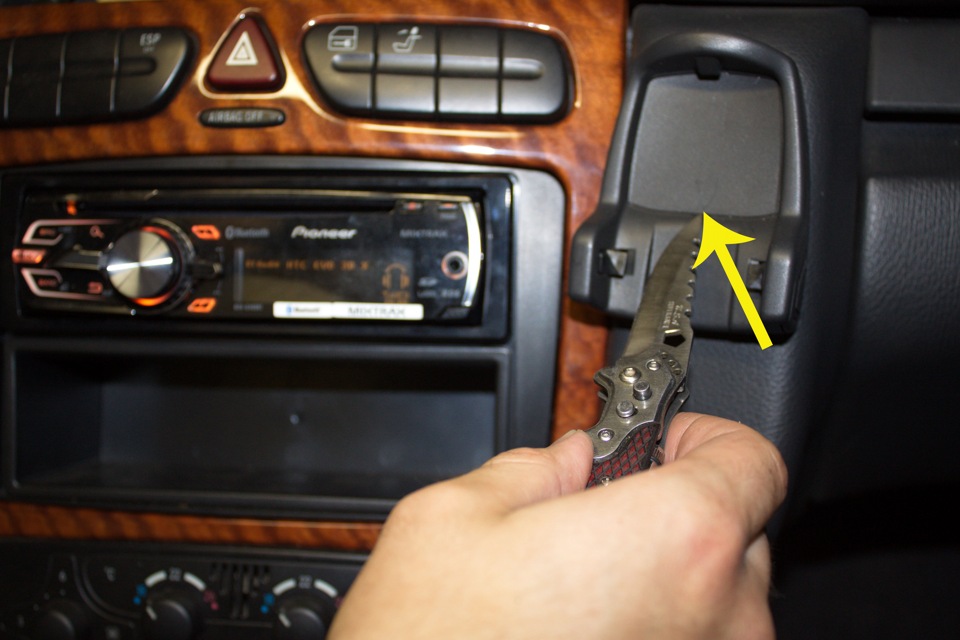
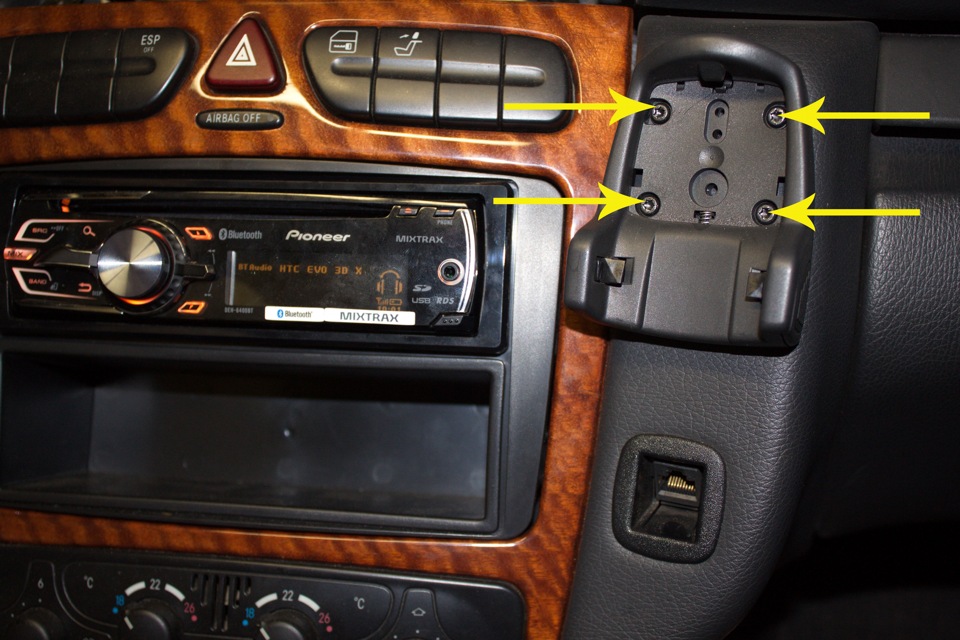
and unscrew 4 screws with the same T-20 key:
14. Next, remove the panel, it is removed together with the climate unit, the radio tape recorder will remain in place with its fasteners, for this we simply pull it towards ourselves from above and below
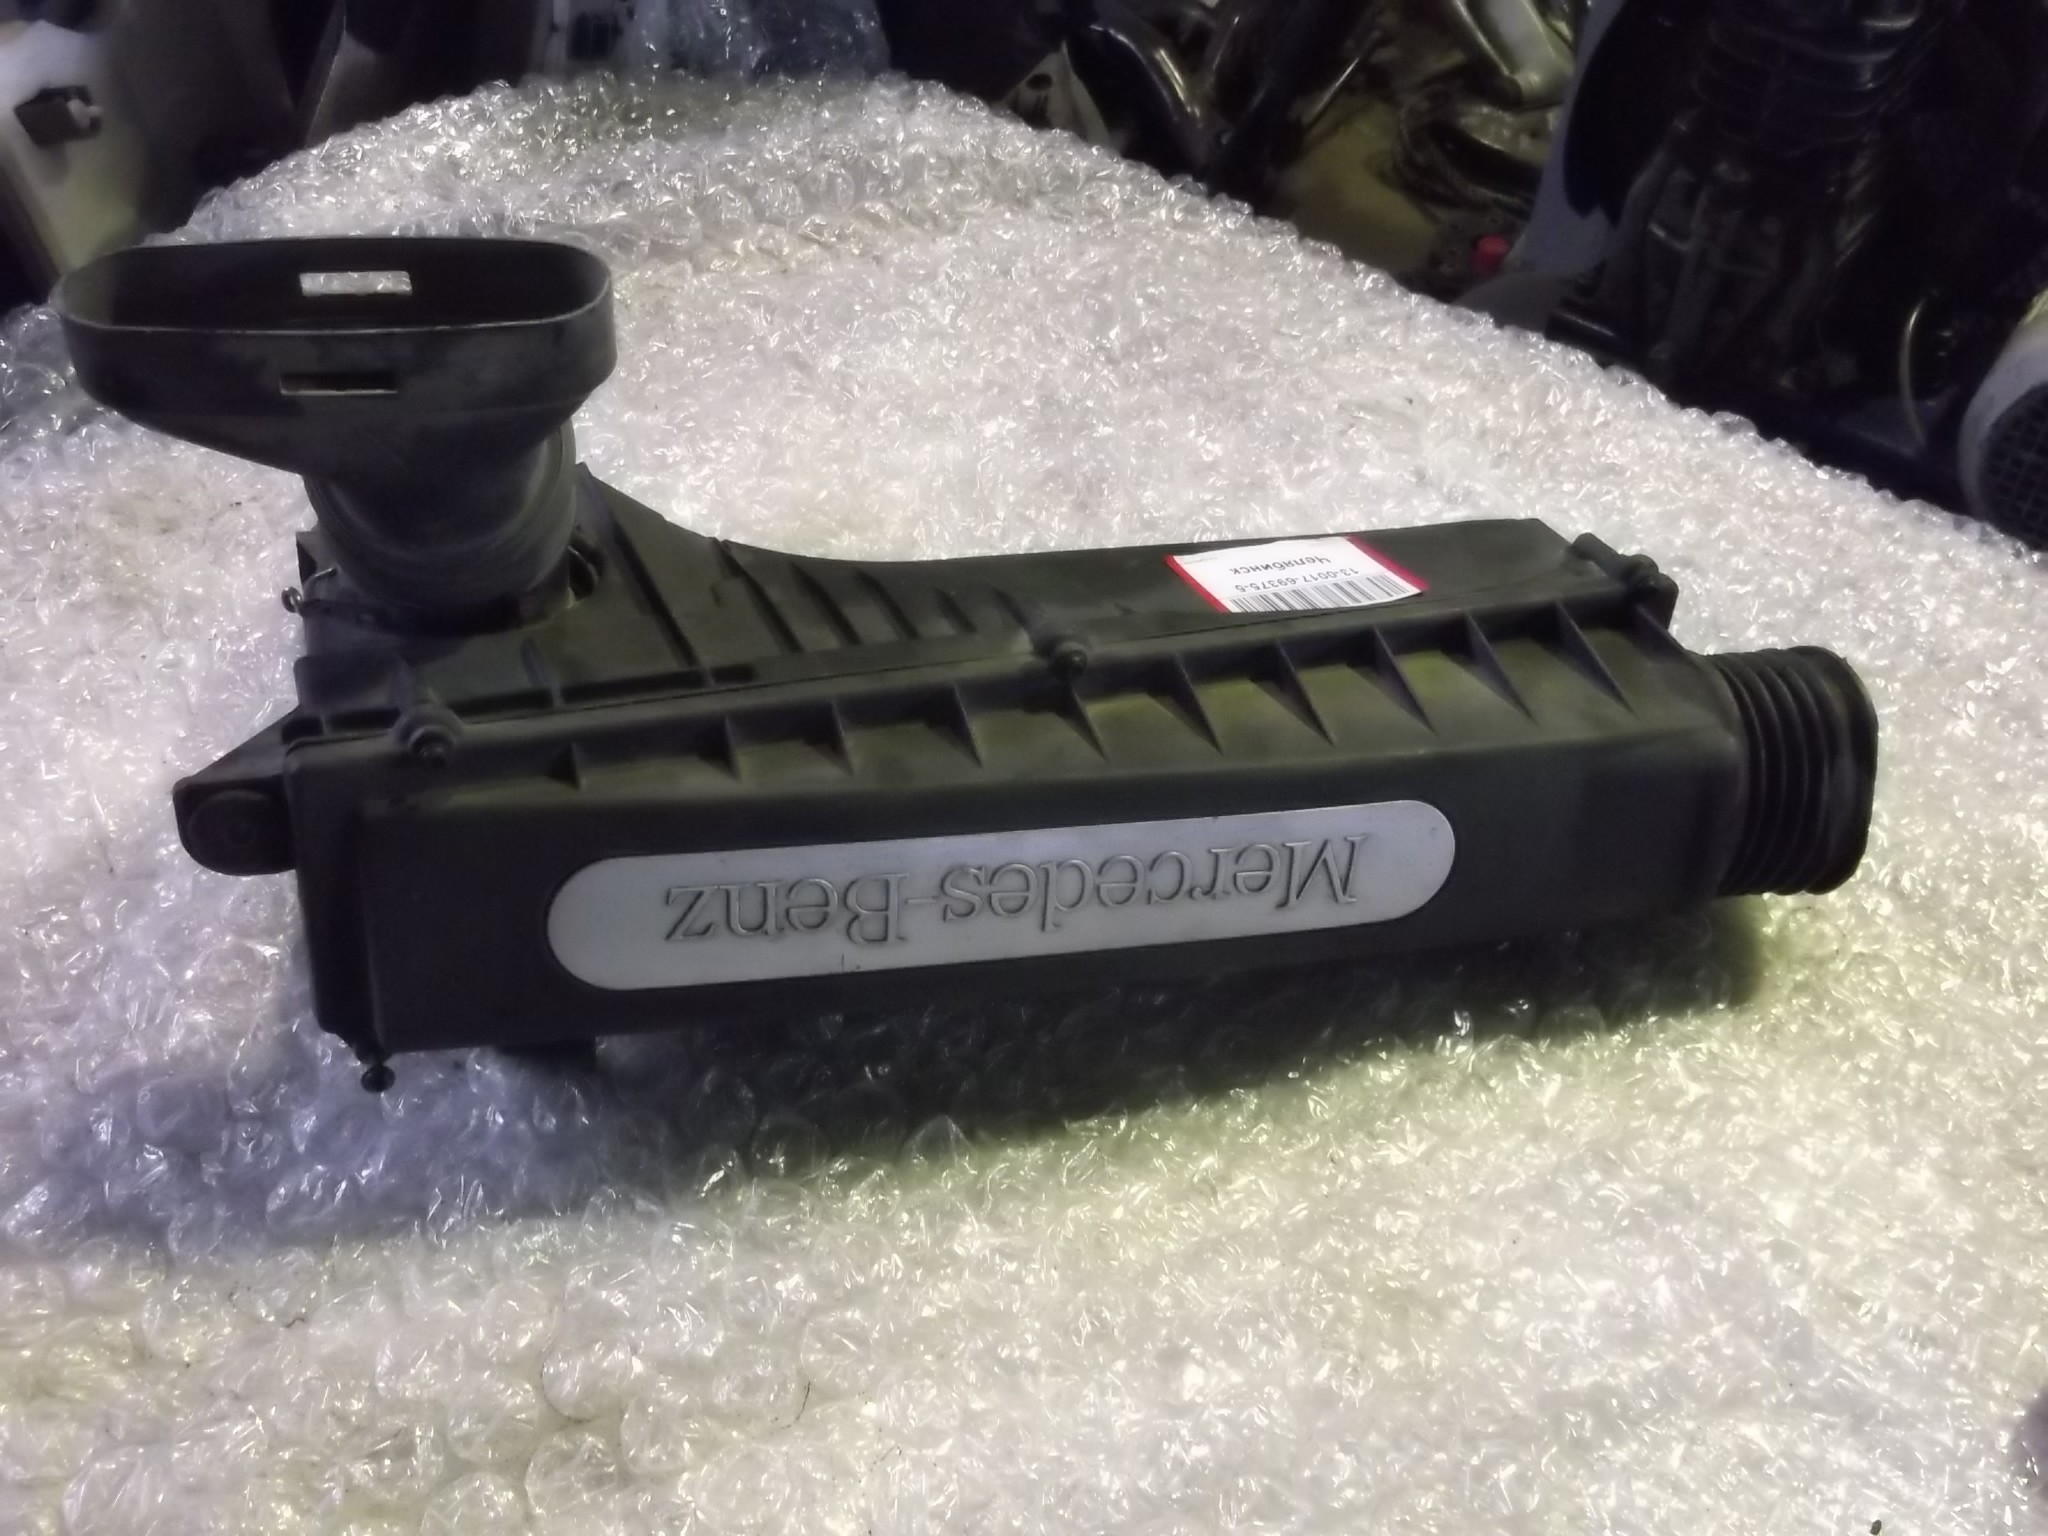
, we don’t completely remove the wires there, it’s not worth disconnecting them without disconnecting the battery terminal, in order to remove the battery terminal we remove the air filter by snapping off 3 latches and pulling it towards ourselves We
loosen the negative terminal bolt with a 10 key and take it away from there are no photo terminals because they didn’t fit here, max 20, but I think there’s nothing complicated here.
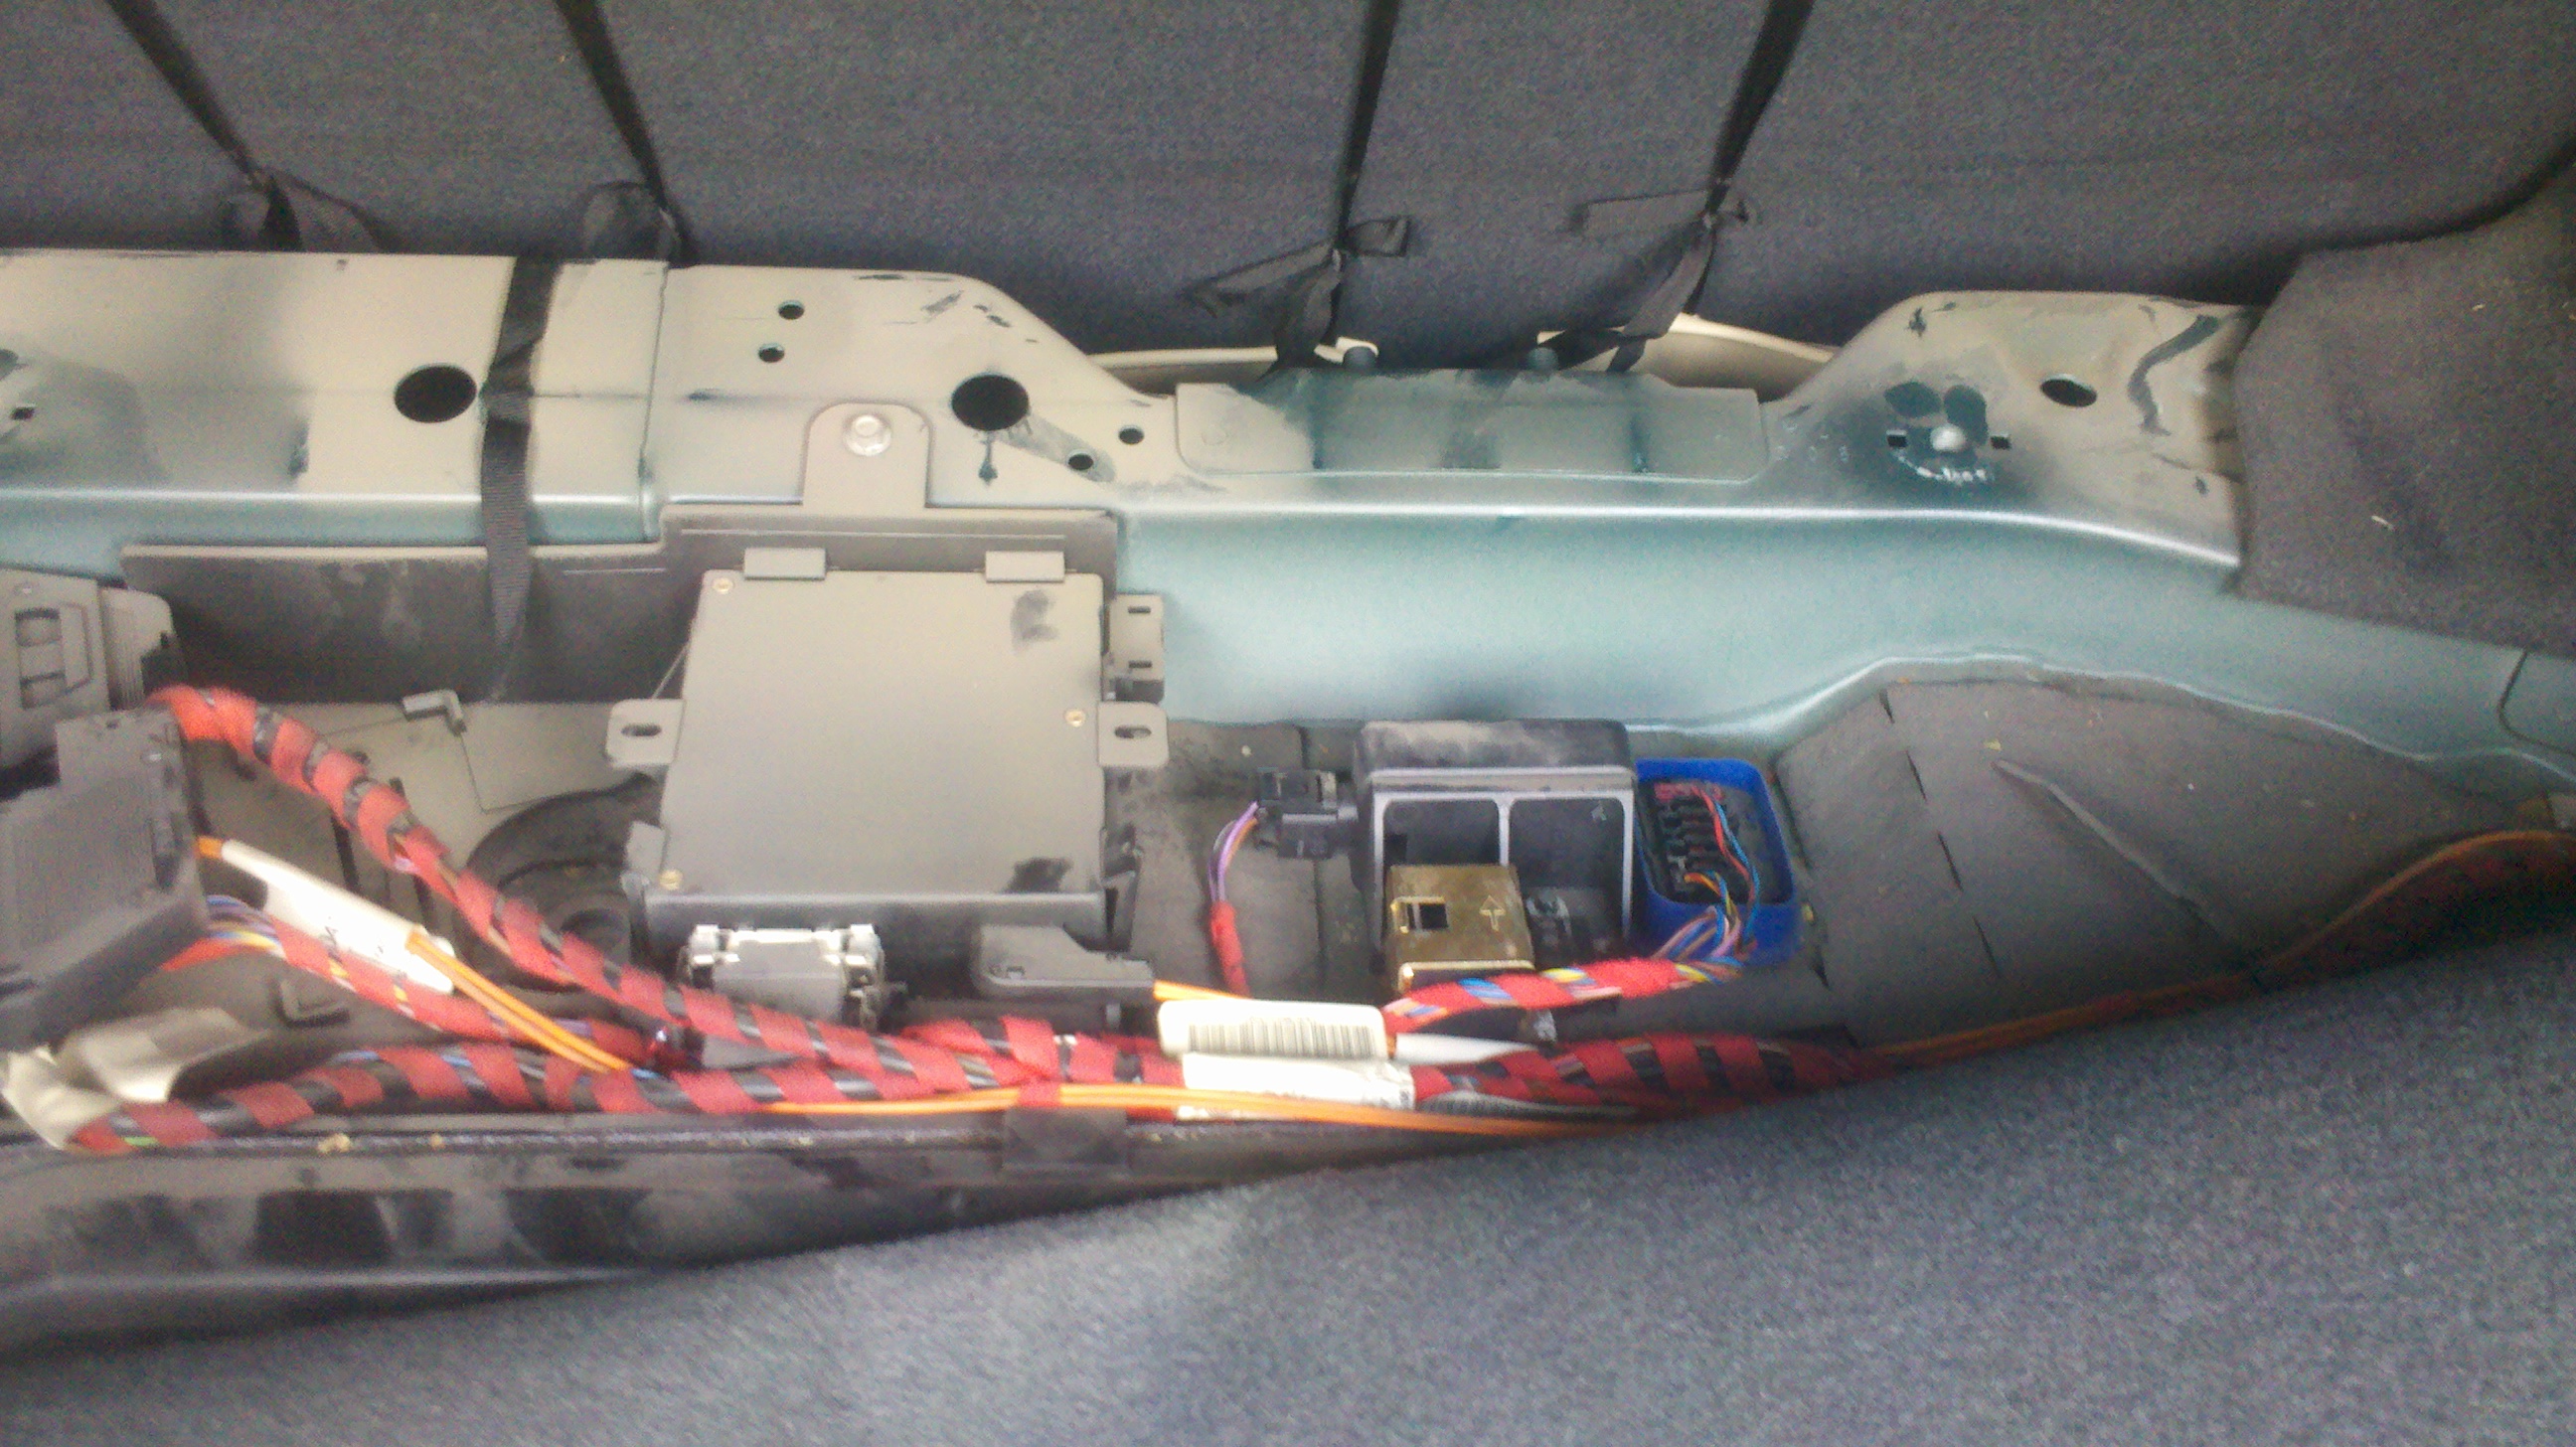
15. Now turn off the wires.
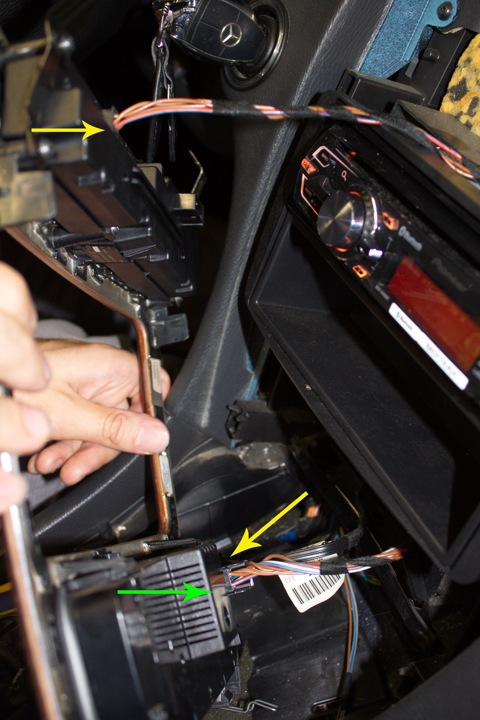
The green arrow indicates the connector with the mount, you just need to pull it (the mount) up and the connector will pop out.
16. Well, then everything is simply unscrewed with a T-20 key, four self-tapping screws for fastening the radio and pockets located to the right and left of them and take out the whole thing, on the radio we turn off (at least on pre-styling models) the standard Euro connector, in the new Pioneer radios too "Euro"
Source: https://www.drive2.ru/l/288230376153145494/