Tools:
- Open end wrench 10 mm
- Straight ring wrench 18 mm
- Straight ring wrench 21 mm
- 11 mm brake pipe wrench
- Key with Torx tip T40
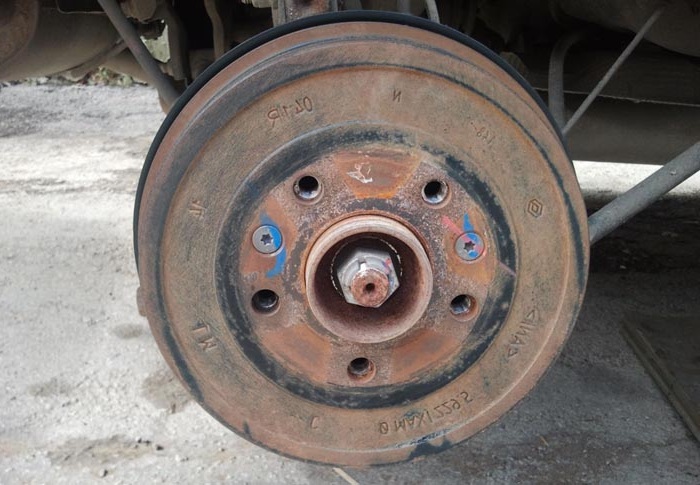
- Crank for the end nozzle (or pneumatic wrench)
- Head 18 mm
- Head 21 mm
- Head 30 mm
- torque wrench
- Hammer medium (if necessary)
- Screwdriver flat medium
- Drift (if necessary)
- Pliers
- screw jack
- balloon wrench
- Support adjustable
- Wheel chock (shoe)
- Metal brush
Parts and consumables:
- Nut 8200964237 - 2 pcs.
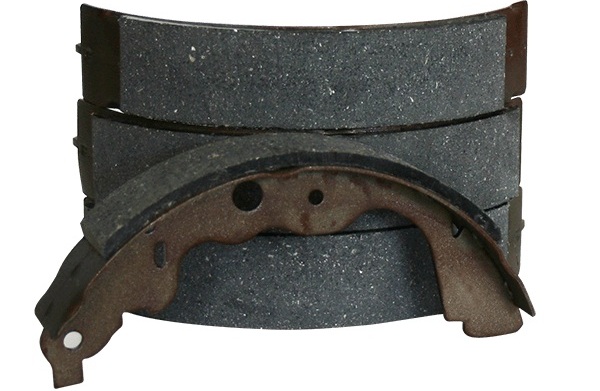
- Brake pads for rear brake mechanisms 7701210109 (if necessary)
- Wooden block (if necessary)
- Aerosol lubricant type WD-40
Notes:
Remove the rear suspension knuckle to replace the rear wheel hub bearing, brake shield, to replace the knuckle assembly with bearing and silent blocks.
The work is shown on the knuckle of the rear right wheel, but it is the same for both sides of the rear suspension.
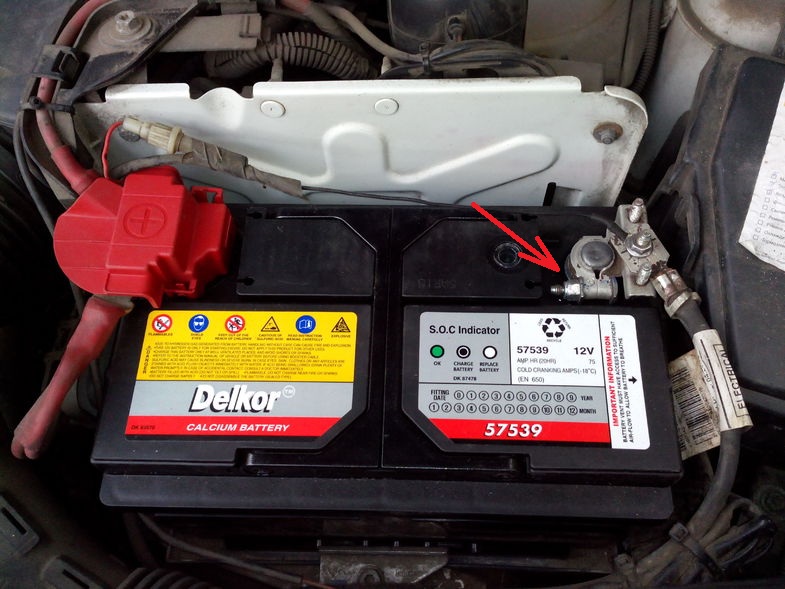
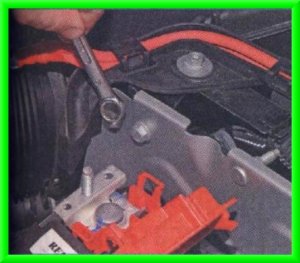
1. Disconnect a wire from the minus plug of the storage battery.
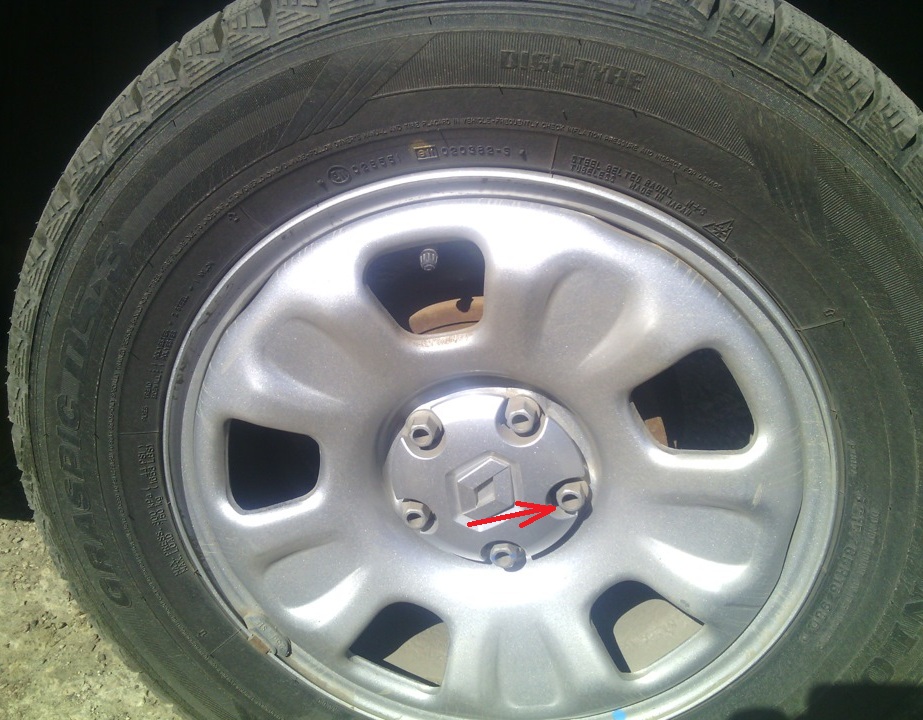
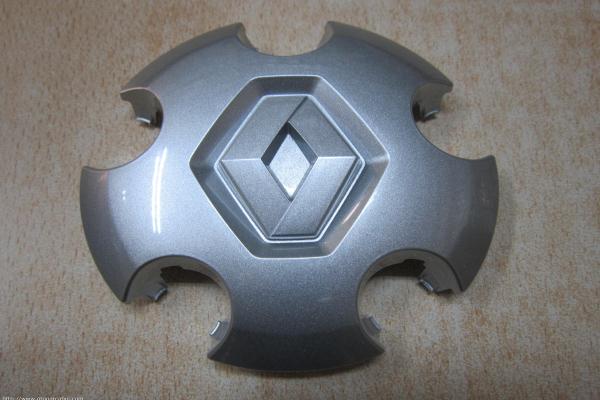
2. Pry off the edge of the decorative cap with the hook supplied with the car and remove it.
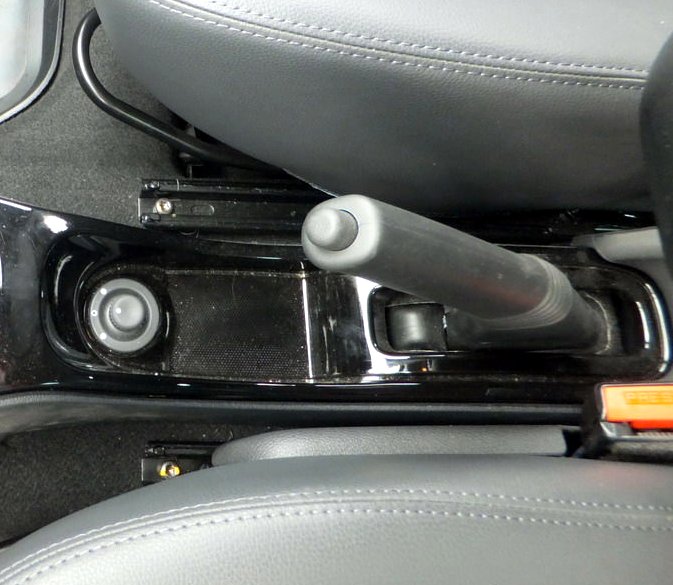
3. Apply the parking brake, engage first gear and place a chock under the left front wheel. Loosen the right rear wheel nuts 1 turn with a wheelbarrow wrench, and then use a jack to hang the right rear of the car and place it on a support.
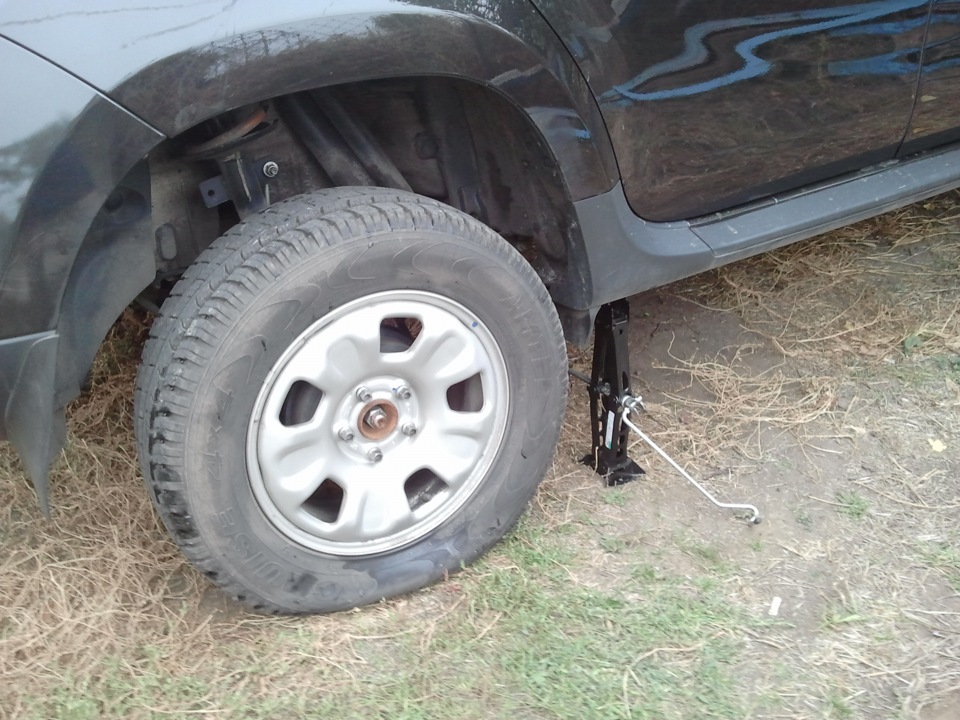
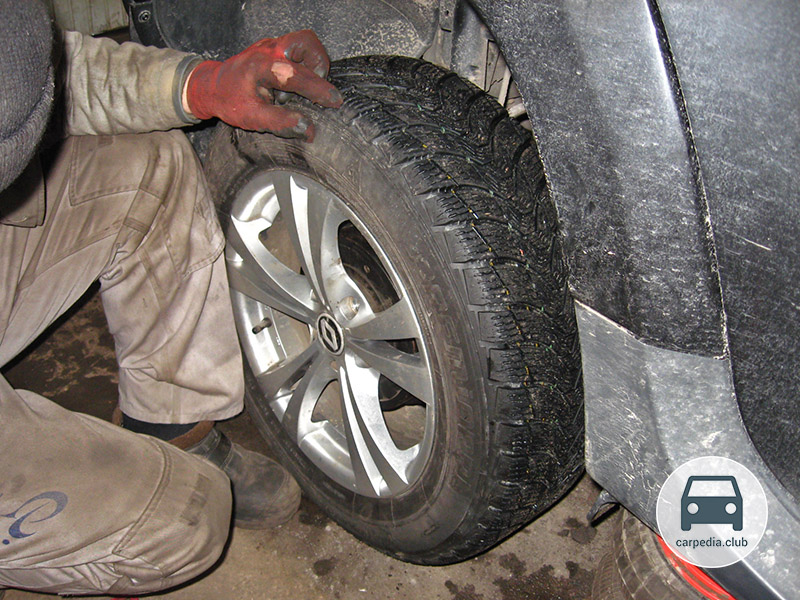
4. Fully unscrew the wheel nuts and remove the right rear wheel from the hub.
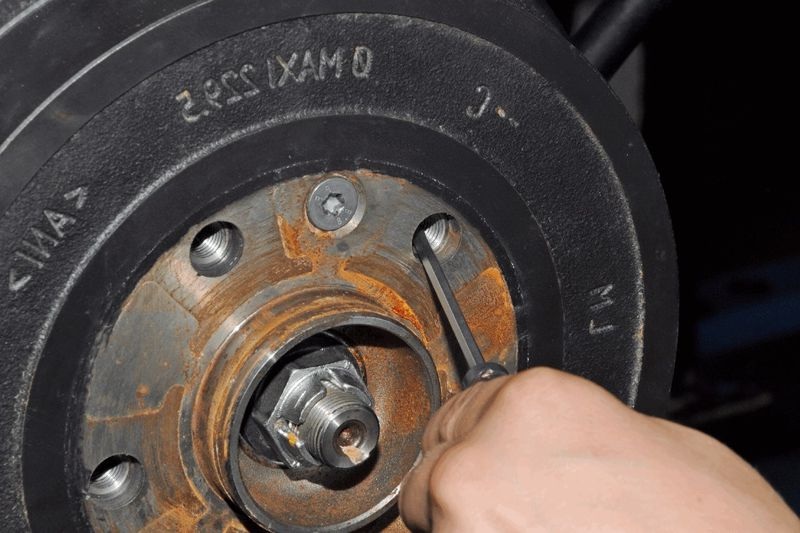
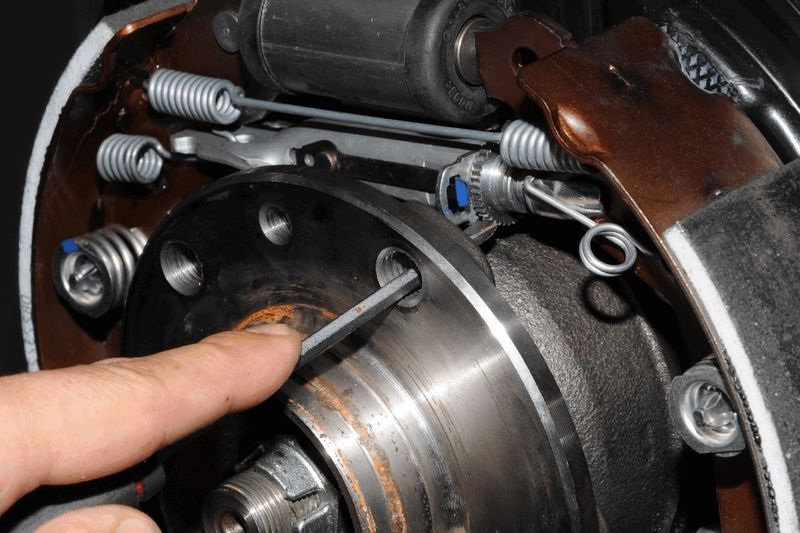
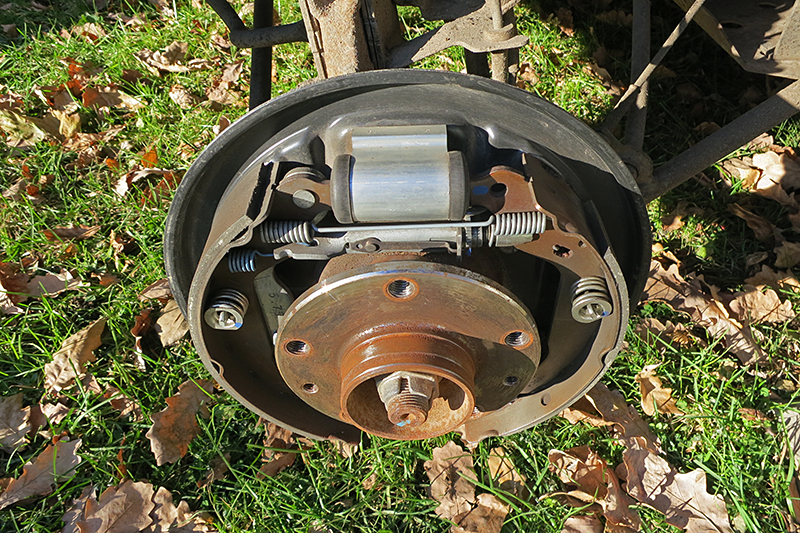
5. Release the parking brake lever. To bring the brake pads together and free the drum, it is necessary to place a flat screwdriver in the hole designed for the wheel fixing bolt. Next, by touch, you need to find the ratchet nut of the mechanism for automatically adjusting the gap between the shoes and the drum, thereby reducing the length of the spacer bar (the second photo shows the placement of the ratchet nut).
Note:
Turn the ratchet nut on the left and right wheels by the teeth from the bottom up.
6. Using a Torx T40 wrench, remove the two screws securing the brake drum to the hub.
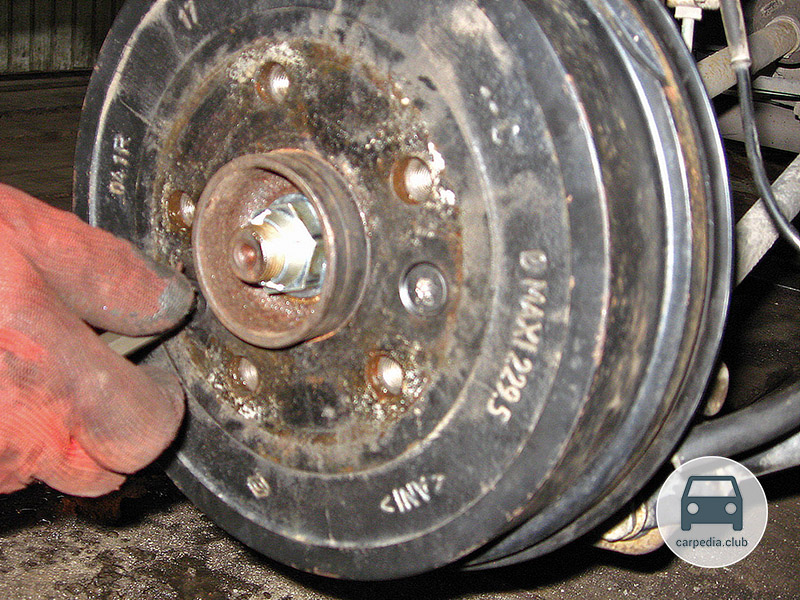
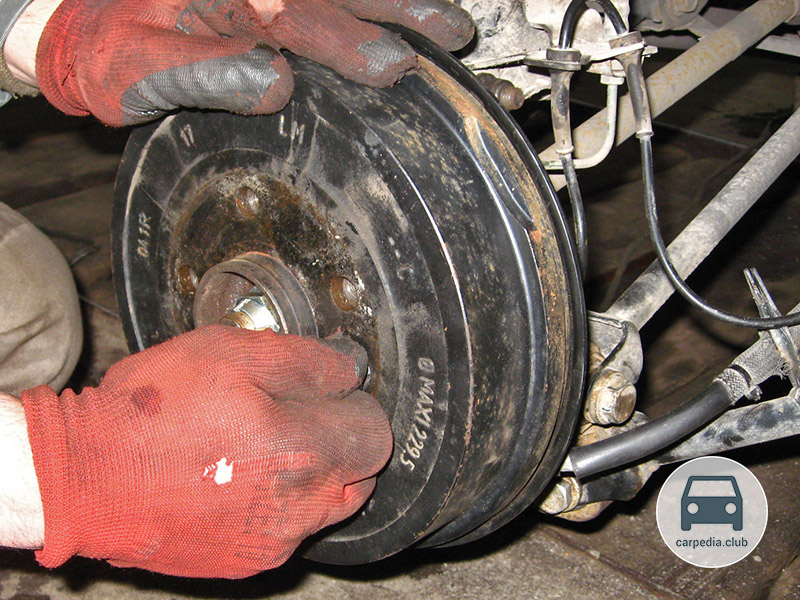
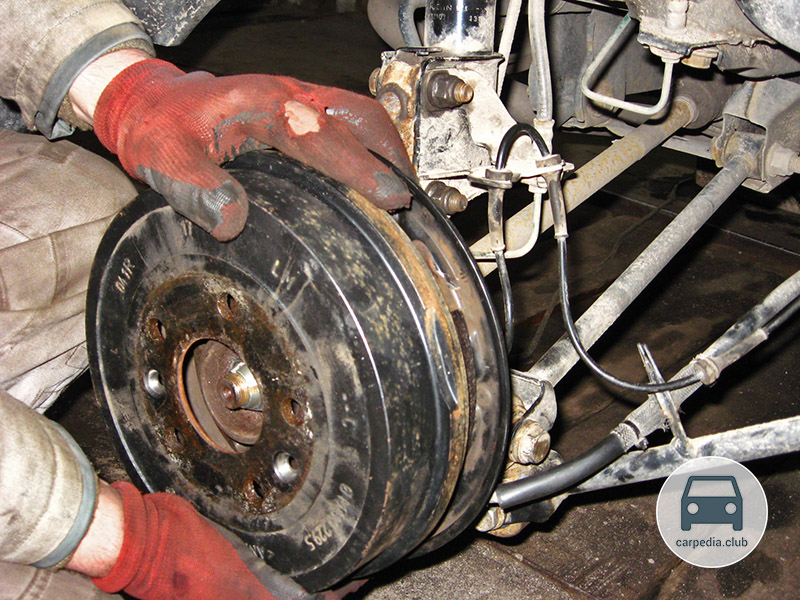
7. Remove the brake drum.
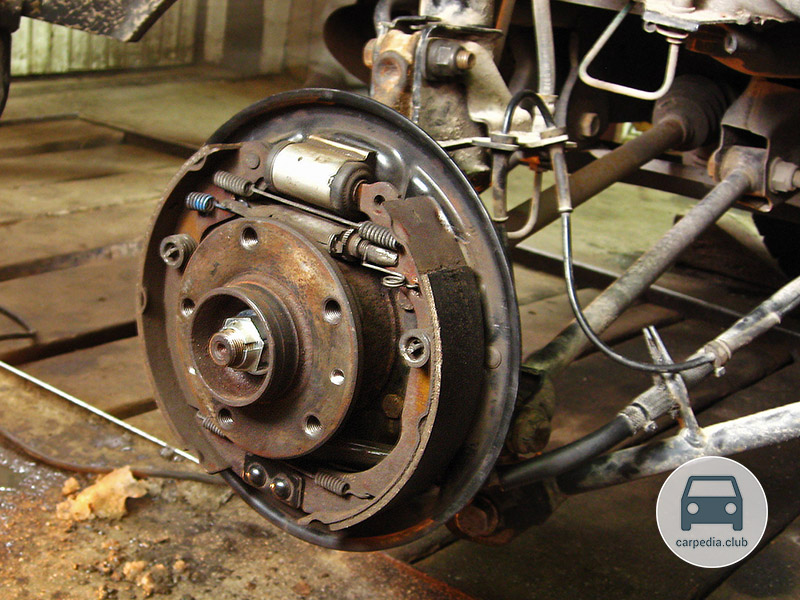
Note:
If it is difficult to remove the drum, you can remove it from the seat belt of the hub by tapping on the edge with a hammer through a wooden spacer.
Do not depress the brake pedal after removing the brake drum, as the pistons may completely come out of the wheel cylinder.
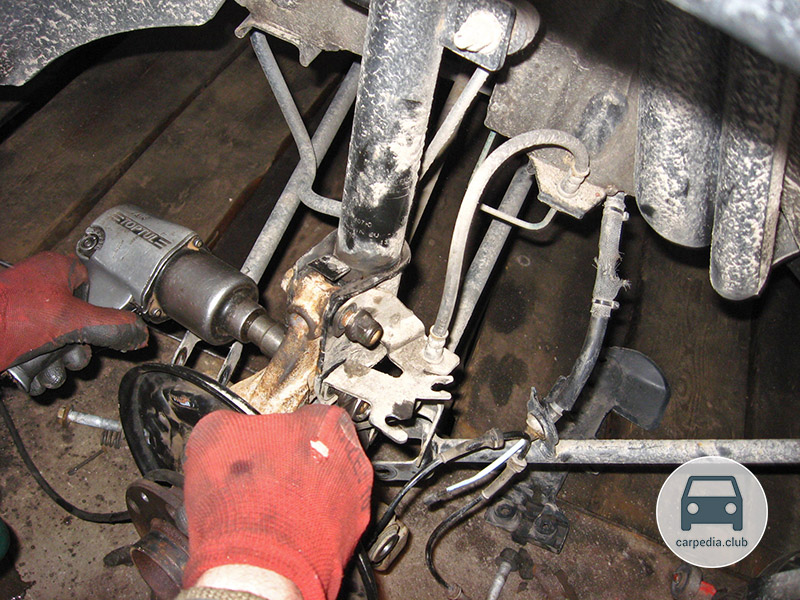
8. Using a pneumatic wrench, unscrew the rear wheel hub nut by 1-2 turns.
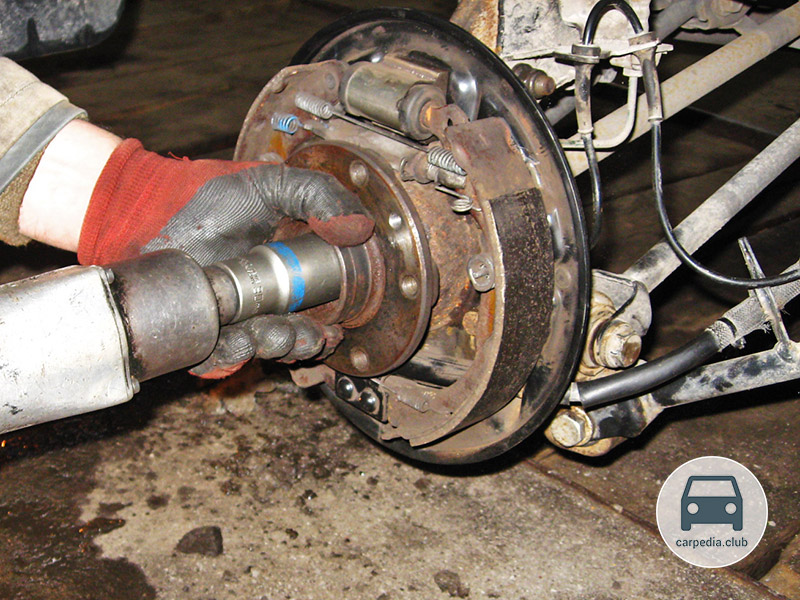
Note:
The tightening torque of the hub nut is significant, so it is recommended to use a wrench. But in the absence of a pneumatic wrench, it is necessary to unscrew the hub fastening nut by a turn even before removing the brake drum, asking an assistant to press the brake pedal.
9. Still reduce the length in the spacer of the rear brake pads.
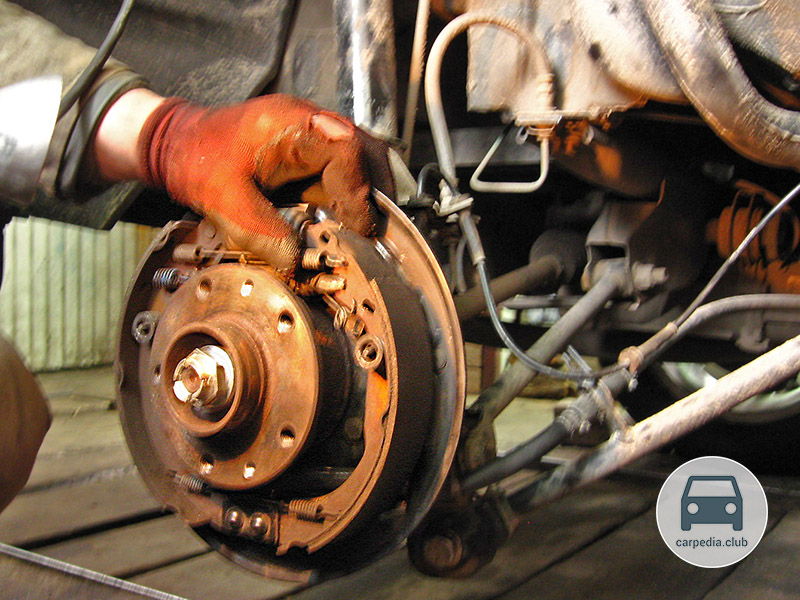
10. Using a screwdriver, disengage the hook of the upper coupling spring from the block and remove it.
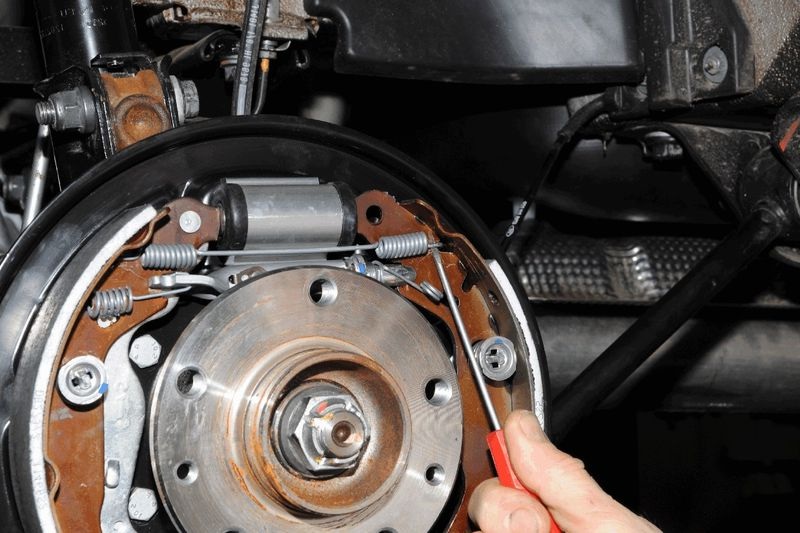
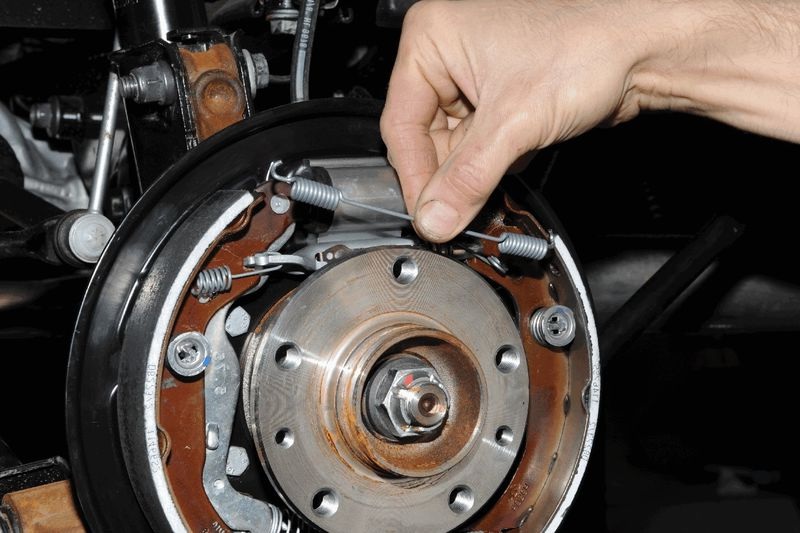
11. Similarly remove the lower coupling spring.
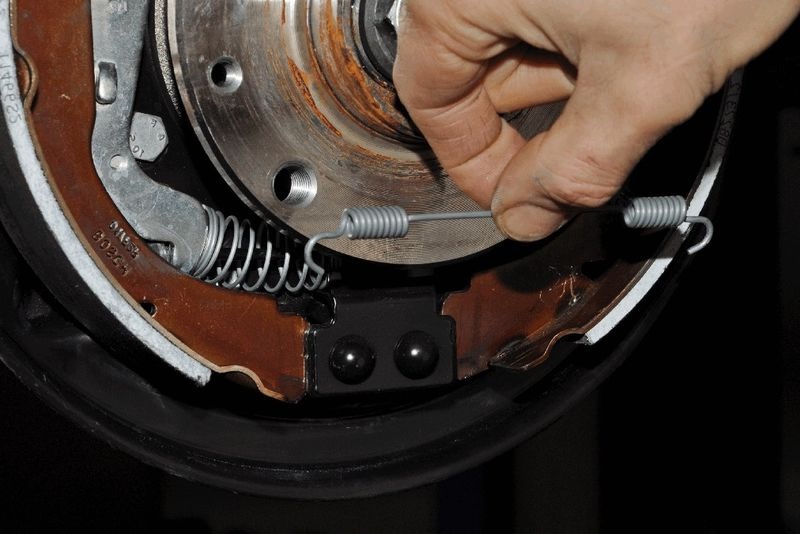
12. Then remove the gap adjuster spring.
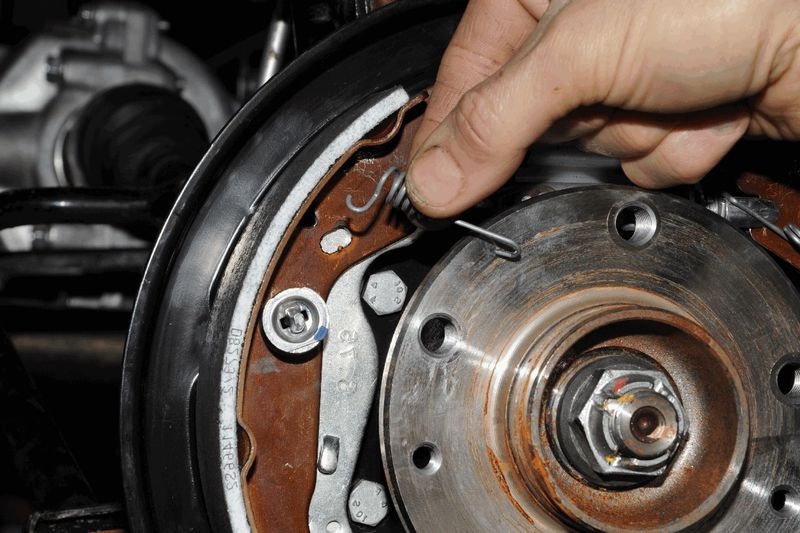
13. Use pliers to rotate the spring cup of the rear shoe support strut until the groove in the cup aligns with the shank of the strut.
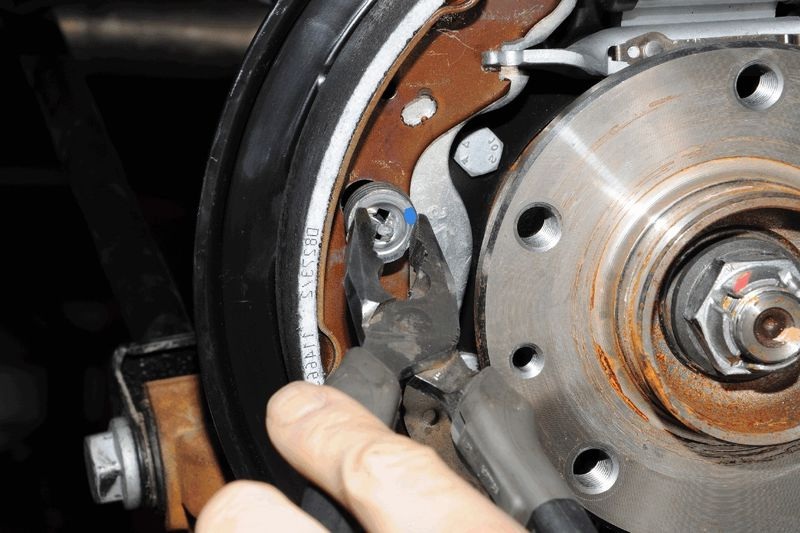
14. Remove a cup with a spring and take out a basic rack from an aperture of a board of the brake mechanism.
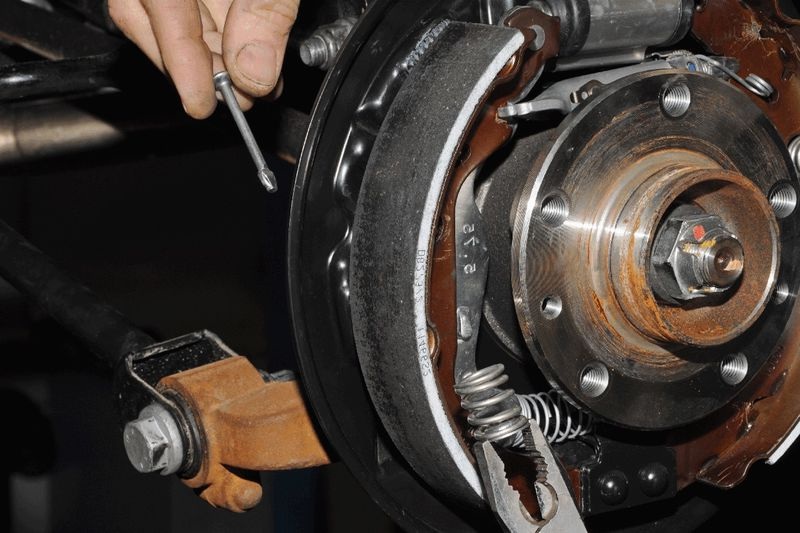
15. Similarly remove a basic rack of a forward block.
16. Remove the rear brake shoe from the brake shield.
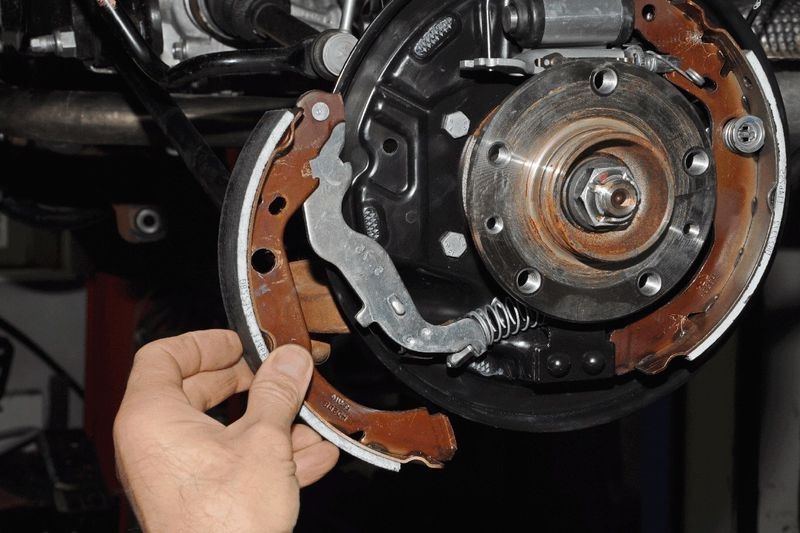
17. Disconnect the tip of the parking brake cable from the rear shoe lever.
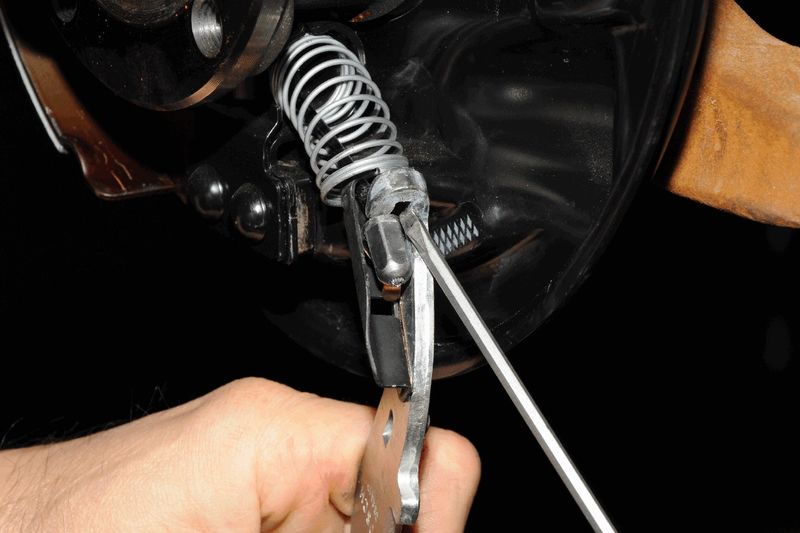
18. Remove the shoe and cable end spring.
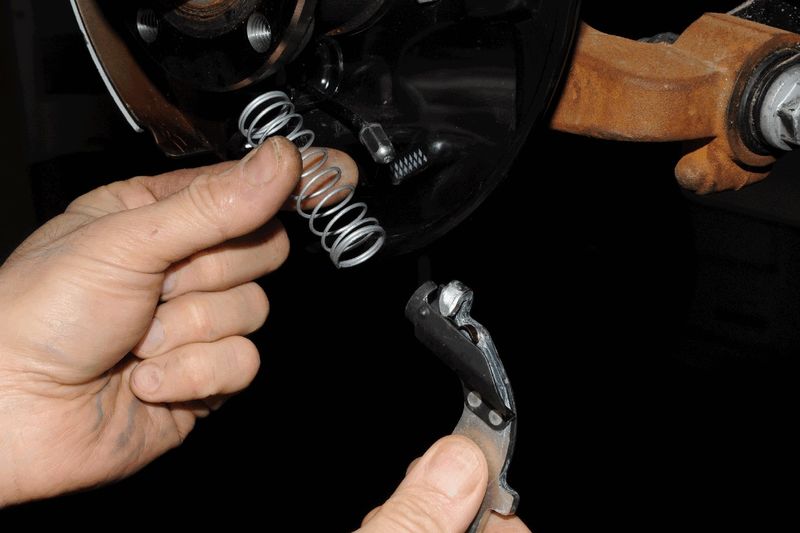
19. Remove the front brake shoe together with the spacer bar and separate them.
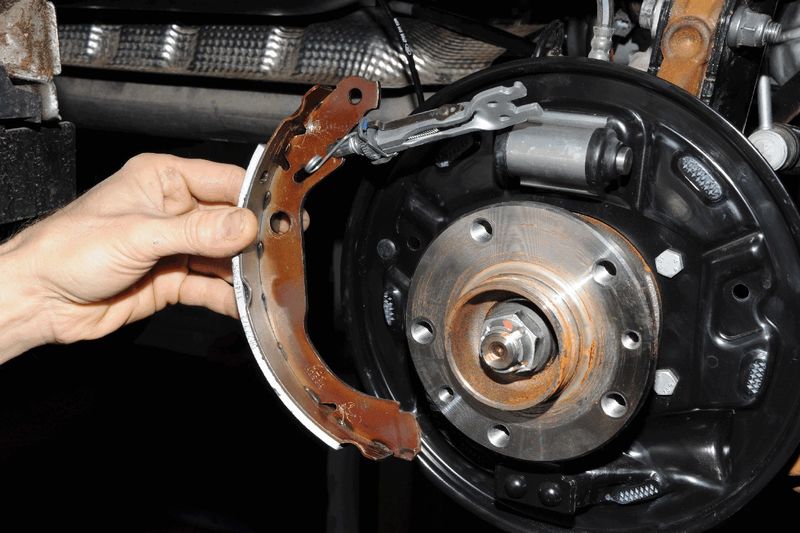
20. Squeezing the tabs of the latch of the rear tip of the cable sheath with pliers, remove the tip from the hole in the shield of the brake mechanism.

21. With a 10 mm head, unscrew the two nuts securing the casing.
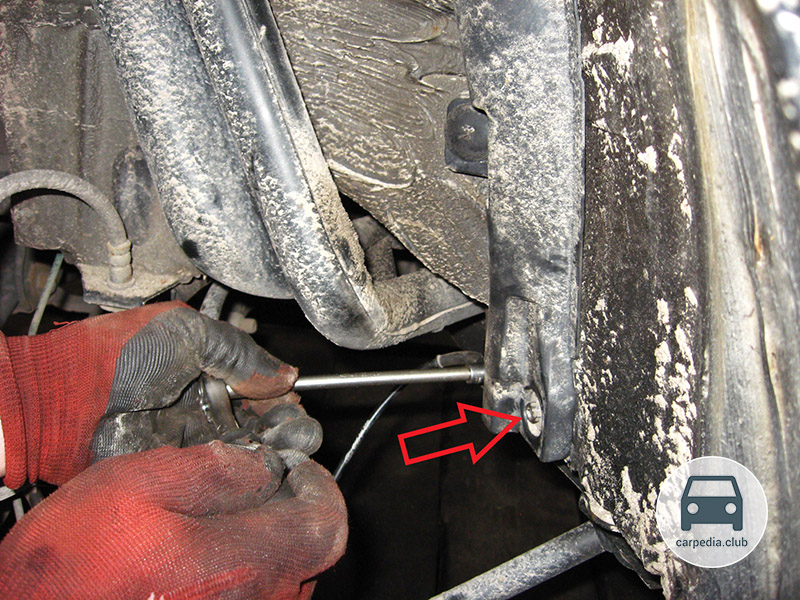
22. Using a slotted screwdriver, unscrew the two plastic nuts that secure the protective cover of the sensor wiring harness.
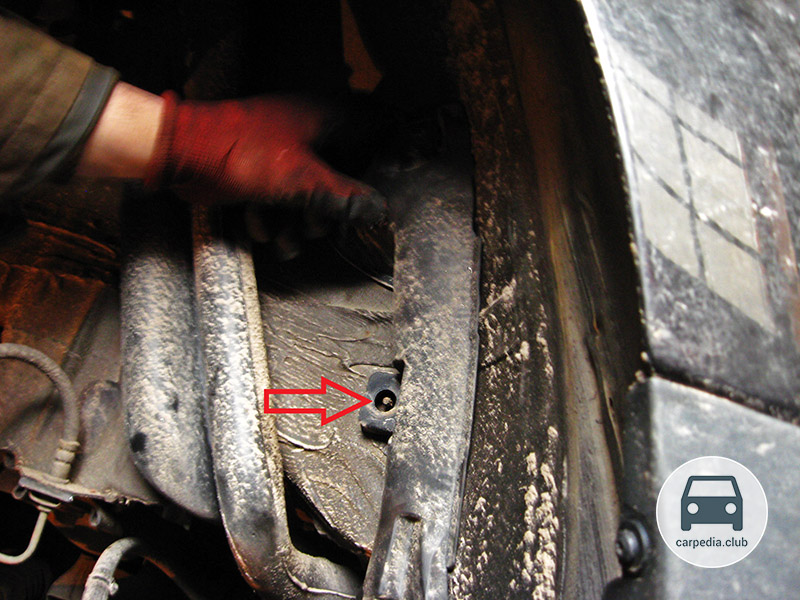
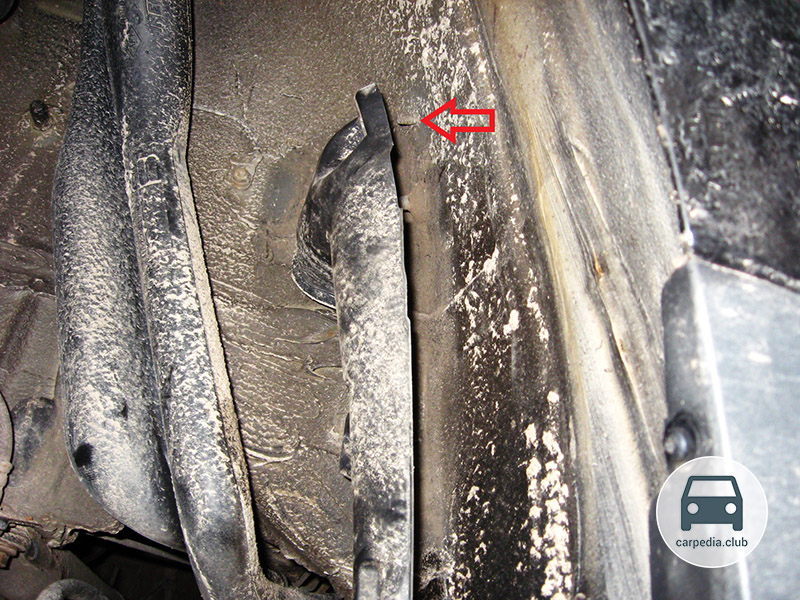
23. Take the casing away from the arch and remove the wiring harnesses from the casing holders.
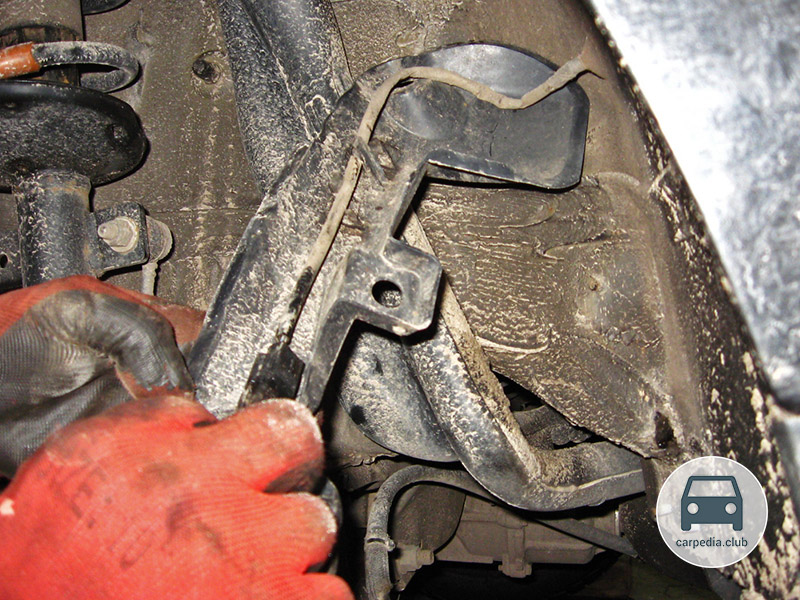
24. While pressing the latch, disconnect the rear wiring harness connector from the sensor wiring harness connector.
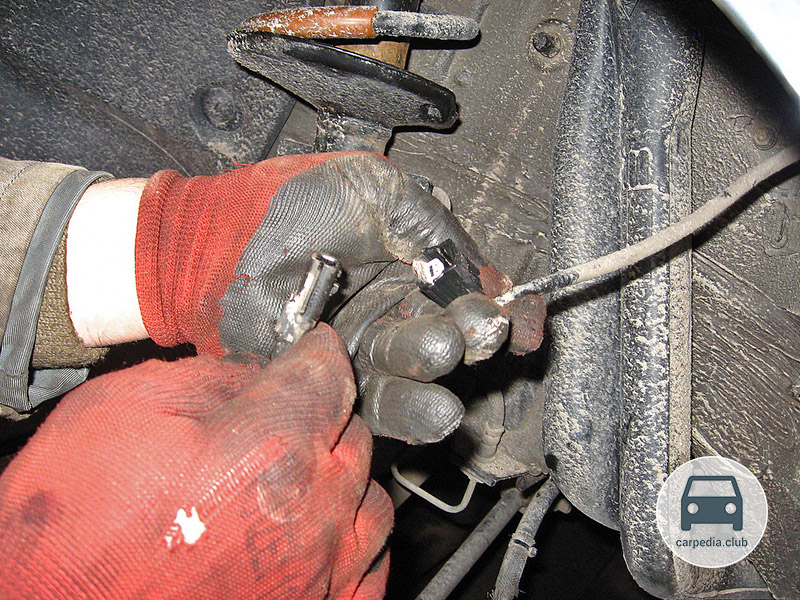
25. Remove the rubber sleeve of the sensor wiring harness from the holder on the rear suspension arm.
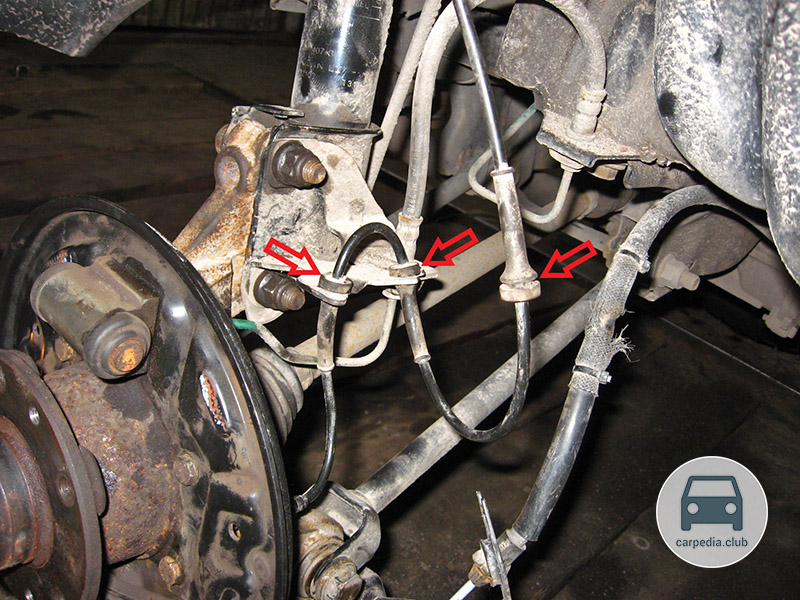
26. Turn away completely a nut of fastening of a nave of a back wheel.
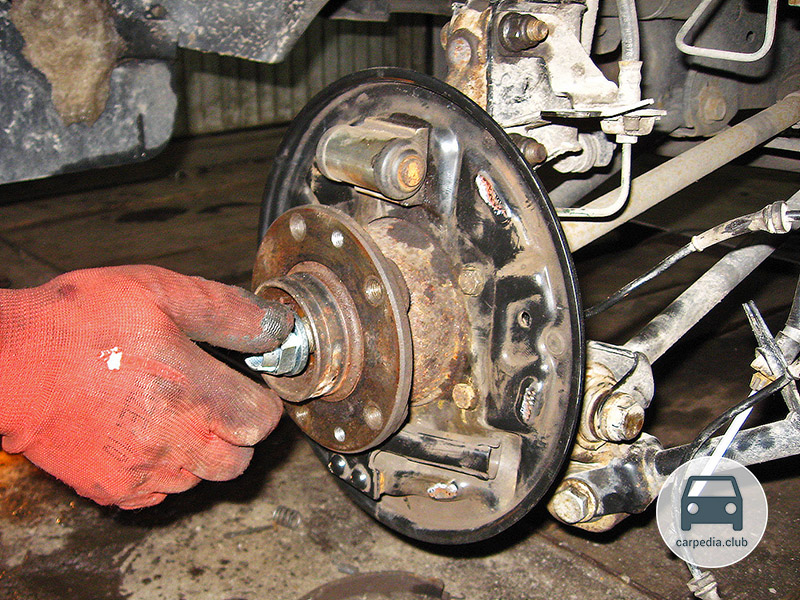
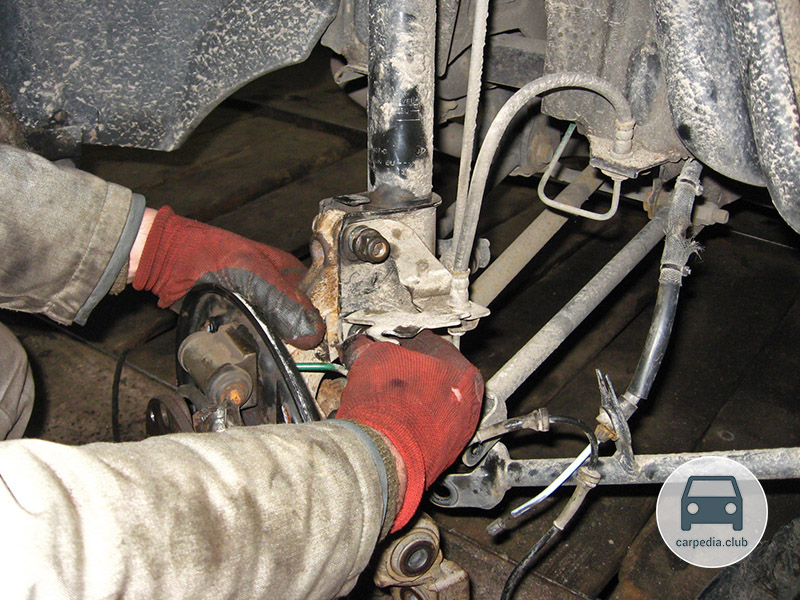
27. On the Renault Duster, the rear hub is attached with three levers and a shock absorber strut. Using a 21 mm head, unscrew the nut of the bolt securing the rear transverse arm lug to the rear suspension knuckle, holding the bolt from turning with a ring wrench of the same size.
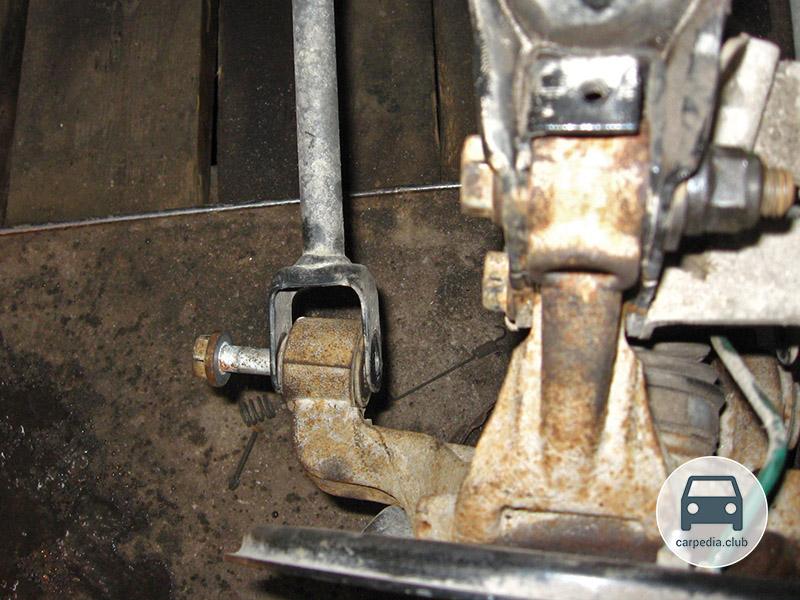
28. Remove the bolt or knock it out with a soft metal drift.
29 . Similarly, disconnect the longitudinal (see the second photo below) and the front transverse arm of the rear suspension from the fist (see the first photo below).
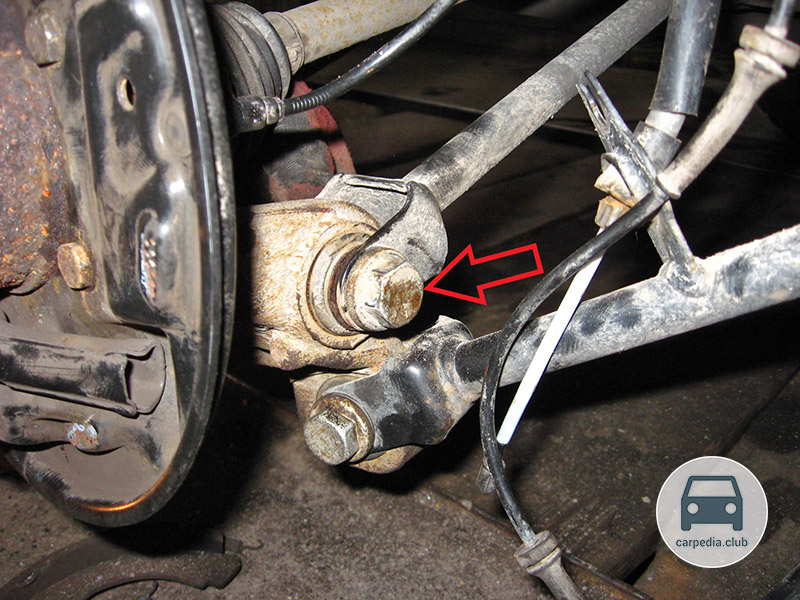
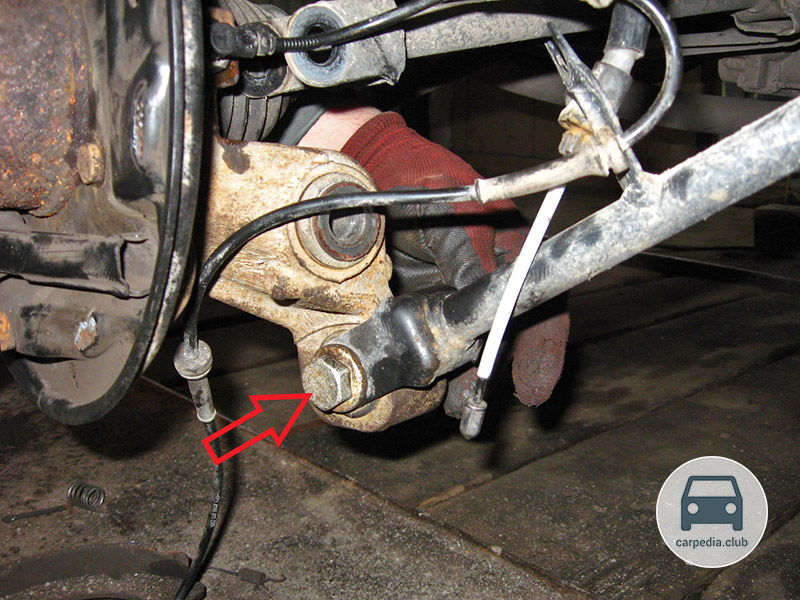
30. Using an 18 mm head, unscrew the nut of the bolt of the upper mount of the strut to the steering knuckle, holding the bolt with a wrench of the same size.
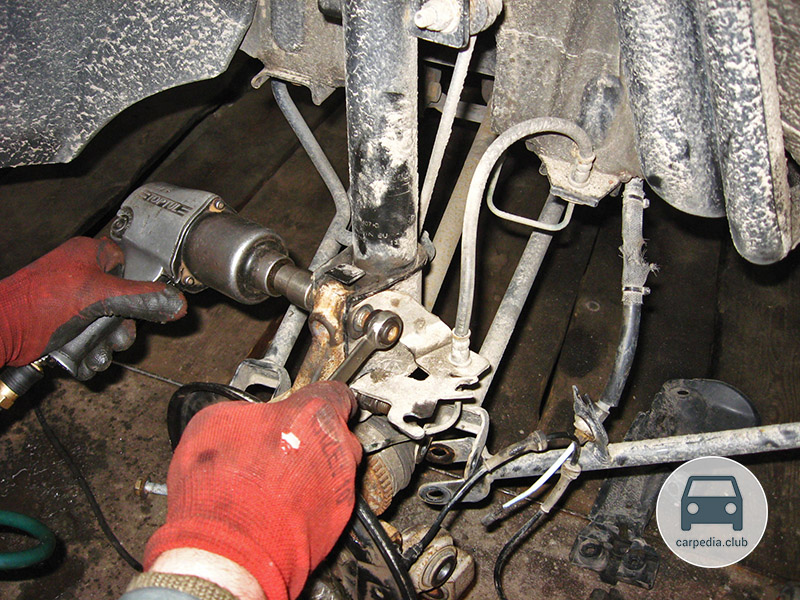
31. Similarly turn off a nut of a bolt of the bottom fastening of a rack.
32. Before unscrewing the brake pipe fitting from the cylinder bore with a metal brush, clean the place of their connection from dirt and corrosion and apply an easily penetrating liquid like WD-40 to it (for clarity, it is shown on the removed shield).
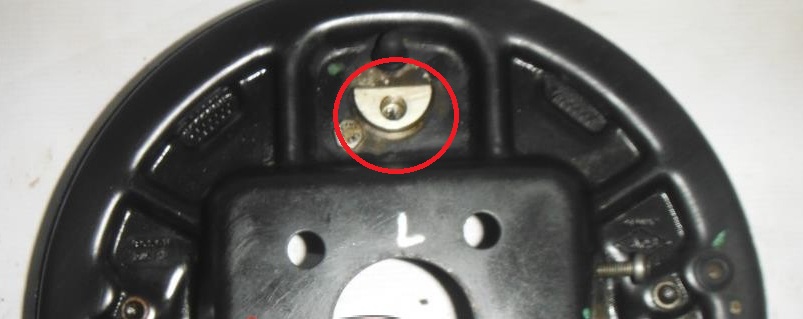
33. Using a special 11 mm wrench (for brake pipe fittings), unscrew the brake pipe fitting and remove the tip of the tube from the cylinder bore. Then move the wire harness and brake hose holders away from the strut.
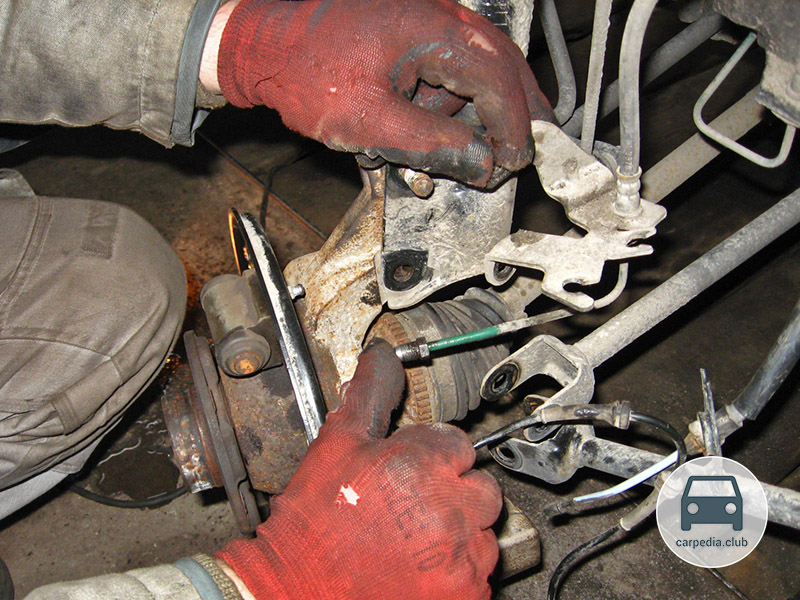
34. Remove the lower knuckle to strut bolt or knock it out with a soft metal drift.
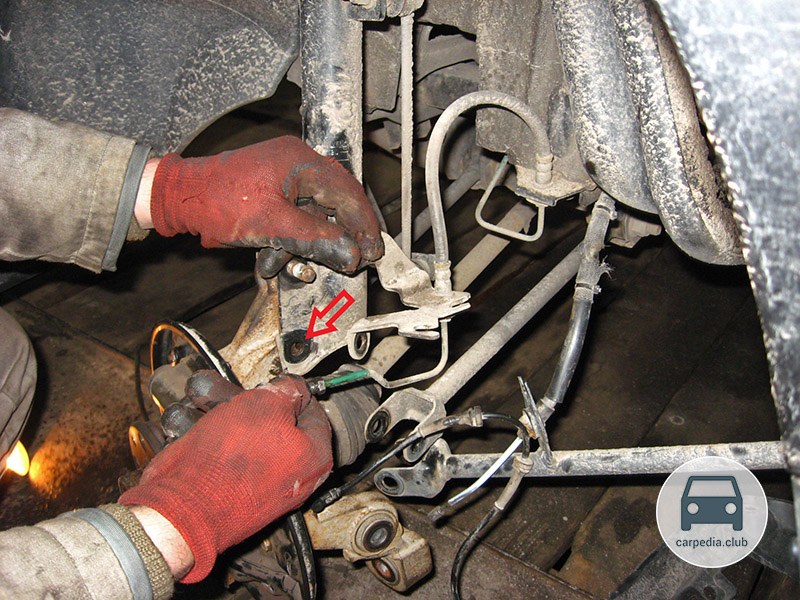
35. Move the rear suspension knuckle to the side and remove the splined shank of the outer hinge housing from the wheel hub.
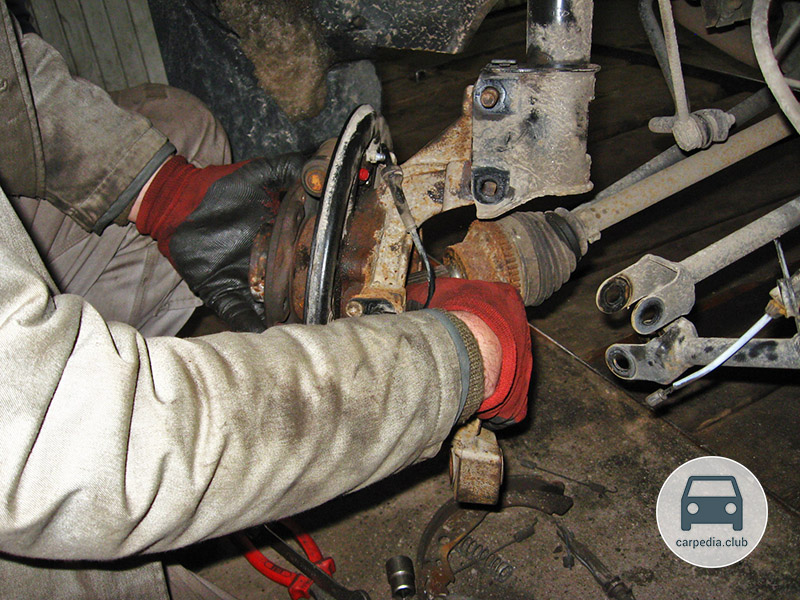
36. Similarly to item 34, remove the upper bolt of the fist to the rack and remove the fist.
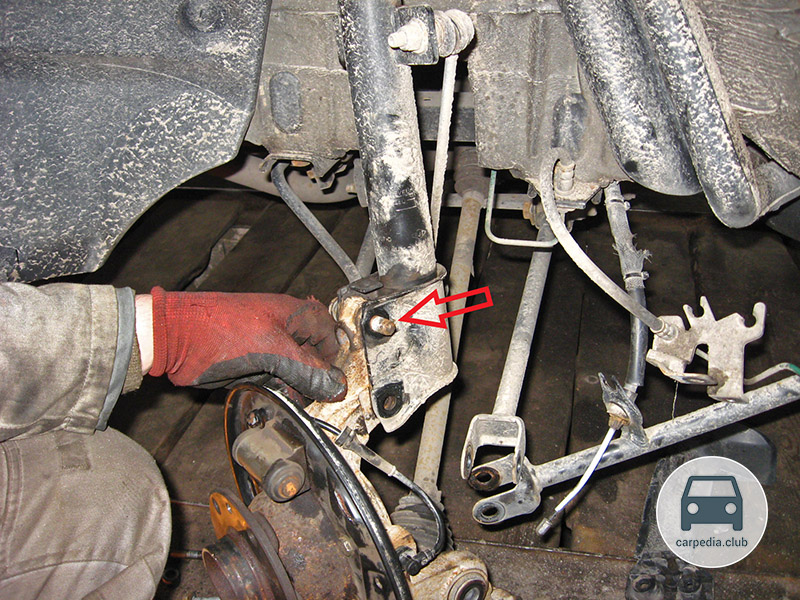
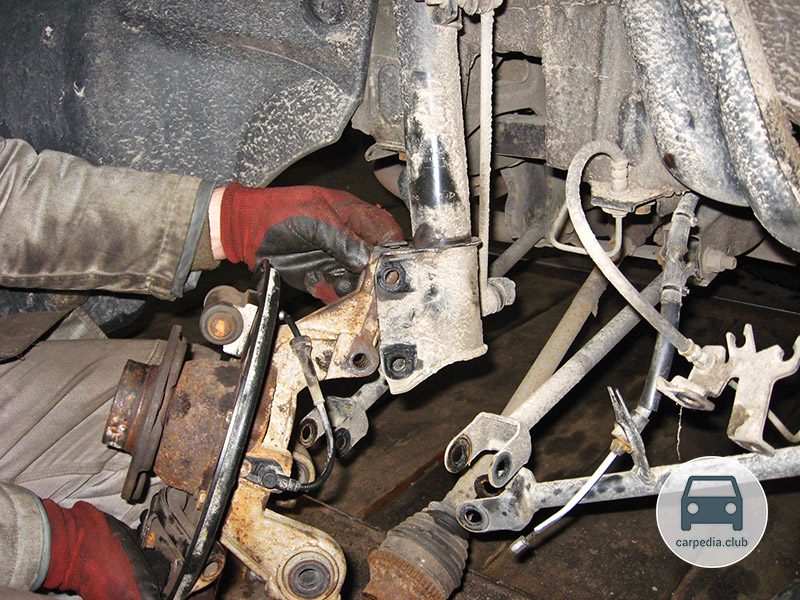
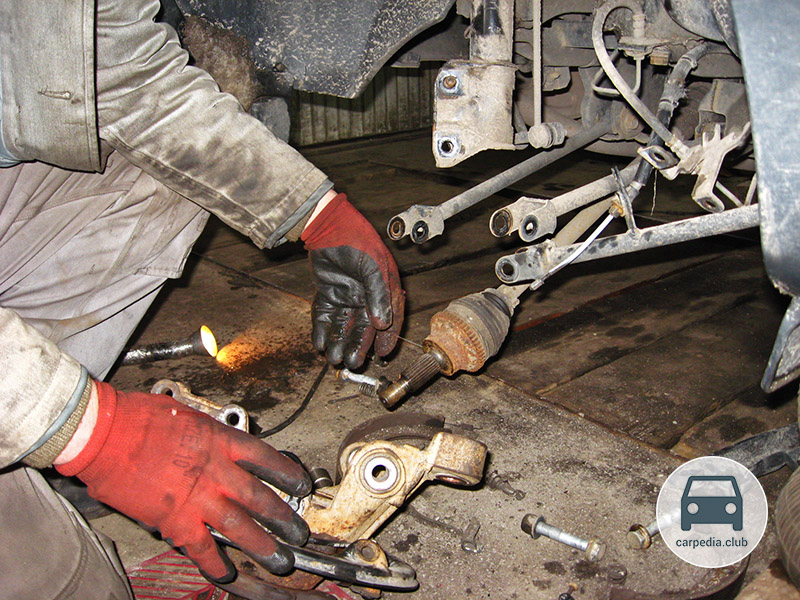
37. Install the fist on the Renault Duster in reverse order, tightening the fasteners to the prescribed torque .
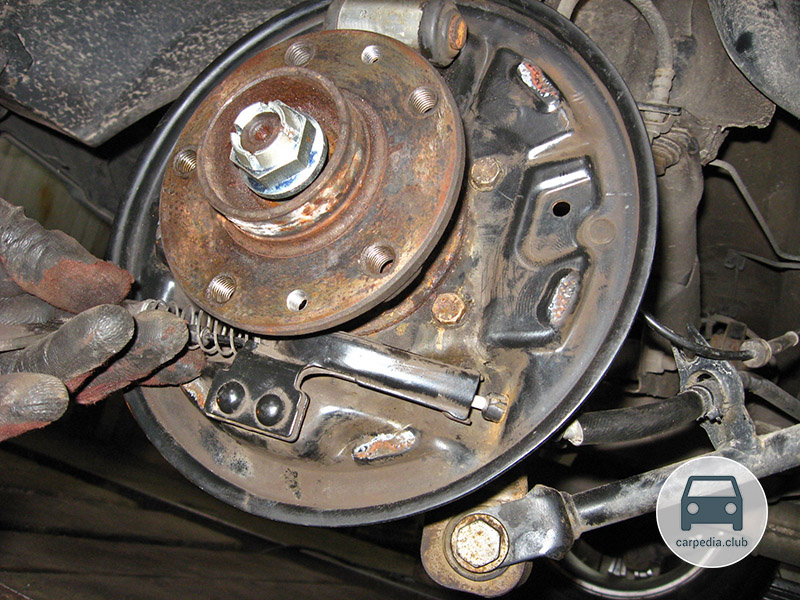
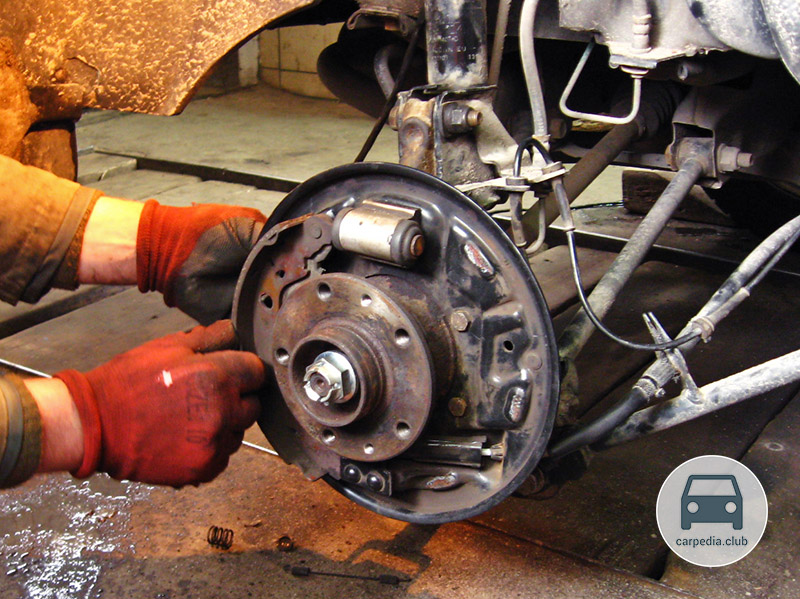
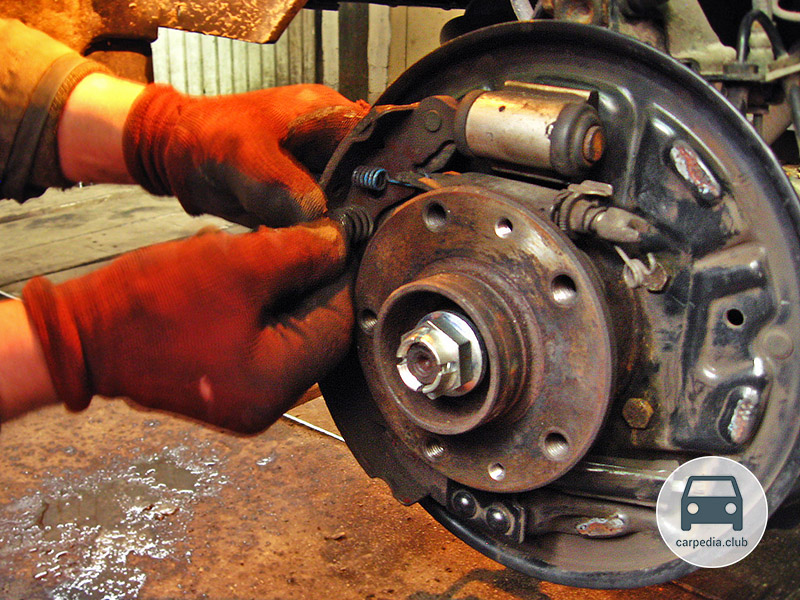
Note:
When assembling, the Renault Duster hub nut must be replaced with a new one. Also, if necessary, replace the brake pads as a set.
The article is missing:
- Tool photo
- Photo of parts and consumables
Source: carpedia.club

![1 generation [2010 - 2015]](/uploads/Renault_Duster_2010-2015_.jpg)
