![1 generation [2003 - 2007]](/uploads/Mitsubishi_Outlander_I_2003_-_2008_.jpg)
![3 generation [2012 - 2014]](/uploads/3.png)
![XL [2005 - 2012]](/uploads/4d137205da66f_.jpg)

Tools:
- Straight box wrench 12 mm
- Straight spanner wrench 15 mm
- Screwdriver flat medium
- Phillips screwdriver, medium
Notes:
Before performing operations, disconnect the wire from the "minus" terminal on the battery.
Attachment points for tailgate trim
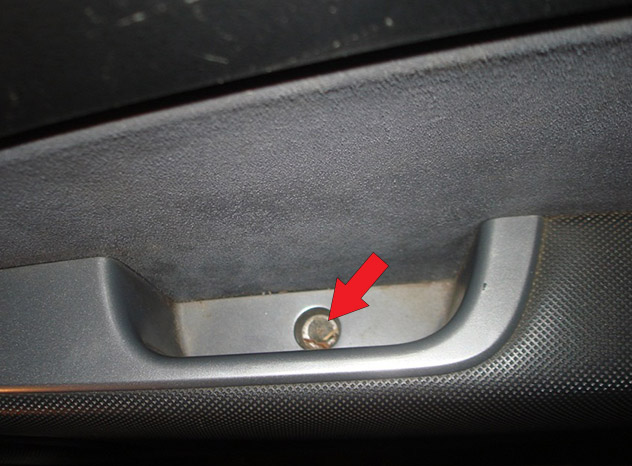
1 - screw under a plastic cap;
2 - self-tapping handle / hook for opening the door;
3 - self-tapping screw in the door closing handle.
Removal of a covering of a back door
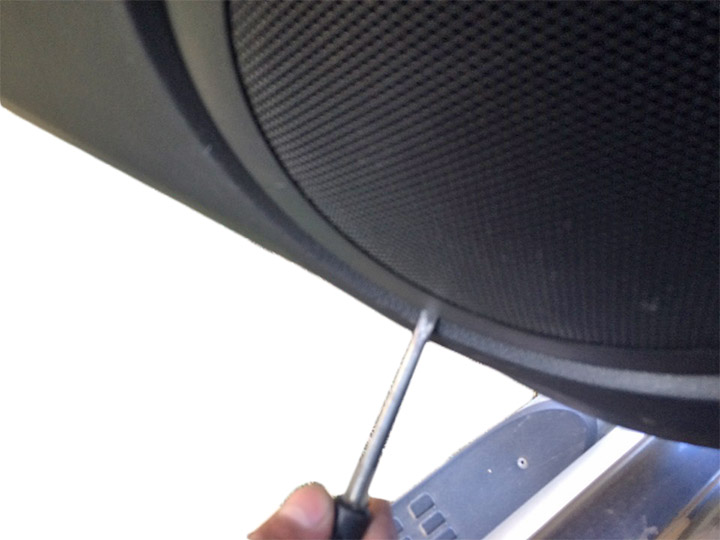
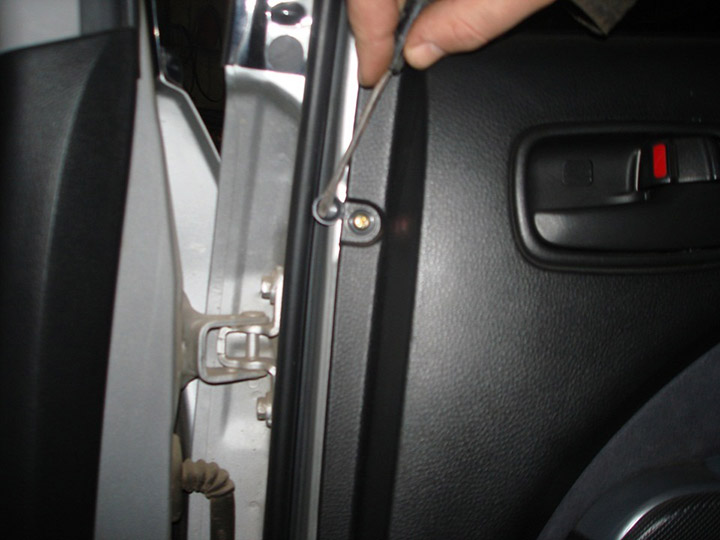
1. Remove the first anchor point. Carefully pry off the cap and remove the screw.
2. At the second attachment point, carefully pry off the square cover.
Unscrew the screw under the plug. The hook/handle frame does not have to be dismantled, so it should not interfere with the dismantling of the skin.
3. At the third attachment point, unscrew the screw in the door handle. It must be unscrewed and be sure to take it out. Otherwise, it may fall into its hole and interfere with the removal of the skin.
4. Gently pry up the casing and pull it yourself, remove the casing from the caps.

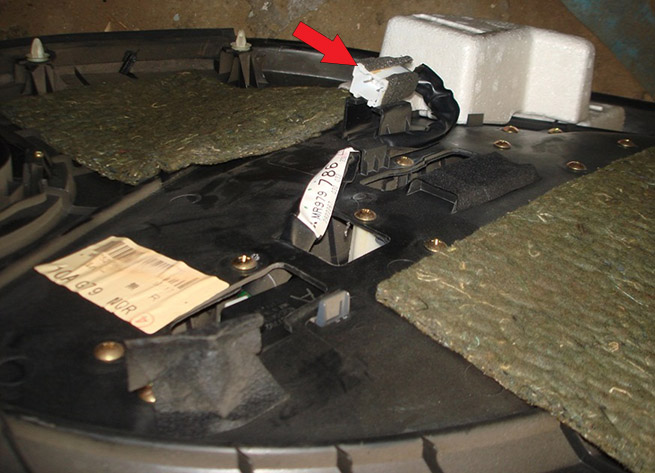
5. Disconnect a socket of the button of a window regulator and remove a covering completely.
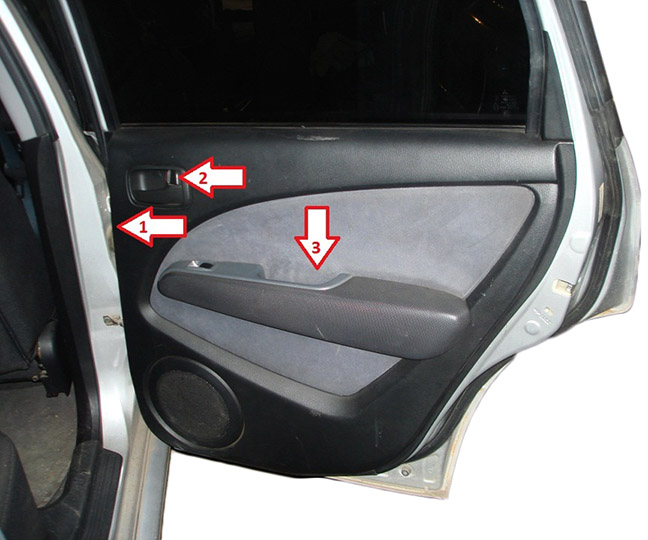
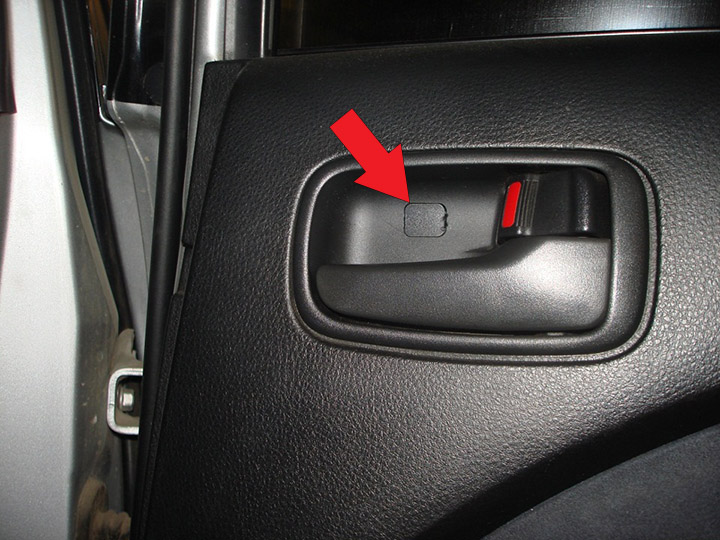
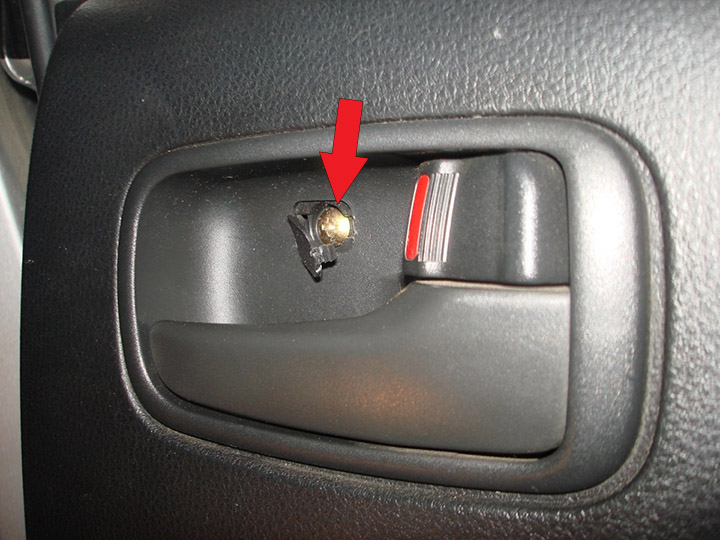
Attachment points for front door trim
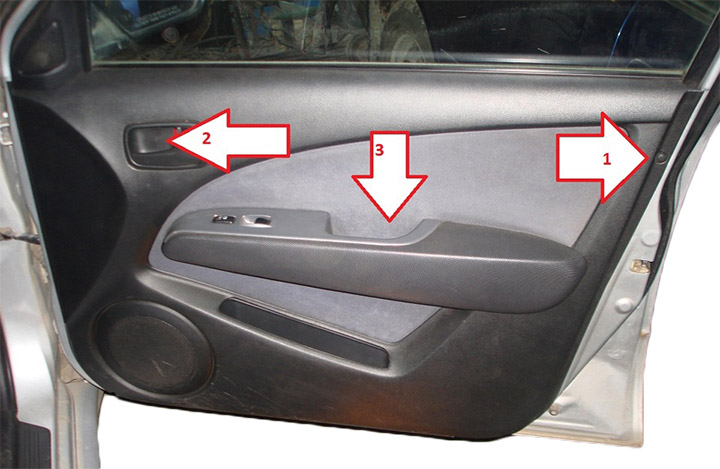
1 - screw under a plastic cap;
2 - self-tapping handle / hook for opening the door;
3 - self-tapping screw in the door closing handle.
Removing the front door trim
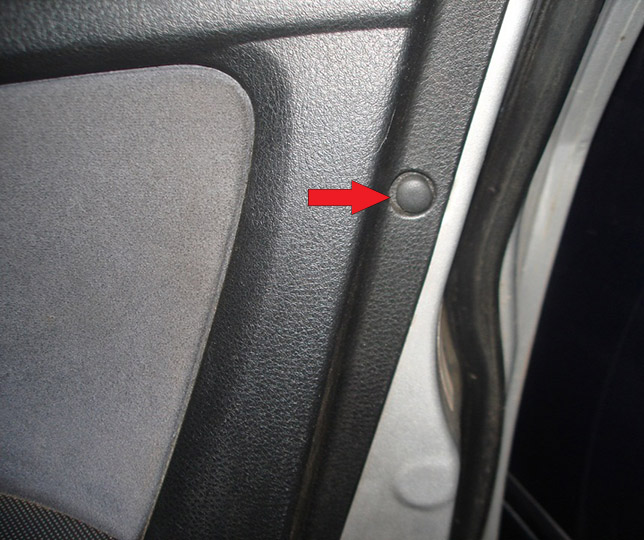
1. Remove the first anchor point. Carefully pry off the cap and remove the screw.
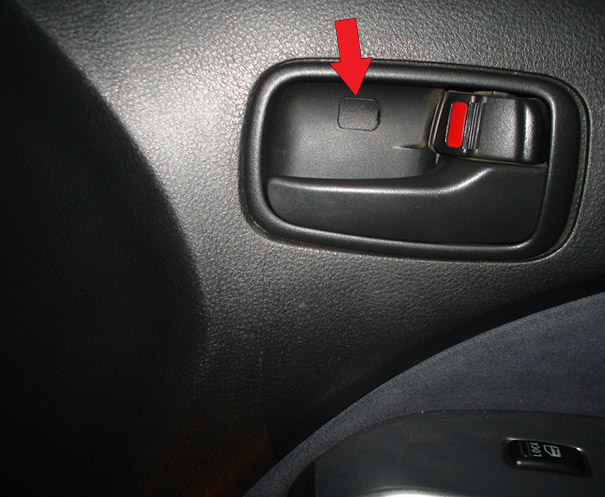
2. At the second attachment point, carefully pry off the blank square and unscrew the self-tapping screw under it.
3. At the third attachment point, unscrew the screw in the door handle. It must be unscrewed and be sure to take it out. Otherwise, it may fall into its hole and interfere with the removal of the skin.

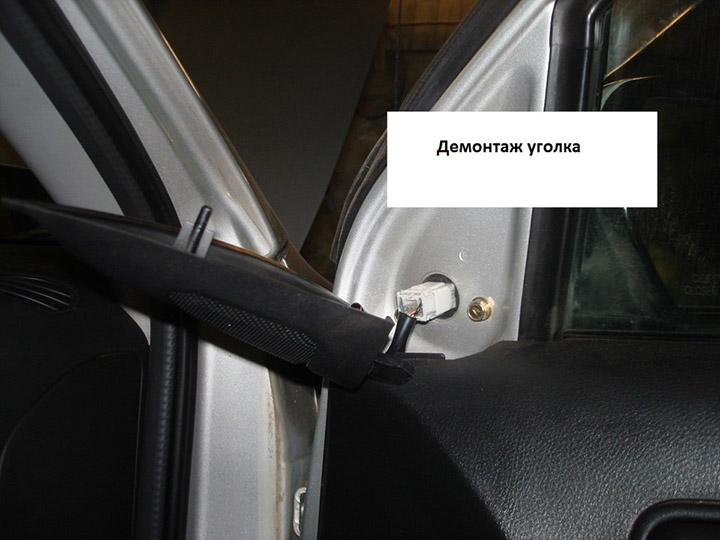
4. Pry with a screwdriver and remove the plastic corner of the door.
5. Gently pry up the casing and pull it yourself, remove the casing from the caps. Disconnect the power window button connector and remove the casing completely.
Removal of a covering of a door of a luggage compartment
1. The tailgate trim consists of two elements.
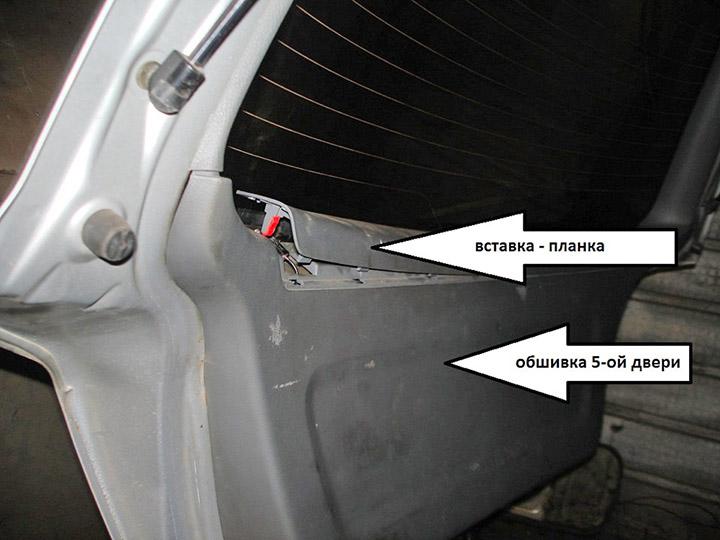
Note:
The bar is only needed to access the heated rear window. If you need to remove the entire casing, you can not remove it, but you need to be careful: when removing the casing, it can jump out by itself, fall and get scratched.
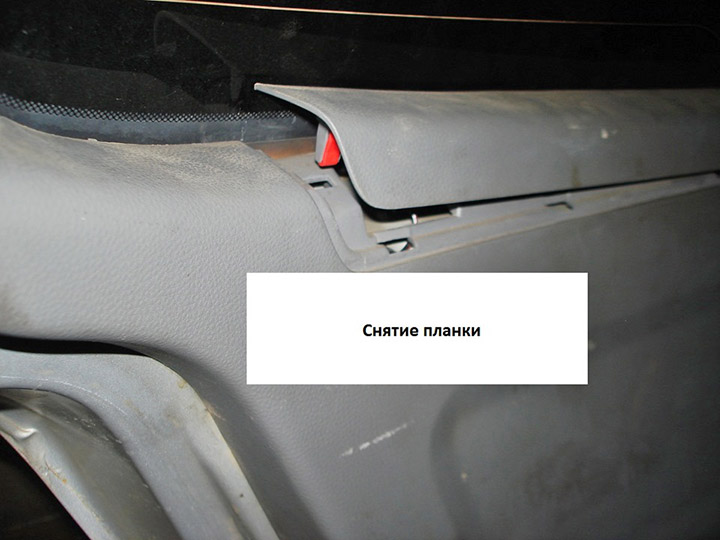
2. To remove the bar, you need to pry it off with a screwdriver (it is held on 5 easily removable caps).
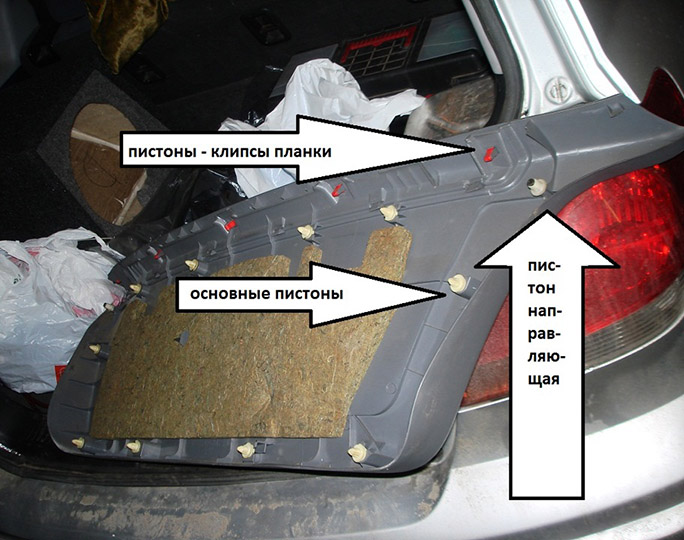
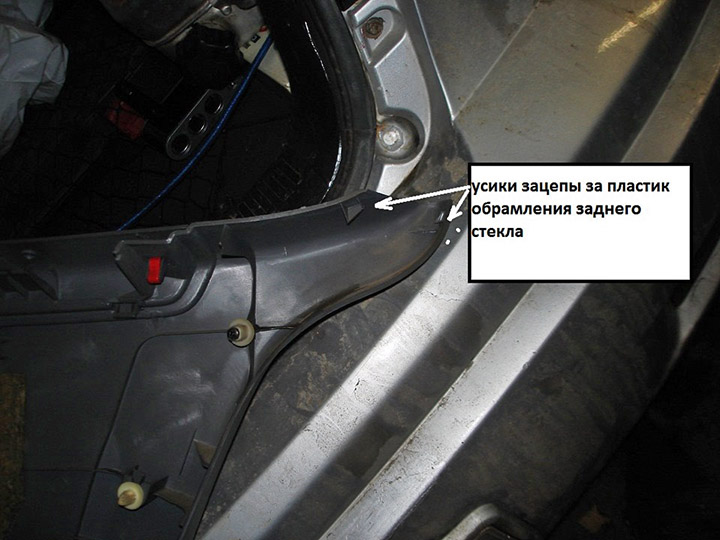
3. The skin rests on 10 caps and two caps - guides. The casing has 4 antennae, two on each side, for snapping onto the plastic of the rear window frame. Gently pry up the casing and pull it in the opposite direction from the cover. It is better to start from the bottom so as not to damage the latch antennae on the plastic of the glass frame.
All skins are installed back according to similar scenarios. It is necessary to attach the casing, get the guide caps into the holes and with light strokes of the palm, insert the caps into place.
The article is missing:
- Photo of tools
Source: http://carpedia.club