![1 generation [2003 - 2007]](/uploads/Mitsubishi_Outlander_I_2003_-_2008_.jpg)
![3 generation [2012 - 2014]](/uploads/3.png)
![XL [2005 - 2012]](/uploads/4d137205da66f_.jpg)
Tools:
- Ratchet wrench
- Extension (with gimbal)
- 10 mm head
- 12 mm head
- 14 mm head
- Head 17 mm
- Open-end spanner 10 mm
- 16 mm box spanner
- 17 mm straight spanner
- 19 mm box spanner
- Medium flat screwdriver
- Torque wrench
- Balloon wrench
- Collar for end attachment
- Wrench attachment 22 mm
- Screw jack
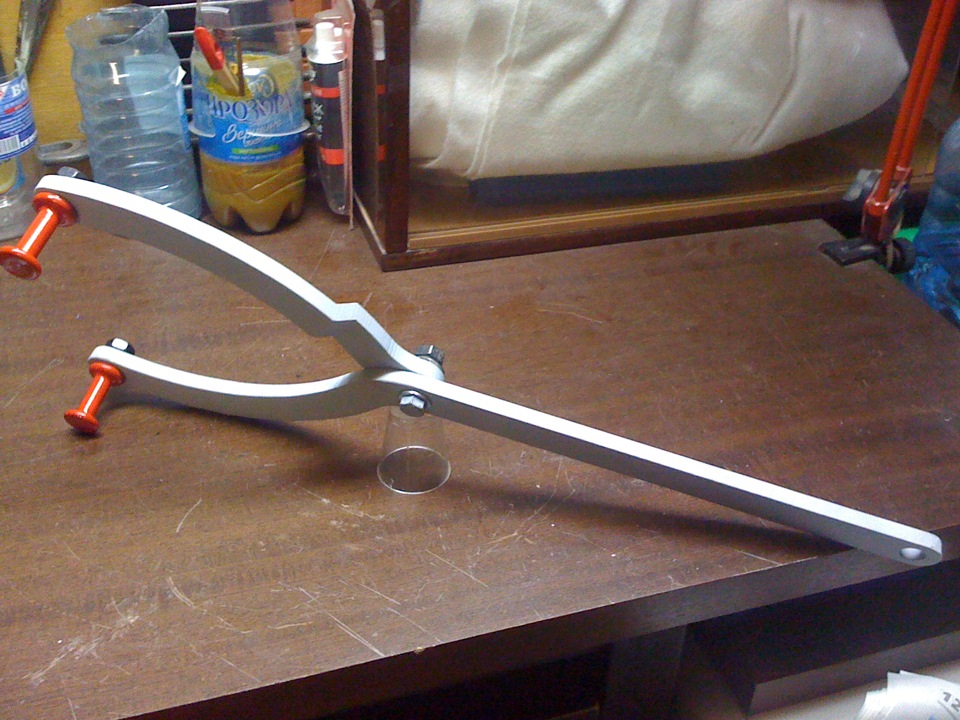
- Tool for fixing the crankshaft pulley (fork holder MB990767 and special bolts and MD998719)
- Adjustable support (or lifting device)
- Medium hammer
- Hexagonal special key for fixing the tensioner ratchet (or pin)
- Hexagonal special key for fixing the tensioner (or pin)
- Mandrel MB991448 (if required)
- Oil pan remover MD998727
- Marker
- Knife (or scraper)
- Wheel chock (shoe)
- Funnel
- Flute brush
- Pliers
Parts and consumables:
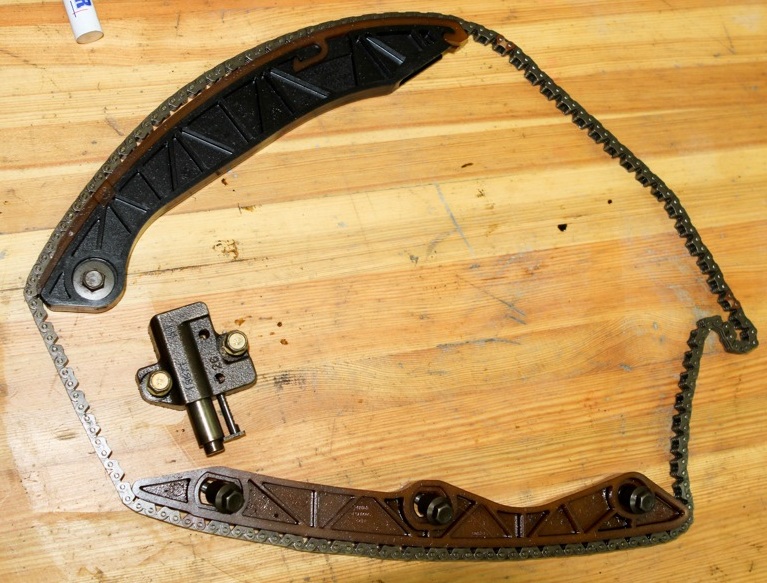
- Timing chain MN183891
- Timing chain dampers MN183892 and MN183893
- Tensioner MN183894
Engine oil pan drain plug gasket MD050317
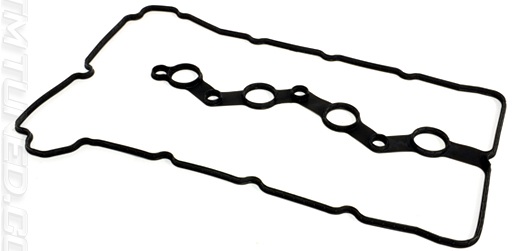
Cylinder head cover gasket 1035A583

Front crankshaft oil seal 0127.52 (if necessary)
- Technical capacity
- Rope or wire
- Degreaser
- Cleaner (or solvent)
- Loctite 5900 or 5970 sealant, Three Bond 1217G (1000А923)
- Engine oil
- Rags
Notes:
Replacing the timing chain of the Mitsubishi Outlander HL with a 4B12 or 4B11 engine is carried out with a mileage of 200-300 thousand km. By this time, the chain wears out, and the tensioner cannot provide the recommended chain tension due to the wear of the surfaces of the damper and the timing shoe.
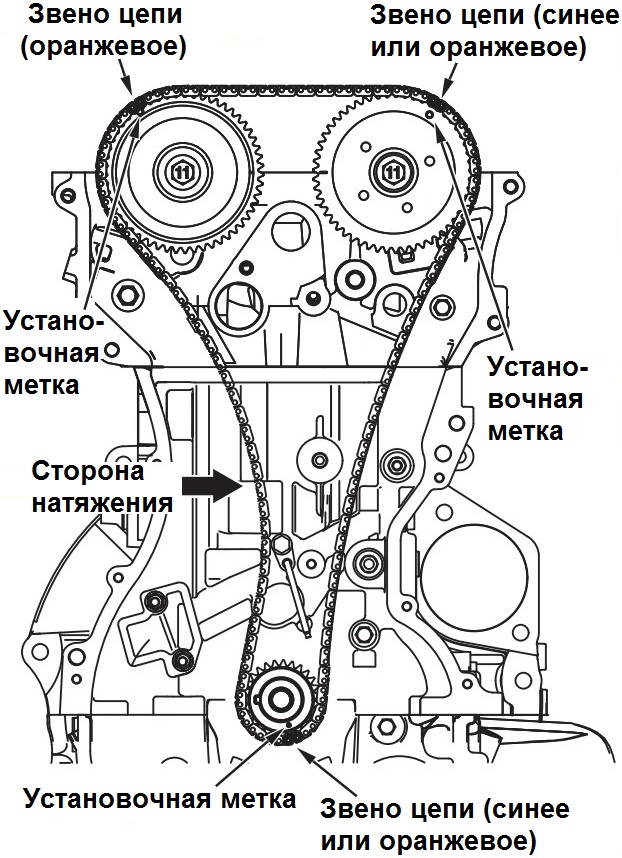
The new timing chain may not have painted links. If so, mark your sprockets and chain links before removing.
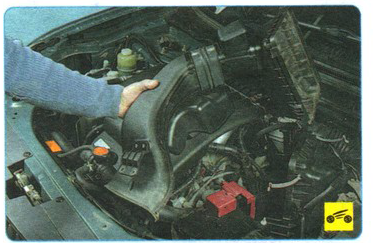
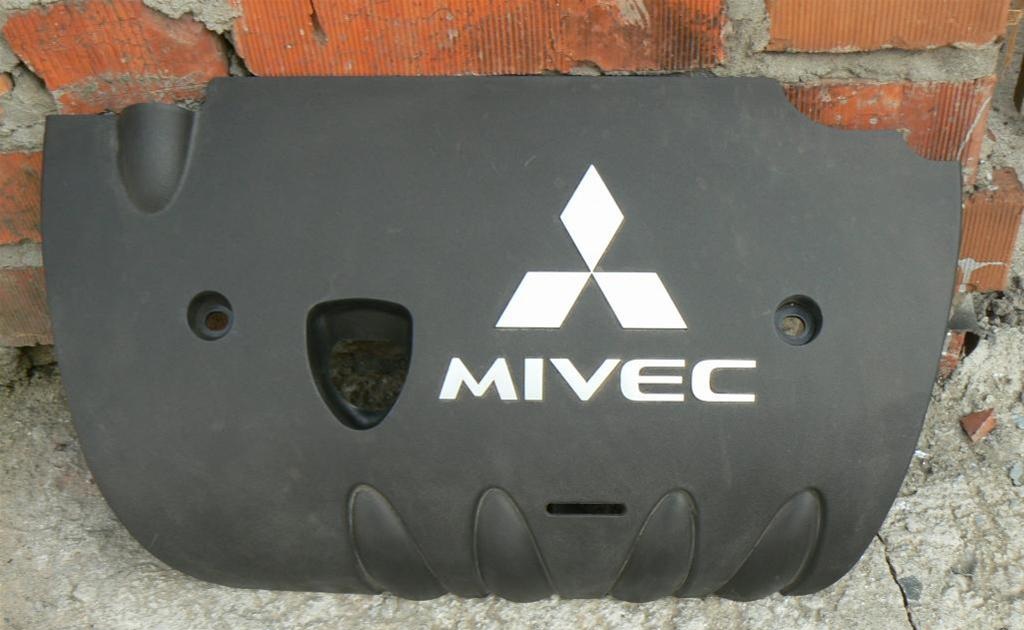
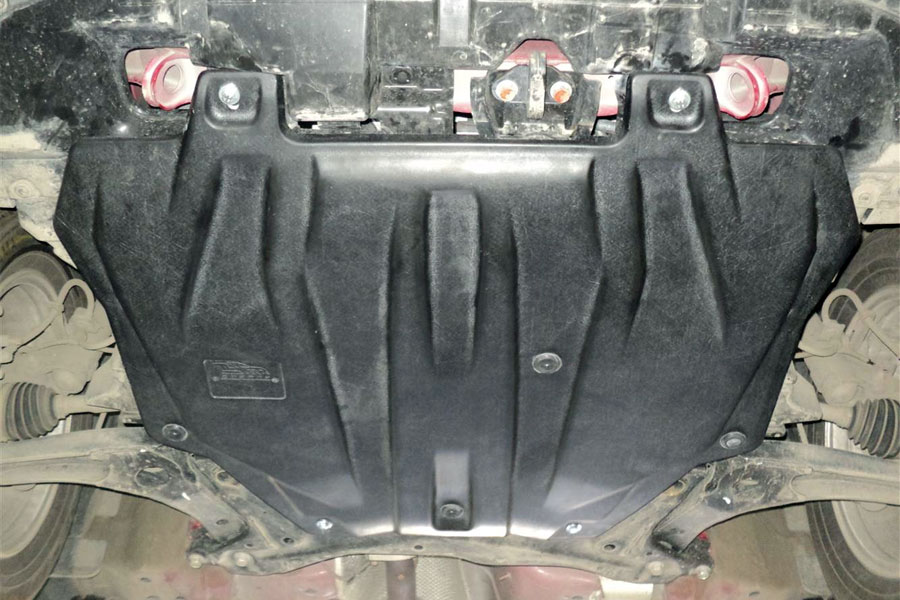
1. Remove the decorative engine cover as described here.
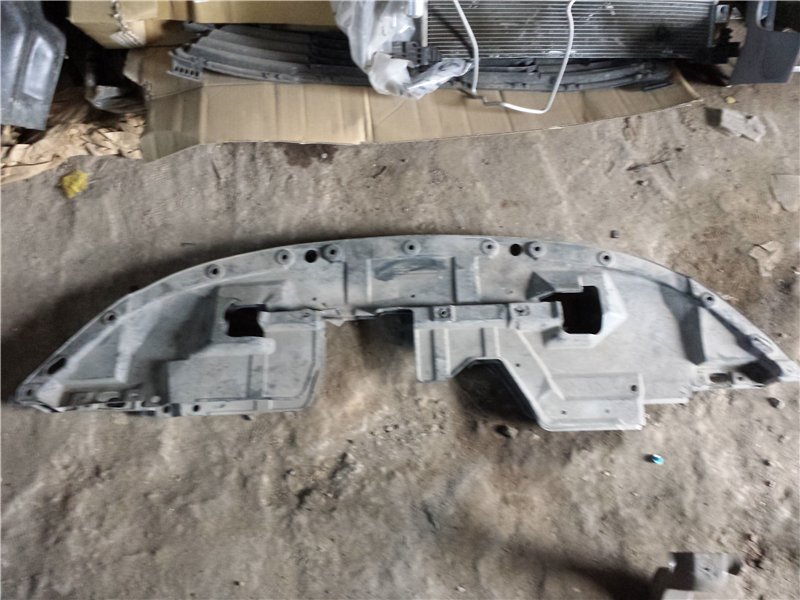
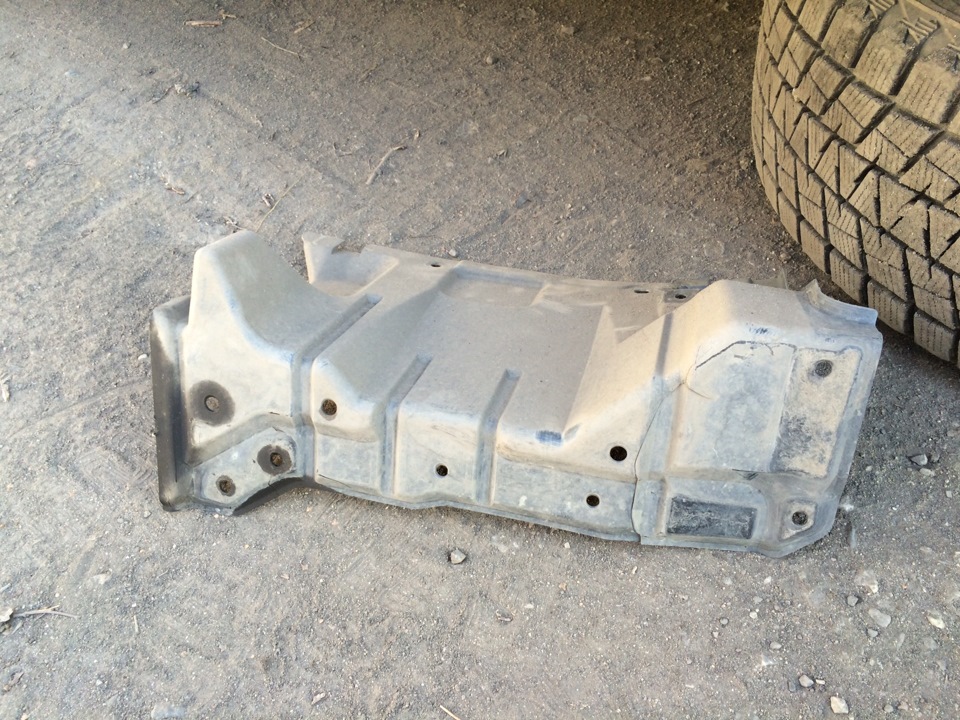
2. Remove the engine crankcase and mudguards (lower, front and rear) as described in this article .
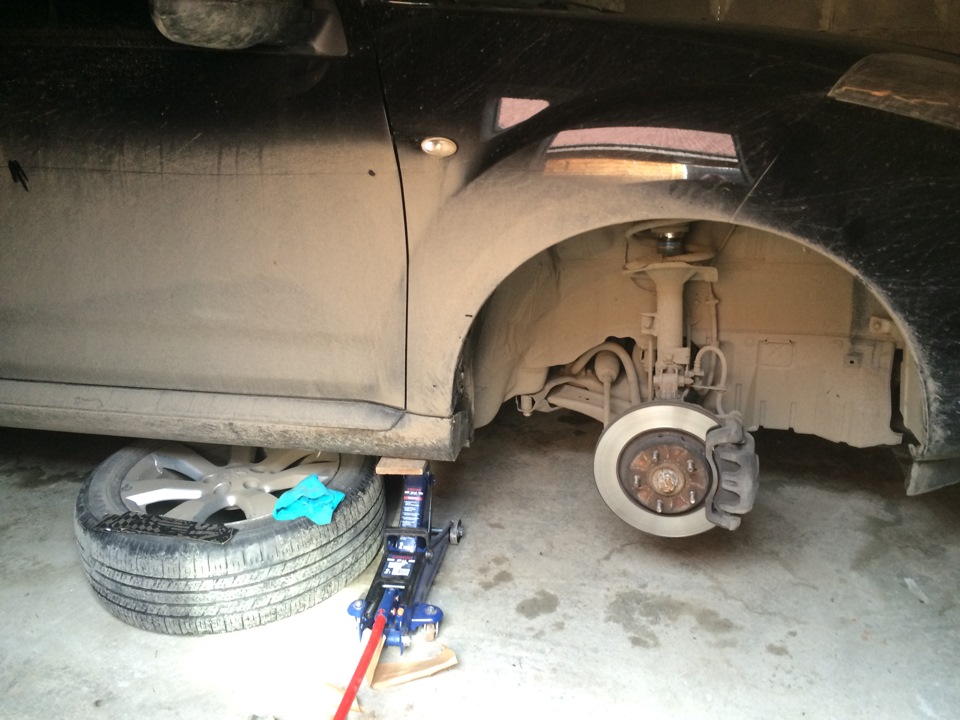
3. Then remove the right wheel as well as the right side mudguard in the engine compartment .
4. Drain the engine oil from the engine.
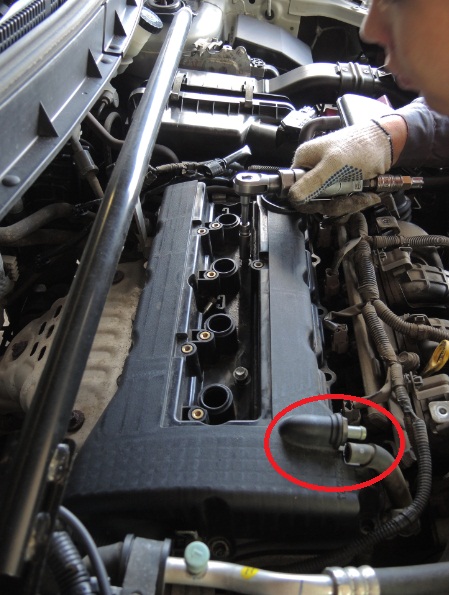
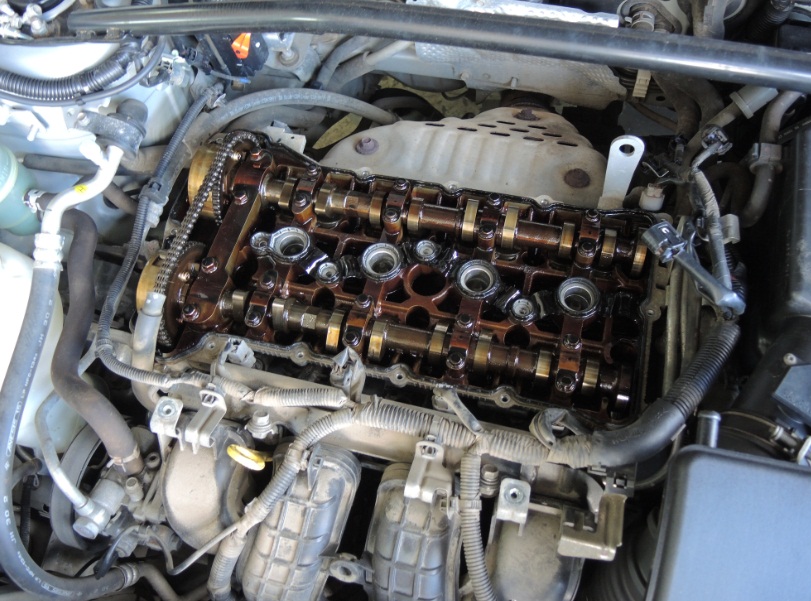
5. Remove the engine cylinder head cover as described here .
6. Loosen the mounting bolts of the A/C compressor and electromagnetic clutch assembly and remove the compressor and clutch from the bracket together with the connected hoses. The following is the sequence for loosening the clutch compressor assembly bolts.
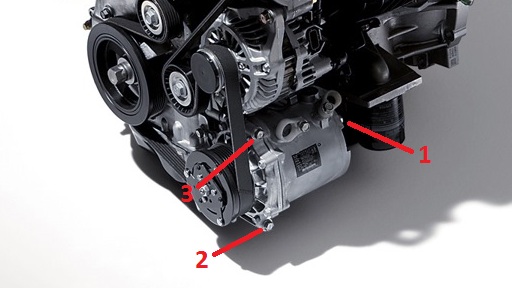
Note:
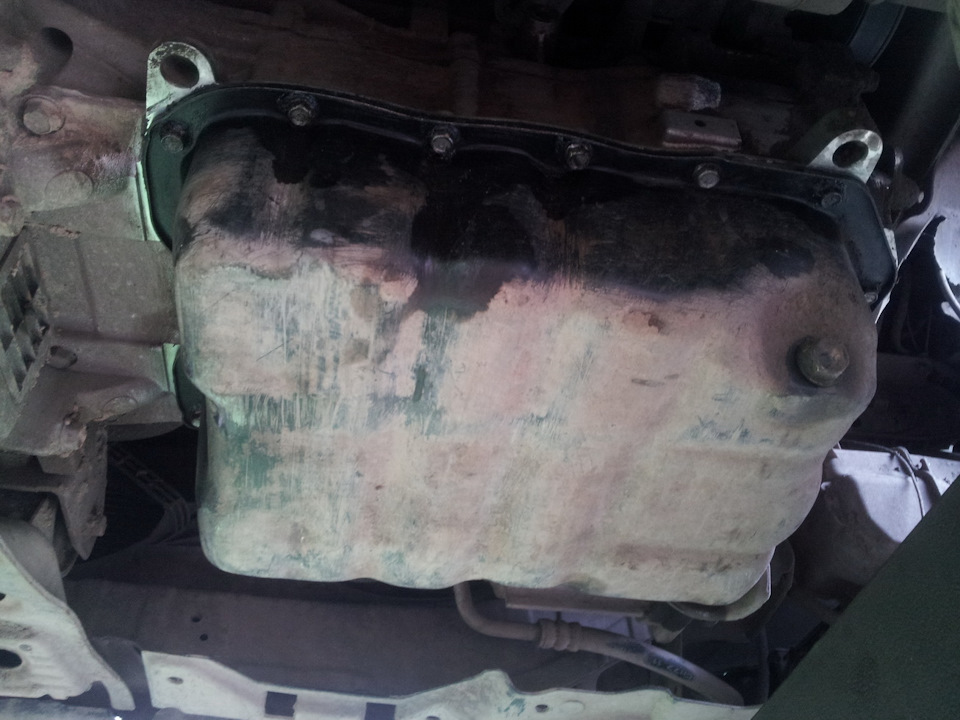
After removal, use a wire or rope to hang the air conditioning compressor assembly together with the hoses on the body in a place where they will not interfere with further work.
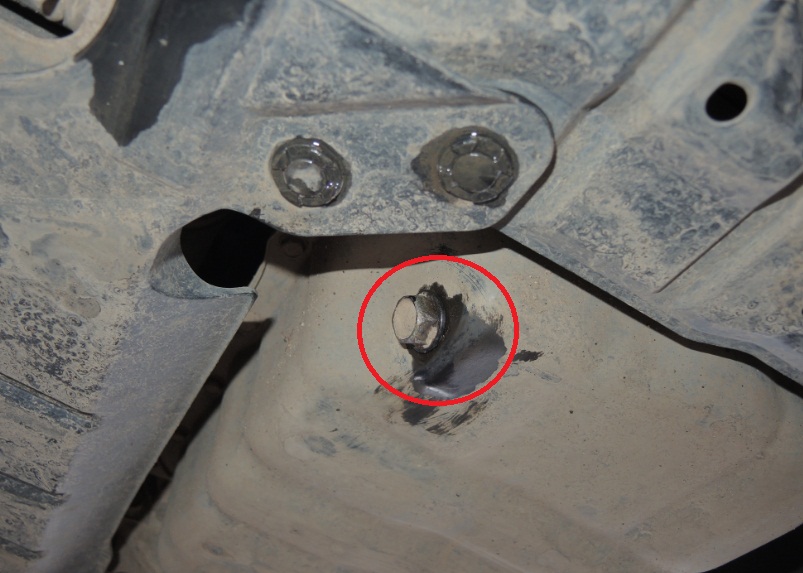
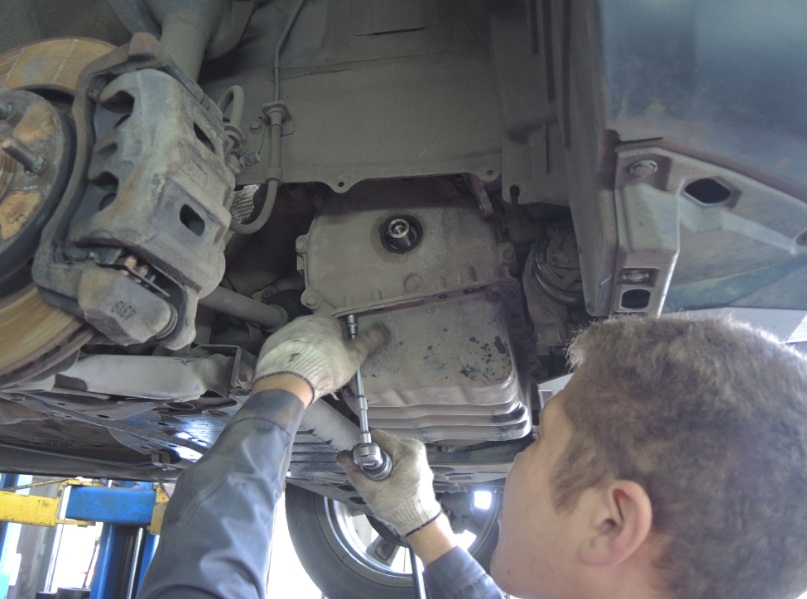
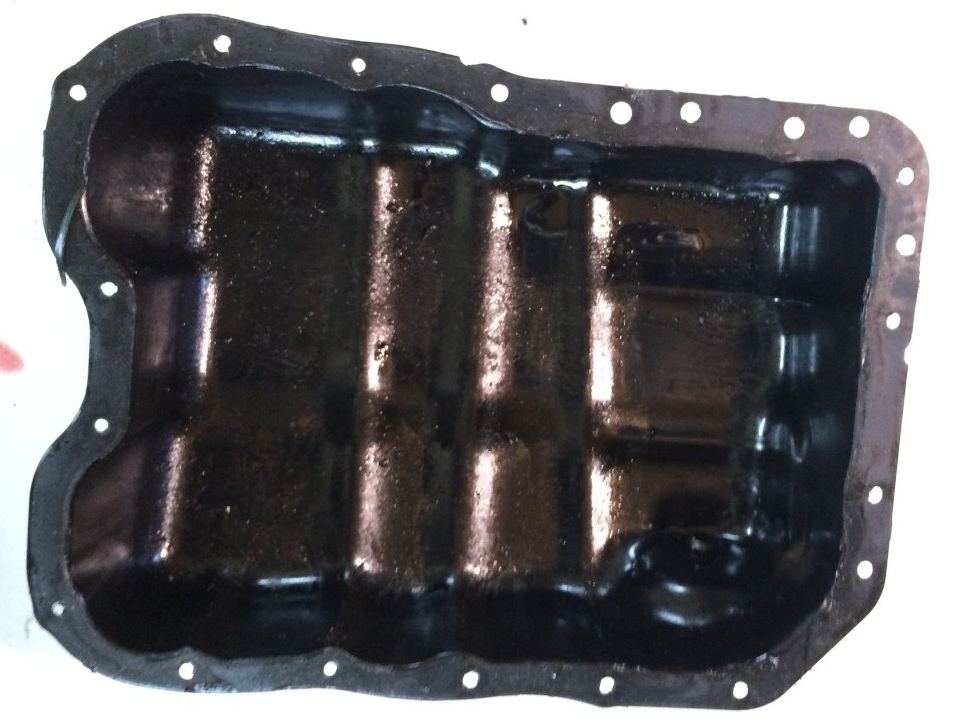
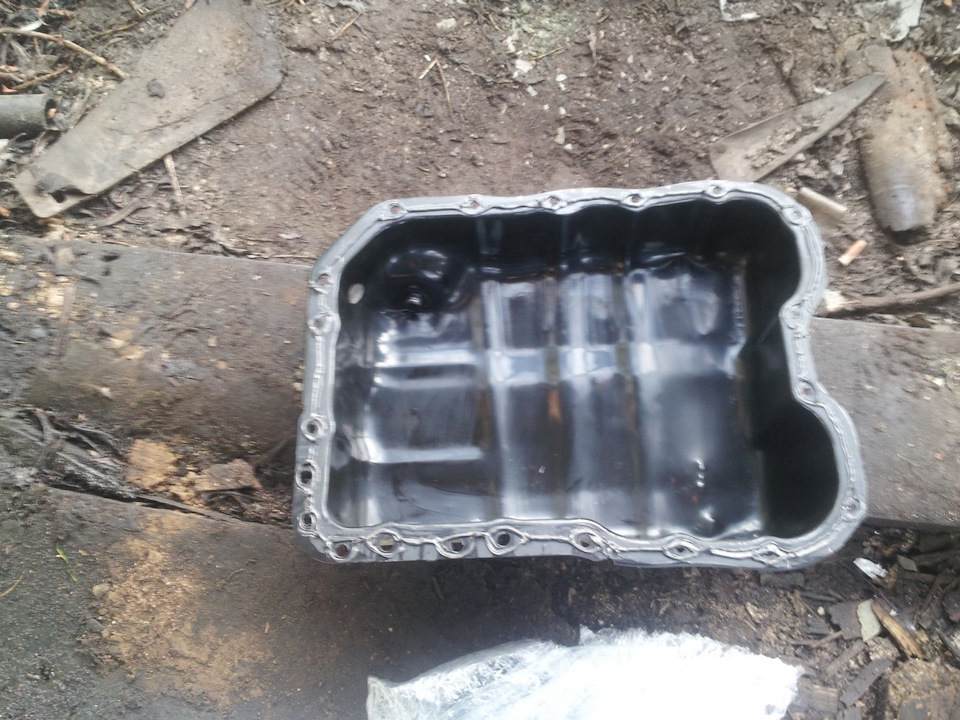
7. Remove the oil pan by unscrewing its bolts around the perimeter.
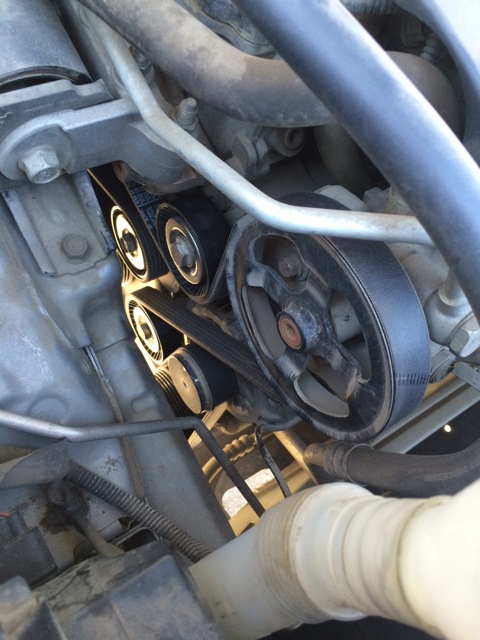
8. Remove the accessory drive belt as described here .
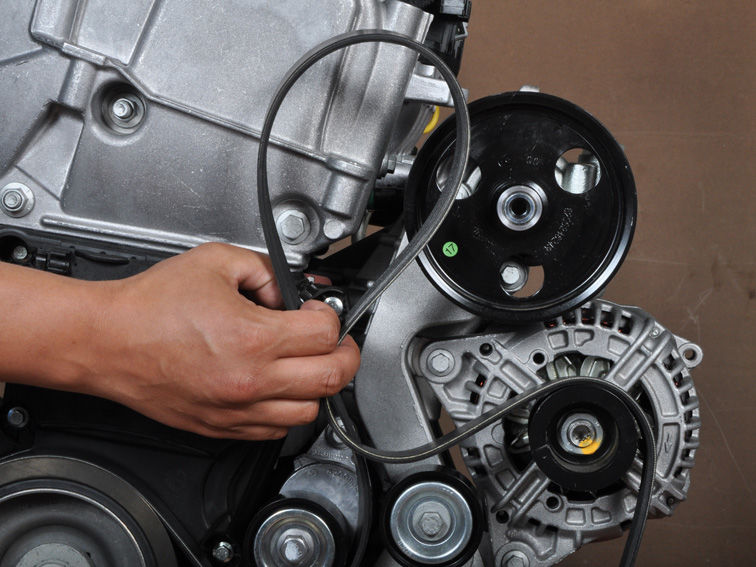
Note:
If the accessory drive belt is to be reused, use a marker on the back (non-working) side of the belt with an arrow indicating clockwise rotation.
9. Secure the crankshaft pulley against turning using a special tool (fork holder and special bolts, k.n. MB990767 and MD998719, respectively).
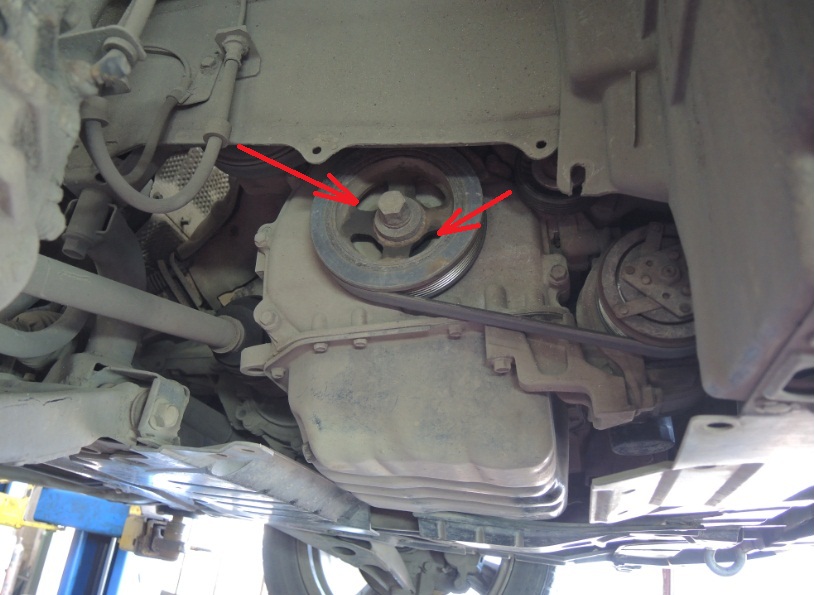
10. Using a knob with a 22 mm nozzle, unscrew the central bolt securing the crankshaft pulley, remove the washer and the crankshaft pulley.
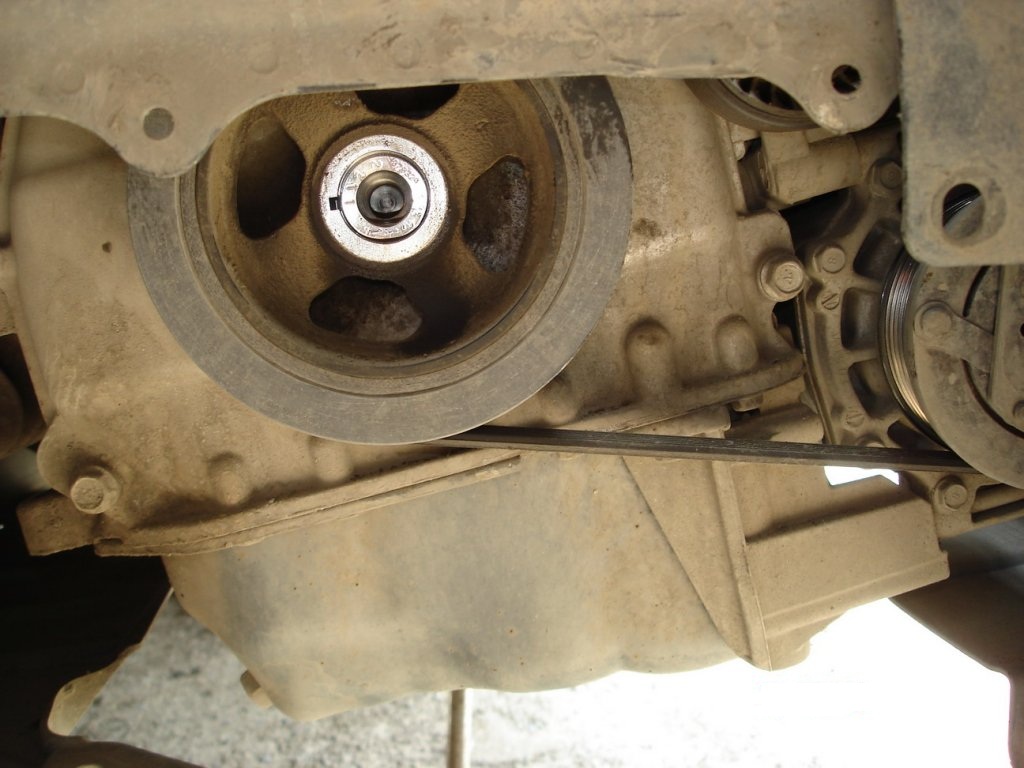
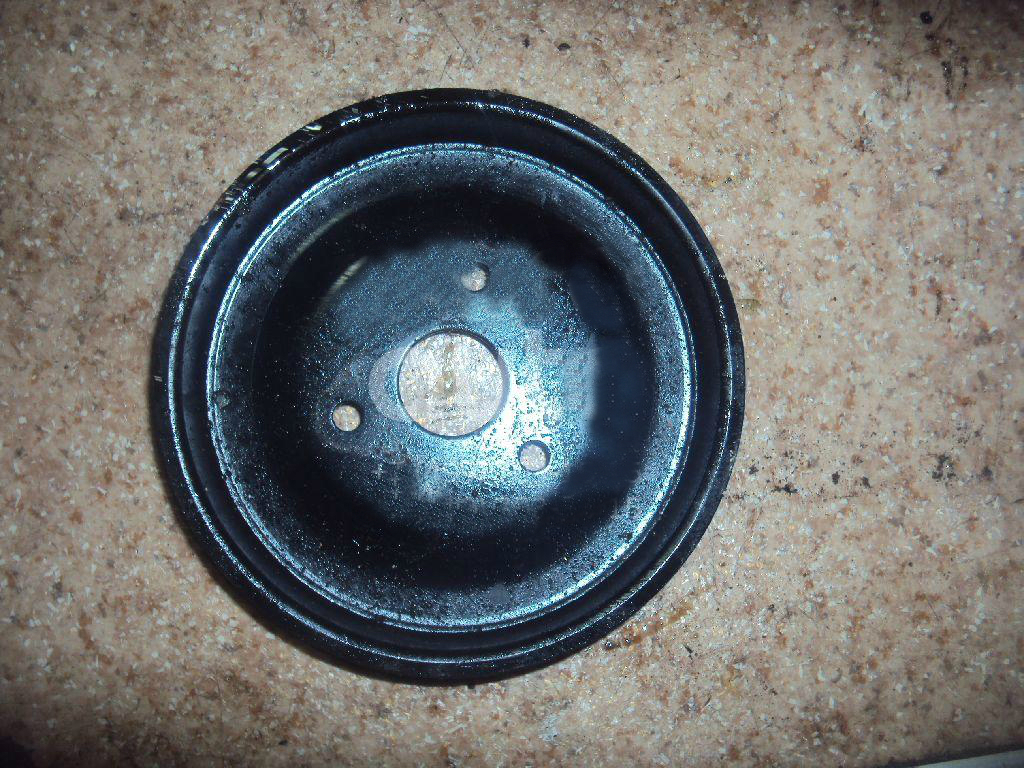
11. Then remove the coolant pump pulley by unscrewing the three bolts securing it with a 10 mm head.
12. Using a 16 mm spanner wrench, unscrew the bolts securing the guide rollers of the accessory drive belt and remove them.
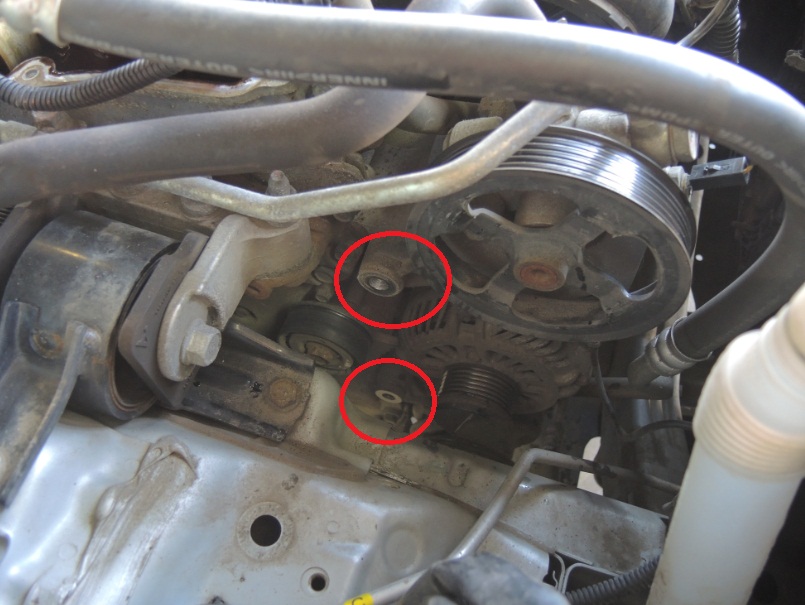
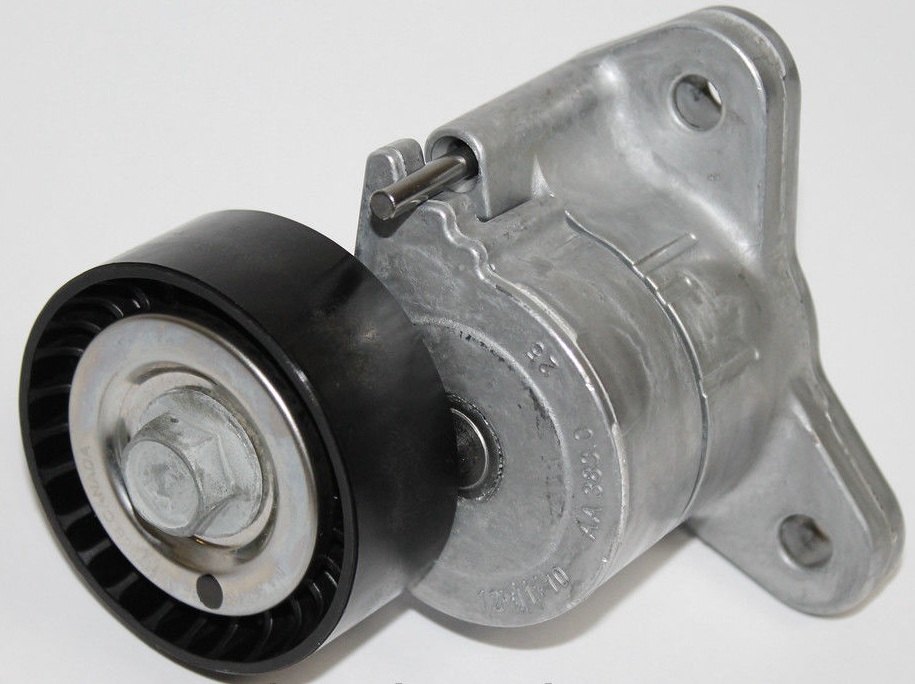
13. Remove the accessory belt tensioner mechanism by unscrewing the two bolts of its fastening with a 10 mm head, as described here .
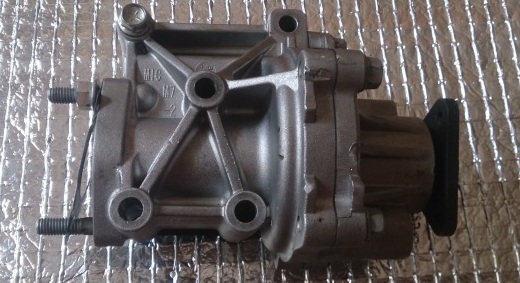
14. Remove the power steering pump assembly from the bracket with the attached hoses.
Note:
After removal, use a wire or rope to hang the power steering pump assembly with hoses on the body in a place where they will not interfere with the removal and installation of the timing chain.
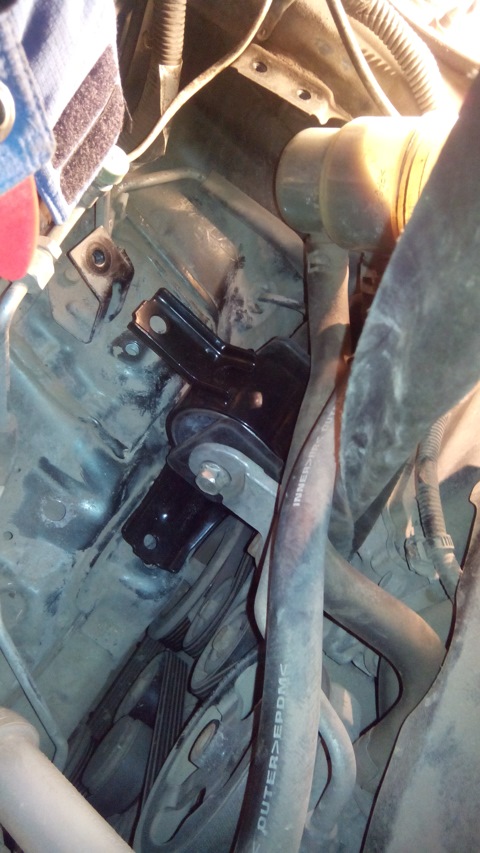
15. Remove the right engine mount as described here .
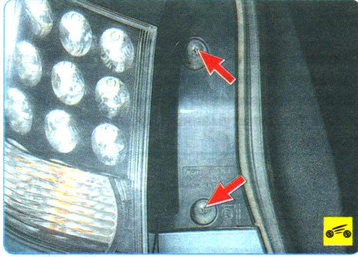
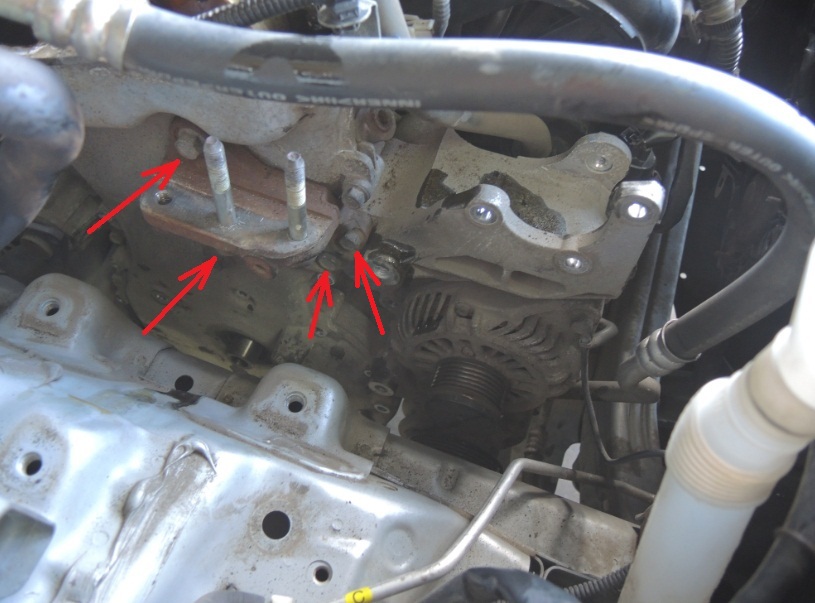
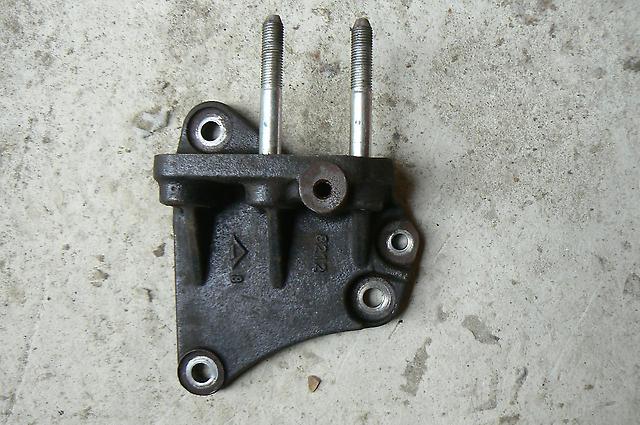
16. Remove the four bolts securing the right support bracket to the timing cover and remove it.
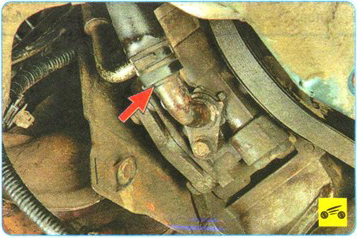
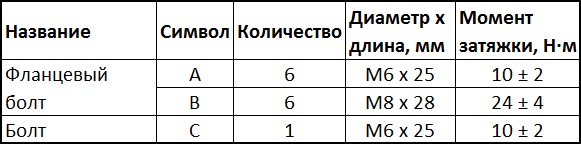
17. Remove the bolts securing the timing chain cover.
18. Insert a flathead screwdriver into the slot between the tab on the timing chain cover and the cylinder head.
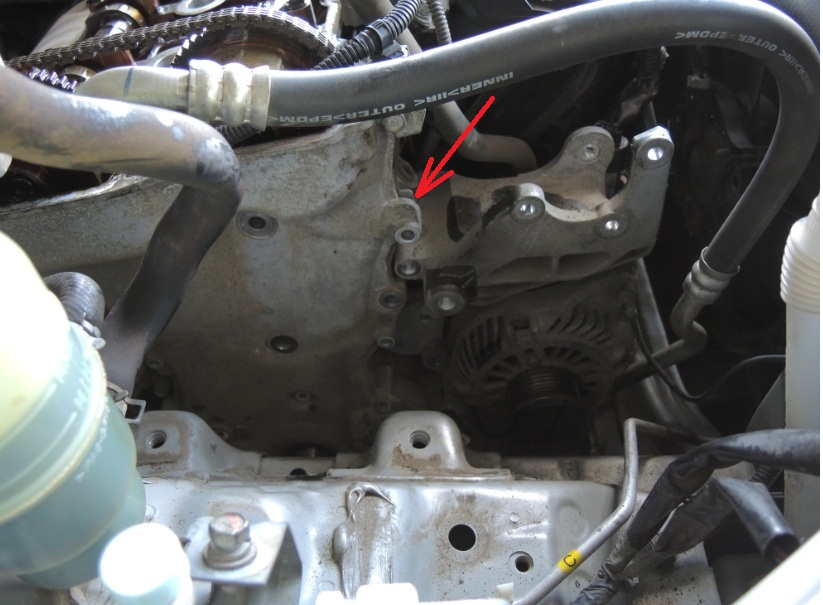
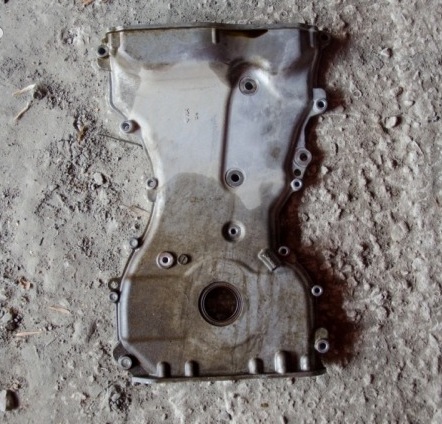
19. Slightly swinging the screwdriver back and forth, carefully separate the timing chain cover from the cylinder head and cylinder block, then remove the cover.
Note:
If the adhesion force (adhesion strength) of the sealant applied to the timing chain cover is so great that the projection on the cover may be damaged (break off) when it is disconnected, insert the hammer handle inside the timing chain cover and, slightly shaking the handle, disconnect the cover from the head cylinder block and cylinder block.
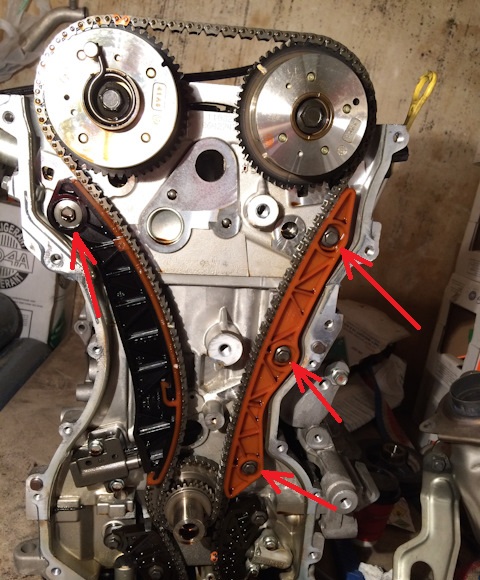
20. Remove the timing chain guide by unscrewing the mounting bolts.

21. Temporarily install the crankshaft pulley.
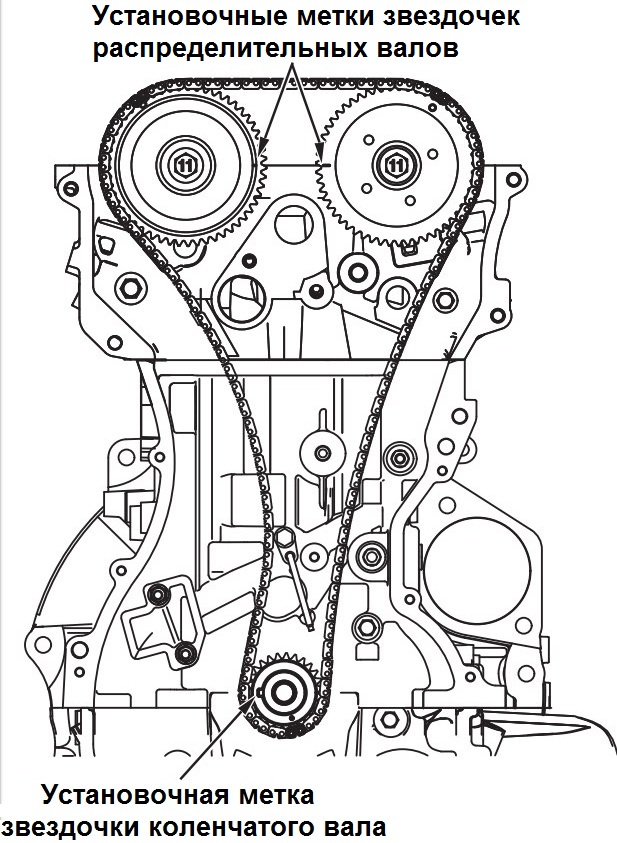
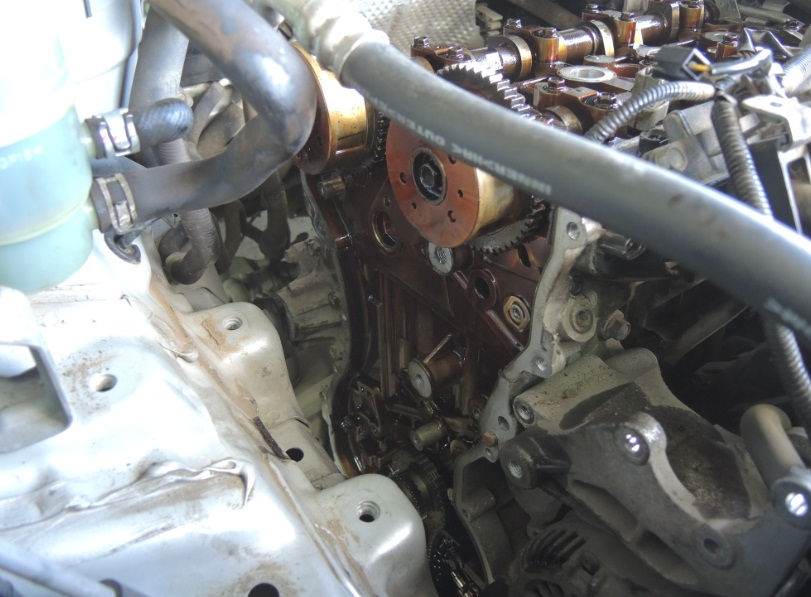
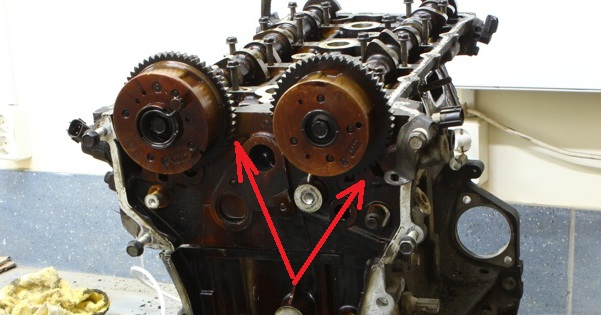
22. Turn the crankshaft clockwise until the alignment mark on the camshaft sprocket aligns with the upper plane of the cylinder head, as well as the alignment mark (key) of the crankshaft sprocket with the plane of the cylinder block under the main bearing cap, as shown in the photo below.
Note:
Do not turn the crankshaft counterclockwise.
This does not require the timing chain link (orange or blue) to always align with each sprocket alignment mark.
23. Remove the temporarily installed crankshaft pulley.
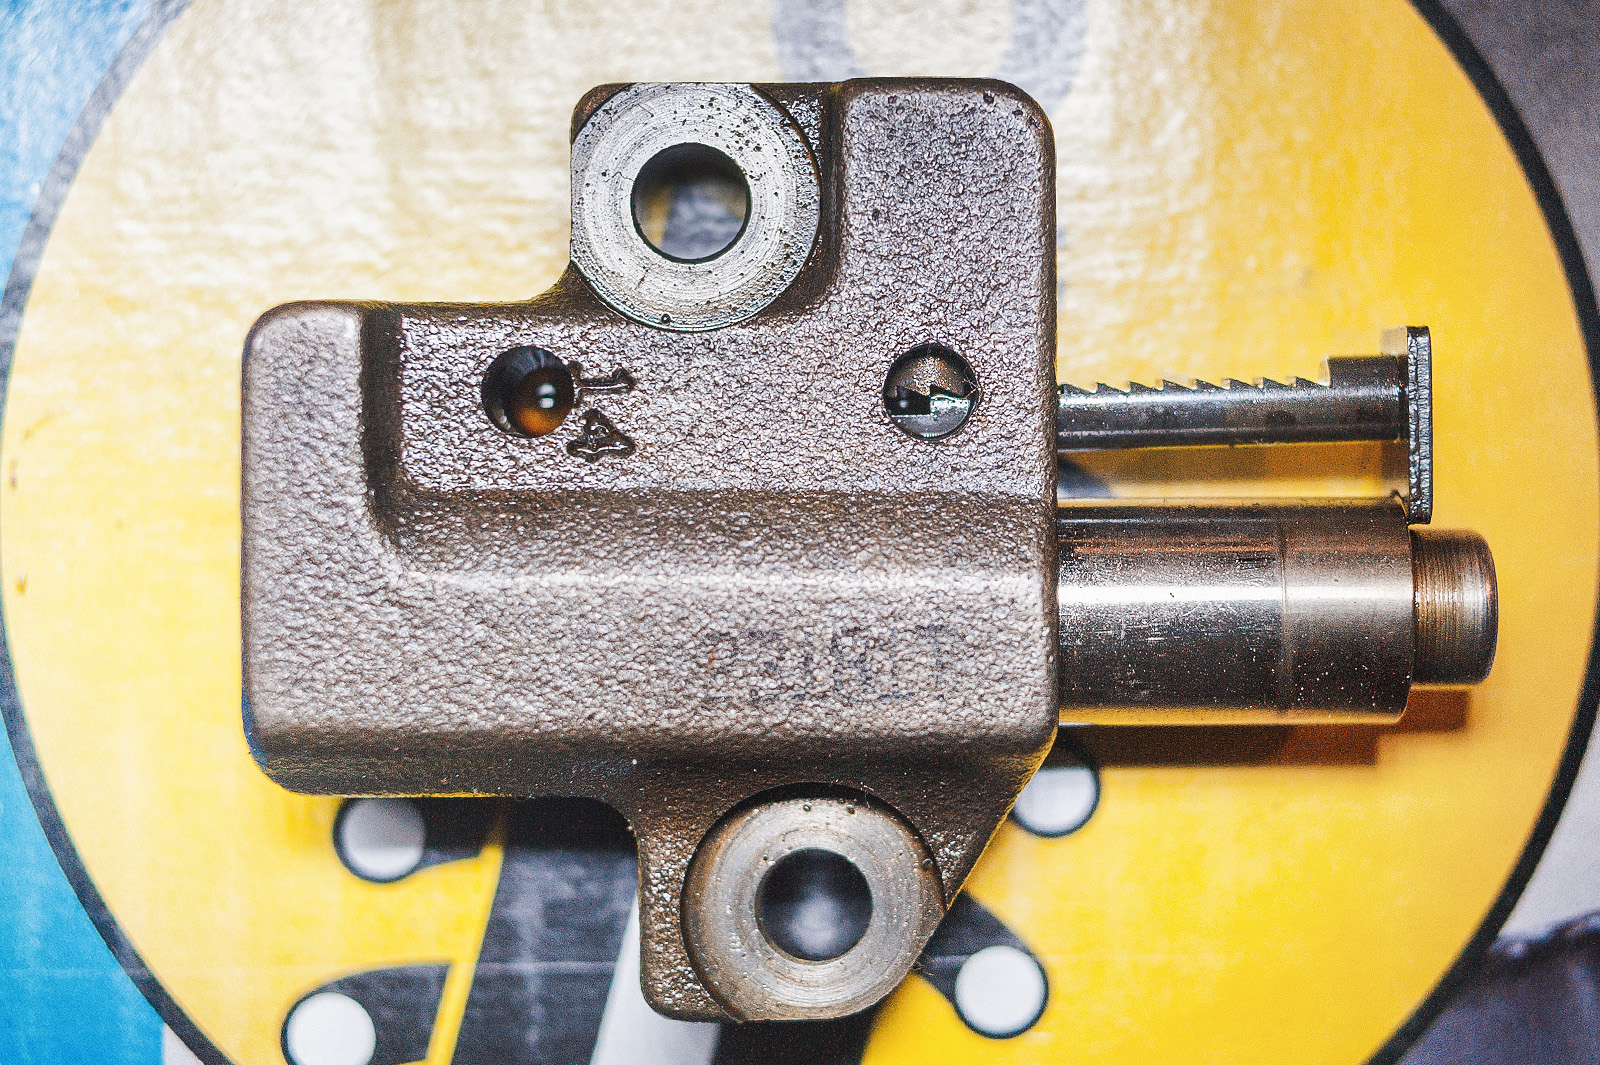
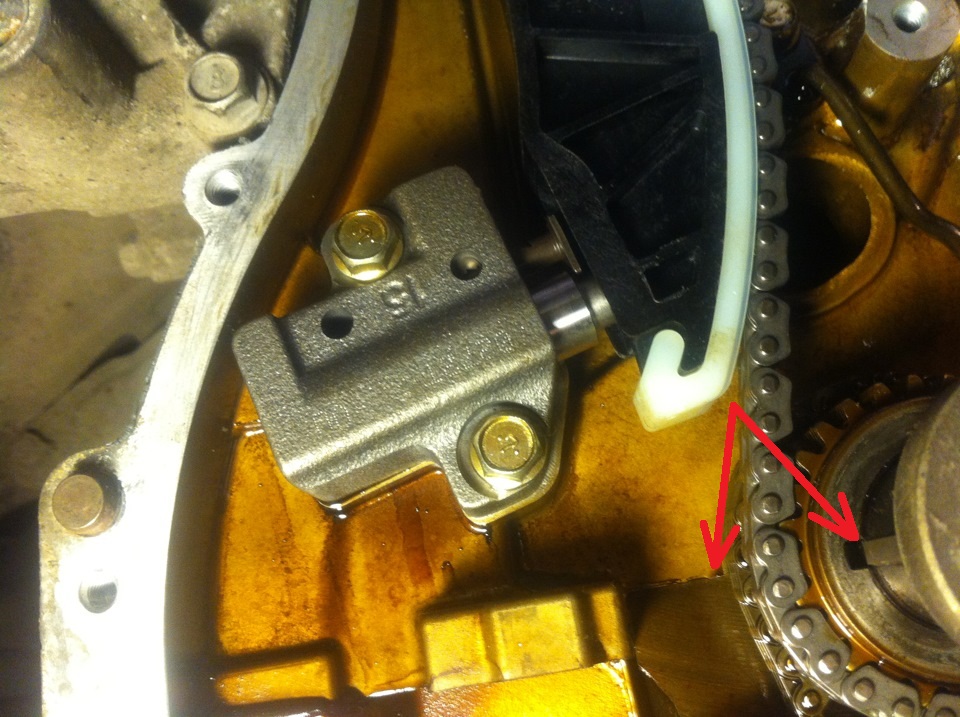
24. Use a flat screwdriver to release the tensioner ratchet.

25. Drown the timing chain tensioner rod and install a stiff wire or hex key (L-shaped, 1.5 mm) to secure the rod (pictured above).
26. Remove the tensioner from the engine by unscrewing two bolts of its fastening.
27. Before removing the timing chain, unscrew the fastening bolts of the tensioner shoe and the timing chain damper and remove them.
28. Now you can remove the Outlander HL timing chain.

Installing the timing chain
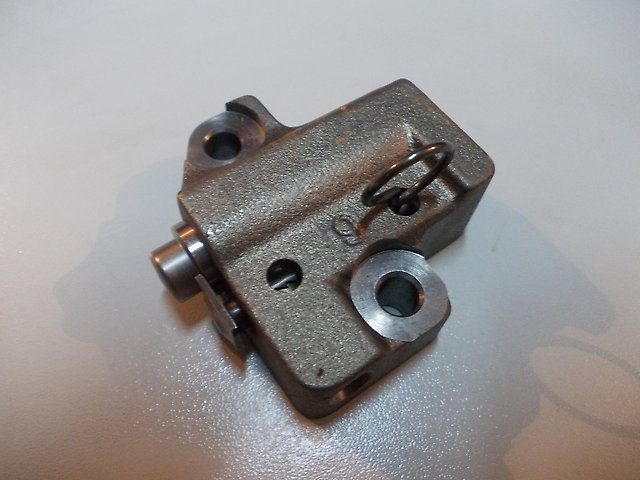
1. Check the timing chain tensioner rod for wear and damage. Replace the tensioner if necessary.
2. Check that the timing chain tensioner rod has sufficient travel and that the tensioner ratchet is working properly.
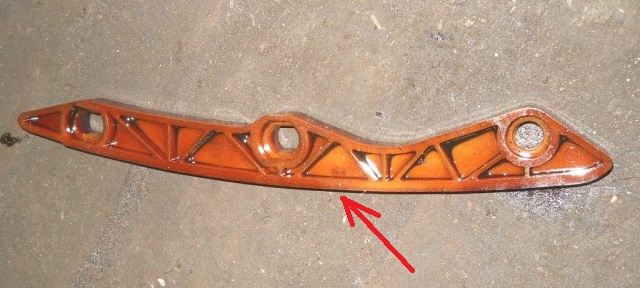
3. Check the tensioner shoe for cracks, peeling, or other defects on surface "A" (sliding contact with the timing chain) and on surface "B" which is in contact with the tensioner. Replace the tensioner shoe if necessary.
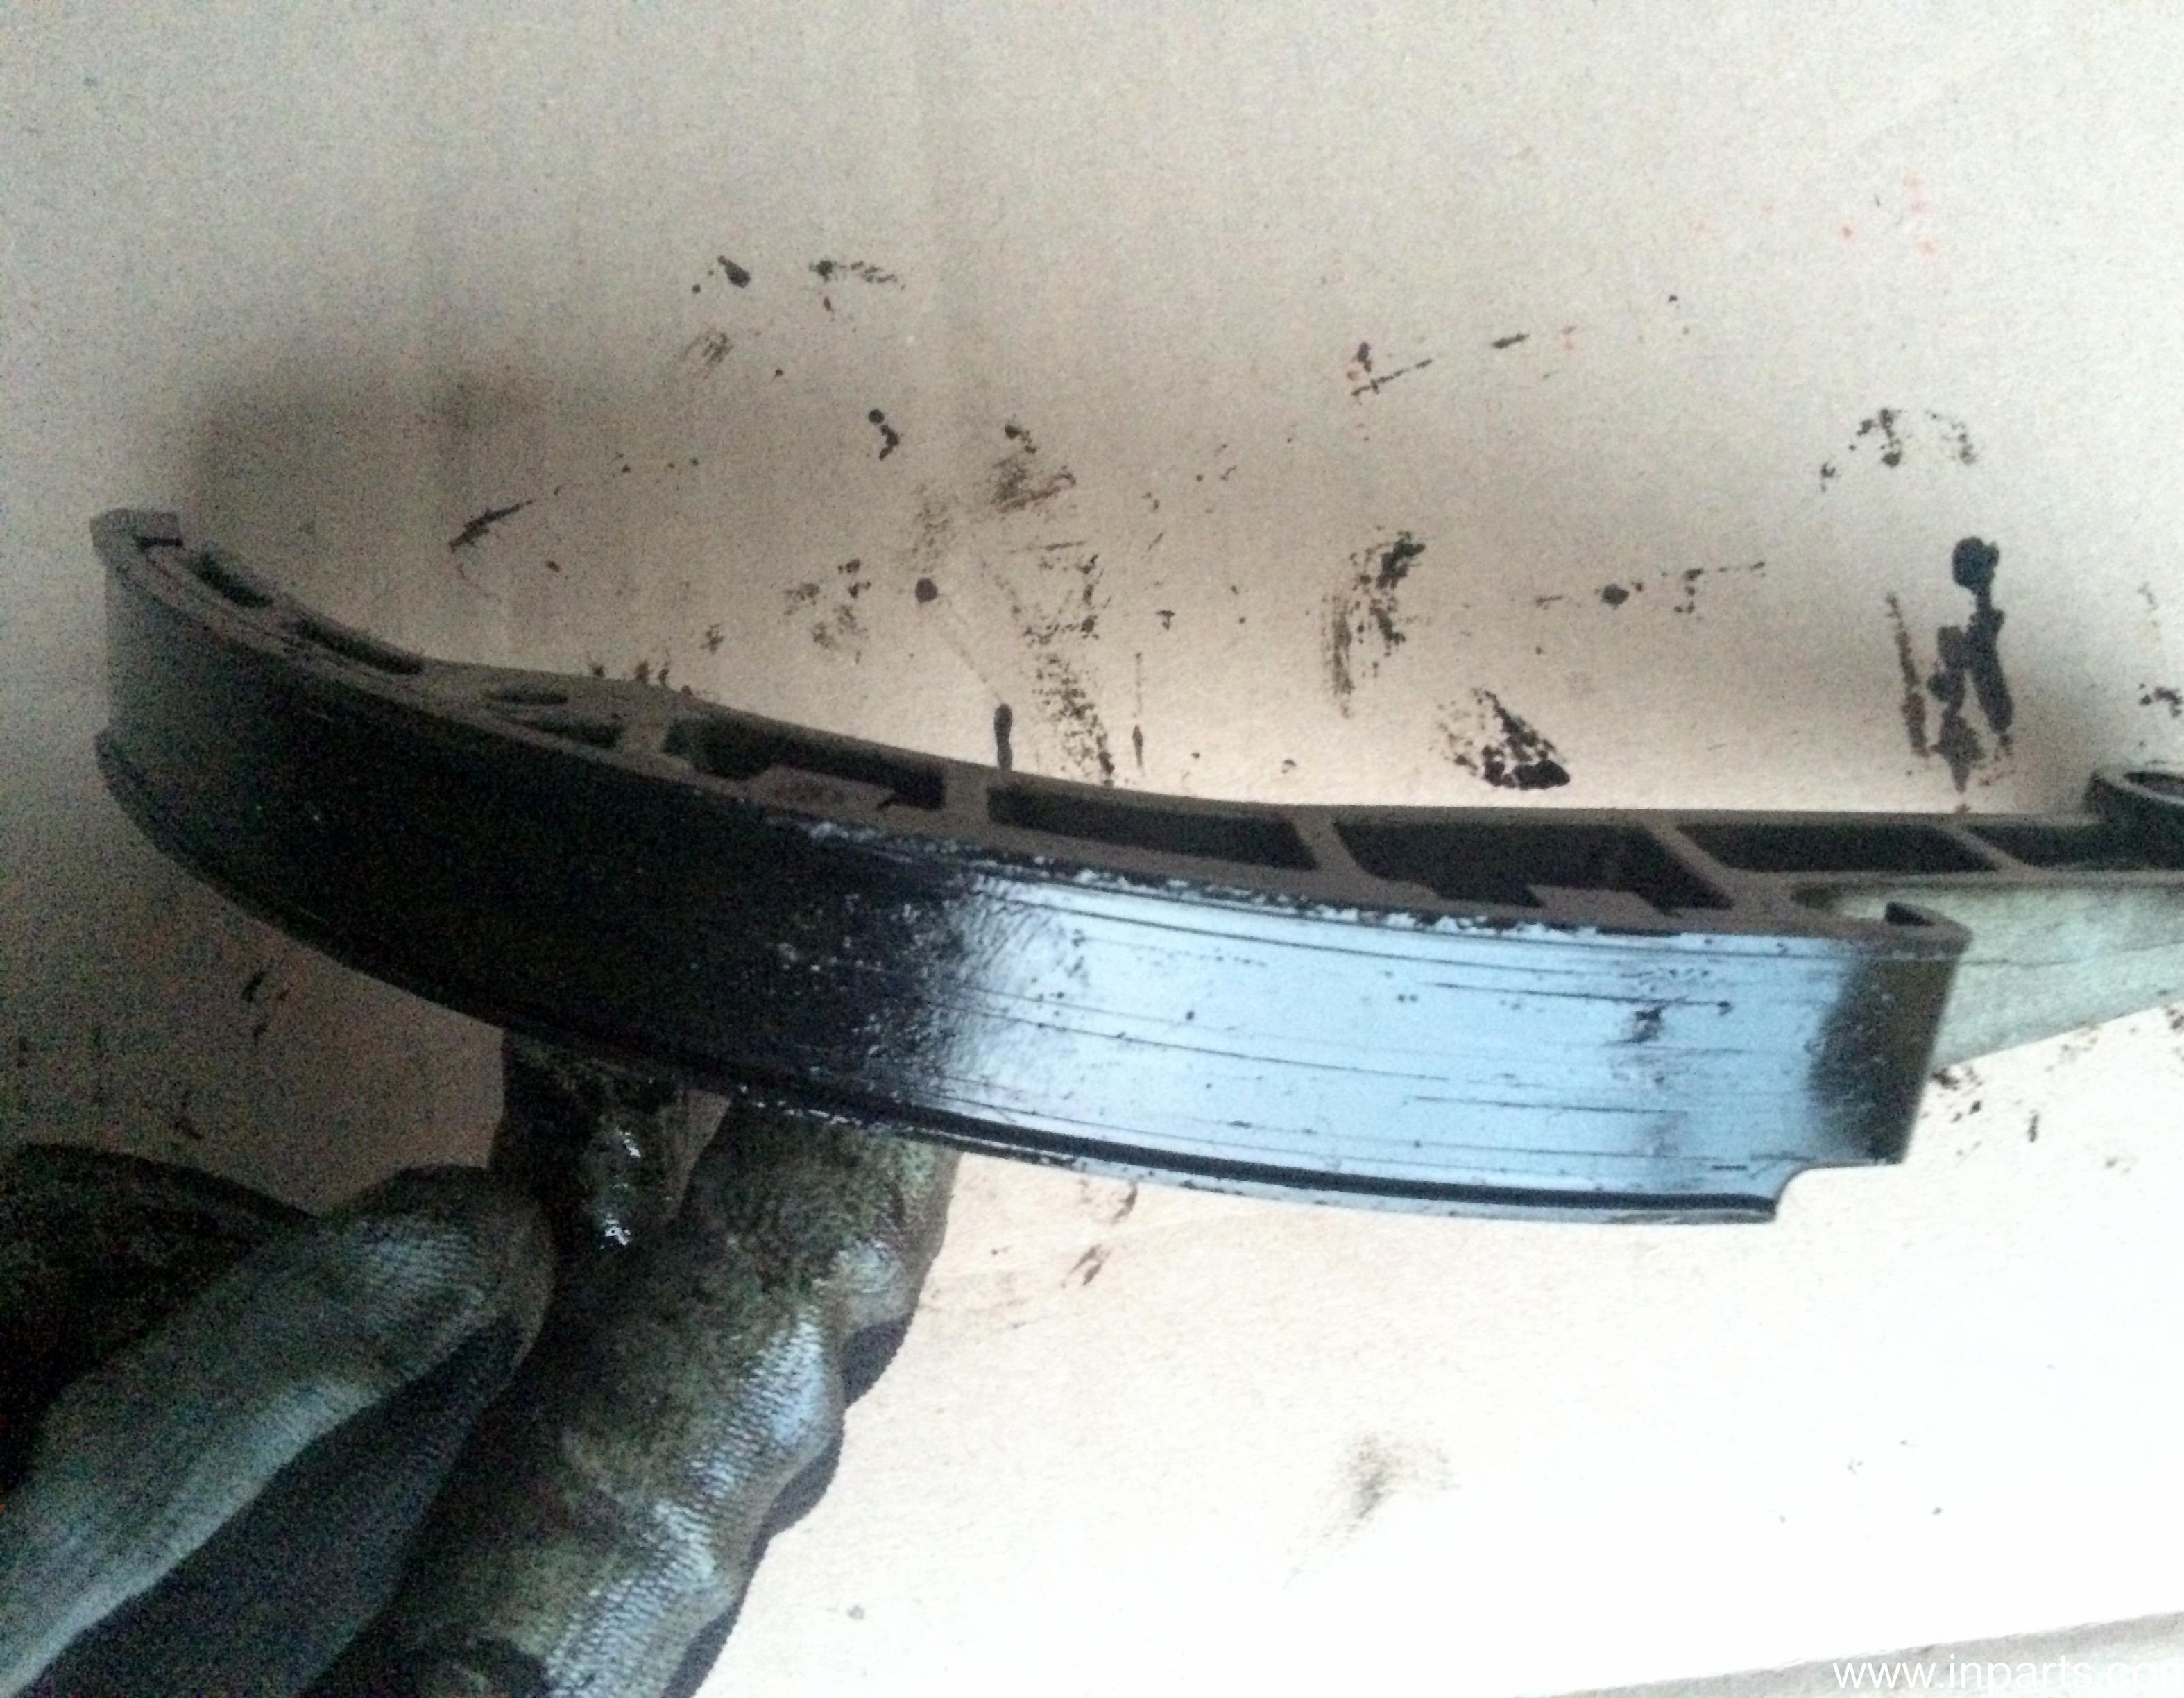
4. Check the chain damper for cracks, delamination or other defects on surface "A" (sliding contact with the timing chain) and on surface "B" which is in contact with the tensioner. Replace the chain damper if necessary.
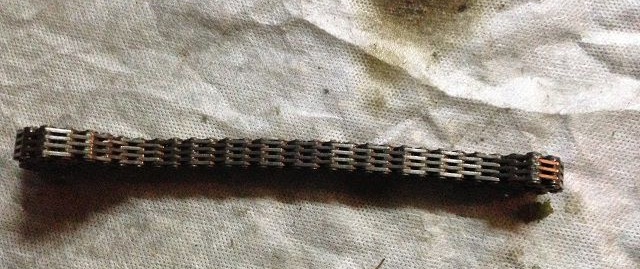
5. Check chain elements (bushings and plates) for wear. Replace chain if wear is excessive.
6. Check the teeth of the camshaft sprockets and the crankshaft sprocket for excessive wear, cracks or other defects. Replace the defective part if necessary.
7. Make sure the timing mark on each camshaft sprocket is aligned with the top of the cylinder head.
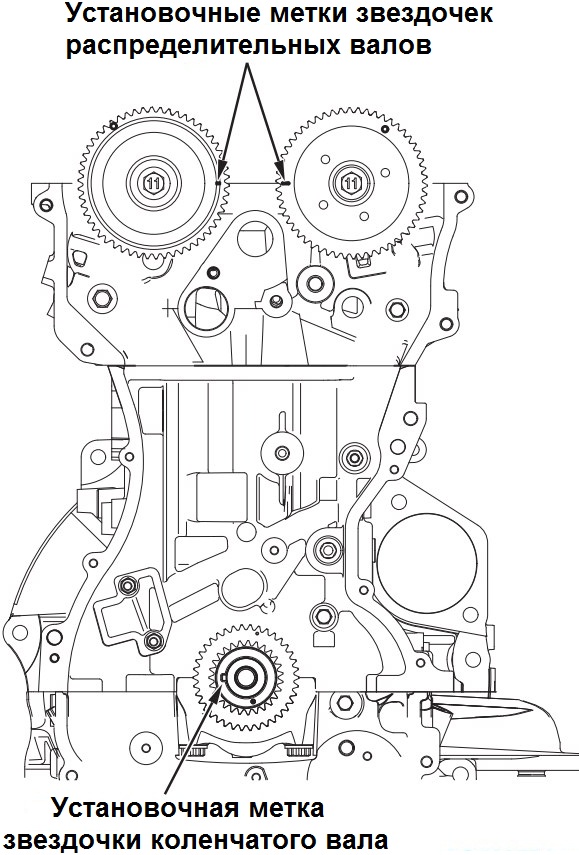
8. Make sure the timing mark (key) of the crankshaft sprocket is aligned with the plane of the cylinder block under the main bearing cap.
9. Install the timing chain onto the sprockets, aligning the timing mark of each sprocket with the marked timing chain link (orange or blue), taking care not to slack the chain on the tensioner side.
10. Install the timing chain tensioner to the cylinder block, tighten the mounting bolts to a nominal torque of 10 ± 2 Nm.
11. Remove the stiff wire or hex key from the tensioner to free the stem. The timing chain must be tensioned using the tensioner shoe.
12. If necessary, replace the front crankshaft oil seal using an appropriate size mandrel and hammer to install it in the cover.
13. Clean the mating surfaces of the cylinder block and the cylinder head under the cover, as well as the flange of the timing chain cover from the remains of the old sealant.
Note:
After degreasing, do not touch the degreased surface with your fingers.
14. Apply sealant with a continuous strip of 2.5 ± 0.5 mm across the timing chain cover flange and 4.5 ± 0.5 mm or 2.5 ± 0.5 mm on the timing chain cover flange in area "A ".
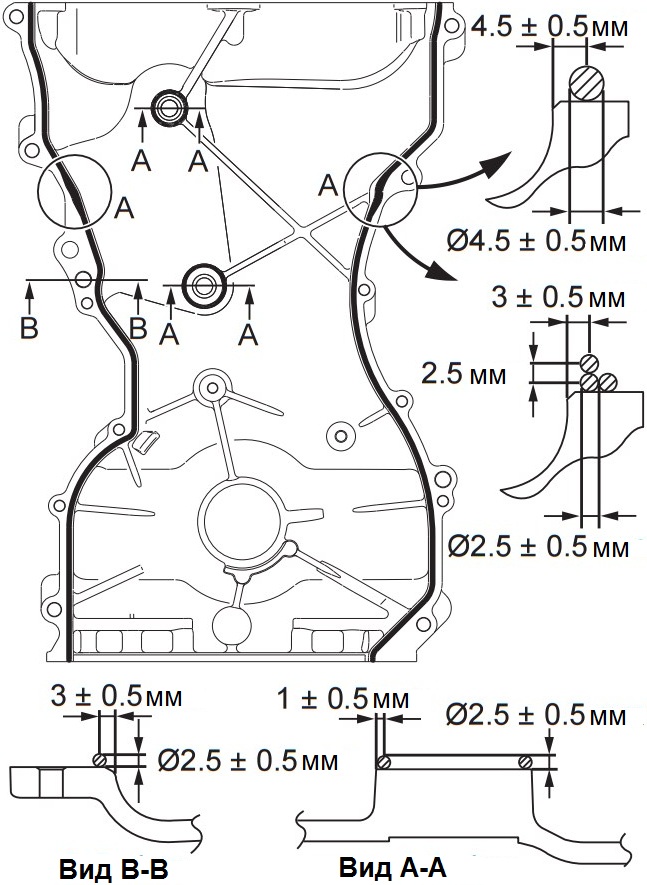
Note:
Do not over-apply the sealant as tightening the bolts may cause the sealant to get into the cover.
15. Apply sealant to the joint between the cylinder block and the cylinder head as shown in the illustration.
16. Apply a small amount of engine oil to the lip of the front crankshaft oil seal around its entire circumference.
17. Carefully install the timing chain cover onto the cylinder block and cylinder head so that the sealant does not come into contact with other parts.
Note:
If during installation the sealant applied to the timing chain cover flange came into contact with other parts, remove the applied sealant and repeat the installation procedure (paragraphs 7-11).
Do not damage the front crankshaft oil seal when installing the timing chain cover.
Cover installation should be completed within 5 minutes after applying the sealant.
18. Install and tighten the timing chain cover bolts (gradually, in steps, to the rated torque).
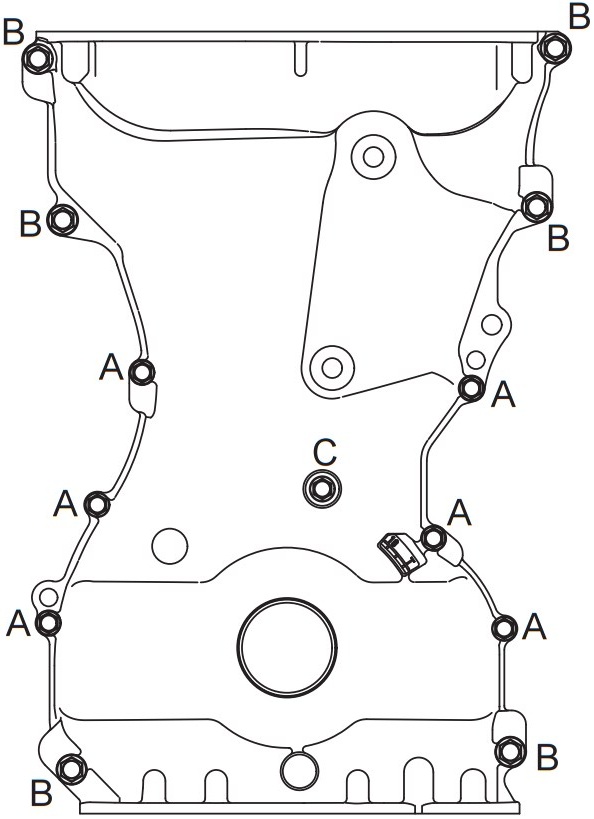
Note:
The sizes and tightening torques of the timing chain cover bolts are different, do not mix them up when installing.
19. Install and temporarily tighten the coolant pump pulley mounting bolts, then install the ancillary drive belt (in the direction of the arrow) and tighten the pump pulley mounting bolts to a nominal torque of 9 ± 1 N·m.
20. After completing the installation of the removed accessory drive parts, reinstall the oil pan and A/C compressor with bracket, screw the drain plug with a new gasket, and wait at least an hour before filling oil and starting the engine.
21. Then install the cylinder head cover after cleaning it from deposits.
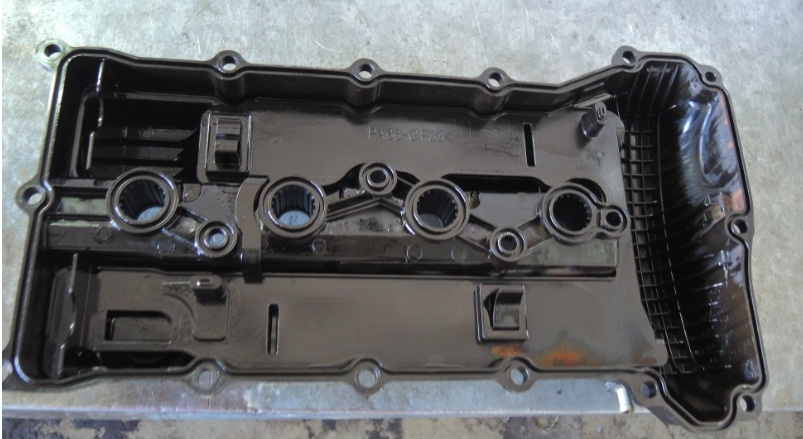
22. Fill the Outlander XL engine with oil by unscrewing the plug in the cylinder head cover.
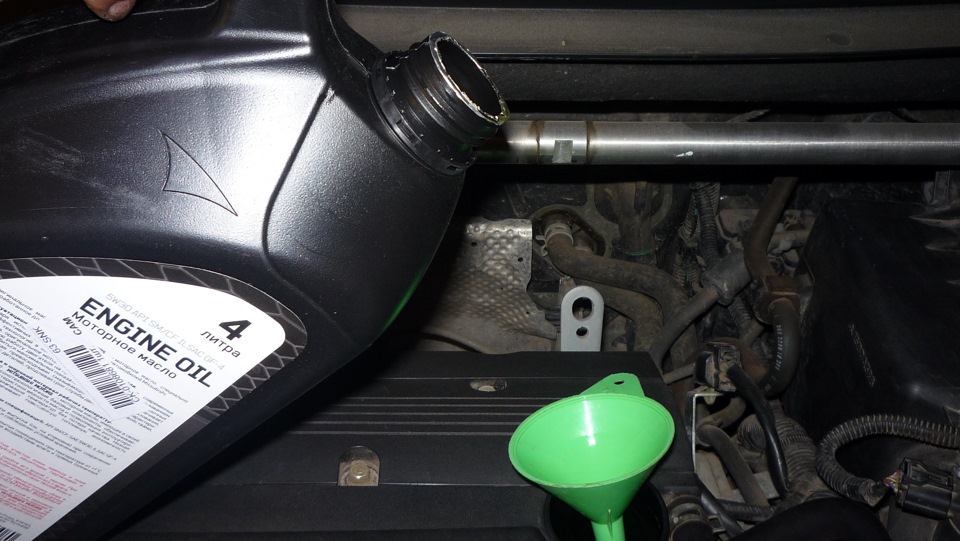
23. Install the side engine compartment cover (right) and splash guard with engine protection.
The article is missing:
- Tool photo
- Photos of parts and consumables
Source: carpedia.club