![5J [restyling] [2010 - 2015]](/uploads/Skoda_Fabia_5J_2010_-_2015_.jpg)
![6Y [restyling] [2002 - 2007]](/uploads/0427389.jpg)

Tools:
- Rolling jack or telescopic jack (preferably 2 pcs.)
- Car support
- Collar for end cap 3/4"
- Nozzle on the crank 10 mm
- Nozzle on the crank 13 mm
- Torx wrench (star) T25
- balloon wrench
Parts and consumables:
- Disc (basket) clutch assembly (VAG 045 141 025 AX)
Note:
The clutch replacement procedure is described for a vehicle equipped with a 1.9 L (74 kW) ATD/AXR engine with a 5-speed 02J series manual transmission.
Signs of the clutch flywheel being worn out can be expressed in light shocks when starting off. After a while, the car may completely stop moving.
1. Open the hood and remove the upper engine protection cover by opening the decorative covers marked with arrows and unscrewing the nuts by 10. Remove the lower engine protection cover using an asterisk.
2. Disconnect the "minus" terminal on the battery as described here .
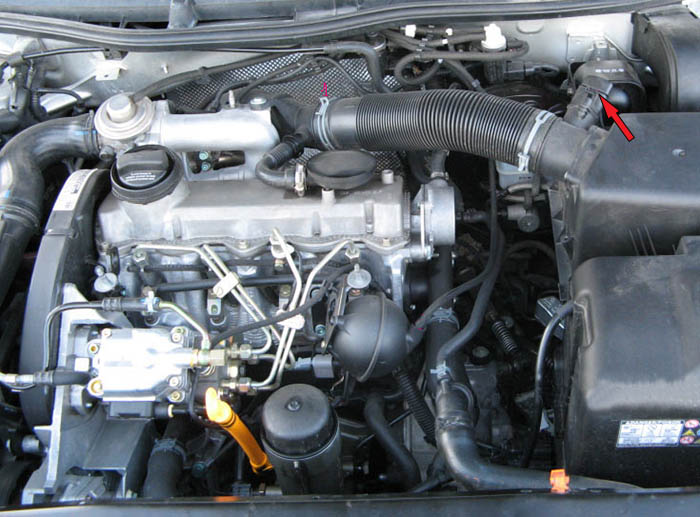
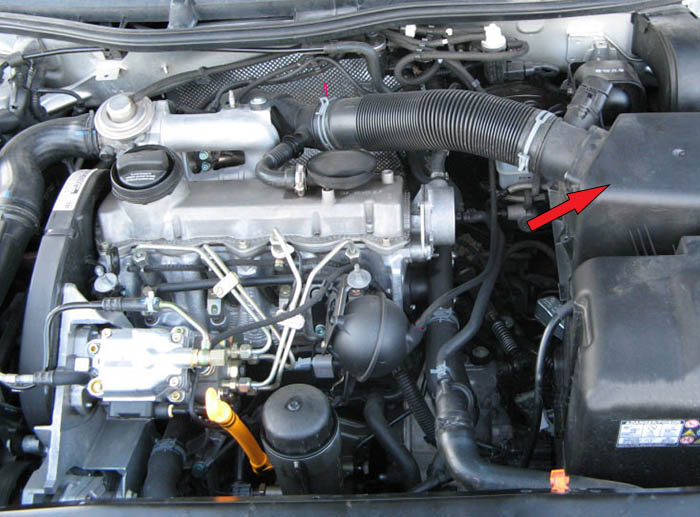
3. Remove the branch pipe connecting the air filter and the throttle body, after loosening (squeezing) the retaining rings marked with arrows.
4. Disconnect the temperature and air quantity sensor block.
5. Turn off two bolts of fastening of a casing and remove the air filter of the engine.
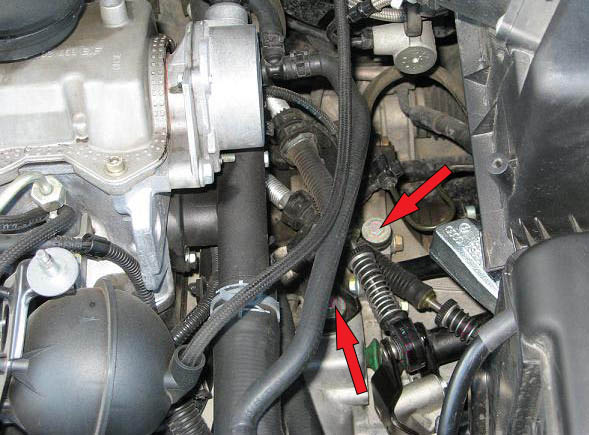
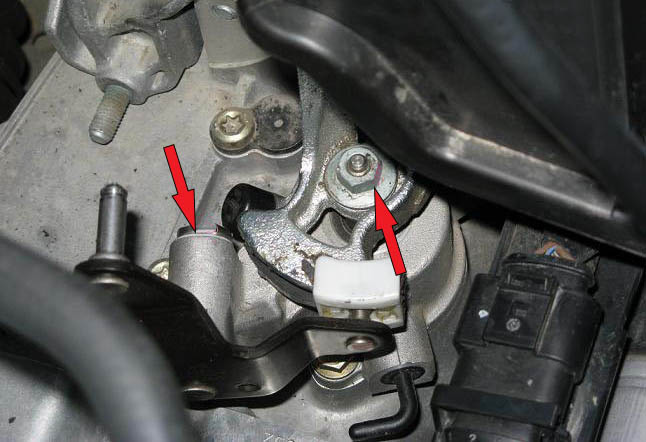
6. Remove the cable drive from the gearbox by removing the lock washer.
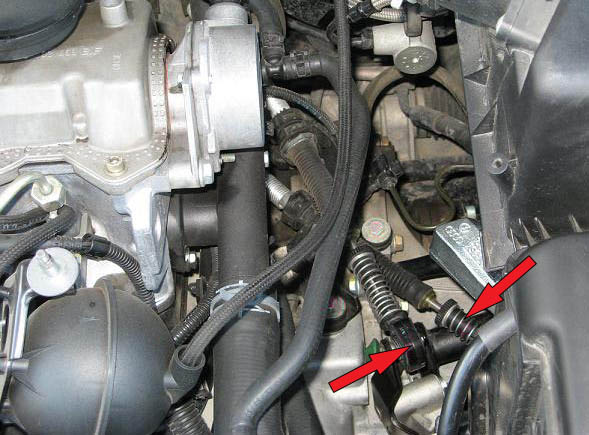
7. Unscrew the screws securing the cable drive (three screws, one not visible in the photo). Take away the cable mechanism of the check point with fastening aside.
8. Unscrew the metal bar (two 13 bolts), disconnect the speed sensor connector (located in the main gear area) and the rear speed sensor connector (located in the starter area).
9. Remove the retaining clip, unscrew the gear change nut and remove the gear change mechanism.
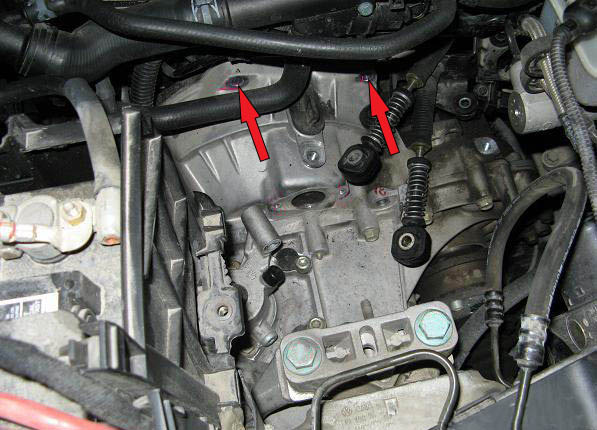
10. Turn off bolts of fastening of the working cylinder of a hydraulic drive of a check point (holes for bolts are shown in a picture).
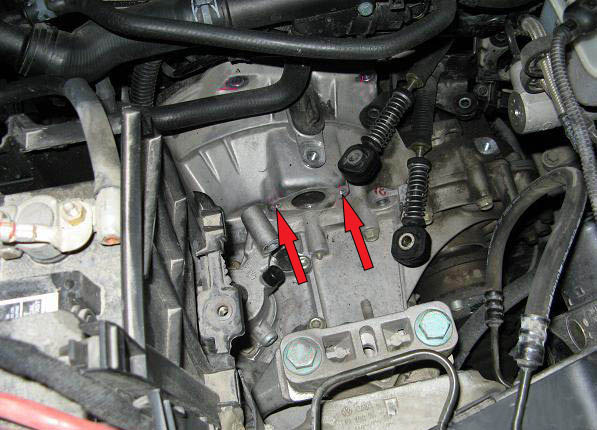
11. Turn off the top bolts of fastening of a transmission to the engine (holes for bolts are shown in a picture).
12. Place supports under the engine and gearbox, or fix the engine and gearbox to the beam from above. Loosen the gearbox support bolts.
Note:
From this point on, the gearbox is practically not connected to the body and you need to be careful.
13. To facilitate further work, remove the front left wheel and the protective plastic casing of the left wing by unscrewing 4 bolts.
14. Unscrew the bolts 3 and brackets 2 of the hydraulic steering drive (for vehicles with power steering).
15. Remove the starter (attached with 2 bolts through the box to the block). In more detail, the process of removing the start is described here .
16. Lower the gearbox down and unscrew the 3 bolts (from the side of the left front wheel). Remove the gearbox mount.
17. Turn off on 6 bolts of fastenings of internal SHRUS.
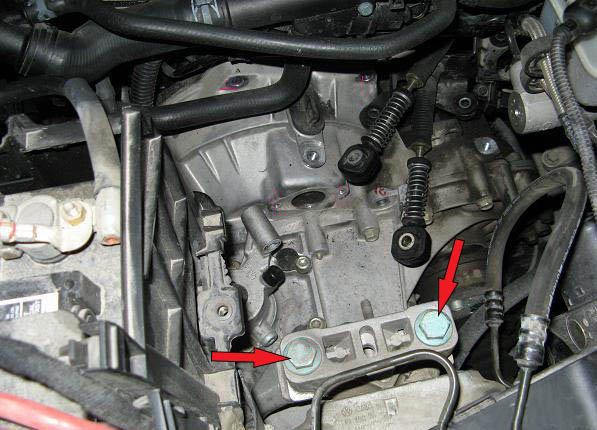
18. Turn off bolts of a rocking (bottom) support of the engine.

19. Loosen the bolts of the exhaust system lock (near the hand brake) in order to disconnect the pipes. Loosen the bolts in the places where the exhaust manifold support is attached in the engine area. This is necessary in order to be able to move the engine forward to release the gearbox. Details of the exhaust system are described in more detail here .
20. Unscrew the bolts securing the gearbox to the engine (one more bolt is not visible in the picture, it is twisted from the opposite side). Move the engine as far forward as possible, and remove the gearbox, being careful not to damage the hydraulic steering.
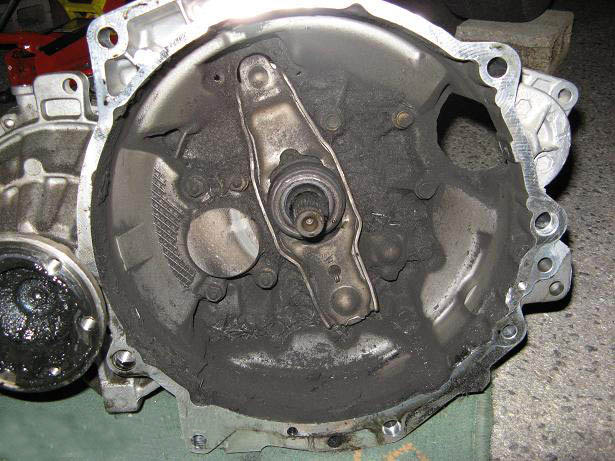
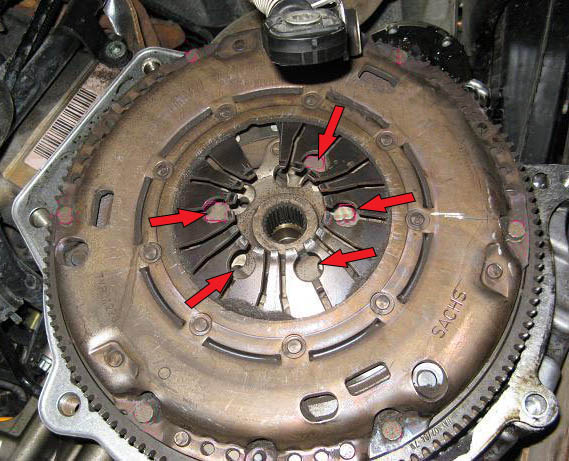
21. To remove the old clutch disc with basket and flywheel, unscrew the bolts in a circle, and then remove the flywheel.

22. When installing the clutch, it is enough to tighten the bolts into the holes. Note that the 6 bolt holes on the flywheel are not all symmetrical, although there is no pilot pin.
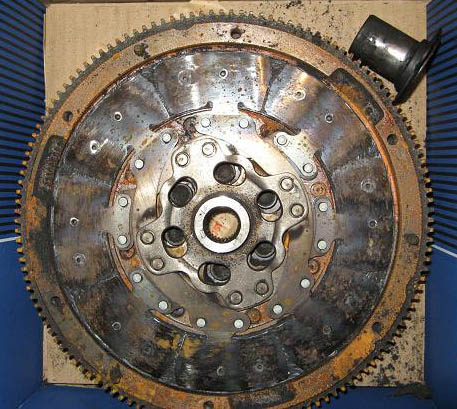
23. Used clutch disc.
24. Assembly takes place in the reverse order.
The article is missing:
- Tool photo
- Photo of parts and consumables
- High-quality repair photos
Source: http://carpedia.club